SwiftUI is an enormous step towards Apple’s goal of getting everyone coding, simplifying the basics so everyone can spend more time on custom features that delight the users. It requires Xcode 11 and macOS Catalina, for which the Betas can be downloaded at the Apple developer portal.
It is the cross-platform that works across iOS, macOS, tvOS and watchOS and lets you replace Interface Builder (IB) and storyboards. IB and Xcode were separate apps before Xcode 4, and the seams still show every time you edit the name of an IBAction or IBOutlet or delete it from your code, and your app crashes because IB doesn’t see changes to code. SwiftUI also works with UIKit — like Swift and Objective-C.
Create a New Project
Step 1. Open Xcode and either click Create a new Xcode project in Xcode’s startup window or choose File > New > Project.
Step 2. In the template selector, select iOS as the platform, select the Single View App template and then click Next.

Step 3. Enter “SwiftUIExample” as the Product Name, select SwiftUI for the user interface, and click Next.

Step 4. In the project navigator, open the SwiftUIExample group to see what you got: the old AppDelegate.swift is now split into AppDelegate.swift and SceneDelegate.swift.
SceneDelegate isn’t specific to SwiftUI, but this line is:
UIHostingController creates a view controller for the SwiftUI view ContentView. Now, select ContentView.swift.
By default, SwiftUI view files declare two structures. The first structure (ContentView) conforms to the View protocol and describes the view’s content and layout.
The second structure (ContentView_Previews) declares a preview for that view.
|
1 2 3 4 5 6 7 8 9 10 11 12 13 |
import SwiftUI struct ContentView: View { var body: some View { Text("Hey Apple") } } struct ContentView_Previews: PreviewProvider { static var previews: some View { ContentView() } } |
Step 5. In the canvas, click Resume to display the preview.
Inside the body the property, change “Hey Apple”.
As you change the code in a view’s body the property, the preview updates to reflect your changes.
Build a Form UI with SwiftUI
Step 1. Extracting the Text Field for Reusable View
If we are using the text fields of the same layout and design. Instead of duplicating the code we just wrote for other text fields, it’s better to extract the code to create a separate view for reuse.
Let’s name the struct LabelAndTextField and move the VStack code block like this:
|
1 2 3 4 5 6 7 8 9 10 11 12 13 14 15 16 |
struct LabelAndTextField : View { @State var label: String @State var text: String = "" @State var placeHolder: String var body: some View { VStack(alignment: .leading, spacing: 5) { Text(label) .font(.headline) TextField(placeHolder, text: $text) .padding(.all) .background(Color(red: 239.0/255.0, green: 243.0/255.0, blue: 244.0/255.0, opacity: 0.6)) } .padding(.leading, 10) } } |
- A TextField is a UI element where a user can fill in some text using the keyboard. When initializing a TextField element, two properties are required. The first property is the placeholder of the TextField. The second property is a property wrapper variable, containing the value of the TextField.
- We can use “normal” constants and variables in SwiftUI, but if there is designate a variable as a
@Statevariable if the UI should update whenever its value changes. - Use the
padding()modifier method to give little more space. - Horizontal stack(HStack) displays the target side by side.
- Vertical stack(VStack) displays the target from top to bottom.
Step 2. Add the Multiple Label & Text Fields Using List
Now going back the ContentView. Create a text field by constructing a LabelAndTextField with the specified label name and place holder like below:
|
1 2 3 4 5 6 7 8 9 10 11 12 13 14 15 |
struct ContentView: View { var body: some View { List { VStack(alignment: .leading) { LabelAndTextField(label: "First Name", placeHolder: "First Name") LabelAndTextField(label: "Last Name", placeHolder: "Last Name") LabelAndTextField(label: "Address", placeHolder: "Address") LabelAndTextField(label: "Mobile Number", placeHolder: "Mobile Number") LabelAndTextField(label: "Email", placeHolder: "Email") LabelAndTextField(label: "Password", placeHolder: "Password") LabelAndTextField(label: "Confirm Password", placeHolder: "Confirm Password") } } } } |
Vstack is used to add the layout in a vertical arrangement. Through VStack we can’t display all the information in a single view, so we will embed the stack in List. List make the view scrollable. and allows developers to quickly build a table or present rows of information in a single column.
Step 3. Add Image in View
Let’s name the struct ImageView and move the HStack code block like this:
|
1 2 3 4 5 6 7 8 9 10 11 12 13 |
struct ImageView: View { var body: some View { HStack { Spacer() Image("user") .resizable() .scaledToFit() .frame(width: 300, height: 300, alignment: .center) .padding(20) Spacer() } } } |
Spacer() automatically fill up all available space on their axis of expansion, it takes up space automatically as add horizontally or vertically in a view. Now add ImageView in ContentView like this:
|
1 2 3 4 5 6 7 8 9 10 11 12 |
struct ContentView: View { var body: some View { List { VStack(alignment: .leading) { ImageView() LabelAndTextField(label: "First Name", placeHolder: "First Name") .... .... } } } } |
Step4. Add Button in View
The SwiftUI provides a component called Button to create a button. It will be written as:
|
1 2 3 |
Button(action: {}) { Text("Register") } |
The action parameter takes in a closure, which will be performing an action when the button is tapped or pressed. Create another struct and name it SelectableButton like this :
|
1 2 3 4 5 6 7 8 9 10 11 12 13 14 15 16 17 |
struct SelectableButton : View { @State var titleText: String var colorValue: Color var body: some View { Button(action: {}) { HStack { Spacer() Text(titleText) .font(.title) .foregroundColor(.white) Spacer() } } .padding(.vertical, 20) .background(colorValue) } } |
Now add SelectableButton in ContentView as:
|
1 2 3 4 5 6 7 8 9 10 11 12 13 14 15 16 17 18 19 20 |
struct ContentView: View { var body: some View { List { VStack(alignment: .leading) { ImageView() LabelAndTextField(label: "First Name", placeHolder: "First Name") LabelAndTextField(label: "Last Name", placeHolder: "Last Name") ... ..... LabelAndTextField(label: "Confirm Password", placeHolder: "Confirm Password") SelectableButton(titleText: "Register",colorValue: Color.red).previewLayout(.sizeThatFits) .padding(.top, 15) .padding(.bottom, 15) SelectableButton(titleText: "I have already account",colorValue: Color.blue).previewLayout(.sizeThatFits) .padding(.top, 15) .padding(.bottom, 15) } } } } |
Step 5. Embedding the View in a Navigation View
Navigation is fundamental to all applications. Now embed the entire form in a navigation view like this:
|
1 2 3 4 5 6 7 8 9 10 11 12 13 14 |
struct ContentView: View { var body: some View { NavigationView { List { VStack(alignment: .leading) { .... .... .... } } .navigationBarTitle(Text("Registration")) } } } |
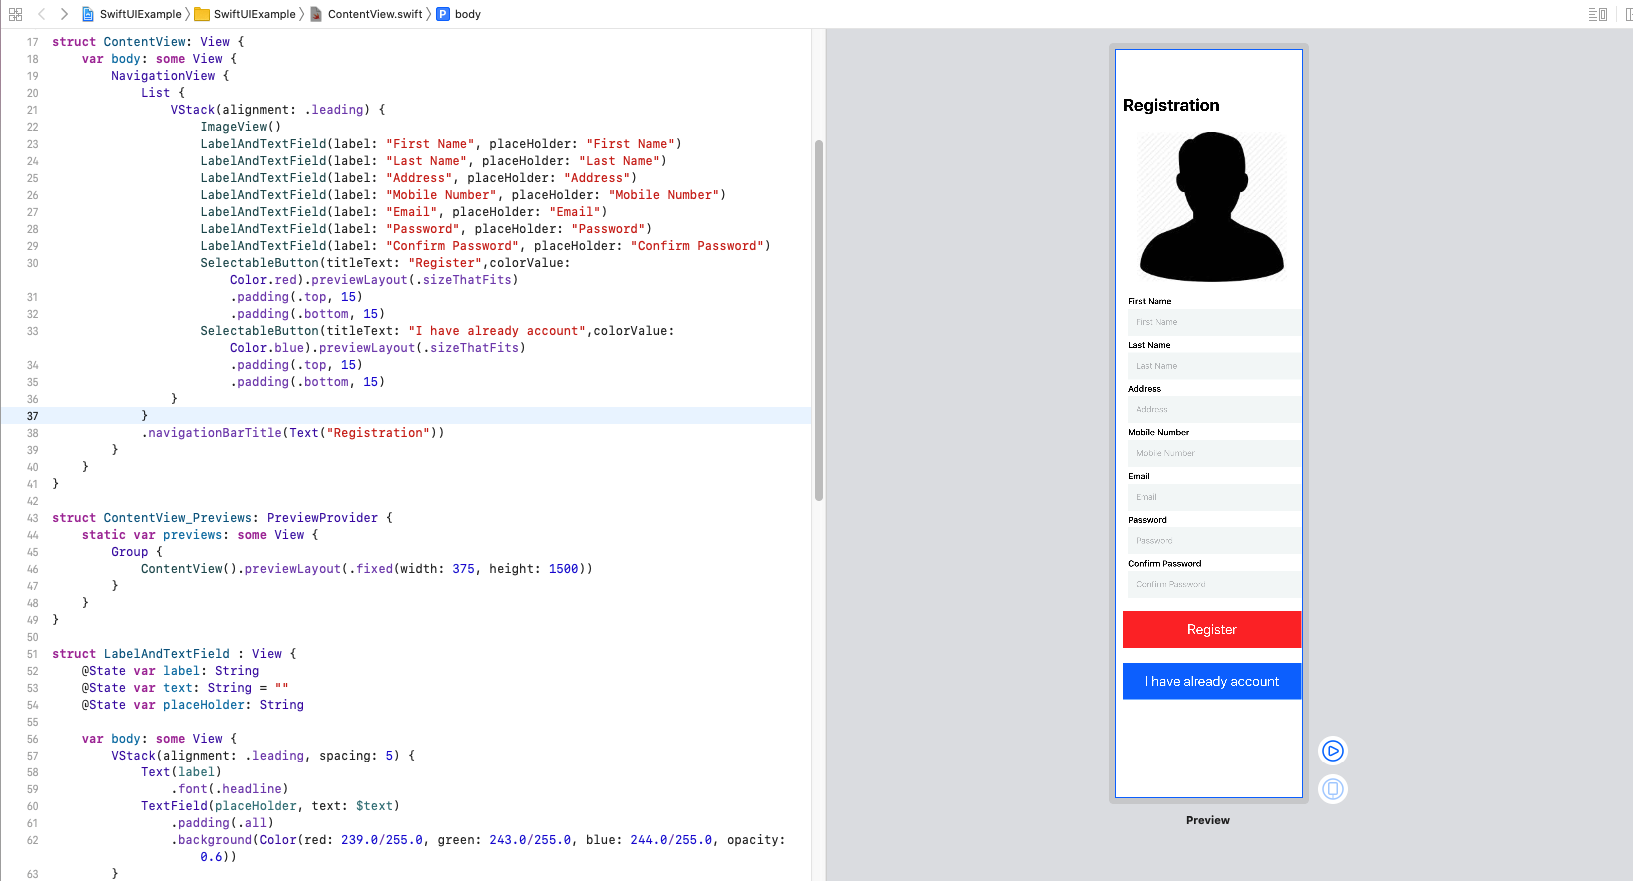
So, if the form may too long for the screen and to view the entire form, hit the Run button to run the application and then you can scroll through the form. To initiate the ContentView in ContentView_Previews struct like this:
|
1 2 3 4 5 6 7 |
struct ContentView_Previews: PreviewProvider { static var previews: some View { Group { ContentView().previewLayout(.fixed(width: 375, height: 1500)) } } } |
By this, the preview the entire form without running the app as:
. . . . . . . . . . . . . . . .
Thanks for reading, I hope this blog will help you and give a basic idea of how to use SwiftUI.
If you have any query please ask me on the comment. Stay cool and updated. 🙂

Be the first to comment.