CoreData is the framework provided by Apple to save, track, filter, and modify the data within the iOS applications. It is not the database, but it uses SQLite as it’s persistent store. It is used to manage the model layer object in our application. It manages the object graphs, tracks the changes in the data, and modifies the data on the user interactions.
How to use Core Data
Let’s create a single view iOS application to demonstrate the basics of CoreData. To enable the app to use CoreData, we must check the Use CoreData option displayed at the bottom.
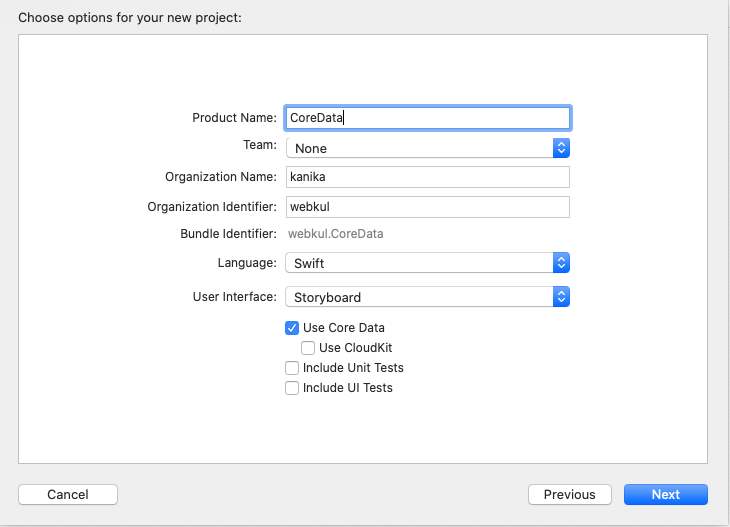
Checking the Use Core Data box will cause Xcode to generate boilerplate code for what’s known as an NSPersistentContainer in AppDelegate.swift.
The NSPersistentContainer consists of a set of objects that facilitate saving and retrieving information from Core Data. Inside this container is an object to manage the Core Data state as a whole, an object representing the Data Model, and so on.
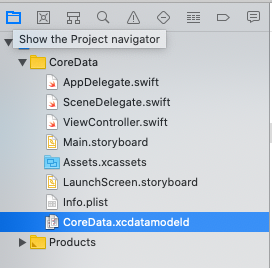
the new file CoreData.xcdatamodeld has been added to the Application’s package. It acts as the model layer for the data. We can add the entity, attributes, and relations into the model layer.
Adding the Entity to Core Data Model
We can add an entity into the xcdatamodeld file by selecting an option Add Entity given at the bottom of the file. In the right pane of the file, we can add attributes, relationships, and fetched properties to the Entity.
Here, we have created a Student entity and added three attributes id, and name in the model, as shown in the below image.

Now, we have created our model Student. Let’s add some records into this model. The model will be saved to the CoreData.
To add records to the model, we need to follow the following steps.
- Instantiate the persistentContainer.
- Create the context object.
- Create an entity object.
- Create a new record object.
- Set values for the records for each key.
We have created an AppDelegate object, the context, entity, and entity object. We have also set the values for the newly created entity object.
Now, we need to save the data inside CoreData. To save the data, we use the context object to save the context. We have to wrap this code with the try-catch block.
Now, if we run our application, our data will be saved inside the CoreData.
The AppDelegate.swift and ViewController.swift file contains the following code.
AppDelegate.swift
|
1 2 3 4 5 6 7 8 9 10 11 12 13 14 15 16 17 18 19 20 21 22 23 24 25 26 27 28 29 30 31 32 33 34 35 36 37 38 39 40 41 42 43 44 45 46 47 48 49 50 51 52 53 54 55 56 57 58 59 60 61 62 |
import UIKit import CoreData @UIApplicationMain class AppDelegate: UIResponder, UIApplicationDelegate { func application(_ application: UIApplication, didFinishLaunchingWithOptions launchOptions: [UIApplication.LaunchOptionsKey: Any]?) -> Bool { // Override point for customization after application launch. return true } // MARK: UISceneSession Lifecycle func application(_ application: UIApplication, configurationForConnecting connectingSceneSession: UISceneSession, options: UIScene.ConnectionOptions) -> UISceneConfiguration { // Called when a new scene session is being created. // Use this method to select a configuration to create the new scene with. return UISceneConfiguration(name: "Default Configuration", sessionRole: connectingSceneSession.role) } func application(_ application: UIApplication, didDiscardSceneSessions sceneSessions: Set<UISceneSession>) { // Called when the user discards a scene session. // If any sessions were discarded while the application was not running, this will be called shortly after application:didFinishLaunchingWithOptions. // Use this method to release any resources that were specific to the discarded scenes, as they will not return. } // MARK: - Core Data stack lazy var persistentContainer: NSPersistentContainer = { let container = NSPersistentContainer(name: "CoreData") container.loadPersistentStores(completionHandler: { (storeDescription, error) in if let error = error as NSError? { fatalError("Unresolved error \(error), \(error.userInfo)") } }) return container }() func saveContext () { let context = persistentContainer.viewContext if context.hasChanges { do { try context.save() } catch { // fatalError() causes the application to generate a crash log and terminate. You should not use this function in a shipping application, although it may be useful during development. let nserror = error as NSError fatalError("Unresolved error \(nserror), \(nserror.userInfo)") } } } } |
ViewController.swift
|
1 2 3 4 5 6 7 8 9 10 11 12 13 14 15 16 17 18 19 20 21 22 23 24 25 26 |
import UIKit import CoreData class ViewController: UIViewController { override func viewDidLoad() { super.viewDidLoad() // Do any additional setup after loading the view. let appDelegate = UIApplication.shared.delegate as! AppDelegate let context = appDelegate.persistentContainer.viewContext let entity = NSEntityDescription.entity(forEntityName: "Employee", in: context) let newemployee = NSManagedObject(entity: entity!, insertInto: context) newemployee.setValue("John", forKey: "name") newemployee.setValue(1, forKey: "id") do{ try context.save() }catch{ debugPrint("not save") } } } |
Fetching the records
Fetching the records from the CoreData is very simple. We need to instantitate the NSFetchRequest class and create a request object. We can pass this request object into the fetch() method for NSManagedContext reference.
|
1 2 3 4 5 6 7 8 9 10 11 12 13 |
func fetchData(){ let request = NSFetchRequest<NSFetchRequestResult>(entityName: "Employee") request.returnsObjectsAsFaults = false do{ let result = try context.fetch(request) for data in result{ debugPrint((data as AnyObject).value(forKey: "name") as! String) debugPrint((data as AnyObject).value(forKey: "id") as! Int16) } }catch{ } } |

Be the first to comment.