Flutter comes with its UI toolkit full of many widgets that do various things. One such widget Flutter offers is the DataTable widget to display tabular data structures. The Data Table in Flutter is very flexible compared to the native platform-specific list views.
For Mobile app developers, displaying data is an everyday task. We also need to display data in tables by laying out all the rows & columns with appropriate needed space for the same. Data tables are easy to understand. It also helps users to categorize the data. Data Tables in Flutter also help to show & understand more data in less space.
Read more about the Flutter app development Services that Mobikul offers.
Let’s check how can we implement DataTable in Flutter.
Add Data Table Widget:
Create a Data table by adding a Data Table widget & add decoration using the Table Border widget.
|
1 2 3 4 5 6 7 8 9 10 |
body: Center( child: DataTable( border: const TableBorder( top: BorderSide(color: Colors.grey, width: 0.5), bottom: BorderSide(color: Colors.grey, width: 0.5), left: BorderSide(color: Colors.grey, width: 0.5), right: BorderSide(color: Colors.grey, width: 0.5), horizontalInside: BorderSide(color: Colors.grey, width: 0.5), verticalInside: BorderSide(color: Colors.grey, width: 0.5), ), |
Define Data Columns:
Add Data columns in the Data Table column property:
|
1 2 3 4 5 6 7 |
columns: const <DataColumn>[ DataColumn( label: Text("Name")), DataColumn(label: Text("Age")), DataColumn(label: Text("Profession")) ], |
Define rows & data cells:
Create Data rows and add data cells to them.
|
1 2 3 4 5 6 7 8 9 10 11 12 13 14 15 16 17 18 |
rows: <DataRow>[ DataRow( cells: const <DataCell>[ DataCell( Text("John"), ), DataCell(Text("26")), DataCell(Text("Architect")) ]), DataRow( cells: const <DataCell>[ DataCell(Text('Aditya')), DataCell(Text('24')), DataCell(Text('Associate Professor')), ], ), ], |
We can use its different properties for different purposes. I want to select the row by tapping on it. Let’s check how can we select a row.
Show selected row:
selected: It’s a property that takes a boolean value & shows if the row is selected or not.
onSelectChanged: It is called when the user selects or unselects a selectable row
Define an integer selectedIndex:
|
1 |
int selectedIndex = -1; |
Add condition on selected property & change selectedIndex value onSelectChanged.
|
1 2 3 4 5 6 |
selected: 0 == selectedIndex, onSelectChanged: (bool? value){ setState(() { selectedIndex = 0; }); }, |
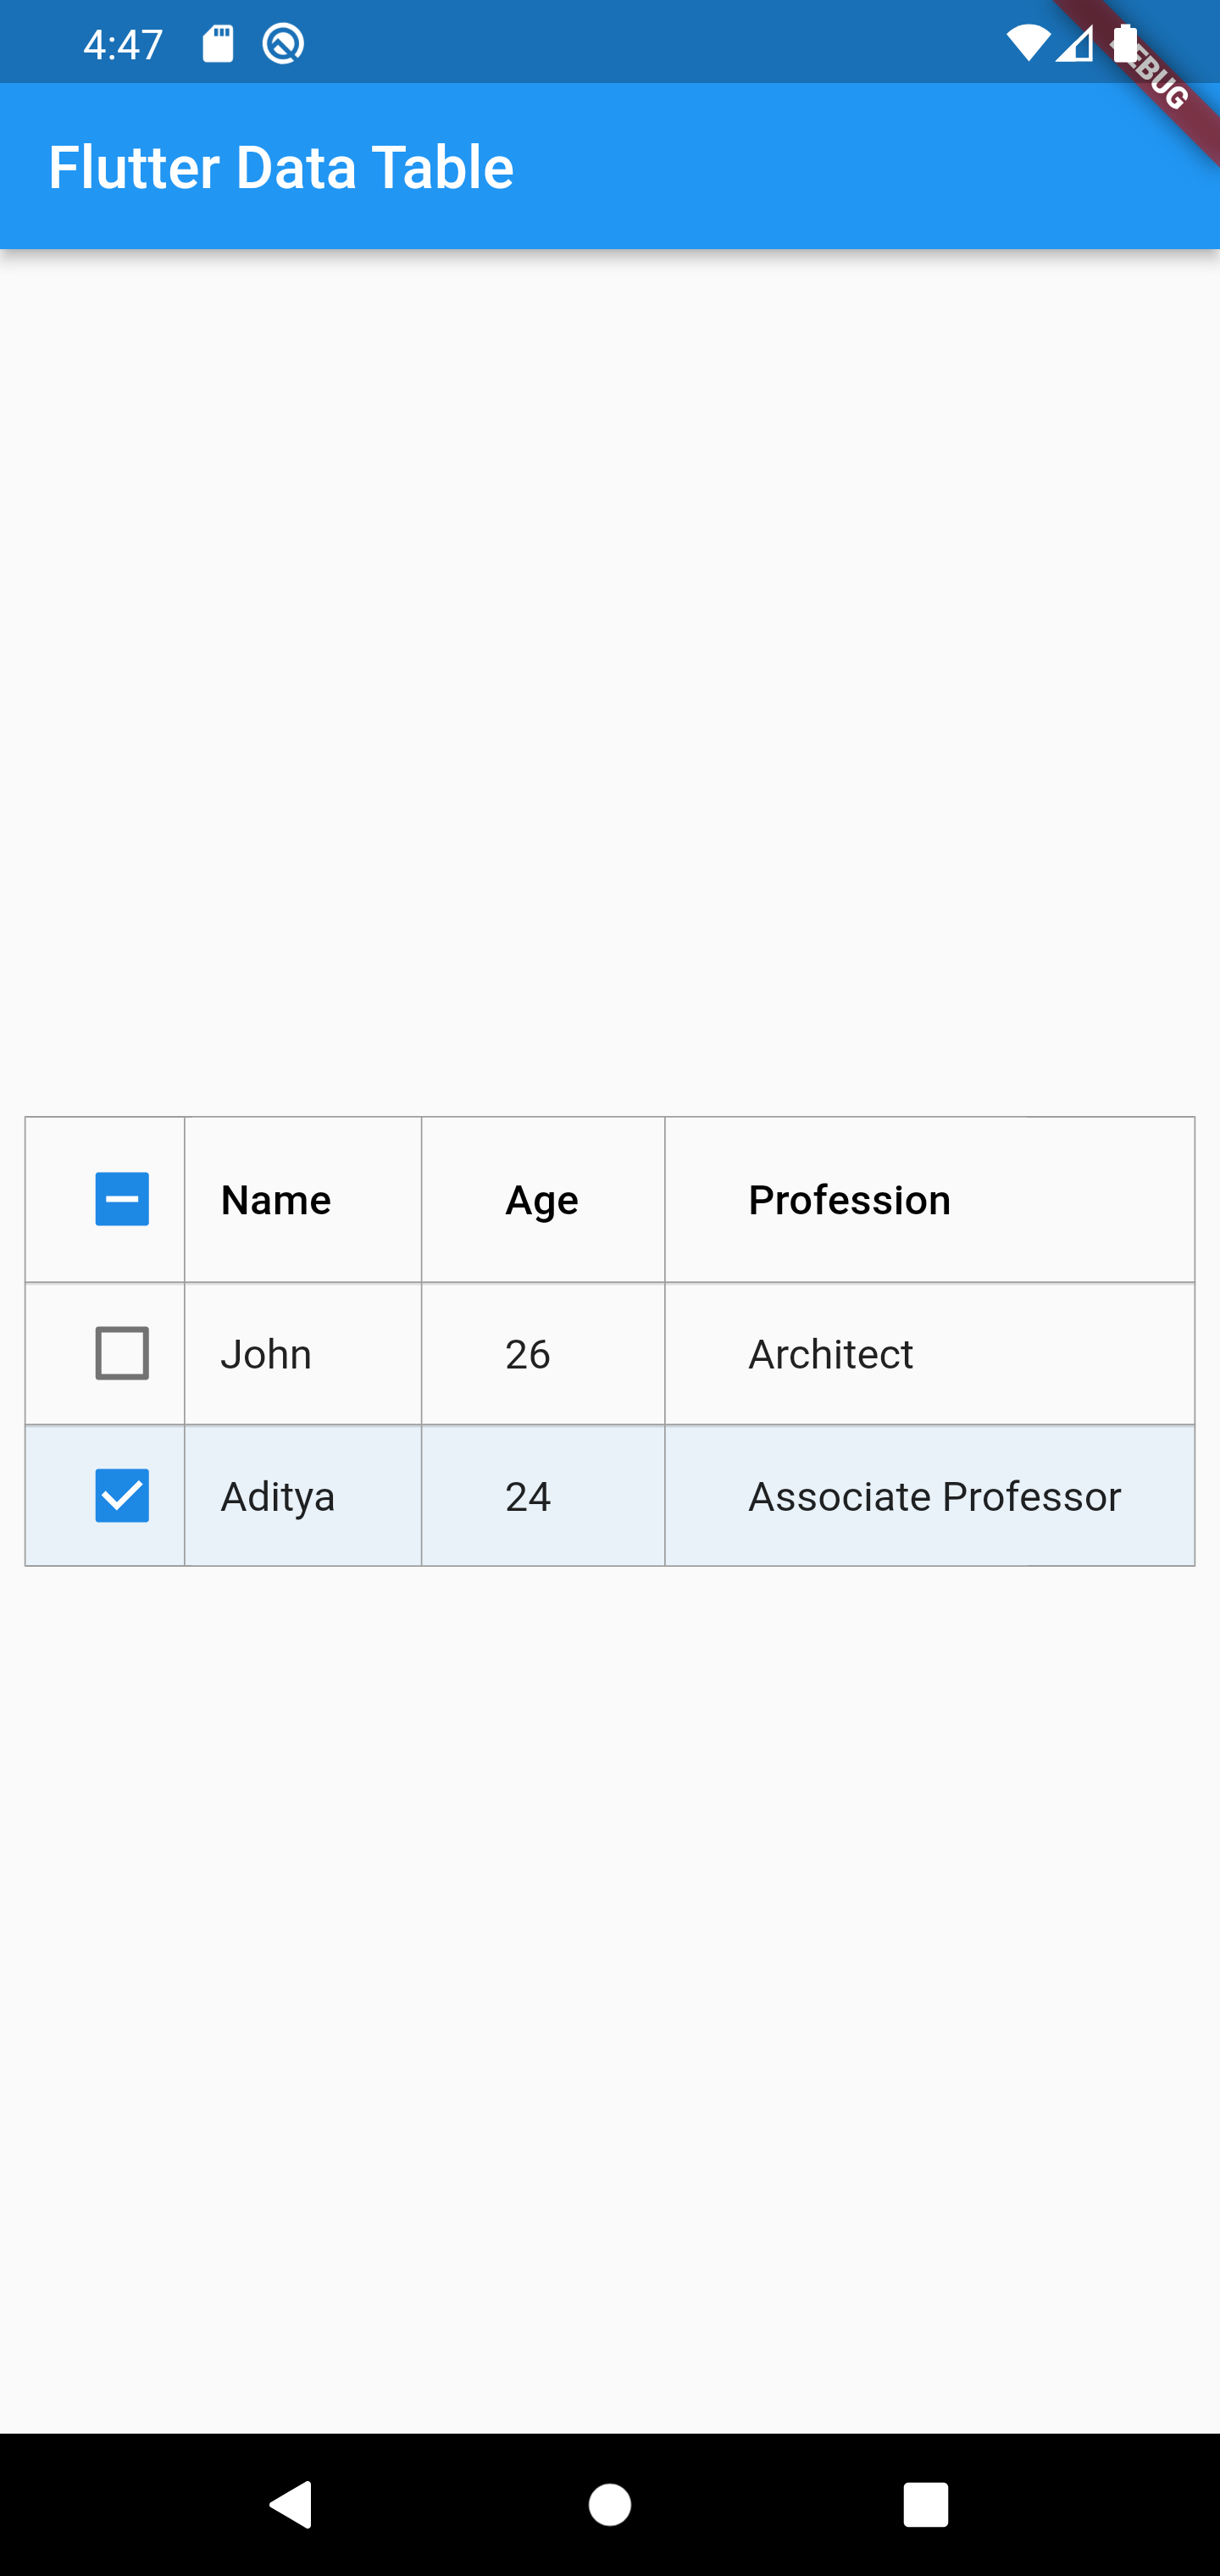
Output:
Full code:
|
1 2 3 4 5 6 7 8 9 10 11 12 13 14 15 16 17 18 19 20 21 22 23 24 25 26 27 28 29 30 31 32 33 34 35 36 37 38 39 40 41 42 43 44 45 46 47 48 49 50 51 52 53 54 55 56 57 58 59 60 61 62 63 64 65 66 67 68 69 70 71 72 73 74 75 76 77 78 79 80 81 82 83 84 85 86 87 88 89 90 91 92 93 94 95 96 |
import 'package:flutter/material.dart'; void main() { runApp(const MyApp()); } class MyApp extends StatelessWidget { const MyApp({Key? key}) : super(key: key); // This widget is the root of your application. @override Widget build(BuildContext context) { return MaterialApp( title: 'Flutter Demo', theme: ThemeData( primarySwatch: Colors.blue, ), home: const MyHomePage(title: 'Flutter Data Table'), ); } } class MyHomePage extends StatefulWidget { const MyHomePage({Key? key, required this.title}) : super(key: key); final String title; @override State<MyHomePage> createState() => _MyHomePageState(); } class _MyHomePageState extends State<MyHomePage> { bool? isRowSelected; int selectedIndex = -1; @override Widget build(BuildContext context) { return Scaffold( appBar: AppBar( title: Text(widget.title), ), body: Center( child: DataTable( border: const TableBorder( top: BorderSide(color: Colors.grey, width: 0.5), bottom: BorderSide(color: Colors.grey, width: 0.5), left: BorderSide(color: Colors.grey, width: 0.5), right: BorderSide(color: Colors.grey, width: 0.5), horizontalInside: BorderSide(color: Colors.grey, width: 0.5), verticalInside: BorderSide(color: Colors.grey, width: 0.5), ), rows: <DataRow>[ DataRow( selected: 0 == selectedIndex, onSelectChanged: (bool? value){ setState(() { selectedIndex = 0; }); }, cells: const <DataCell>[ DataCell( Text("John"), ), DataCell(Text("26")), DataCell(Text("Architect")) ]), DataRow( selected: 1 == selectedIndex, onSelectChanged: (bool? value){ setState(() { selectedIndex = 1; print(selectedIndex); }); }, cells: const <DataCell>[ DataCell(Text('Aditya')), DataCell(Text('24')), DataCell(Text('Associate Professor')), ], ), ], columns: const <DataColumn>[ DataColumn( label: Text("Name")), DataColumn(label: Text("Age")), DataColumn(label: Text("Profession")) ],), ), ); } } |
Conclusion:
This is how we create Data Tables in Flutter.
Thanks for reading this article.
If I got something wrong, let me know in the comments. I would love to improve.
You can also read: https://mobikul.com/get-storage-in-flutter/
Reference link: https://api.flutter.dev/flutter/material/DataTable-class.html

Be the first to comment.