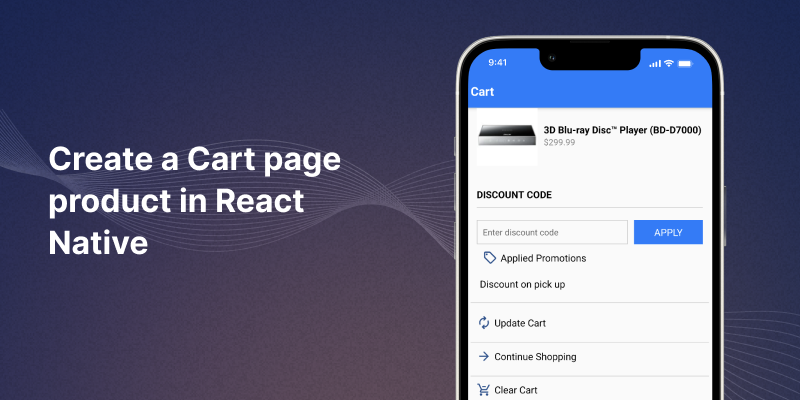
To create a cs-cart shopping cart page in React Native for any e-commerce app. In this blog, we’ll walk through a React Native implementation of a cart page using modern tools and practices.
Our example leverages axios for data fetching, FlatList for rendering product lists, and a variety of UI components from react-native.

Implementation
Now we are implementing the Cart Page, step by step.
Setting Up Your Cart Page With React Native
1. Create Your React Native Project:
Open your terminal and type the command below to create a new project.
|
1 |
npx react-native init CartProductPage |
2. Navigate to Your Project Directory:
Navigate to the project directory where App.js and other necessary files are located.
|
1 |
cd CartProductPage |
3. Run Your App:
Run the command below to start your project on Android or iOS.
|
1 2 |
npx react-native run-android // For Android npx react-native run-ios // For iOS |
Create The Cart Page Component
We’ll start by creating a file named CartProductPage.js in the src/components folder.
We can easily create components in React Native. Here’s an explanation along with the code snippet for your CartProductPage.js.
1. Fetching Cart Data
To create a cart page product in React Native, The CartProductPageaxios.
The useEffect hook handles data retrieval and updates the component’s state.
This ensures that the cart data is fetched when the component mounts; furthermore, it displays a loading indicator while waiting for the response,
thereby keeping the user informed of the ongoing data retrieval process.
|
1 2 3 4 5 6 7 8 9 10 11 12 13 14 15 |
const fetchCartData = async () => { try { const response = await axios.get('https://api.example.com/cart', { headers: { 'Authorization': 'Bearer YOUR_API_KEY' } }); setCartData(response.data); } catch (error) { console.error(error); } finally { setLoading(false); } }; fetchCartData(); }, []); |
2. Rendering Cart Items
The FlatList component efficiently displays a list of cart items. Each item is represented by a product image and details, thanks to a renderItem function.
This approach ensures smooth scrolling and performance even with large datasets.
|
1 2 3 4 5 6 7 8 9 10 11 12 13 14 15 16 17 18 |
<FlatList data={cartData.cart.products} keyExtractor={(item) => item.item_id.toString()} renderItem={renderItem} ItemSeparatorComponent={() => <View style={styles.divider} />} /> //Render flatList items const renderItem = ({ item }) => ( <View style={styles.productContainer}> <Image source={{ uri: item.image_path }} style={styles.productImage} /> <View style={styles.productDetails}> <Text style={styles.productName}>{item.product}</Text> <Text style={styles.productPrice}>{item.format_display_price}</Text> </View> </View> ); |
3. Interactive Buttons
The page includes buttons for updating the cart, continuing shopping, and clearing the cart. Each button triggers an alert for now;
however, in a real application, these would be linked to the corresponding functionalities.
Specifically, the “Update Cart” button will connect to an API call to refresh the cart’s content. Meanwhile, the “Clear Cart” button will clear all cart data, effectively emptying the cart’s contents.
Additionally, the “Continue Shopping” button would redirect users to the shopping home page. Moreover, once these functionalities are integrated,they will significantly enhance the app’s usability.
Consequently, this integration will provide a more seamless and intuitive user experience.
|
1 2 3 4 5 6 7 8 9 10 11 12 13 14 15 16 17 18 19 20 21 22 23 |
const handleUpdateCart = () => { Alert.alert('Update Cart', 'Update cart.'); }; const handleClearCart = () => { Alert.alert( "Clear Cart", "Are you sure you want to clear the cart?", [ { text: "Cancel" }, { text: "OK", onPress: () => { Alert.alert('Clear Cart', 'Clear cart functionality not implemented yet.'); }} ] ); }; //button <TouchableOpacity style={styles.buttonUi} onPress={handleUpdateCart}> <Image source={require('./assets/sell_24dp_255290_FILL0_wght400_GRAD0_opsz24.png')} style={styles.image} /> <Text style={styles.buttonText}>Applied Promotions</Text> </TouchableOpacity> |
4. Styling
The StyleSheet API helps style the cart page. We use a combination of padding, margins, and colours to ensure a clean and modern look.
The fixed bottom container for the total amount and proceed button stays in view, enhancing user interaction.
|
1 2 3 4 5 6 7 8 9 10 11 12 13 14 15 16 17 18 19 20 |
const styles = StyleSheet.create({ safeArea: { flex: 1 }, container: { flex: 1, padding: 16 }, productContainer: { flexDirection: 'row', alignItems: 'center', backgroundColor: '#f0f0f0', padding: 10, borderRadius: 8, }, productImage: { width: 100, height: 100, marginRight: 10 }, productDetails: { flex: 1 }, proceedButton: { backgroundColor: '#007bff', padding: 10, borderRadius: 5, alignItems: 'center', }, proceedButtonText: { color: '#fff', fontSize: 16, fontWeight: 'bold' }, }); |
Here is The Output Of The Project:
Create cs-cart shopping cart screen in react native
Designing the cart page in React Native, involves creating a dynamic and visually appealing interface .
And by leveraging hooks for data fetching and state management that creates a better user experience.
Conclusion
This cs-cart shopping cart page in react native showcases the ability to build responsive and interactive UIs with ease.
By leveraging hooks for data fetching and state management, and combining it with efficient list rendering and styling, we create a solid foundation for any e-commerce application.
Future enhancements might include actual functionalities for cart updates and clearing, and improved error handling for a better user experience.
In this blog, we discussed How to create cs-cart shopping cart page in react native
You can also check other blogs from here.
Thanks for reading this blog ❤️
Hope this blog helped you to better understand how to effectively implement and enhance your cart page features in React Native.

Be the first to comment.