AdMob by Google is an advertising platform designed for mobile app developers. It helps you to monetize your app and start earning from it by displaying ads from Google in their apps. It is the top choice for the developers because it is easy and free to implement, does most of the work by itself and you can start earning without any complex coding. It is fully customizable, you can select where to show ads and what type of ads to be displayed.
To get started with AdMob, you need a Google account which will be used to login to AdMob console. You need to add your app and then create some ad units which you will be using in your app. Creating Ad Units is easy. All you need to do is follow the instructions provided by Google but in this blog, we will be focusing on how to implement them in your Android application.
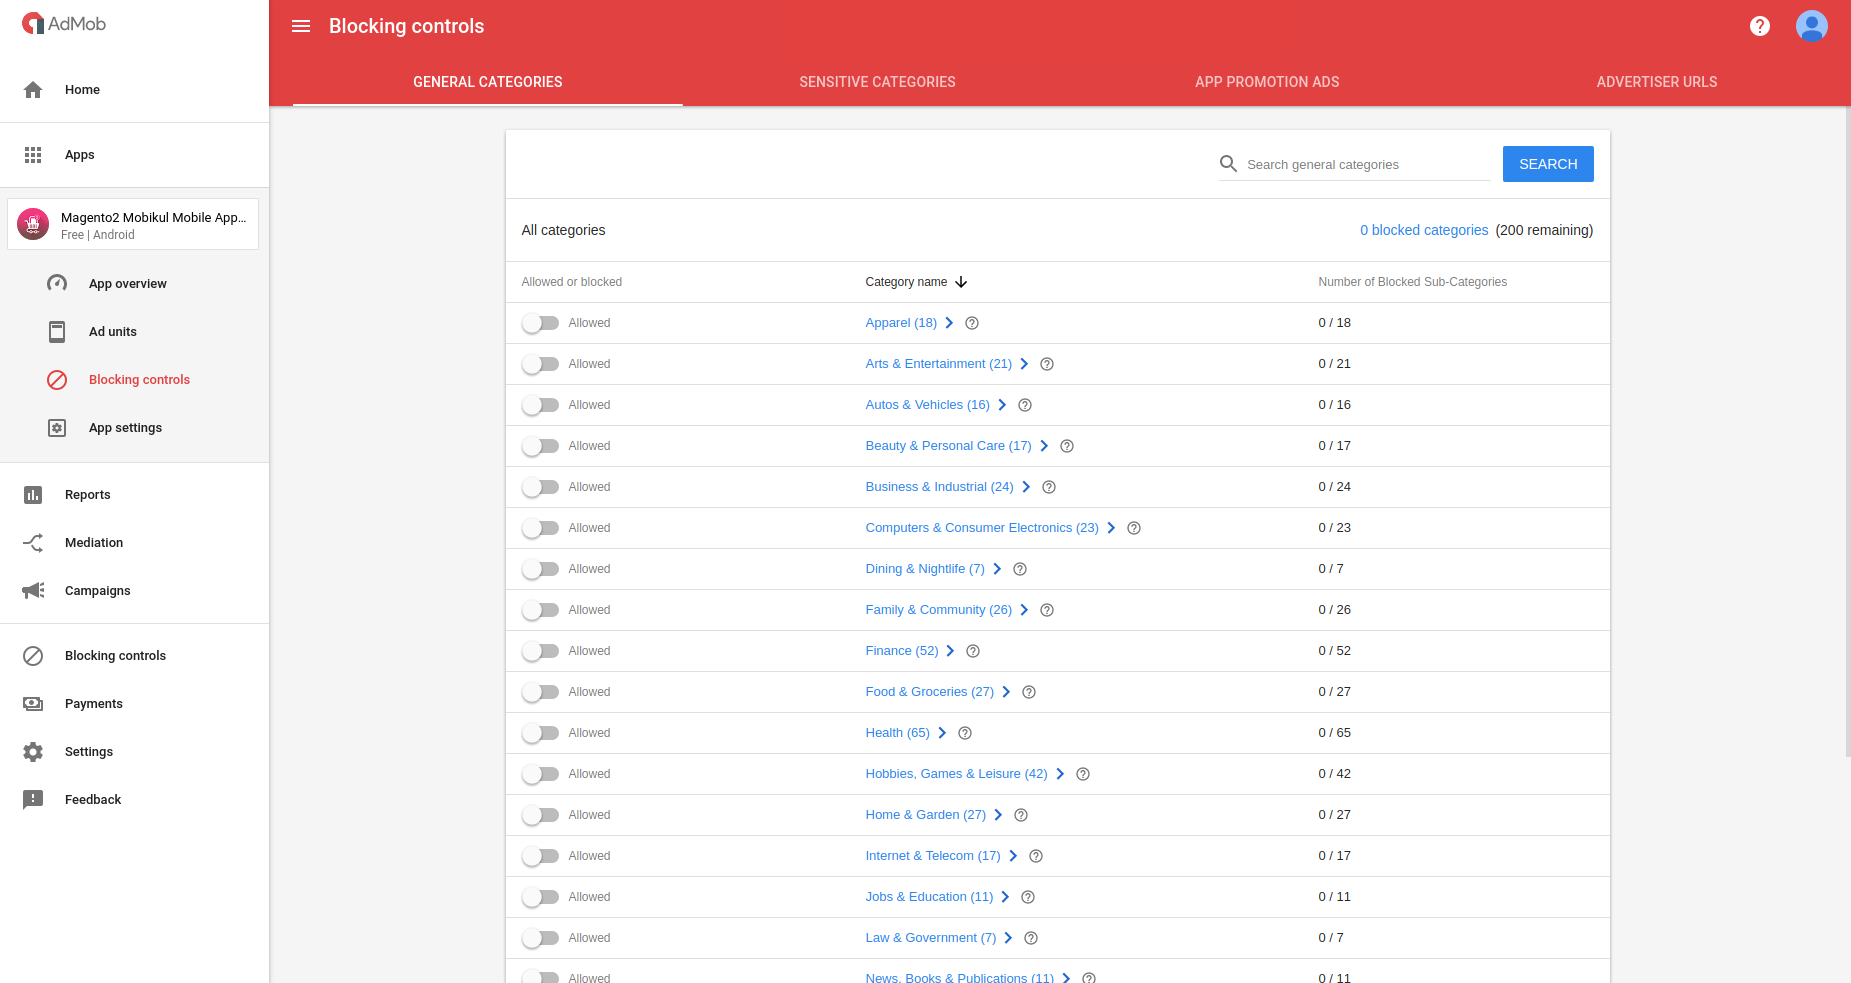
You can fully control the ads that will be displayed in your application. And for that, you can go to AdMob console and select your app. Then select “Blocking Controls” which will show the list of all the types of ads that can be displayed in your app. You can use the switch provided to disable the ads you don’t want.
Below is the screenshot of the AdMob console where you can block the particular ads.
Let us learn how to add and initialize AdMob in your app.
1) You need to add the ads dependency in your module level build.gradle.
|
1 |
compile 'com.google.android.gms:play-services-ads:11.4.2' |
2) You need to initialize Mobile Ads. This can be done in your Application class or you can do this anytime before creating an ad but only once.
|
1 2 |
// Sample AdMob app ID: ca-app-pub-3940256099942544~3347511713 MobileAds.initialize(this, "YOUR_ADMOB_APP_ID"); |
3) In case you are using test ads which you should while developing the app. You need to register your device to show test apps. Otherwise, your apps will be not be displayed. Below provided code segment helps you to do this.
|
1 2 |
// Example test device ID: 33BE2250B43518CCDA7DE426D04EE232 new AdRequest.Builder().addTestDevice("YOUR_TEST_DEVICE_ID").build(); |
If you want to find out your test device id then check the logcat output for a message that looks like this:
|
1 |
I/Ads: Use AdRequest.Builder.addTestDevice("33BE2250B43518CCDA7DE426D04EE232") to get test ads on this device. |
Now we are ready to get the ads in our app and start earning. Let us now look at various types of ads provide by Google and how to implement them.
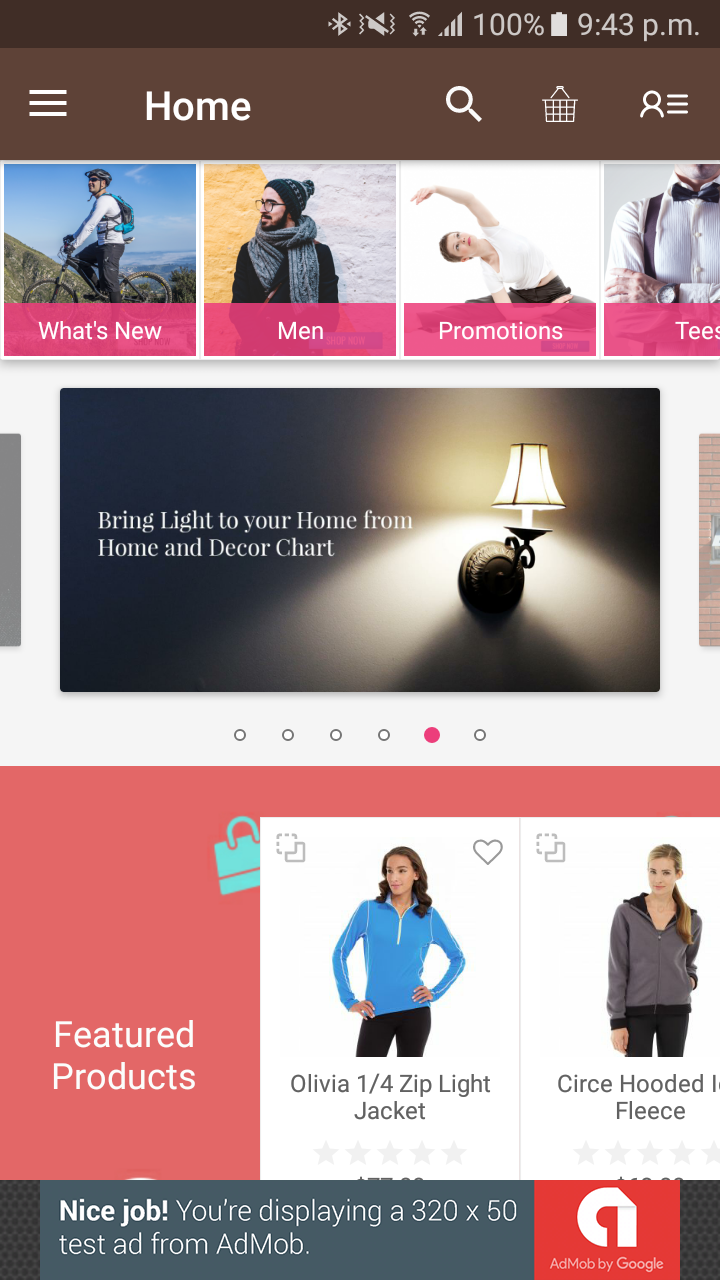
1) Banner Ads: They are rectangular image or text ads that stay on the app layout while the user interacts with the app and refresh automatically. These can be implemented in two ways.
i) Directly in XML means you can add the AdView in your XML and pass the adSize and adUnitId in the attributes and it will automatically load the ad for you.
|
1 2 3 4 5 6 7 8 9 10 |
<com.google.android.gms.ads.AdView xmlns:ads="http://schemas.android.com/apk/res-auto" android:id="@+id/adView" android:layout_width="wrap_content" android:layout_height="wrap_content" android:layout_centerHorizontal="true" android:layout_alignParentBottom="true" ads:adSize="BANNER" ads:adUnitId="ca-app-pub-3940256099942544/6300978111"> </com.google.android.gms.ads.AdView> |
ii) You can also add the banner type ad programmatically.
|
1 2 3 4 |
AdView adView = new AdView(this); adView.setAdSize(AdSize.BANNER); adView.setAdUnitId("ca-app-pub-3940256099942544/6300978111"); your_view.addView(adView); |
In both the cases, you would have to pass the adSize and adUnitId without them the ads will not appear.
Below is the screenshot of the Banner Ads.
2) Interstitial Ads: These are the full page ads which cover the full screen of the app. They are displayed at certain points in the application like between a transition. To implement it, we need to declare an object of the InterstitialAd class.
|
1 2 3 4 5 6 7 8 |
InterstitialAd interstitialAd = new InterstitialAd(this); interstitialAd.setAdUnitId("ca-app-pub-3940256099942544/1033173712"); interstitialAd.loadAd(new AdRequest.Builder().build()); interstitialAd.setAdListener(new AdListener() { public void onAdLoaded() { interstitialAd.show(); } }); |
In the above code segment, we have created an object of the InterstitialAd class and initialized it. We have also added a listener which will show the ad as soon as it gets completely loaded. It is a good practice to load the ad a little earlier to avoid loading delay and just call the show().
Below is the screenshot of the Interstitial Ads.

3) Rewarded Video Ads: Rewarded video ads are full-screen video ads that users have the option of watching in full in exchange for in-app rewards. To implement these type of ads, you need to implement the RewardedVideoAdListener interface and then create an object of RewardedVideoAd class.
|
1 2 3 |
RewardedVideoAd rewardVideoAd = MobileAds.getRewardedVideoAdInstance(this); rewardVideoAd.setRewardedVideoAdListener(this); rewardVideoAd.loadAd("ca-app-pub-3940256099942544/5224354917", new AdRequest.Builder().build()); |
this will initialize your video ad and you need to call the show() function to show the ad.
|
1 |
rewardVideoAd.show(); |
When you implement the RewardedVideoAdListener interface then you will have to override its functions which will be executed according to situations like whether the user have completely watched the ad or not. the overridden methods will look like this.
|
1 2 3 4 5 6 7 8 9 10 11 12 13 14 15 16 17 18 19 20 21 22 23 24 25 26 27 28 29 30 31 32 33 34 |
@Override public void onRewardedVideoAdLoaded() { } @Override public void onRewardedVideoAdOpened() { } @Override public void onRewardedVideoStarted() { } @Override public void onRewardedVideoAdClosed() { } @Override public void onRewarded(RewardItem rewardItem) { } @Override public void onRewardedVideoAdLeftApplication() { } @Override public void onRewardedVideoAdFailedToLoad(int i) { } |
Below is the video of the Rewarded Video Ads.
You can do whatever you want according to your need.
That’s all for this blog. We have Native Ads Express too but they are deprecated now and Native Ads Advanced is currently in a limited beta release. You can always check googles documentation of AdMob for more information.
Thank you very much. This is Vedesh Kumar signing off.

6 comments
You will not be able to add this piece of code directly to your react native project.
For officially we would recommend that you use these links –>
1) https://v5.rnfirebase.io/docs/v5.x.x/installation/initial-setup –> for the basic idea of integrating the firebase in your react native code.
2) https://v5.rnfirebase.io/docs/v5.x.x/admob/android –> for the integration of admob in your react native code.
But still, in case you want to mix things up in react native and native code then you will have to create a custom view for displaying ads in the runtime from your MainActivity.java file and then attach the same to your screen.
You can see the comment by pazo on how to create a dynamic view without any XML code and then attach the same to your current window.
i have come over some code that puts an banner ad at the bottom of an surfaceview….
(no xml shit needed at al, and i have fixed size frambuffer….fulll screen game….
mHolder.setFixedSize(mFrameBufferWidth, mFrameBufferHeight); //which is set in Game class….
ok i run and init the game class from mainactivity….
ok, heres the code that makes the trick, in onCreate in activity that sets up the game, fullscreen surface view , fixed size framebuffer, anyway:
in onCreate:
super.onCreate(savedInstanceState);
mGame = new Game(this); //this is Context
setContentView(mGame);
//Makes an admob banner ad at the bottom of the fullscreen surface, dono what the code does, but it works…:)
WindowManager.LayoutParams windowParams = new WindowManager.LayoutParams();
windowParams.gravity = Gravity.BOTTOM;
windowParams.x = 0;
windowParams.y = 0;
windowParams.height = WindowManager.LayoutParams.WRAP_CONTENT;
windowParams.width = WindowManager.LayoutParams.WRAP_CONTENT;
windowParams.flags = WindowManager.LayoutParams.FLAG_NOT_FOCUSABLE
| WindowManager.LayoutParams.FLAG_NOT_TOUCH_MODAL | WindowManager.LayoutParams.FLAG_LAYOUT_IN_SCREEN
| WindowManager.LayoutParams.FLAG_LAYOUT_NO_LIMITS;
windowParams.format = PixelFormat.TRANSLUCENT;
windowParams.windowAnimations = 0;
WindowManager wm = getWindowManager();
// Create the adView
adView = new AdView(this);
adView.setAdSize(AdSize.BANNER);
adView.setAdUnitId(“ca-app-pub-3940256099942544/6300978111”); //test ad id….
// Initiate a generic request to load it with an ad
adView.loadAd(new AdRequest.Builder()
.addTestDevice(“2EE27C29EF745B2252F293AAE9539279”) //youre device id….
.build());
// Add adView to WindowManager
wm.addView(adView, windowParams);
that does the trick! no xml needed and struggle with tthat shit. 🙂 hate xml ….look different everywhere and shit to code. lol i love fullscreen…and this sets the add att bottom of that fullscreen.