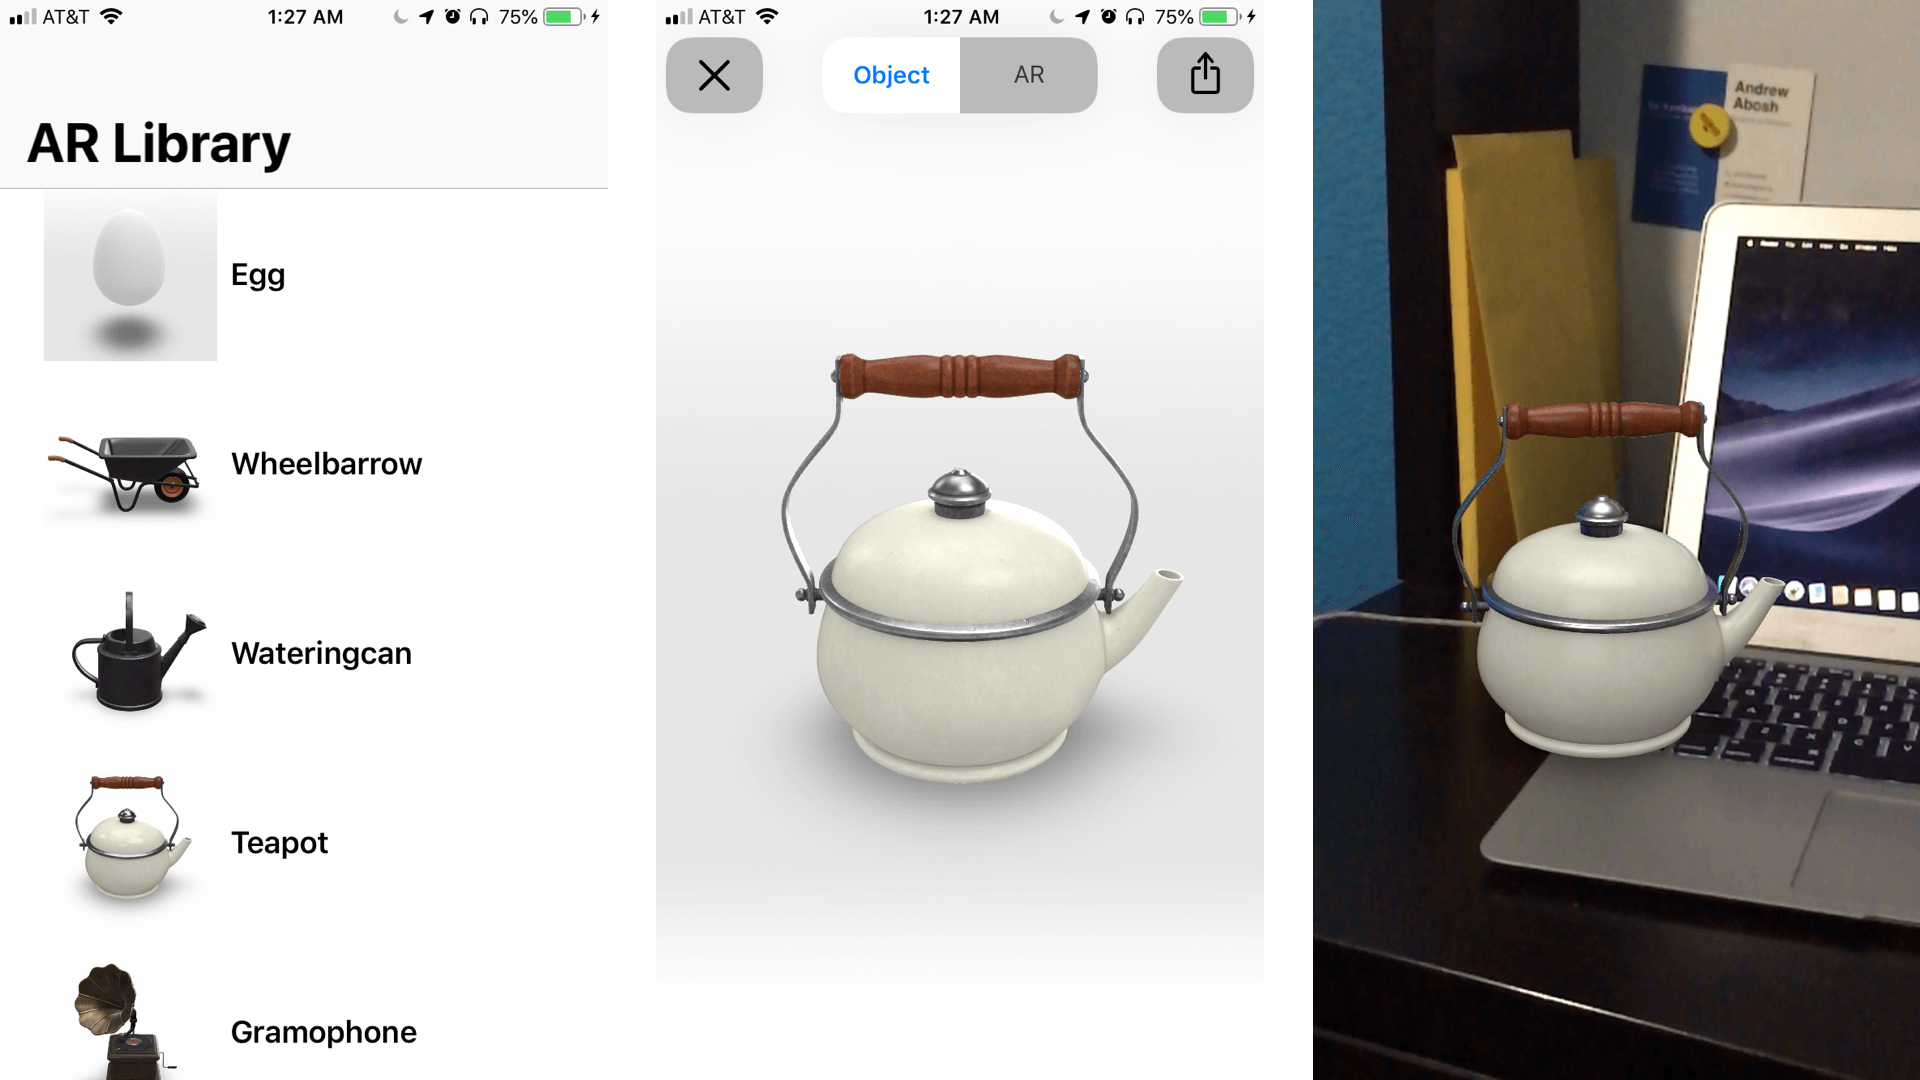
Quick look for representing AR object
Apple released ARKit 2.0 with a slew of brand new APIs and features for Augmented Reality Development. One of these features was an addition to their Quick Look APIs. for iOS 12, Apple has introduced Quick Look for Augmented Reality objects.
This means that you can share .usdz (more on that later) files in Mail, Messages, or any application that supports this type of Quick Look. The recipient can open it up and view the object without having to download an additional app.
In the above image, you can see a teapot being previewed in AR without the help of a separate app. However, AR Quick Look isn’t limited to simply apps. You can integrate AR Quick Look into websites as well! In this tutorial, I’ll walk you through integrating AR Quick Look in an iOS application
What is USDZ?
it’s important to understand what USDZ is. Just like there are many file formats, USDZ is one of them. It stands for Universal Scene Description Zip. If you’ve worked with 3D models before, you’re proabably familiar with 3D models like .OBJ, .DAE, or .sketchup. USDZ is a file created from a collaboration with Pixar and Apple.
At its core, a USDZ file is nothing more than a .zip archive, that it packages the model and its textures into a single file. This is why USDZ files are used for Quick Look and not any other 3D model format.
Converting a 3D model to a USDZ file format
Converting a model to USDZ is quite simple and requires only one line of code!
Take egg.obj file
|
1 |
xcrun usdz_converter /Users/You/PATH/TO/egg.obj /Users/You/CHOOSE/A/PATH/TO/SAVE/egg.usdz |
Press enter. Within a few seconds, you will see the .usdz file saved to the path you chose where you want to save it. Press the spacebar to Quick Look the file.
let’s add our Egg model to the Models folder. Drag egg.usdz to the models folder. Make sure that when you drop it into the folder, you check the target box as shown below.
Next, head over to ViewController.swift and add egg to the models array. This way when we run our app, the model will show up in the list. Just to be sure, run the app again.
It works! Now all that’s left is adding the code to Quick Look these models. First, begin by importing the QuickLook package. When we create a UICollectionView, we also add the Data Source and Delegate protocols to give us access to the methods needed to add data to our collection view. Similarly, we do the same for Quick Look. Modify your code to look like below.
Sample Code:
|
1 2 3 4 5 6 7 8 9 10 11 12 13 14 15 16 17 18 19 20 21 22 23 24 25 26 27 28 29 30 31 32 33 34 35 36 37 38 39 40 41 42 43 44 45 46 47 48 49 50 51 52 53 54 55 56 57 58 59 60 61 62 63 64 65 66 67 68 69 70 |
import UIKit import Foundation import QuickLook import Alamofire class ViewController: UIViewController, UICollectionViewDelegate, UICollectionViewDataSource ,QLPreviewControllerDelegate, QLPreviewControllerDataSource{ var documentPathUrl: URL! var documentsURL: URL! lazy var previewItem = NSURL() @IBOutlet var collectionView: UICollectionView! let models = ["wheelbarrow", "wateringcan", "gramophone", "cupandsaucer", "tulip", "plantpot"] var thumbnails = [UIImage]() var thumbnailIndex = 0 override func viewDidLoad() { super.viewDidLoad() for model in models { if let thumbnail = UIImage(named: "\(model).jpg") { thumbnails.append(thumbnail) } } collectionView.dataSource = self collectionView.delegate = self collectionView.reloadData() } func collectionView(_ collectionView: UICollectionView, numberOfItemsInSection section: Int) -> Int { return models.count } func collectionView(_ collectionView: UICollectionView, cellForItemAt indexPath: IndexPath) -> UICollectionViewCell { let cell = collectionView.dequeueReusableCell(withReuseIdentifier: "LibraryCell", for: indexPath) as? LibraryCollectionViewCell if let cell = cell { cell.modelThumbnail.image = thumbnails[indexPath.item] let title = models[indexPath.item] cell.modelTitle.text = title.capitalized } return cell! } func collectionView(_ collectionView: UICollectionView, didSelectItemAt indexPath: IndexPath) { thumbnailIndex = indexPath.item let previewController = QLPreviewController() previewController.dataSource = self previewController.delegate = self present(previewController, animated: true) } func numberOfPreviewItems(in controller: QLPreviewController) -> Int { return 1 } func previewController(_ controller: QLPreviewController, previewItemAt index: Int) -> QLPreviewItem { let url = Bundle.main.url(forResource: models[thumbnailIndex], withExtension: "usdz")! return url as QLPreviewItem } } |
Note:
When the user will click on Any images then here we have to allocate preview controller.
|
1 2 3 4 5 6 7 8 |
func collectionView(_ collectionView: UICollectionView, didSelectItemAt indexPath: IndexPath) { thumbnailIndex = indexPath.item let previewController = QLPreviewController() previewController.dataSource = self previewController.delegate = self present(previewController, animated: true) } |
|
1 2 3 4 5 6 7 8 |
func numberOfPreviewItems(in controller: QLPreviewController) -> Int { return 1 } func previewController(_ controller: QLPreviewController, previewItemAt index: Int) -> QLPreviewItem { let url = Bundle.main.url(forResource: models[thumbnailIndex], withExtension: "usdz")! return url as QLPreviewItem } |
Through which you can show the AR & you can share as well.
You can download the sample .USDZ from here:
https://developer.apple.com/arkit/gallery/


3 comments
Kindly contact us at [email protected]. So that we could assist you in a better way.
Thanks