UISplitViewController is a container view controller used to display two view controllers in a hierarchical interface, like showing content in the first view controller and related information in the second view controller.
The iOS split view will show the two view controller content based on the size of the device, like if the device is in portrait orientation then it will allow you to see content in both view controller otherwise it will show only one view controller at a time.
Up till now we were able to use split view in iPad only but with introduction of iPhone 6 and iPhone 6+ which support larger screens we can now use this feature in iPhone too.
Create UISplitViewController App
Step 1: Create a project in Xcode.
Step 2: Remove default view controller and drag a split view controller in Main.stroryboard.

This will add several elements in your project.
- A UITableViewController named “PrimaryViewController” that we’ll use as the TableViewController of split View.
- A UIViewController named “Second View Controller” that we’ll use as the Detail view controller of the split view controller.
- A UIViewController named “CustomViewController” that we will use as a custom container that contains SplitViewController.
Create new files for Table view controller, Table view cell and Detail view controller.
Now, drag a label in to table cell and Details view controller and set the constraints.


|
1 2 3 4 5 6 7 8 9 10 11 12 13 14 15 16 17 18 19 20 21 22 23 24 25 26 27 28 29 30 31 32 33 |
import UIKit class TableViewController: UITableViewController { var arrdata = [1,2,3,4,5,6,7] var day = ["Sunday","Monday","Tuesday","Wednesday","Thursday","Friday","Saturday"] override func viewDidLoad() { super.viewDidLoad() } // MARK: - Table view data source override func tableView(_ tableView: UITableView, numberOfRowsInSection section: Int) -> Int { return arrdata.count } override func tableView(_ tableView: UITableView, cellForRowAt indexPath: IndexPath) -> UITableViewCell { if let cell = tableView.dequeueReusableCell(withIdentifier: "TableViewCell", for: indexPath) as? TableViewCell{ cell.label.text = "\(arrdata[indexPath.row])" return cell } return UITableViewCell() } } |
Now we need to write a code to show item details when click on it for that write code in DetailViewController.swift file like as shown below
|
1 2 3 4 5 6 7 8 9 10 11 12 13 14 |
import UIKit class ViewController: UIViewController { @IBOutlet weak var Detaillabel: UILabel! var str = "" override func viewDidLoad() { super.viewDidLoad() // Do any additional setup after loading the view. Detaillabel.text = str } } |
Build and run. At this point, you should see your view controllers.

|
1 2 3 4 5 6 |
override func tableView(_ tableView: UITableView, didSelectRowAt indexPath: IndexPath) { let vc = self.storyboard?.instantiateViewController(withIdentifier: "ViewController") as! ViewController vc.str = "\(day[indexPath.row])" splitViewController?.showDetailViewController(vc, sender: nil) } |
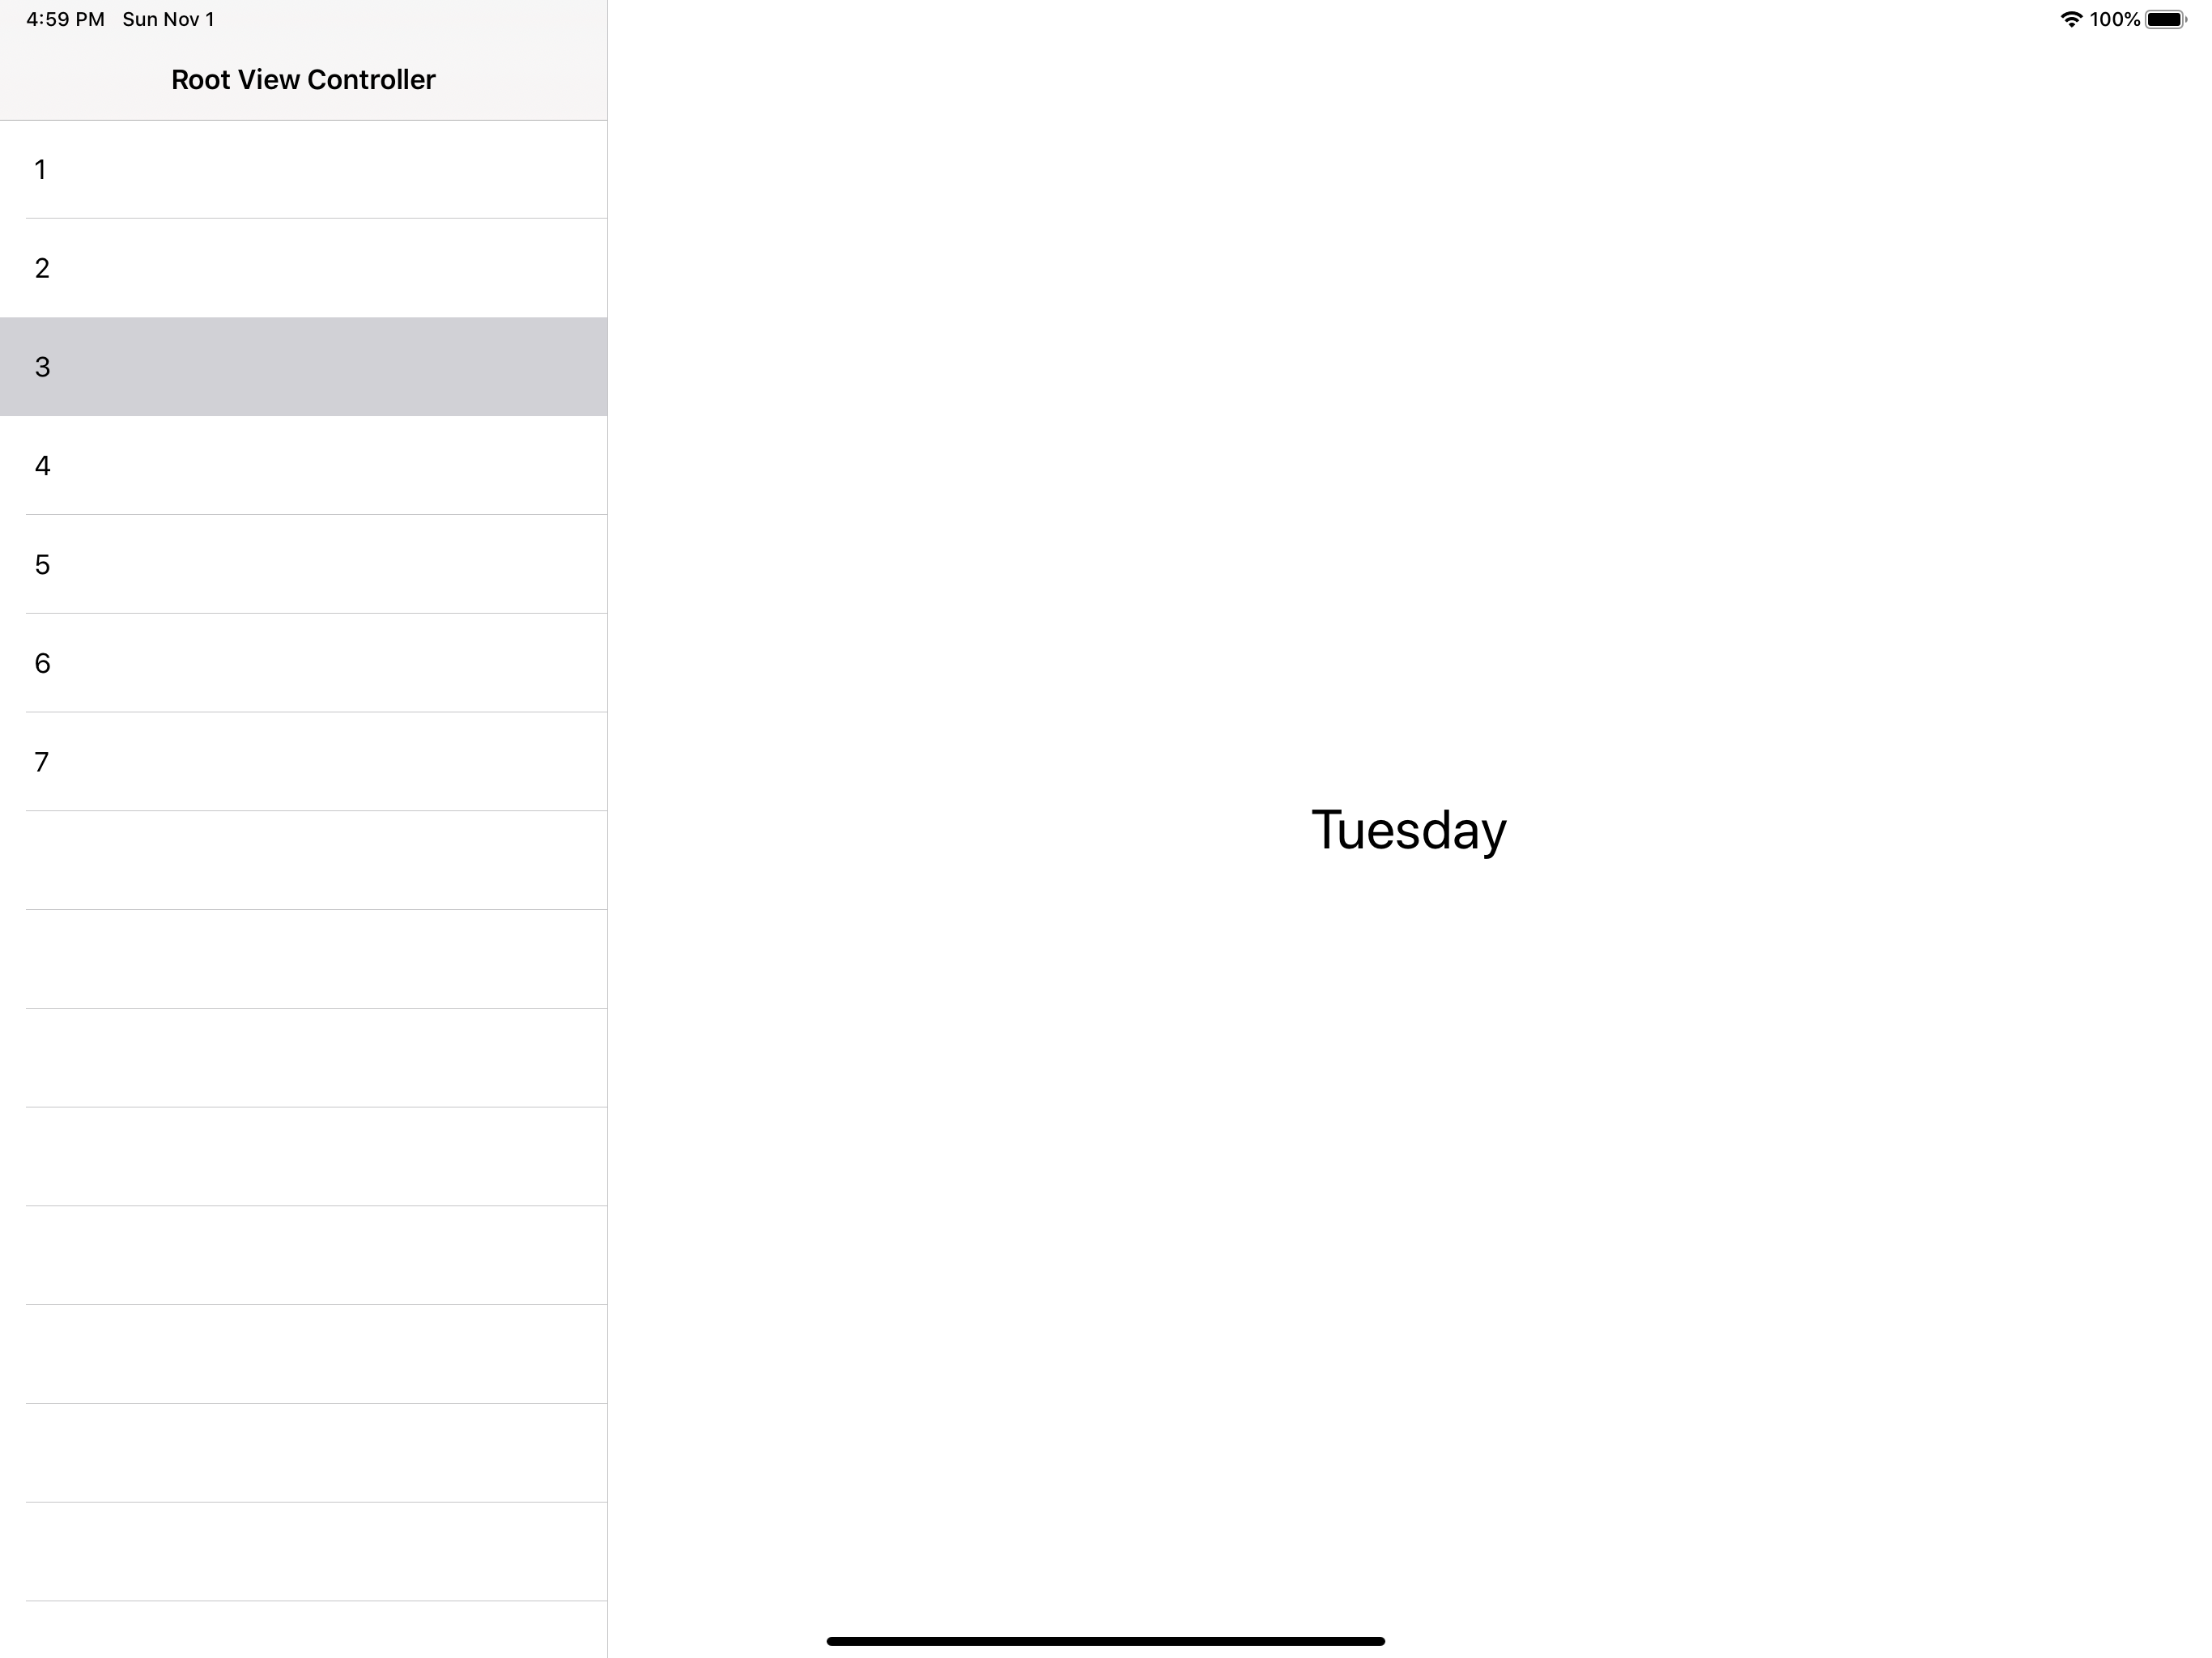
This is how we can use the UISplitViewController in swift to show the two side by side view controller based on our requirements.

Be the first to comment.