Swiftlint
Swift lint is a linting tool that enforces Swift style and conventions, loosely based on GitHub’s Swift Style Guide.
Keeping a codebase consistent and maintainable in a project with a team of developers sometimes may be very hard, different conventions and styles, plus different levels of experience with the language across developers may result in most of the times in an application very difficult to debug and mostly very hard to understand for new developer joining the team.
Linter
In Layman’s Terms: a linter is a tool to help you improve your code. But in what ways does it do that? The answer is: by analyzing your source code looking for problems.
Here’s how Wikipedia defines the term:
lint, or a linter, is a tool that analyzes source code to flag programming errors, bugs, stylistic errors, and suspicious constructs.
The Wikipedia article then goes on to say that the term linter comes from a tool that analyzed C source code. The computer scientist Stephen C. Johnson developed this utility in 1978 when he worked at Bell Labs.
Both the original lint tool, as well as earlier similar utilities, had the goal of analyzing source code to come up with compiler optimizations. Over time, lint-like tools started adding many other types of checks and verification.
For more information about lint click here.
SwiftLint Installation
We can install swiftlint in 2 ways i.e Globally in our system or Locally in our project
- Global Installation
* Using homeBrew:
1brew install swiftlint
* Using Package(.pkg)
You can downloadSwiftLint.pkgfrom the latest GitHub release and running it. - On Project Level
* Using CocoaPods
Simply add the following line to your Podfile:
1pod 'SwiftLint'
Other Possible ways:
- Use in AppCode, Vim, Sublime Text, Atom, Emacs
- Travis has SwiftLint installed on their Xcode images
- Jenkins
- HTML reporter
- FastLane: You can use the official swiftlint Fastlane action to run SwiftLint as part of your FastLane process.
- Hound CI
Integrate SwiftLint with Xcode
In order to integrate SwiftLint with the Xcode project target to get warnings and errors displayed in the Xcode IDE, you just need to add a new “Run Script Phase” and we need to add a small Script in it.
If you have installed Swiftlint using CocoaPods then you need to add ${PODS_ROOT}/SwiftLint/swiftlint in your Script Build Phases. And if you have installed Swiftlint using HomeBrew then you need to add the following code in your Script build Phase:
|
1 2 3 4 5 |
if which swiftlint >/dev/null; then swiftlint else echo "warning: SwiftLint not installed, download from https://github.com/realm/SwiftLint" fi |
Build your app and you should have a lot of errors and warnings, mostly if your project has pods installed, so don’t worry, the cool thing is that we can configure what rules to check or not when using Swiftlint.
Configuring the rules are simple, you just need to create a .swiftlint.yml file in your project directory.
Note: This file is a YAML (Yet Another MarkUp Language) file. If you want to learn how to write
ymlfile then click here.
|
1 2 3 4 5 6 7 8 9 10 11 12 13 14 15 16 17 18 19 20 21 22 23 24 25 26 27 28 29 30 31 32 33 34 35 36 37 38 39 40 41 |
disabled_rules: - trailing_whitespace opt_in_rules: - empty_count - empty_string excluded: - Carthage - Pods - SwiftLint/Common/3rdPartyLib line_length: warning: 150 error: 200 ignores_function_declarations: true ignores_comments: true ignores_urls: true function_body_length: warning: 300 error: 500 function_parameter_count: warning: 6 error: 8 type_body_length: warning: 300 error: 500 file_length: warning: 1000 error: 1500 ignore_comment_only_lines: true cyclomatic_complexity: warning: 15 error: 25 reporter: "xcode" |
Now, Save the configuration file and build, you will see that the number of warnings and errors are now so much lower. I recommend you to go to the Swiftlint rules file in their repository and see all of them. Over 75 rules are included in SwiftLint. Or you can run swiftlint rules command to see all the rules. Also, this will validate your custom .swiftlint.yml file if you run this command in your project directory where the .swiftlint.yml file available.
Example
I have created a small project and installed Swiftlint using Podfile in it. Now when I build this build I am getting the following errors and warning on my screen.

These errors and warnings are occurred becase they are not following the linting convention. Now, I want to remove these warnings so I have created .swiftlint.yml file in the root directory of this project and added the following line in that file.
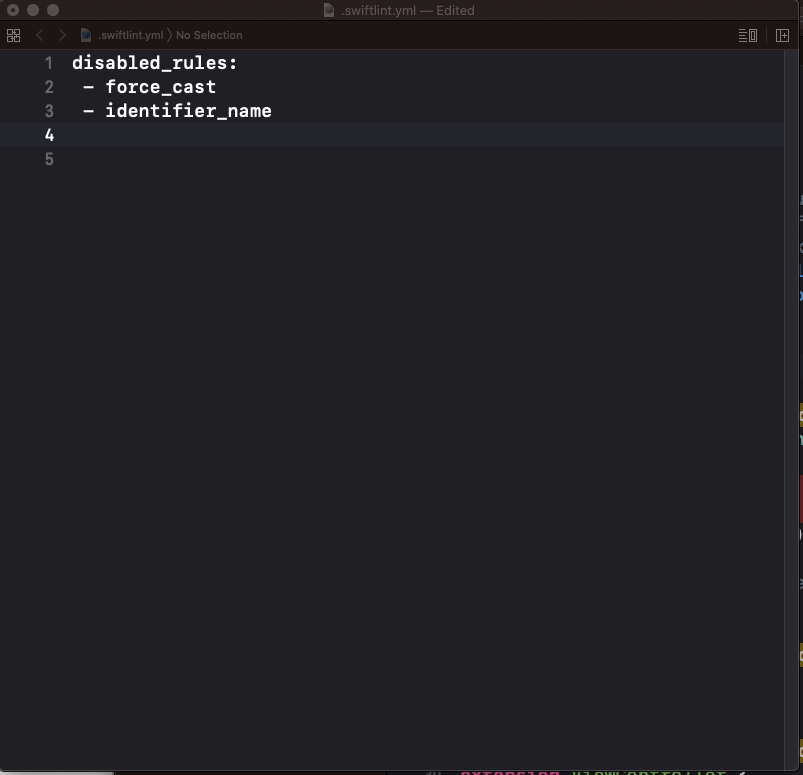
These lines are just disabling the force_case and identifier_name rule. And when we build our project it will build successfully and all the above 3 errors will be removed.

Hide Pod Warnings
You can hide Pod warnings from your Xcode Project by adding inhibit_all_warnings! in your Podfile for all 3rd party dependencies or :inhibit_warnings => true for specific dependency.
|
1 2 3 4 5 6 7 |
platform :ios # ignore all warnings from all dependencies inhibit_all_warnings! # ignore warnings from a specific dependency pod 'FBSDKCoreKit', :inhibit_warnings => true |
Then you need to execute pod install.
AutoCorrect
A cool thing about Swiftlint is that it also can automatically correct certain violations by running the following command on the terminal –
|
1 |
swiftlint autocorrect |
Also, Before using the autocorrection feature, Files on disk are overwritten with a corrected version. So, make sure to have backups of these files before running swiftlint autocorrect, otherwise some data may be lost.
Configuration Parameters
The following parameters can be configured:
disabled_rules: Disable rules from the default enabled set.opt_in_rules: Enable rules, not from the default setting.whitelist_rules: Acts as a whitelist, only the rules specified in this list will be enabled. Can not be specified alongsidedisabled_rulesoropt_in_rules.analyzer_rules: This is an entirely separate list of rules that are only run by theanalyzecommand. All analyzer rules are opt-in, so this is the only configurable rule list (there is no disabled/whitelist equivalent).
|
1 2 3 4 5 6 7 8 9 10 11 12 13 14 15 16 17 18 19 20 21 22 23 24 25 26 27 28 29 30 31 32 33 34 35 36 37 38 39 40 41 42 43 44 45 46 47 48 |
disabled_rules: # rule identifiers to exclude from running - colon - comma - control_statement opt_in_rules: # some rules are only opt-in - empty_count # Find all the available rules by running: # swiftlint rules included: # paths to include during linting. `--path` is ignored if present. - Source excluded: # paths to ignore during linting. Takes precedence over `included`. - Carthage - Pods - Source/ExcludedFolder - Source/ExcludedFile.swift # configurable rules can be customized from this configuration file # binary rules can set their severity level force_cast: warning # implicitly force_try: severity: warning # explicitly # rules that have both warning and error levels, can set just the warning level # implicitly line_length: 110 # they can set both implicitly with an array type_body_length: - 300 # warning - 400 # error # or they can set both explicitly file_length: warning: 500 error: 1200 # naming rules can set warnings/errors for min_length and max_length # additionally they can set excluded names type_name: min_length: 4 # only warning max_length: # warning and error warning: 40 error: 50 excluded: iPhone # excluded via string identifier_name: min_length: # only min_length error: 4 # only error excluded: # excluded via string array - id - URL - GlobalAPIKey reporter: "xcode" # reporter type (xcode, json, csv, checkstyle, junit, html, emoji) |
You can also use environment variables in your configuration file, by using ${SOME_VARIABLE} in a string.
Disable rules in code
Rules can be disabled with a comment inside a source file with the following format:
|
1 |
swiftlint:disable <rule1> [<rule2> <rule3>...] |
The rules will be disabled until the end of the file or until the linter sees a matching enable comment:
|
1 |
swiftlint:enable <rule1> [<rule2> <rule3>...] |
Commands: There are ways to control SwiftLint from within your Swift code.
|
1 2 3 4 5 6 7 8 9 10 11 12 |
/**** Regions ****/ // swiftlint:disable colon let noWarning :String = "" // swiftlint:enable colon let hasWarning :String = "" /**** Local ****/ // swiftlint:disable:next force_cast let noWarning = NSNumber() as! Int let hasWarning = NSNumber() as! Int let noWarning2 = NSNumber() as! Int // swiftlint:disable:this force_cast let noWarning3 = NSNumber() as! Int // swiftlint:disable:previous force_cast |
This is often very useful if you want to locally disable a rule. If you want to disable it for a whole file, just add this comment swiftlint:disable : and it will disable the colon rule for that whole file.
Sometimes that’s useful, say for doing it in the whole file for file length, or if for whatever reason you need more than one trailing newline at the end of the file. You can disable it at the top level, or if you want to do it for a region of code, this works like Clean diagnostics where you can do swiftlint:disable, the rule identifier, have your block of code where you do a whole number of unholy things, and then you add another comment right underneath saying swiftlint:enable that same rule again.
Run swiftlint rules to print a list of all available rules and their identifiers.
—
If you want to explore more about the SwiftLint then please visit its official GitHub page.
I strongly recommend watching this great talk about Swiftlint by JP Simard Watch Your Language!.

Be the first to comment.