Introduction:
StoreKit Support in-app purchases and interactions with the App Store. Storekit provides 3 major services which are:
- In-App Purchase.
- Apple Music.
- Recommendations and reviews.
Today I am going to discuss the In-App Purchases and see the process of integrating In-App Purchase in iOS application with Swift 5.0. In-App Purchase or IAP for short is a feature that gives developers the ability to sell content to the end-user after their app has been downloaded.
Types Of In-App Purchases:
When the user makes any IAP buy extra content or better service of a subscription, make one of these in-app purchase:
-
- Consumable: The user needs to buy items every time and use but the user can not be used in the future for free. On reinstalling, changing device users might lose their consumable products.For example, buying game currency, food delivery, etc.
- Non-consumable: The user needs to buy this item one time, can be used in the future for free. On reinstalling, changing devices these products will not be lost. If the user loses, you might be able to download it again for free by restoring in-app purchases.
For example: upgrading the app to the pro version, removing ads, etc. - Non-renewing subscriptions: The user will be able to use these items for a fixed period of time, these items can be purchased again after the subscription end.
For example a sport session pass for one, three, or six months. - Auto-renewable subscriptions: The user will buy this item for a specified period of time, It’ll automatically renew when the period has passed.
For example Ongoing services Netflix, Hotstar, etc.
Steps to Implement the IAP using Swift 5.0.
Step 1: Activate the paid service in your developer account.
- go to appstoreconnect.apple.com
- click on Agreements, Tax, and Banking option.
- fill all the details for the paid app and submit it for review. The Review process will take 1 day. Note: This paid app only need when you want to implement Non-renewing subscriptions implement in your app


- Click on My APP option.
- choose the app where you want to add IAP services
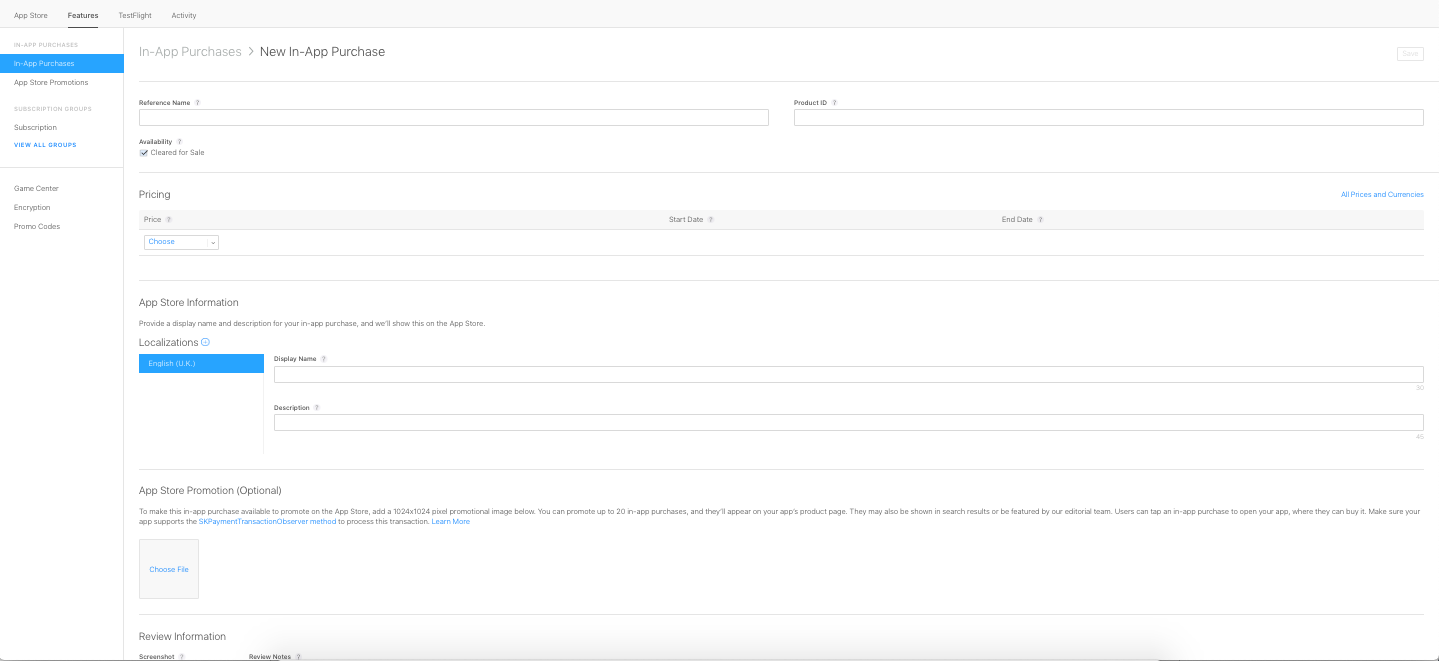
- Now client on the feature option your app and app plus button to create the SKProduct.

- And all app options which is needs for iTunes and set prise and discount if you want.
Note: product id should be unique and app bundle id should prefix of this id. For example, the app bundle is com.test.ios and you want to add monthly subscription in your app then you can use com.test.ios.monthly for your SKProduct id.


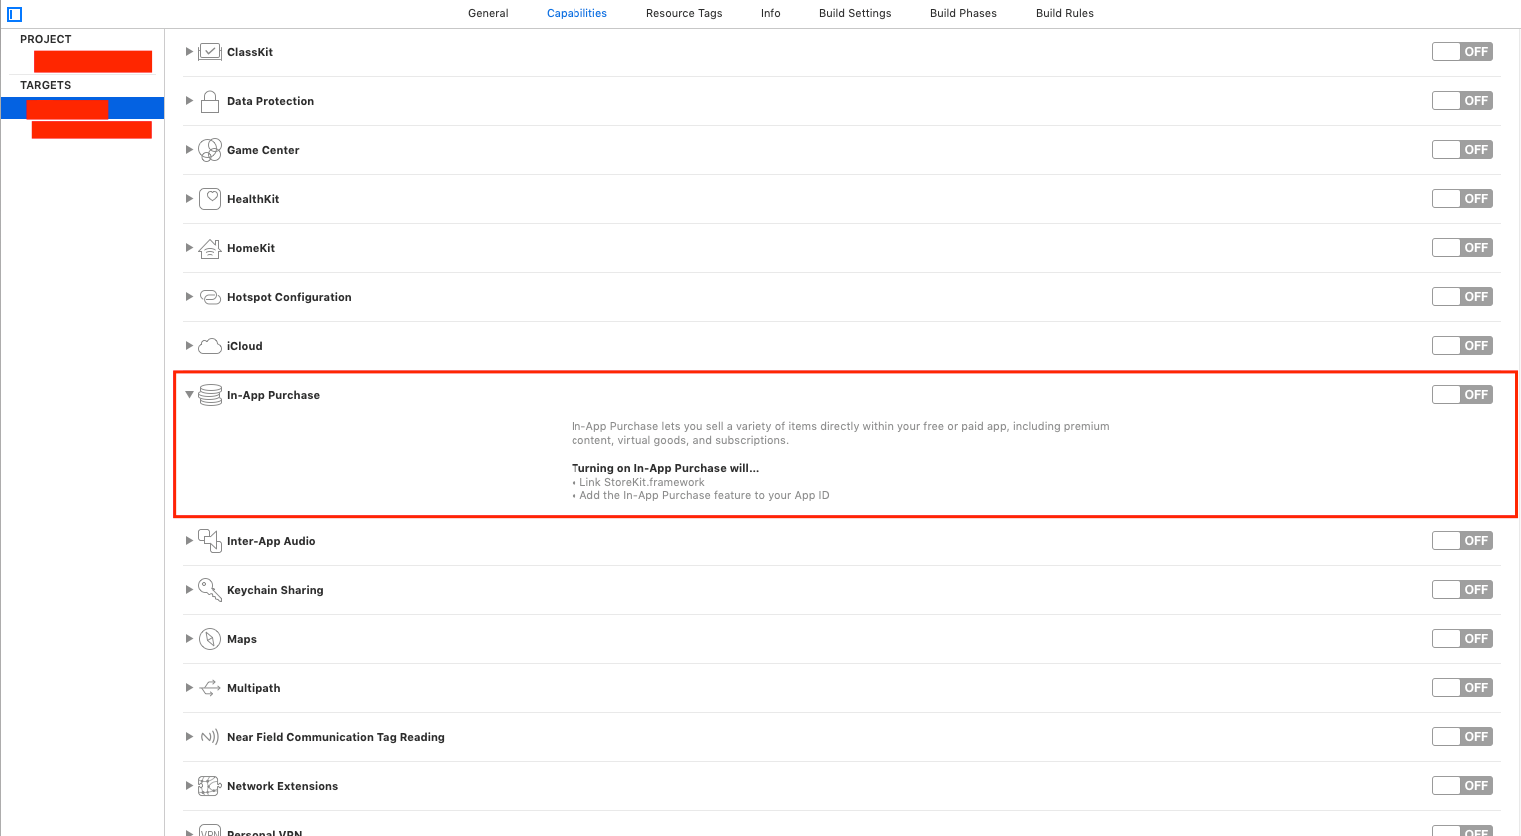
Steps 4: Now configure IAP service in your app. Open Xcode and create a new product and enable In-App purchase form capabilities
Step 5: Create an enum to manage app product ids.
|
1 2 3 4 5 |
enum IAPProduct : String { case week = "com.test.ios.weekly" case month = "com.test.ios.monthly" case year = "com.test.ios.yearly" } |
Steps 6: Now create an IAP service class.
|
1 2 3 4 5 6 7 8 9 10 |
import StoreKit class IPAService: NSObject { static var shared = IPAService() var products = [SKProduct]() var paymentQueue = SKPaymentQueue.default() private override init() { } } |
Step 7: create a method which for requests all information regarding the SKProduct.
|
1 2 3 4 5 6 7 8 |
func getProduct(){ let products : Set = [IAPProduct.week.rawValue,IAPProduct.month.rawValue,IAPProduct.year.rawValue] let request = SKProductsRequest(productIdentifiers: products) request.delegate = self request.start() paymentQueue.add(self) paymentQueue.restoreCompletedTransactions() } |
Steps 8: implement SKProductsRequestDelegate which handles the request and Store all the SKProduct in a variable which help for future use.
|
1 2 3 4 5 6 7 8 |
extension IPAService: SKProductsRequestDelegate{ func productsRequest(_ request: SKProductsRequest, didReceive response: SKProductsResponse) { for product in response.products{ print(product.productIdentifier) } products = response.products } } |
Step 9: Call the getProduct() from the viewController or where you want to call.
|
1 |
IPAService.shared.getProduct() |
Now you can check SKProduct details on the console.
Steps 10: Now create a purchase request for creating the transaction.
|
1 2 3 4 5 6 7 |
func purchase(product:IAPProduct){ guard let productToPurchase = products.first(where: {$0.productIdentifier == product.rawValue}) else { return } let payment = SKPayment(product: productToPurchase) paymentQueue.add(payment) } |
Step 11: Implement SKPaymentTransactionObserver which provides us information about the transaction is successful or failed.
|
1 2 3 4 5 6 7 8 9 10 11 12 13 14 15 16 17 18 19 20 21 22 |
extension IPAService:SKPaymentTransactionObserver{ func paymentQueue(_ queue: SKPaymentQueue, updatedTransactions transactions: [SKPaymentTransaction]) { for transaction in transactions{ print(transaction.transactionState.status(), transaction.payment.productIdentifier) switch transaction.transactionState { case .purchasing: break; case .purchased: Purchase.isBuy = true queue.finishTransaction(transaction) case .restored: Purchase.isBuy = true queue.finishTransaction(transaction) default: queue.finishTransaction(transaction) } } } func paymentQueue(_ queue: SKPaymentQueue, restoreCompletedTransactionsFailedWithError error: Error) { } } |
SKPaymentTransactionState only provides an enum value and now we will convert this enum value to a readable message.
|
1 2 3 4 5 6 7 8 9 10 11 12 13 |
extension SKPaymentTransactionState{ func status() -> String{ switch self { case .deferred: return "deferred" case .failed: return "failed" case .purchased: return "purchased" case .purchasing: return "purchasing" case .restored: return "restored" @unknown default: return "unknown" } } } |
Steps 12: Now call the purchase methods.
|
1 |
IPAService.shared.purchase(product: .week) |
Thank You!!!

2 comments