In this article, we learn about the Stepper Widget In Flutter. We will implement a stepper widget demo and how to use it in your flutter applications.
How to use Stepper Widget In Flutter?
A material stepper widget that showcases progress through a succession of steps. Steppers are especially valuable on account of forms. Where one step requires another or where various steps should be finished to present the complete form.
The widget is a flexible wrapper so a parent class should pass currentStep to this widget dependent on some rationale set off by the three callbacks that it gives.
Let’s Look into it first in the Stepper widget.
You may also check out our Flutter app development company for app development.
|
1 2 3 4 5 6 7 8 9 |
Stepper( type: stepperType, physics: ScrollPhysics(), currentStep: currentStep, onStepTapped: (step){}, onStepContinue: (){}, onStepCancel: (){}, steps: <Step>[], ) |
- type: used to give directional type stepper eg: StepperType.vertical.
- physics: used to give scrollPhysics.
- currentStep: it takes an integer data type, to show the current step widget.
- onStepTapped: integer type function, used to change the stepper position.
- onStepContinue: to increment or go next step.
- onStepCancel: to decrement or take a step back.
- steps: it takes a list of Step widgets.
|
1 2 3 4 5 6 7 8 |
Step( title: widget, content: widget, isActive: currentStep >= 0, state: currentStep >= 0 ? StepState.complete : StepState.disabled, ) |
- title: take any kind of widget.
- content: takes a widget.
- isActive: it’s a boolean type, which checks whether the current step is active on not.
- state: it takes the StepState.
state is having 5 properties
|
1 2 3 4 5 6 7 8 9 10 11 12 13 14 |
/// A step that displays its index in its circle. indexed, /// A step that displays a pencil icon in its circle. editing, /// A step that displays a tick icon in its circle. complete, /// A step that is disabled and does not to react to taps. disabled, /// A step that is currently having an error. e.g. the user has submitted wrong input. error, |
Let’s Implement Code
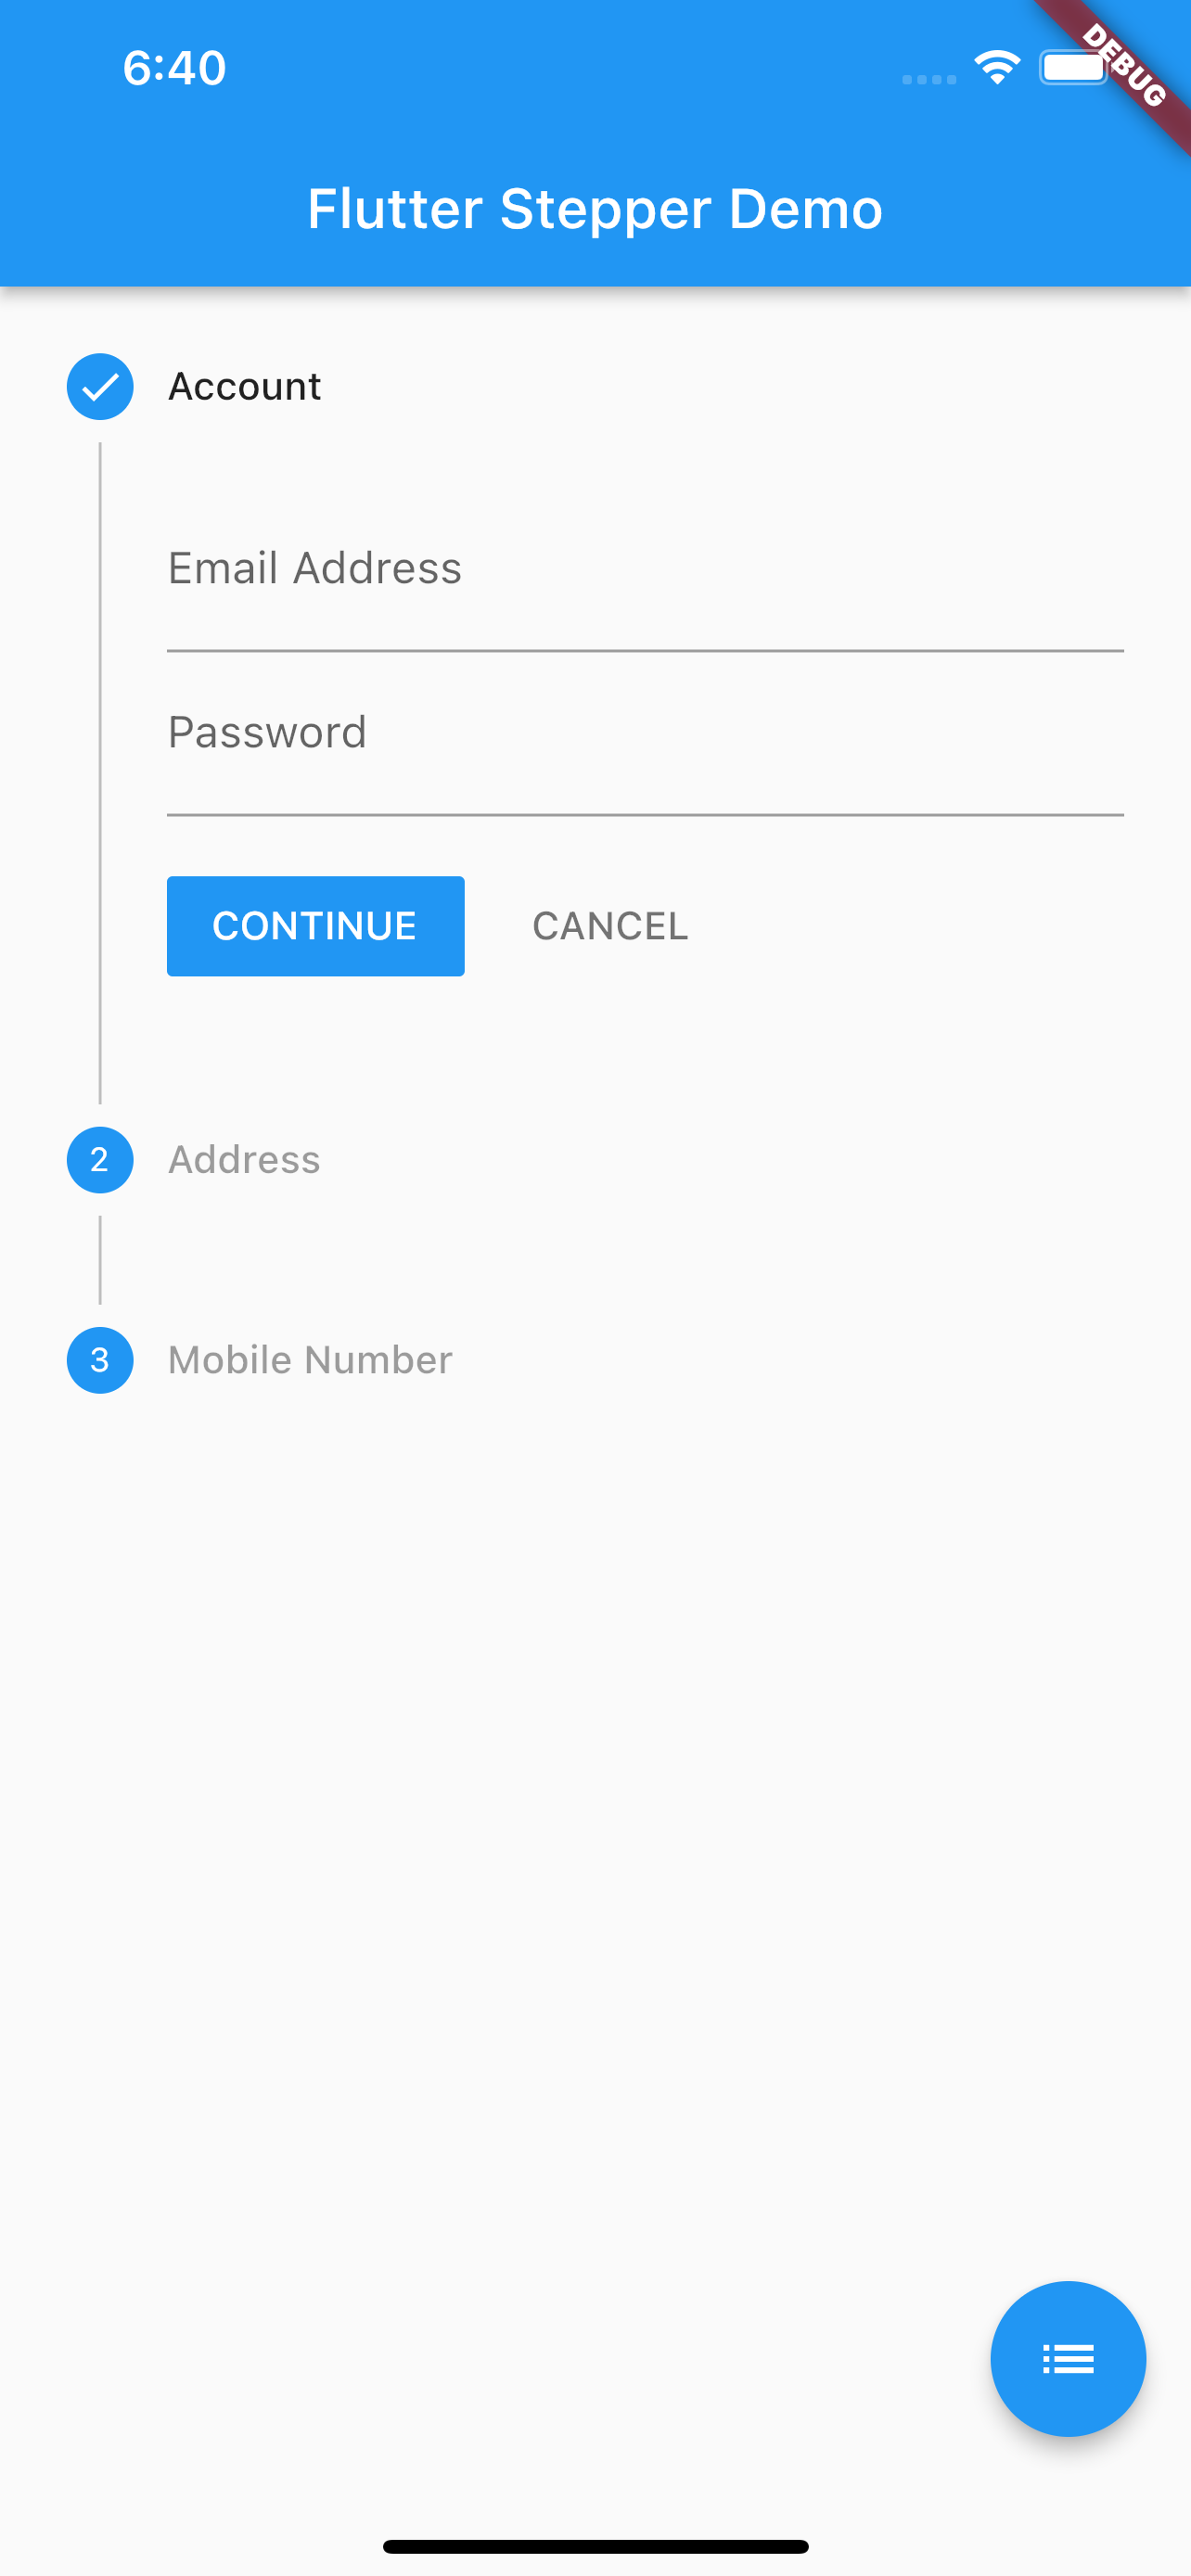
Stepper Widget In Futter we will create a Stepper three steps.
We will deeply define all three steps below are:
First step: we will be called an Account as the title. In this step, we will create two TextFormField called Email Address and Password.
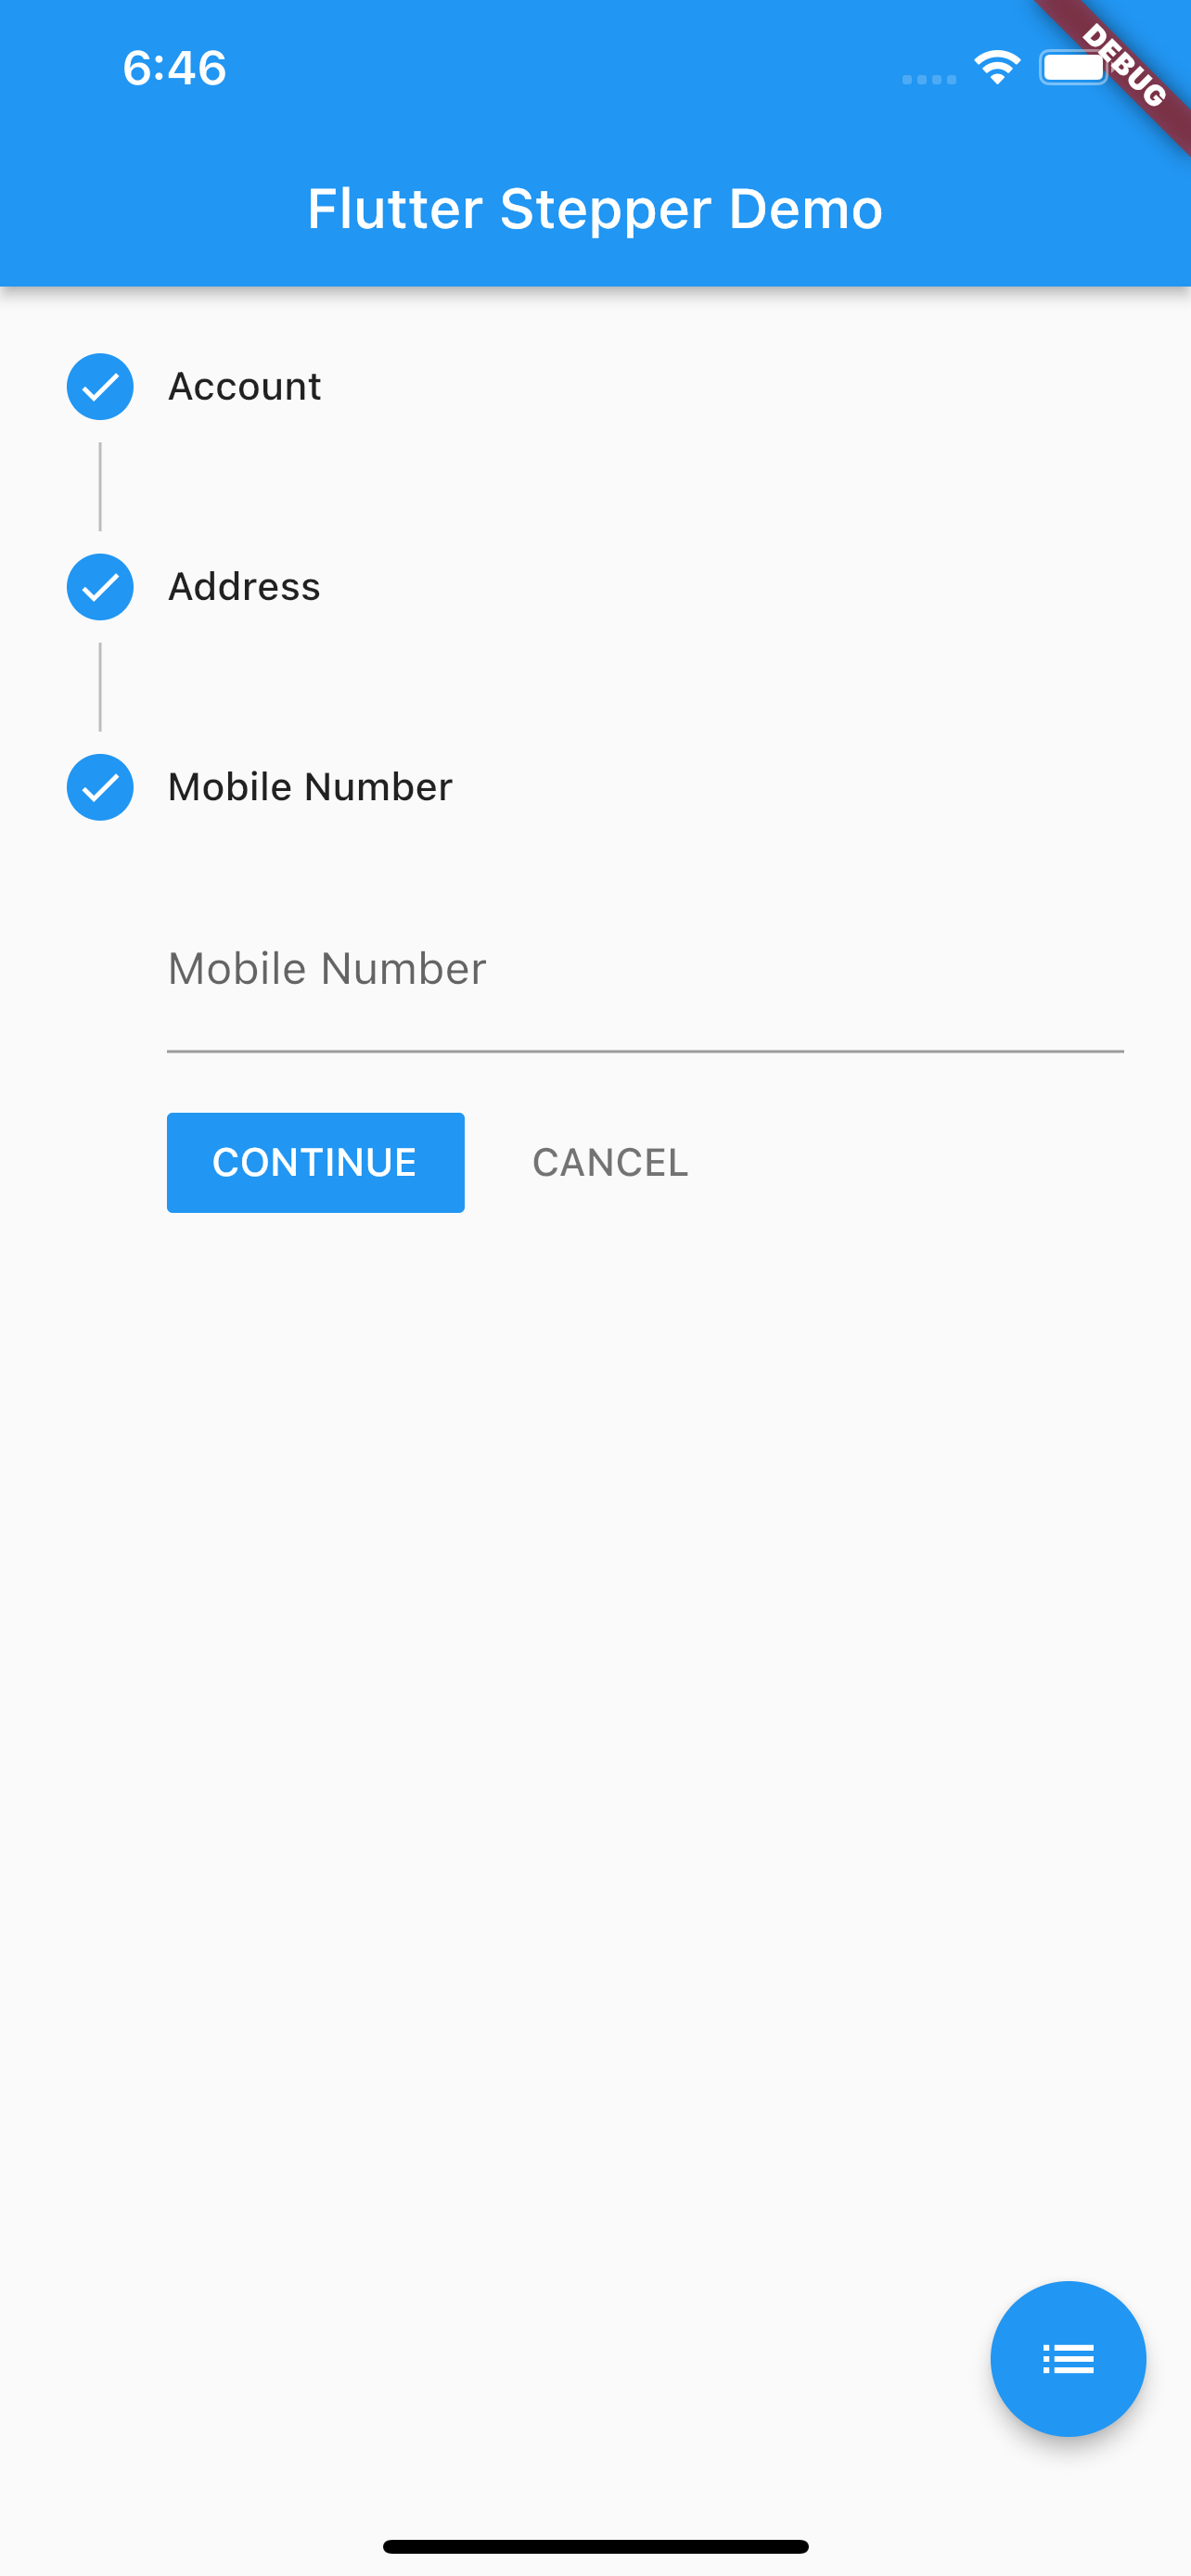
Second step: when the user will tap on the continue button the step will forward to the next step, and the number was changed to the active tick icon. If the user taps on the cancel button step will go back to the previous step and the active tick icon was changed to a number again.

In the last step, we will be called a Mobile Number as the title. In this step, we will create one TextFormField called Mobile Number.
We will also change the direction in the stepper. So we make a floating action button and on this button, we called an icon and switchStepsType() widget.
|
1 2 3 4 |
floatingActionButton: FloatingActionButton( child: Icon(Icons.list), onPressed: switchStepsType, ), |
Now we can deep define switchStepsType() widget.
|
1 2 3 4 5 |
switchStepsType() { setState(() => stepperType == StepperType.vertical ? stepperType = StepperType.horizontal : stepperType = StepperType.vertical); } |


Complete Code to use Stepper Widget In Flutter:
|
1 2 3 4 5 6 7 8 9 10 11 12 13 14 15 16 17 18 19 20 21 22 23 24 25 26 27 28 29 30 31 32 33 34 35 36 37 38 39 40 41 42 43 44 45 46 47 48 49 50 51 52 53 54 55 56 57 58 59 60 61 62 63 64 65 66 67 68 69 70 71 72 73 74 75 76 77 78 79 80 81 82 83 84 85 86 87 88 89 90 91 92 93 94 95 96 97 98 99 100 101 102 103 104 105 106 107 108 109 110 111 112 113 114 115 116 117 118 119 120 121 122 123 124 125 126 127 128 129 130 131 132 133 134 135 136 |
import 'package:flutter/material.dart'; void main() { runApp(const MyApp()); } class MyApp extends StatelessWidget { const MyApp({Key? key}) : super(key: key); @override Widget build(BuildContext context) { return MaterialApp( title: 'Flutter Demo', theme: ThemeData( primarySwatch: Colors.blue, ), home: StepperDemo(), ); } } class StepperDemo extends StatefulWidget { @override _StepperDemoState createState() => _StepperDemoState(); } class _StepperDemoState extends State<StepperDemo> { int _currentStep = 0; StepperType stepperType = StepperType.vertical; @override Widget build(BuildContext context) { return Scaffold( appBar: AppBar( automaticallyImplyLeading: false, title: Text('Flutter Stepper Demo'), centerTitle: true, ), body: Container( child: Column( children: [ Expanded( child: Stepper( type: stepperType, physics: ScrollPhysics(), currentStep: _currentStep, onStepTapped: (step) => tapped(step), onStepContinue: continued, onStepCancel: cancel, steps: <Step>[ Step( title: new Text('Account'), content: Column( children: <Widget>[ TextFormField( decoration: InputDecoration( labelText: 'Email Address'), ), TextFormField( decoration: InputDecoration( labelText: 'Password'), ), ], ), isActive: _currentStep >= 0, state: _currentStep >= 0 ? StepState.complete : StepState.disabled, ), Step( title: new Text('Address'), content: Column( children: <Widget>[ TextFormField( decoration: InputDecoration( labelText: 'Home Address'), ), TextFormField( decoration: InputDecoration( labelText: 'Postcode'), ), ], ), isActive: _currentStep >= 0, state: _currentStep >= 1 ? StepState.complete : StepState.disabled, ), Step( title: new Text('Mobile Number'), content: Column( children: <Widget>[ TextFormField( decoration: InputDecoration( labelText: 'Mobile Number'), ), ], ), isActive:_currentStep >= 0, state: _currentStep >= 2 ? StepState.complete : StepState.disabled, ), ], ), ), ], ), ), floatingActionButton: FloatingActionButton( child: Icon(Icons.list), onPressed: switchStepsType, ), ); } switchStepsType() { setState(() => stepperType == StepperType.vertical ? stepperType = StepperType.horizontal : stepperType = StepperType.vertical); } tapped(int step){ setState(() => _currentStep = step); } continued(){ _currentStep < 2 ? setState(() => _currentStep += 1): null; } cancel(){ _currentStep > 0 ? setState(() => _currentStep -= 1) : null; } } |
That’s all for this Article 🎊 .
Conclusion
We learned about Stepper Widget in Flutter in this blog.
Visit the link for additional information on the Stepper Widget in Flutter.
Thanks for reading this blog. You can also check other blogs from here for more knowledge.

Be the first to comment.