Retrofit API call without Future Builder is used to call Rest API.
we can use it for sending dynamic headers, parameters, requests & responses in a more secure way.

In mobile app development connecting with the server(via API) to store or fetch the data is the most basic requirement.
So, in today’s blog, we check the Retrofit API call without Future Builder.
I hope we are all familiar with it, but we are not using Future Builder.
FutureBuilder is a widget by Flutter which lets you determine the current state of the Future.
Here we have discussed another approach of calling Rest API without Future Builder in Retrofit.
Check our Flutter app development services page.
Let’s Start The Steps For Retrofit API Calling In A Flutter Without Future Builder
- Firstly, create a flutter project.
- Secondly, add the below dependencies in pubspec.yaml file.
|
1 2 3 4 5 6 7 |
dependencies: retrofit: any json_annotation: any dev_dependencies: retrofit_generator: any build_runner: any |
Now, run the command “flutter pub get” to download the dependencies.
- Now, let’s create an abstract API request class.
|
1 2 3 4 5 6 7 8 9 10 |
import 'package:dio/dio.dart'; import 'package:retrofit/http.dart'; import 'package:retrofit_byayush2/user2.dart'; part 'api_client4.g.dart'; @RestApi(baseUrl: "https://jsonplaceholder.typicode.com/") abstract class ApiClient1 { factory ApiClient1(Dio dio, {String baseUrl}) = _ApiClient1; @GET("todos/") Future<List<User>> getusers(); } |
Right now, we will observe some errors in the file in part “api_client4.g.dart” and ApiClient1.
We need to run the command to generate an “api_client4.g.dar” file.
- Now run the command in the terminal
flutter pub run build_runner build
The above command will generate the api_client4.g.dart file. We should never modify the code in the api_client4.g.dart file by hand.
Therefore if we made any changes in ApiClient1. So we need to run the command to update the part file.
- Now, create a model class to store data.
|
1 2 3 4 5 6 7 8 9 10 11 12 13 14 15 |
class User { int id; String title; bool completed; User({this.id,this.title,this.completed}); factory User.fromJson(Map<String,dynamic> parsedjson) { return User( id: parsedjson['id'], title: parsedjson['title'], completed: parsedjson['completed'] ); } } |
- Now, call the get method from your main.dart class.
|
1 2 3 4 5 6 7 8 9 10 11 12 13 14 15 16 17 18 19 20 21 22 23 24 25 26 27 28 29 30 31 32 33 34 35 36 |
Widget build(BuildContext context) { return Scaffold(floatingActionButton: FloatingActionButton( child: Icon(Icons.add), ), appBar: AppBar(title: Text("Retrofit API calling without Future Builder"),), body:circular?Center(child: CircularProgressIndicator()): ListView.separated( separatorBuilder: (context, index) => Divider( color: Colors.black, ), itemCount: user.length, itemBuilder: (context,index) { return Column( crossAxisAlignment: CrossAxisAlignment.start, mainAxisAlignment: MainAxisAlignment.start, children: [ Container( padding: EdgeInsets.all(5.0), decoration: BoxDecoration( // color: Colors.amberAccent, borderRadius: BorderRadius.circular(10.0) ), margin: EdgeInsets.all(5.0), child: Column( children: [ Text(user[index].title,style: TextStyle(color: Colors.black,fontWeight: FontWeight.bold,fontSize: 20.0),), //SizedBox(height: 40.0,) ], ), ), SizedBox(height: 10.0,) ], ); }), ); } |
Please find below the complete code for main.dart class.
|
1 2 3 4 5 6 7 8 9 10 11 12 13 14 15 16 17 18 19 20 21 22 23 24 25 26 27 28 29 30 31 32 33 34 35 36 37 38 39 40 41 42 43 44 45 46 47 48 49 50 51 52 53 54 55 56 57 58 59 60 61 62 63 64 65 66 67 68 69 70 71 72 73 |
import 'package:dio/dio.dart'; import 'package:retrofit/http.dart'; import 'package:flutter/material.dart'; import 'package:retrofit_byayush2/api_client4.dart'; import 'package:retrofit_byayush2/user2.dart'; class Home4 extends StatefulWidget { @override _Home4State createState() => _Home4State(); } class _Home4State extends State<Home4> { bool circular=false; List<User> user=[]; Future<List<User>> fetch1()async{ final client=await ApiClient1(Dio(BaseOptions(contentType: "application/json"))); var data=await client.getusers(); if(data.isNotEmpty) { setState(() { for(var i in data) { user.add(i); } circular=false; }); } return user; } @override void initState() { setState(() { circular=true; }); fetch1(); super.initState(); } @override Widget build(BuildContext context) { return Scaffold(floatingActionButton: FloatingActionButton( child: Icon(Icons.add), ), appBar: AppBar(title: Text("Retrofit API calling without Future Builder"),), body:circular?Center(child: CircularProgressIndicator()): ListView.separated( separatorBuilder: (context, index) => Divider( color: Colors.black, ), itemCount: user.length, itemBuilder: (context,index) { return Column( crossAxisAlignment: CrossAxisAlignment.start, mainAxisAlignment: MainAxisAlignment.start, children: [ Container( padding: EdgeInsets.all(5.0), decoration: BoxDecoration( // color: Colors.amberAccent, borderRadius: BorderRadius.circular(10.0) ), margin: EdgeInsets.all(5.0), child: Column( children: [ Text(user[index].title,style: TextStyle(color: Colors.black,fontWeight: FontWeight.bold,fontSize: 20.0),), //SizedBox(height: 40.0,) ], ), ), SizedBox(height: 10.0,) ], ); }), ); } } |
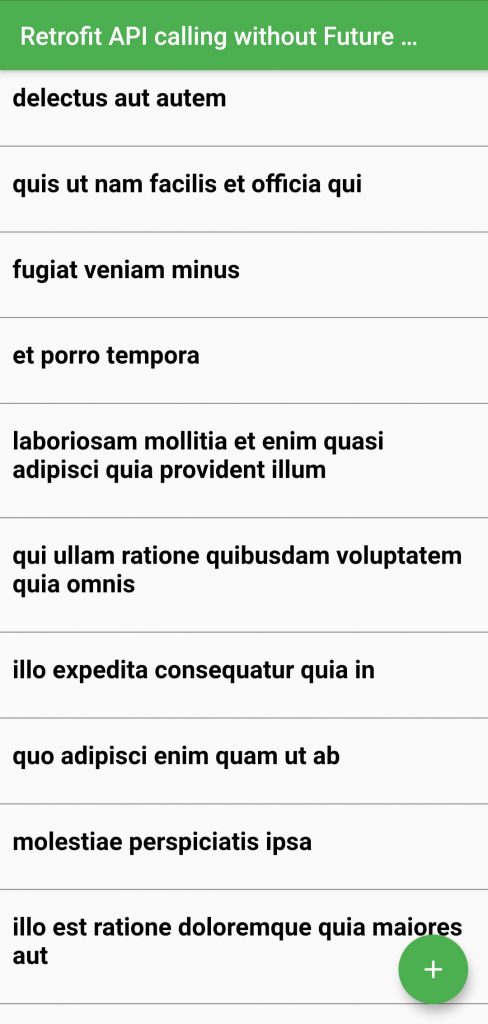
Finally, we can run the code and as a result, we can see the below output.
Conclusion
In this blog, we have discussed Retrofit API calling without using Future Builder.
I hope it will help you out in understanding and getting a brief idea about it.
Similarly, for more interesting blogs check out here – https://mobikul.com/blog/
Thank you for reading!!


Be the first to comment.