In this blog, we are going to learn to integrate the PencilKit in Swift. PencilKit provides a drawing environment for your iOS app that receives input from the user’s finger and helps in turning its view into images that can be used in playing around.
Please follow the below steps for the integration of the PencikKit in Swift.
Step – 1
Create a project on the Xcode and name it as per your preference.
Step – 2
Now create a view in the storyboard and assign it, class PKCanvasView.
Step – 3
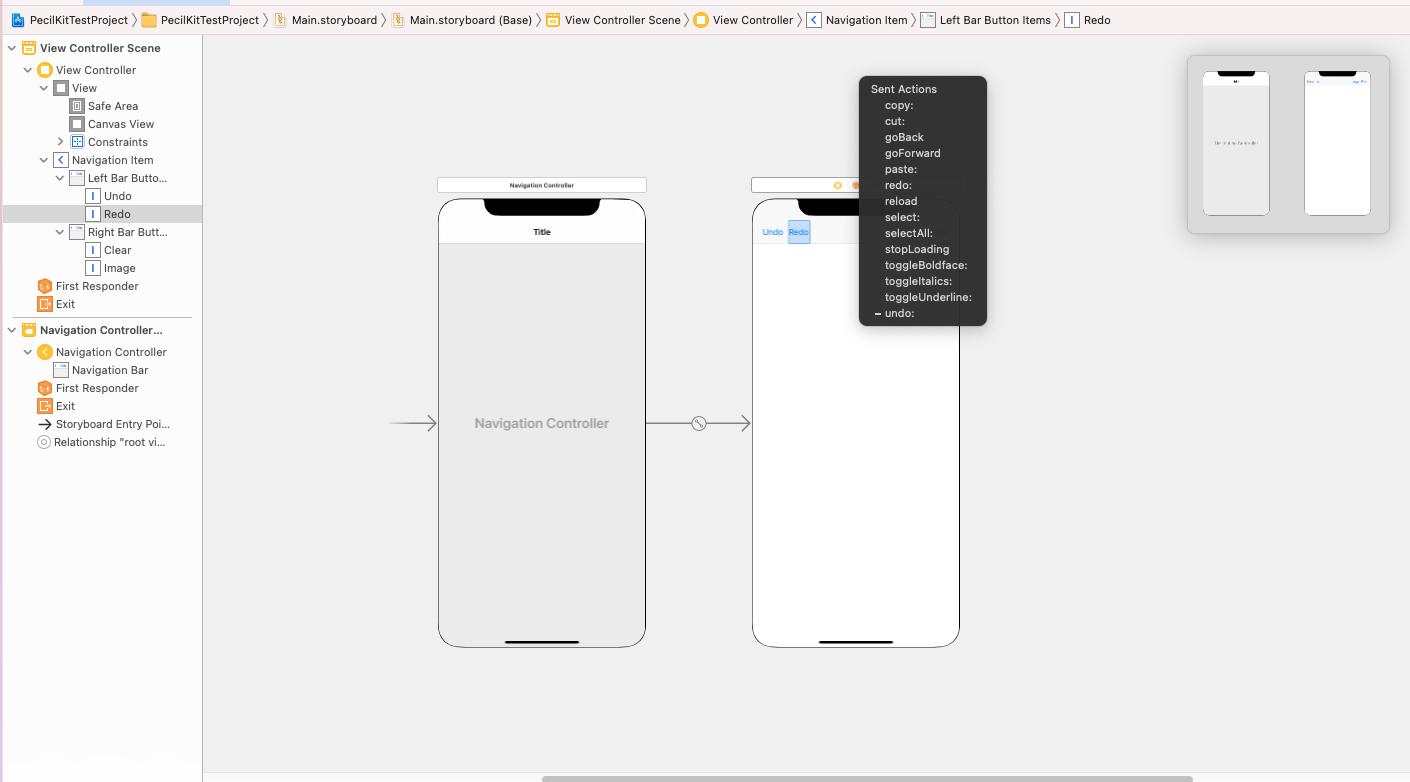
Create a UIBarbutton for clear, undo, redo and image View in the navigation in the ViewController of the project. Add action and outlet for clear and image button from the storyboard.
Step – 4
Create a function for adding up the view set up for the canvas view in the view controller.
|
1 2 3 4 5 6 7 8 9 10 11 12 13 14 15 16 17 18 19 20 21 22 23 24 25 |
override func viewDidLoad() { super.viewDidLoad() canvasView.delegate = self canvasView.becomeFirstResponder() } override func viewDidAppear(_ animated: Bool) { super.viewDidAppear(true) setUpCanvasView() } func setUpCanvasView() { // This function can be used for setting up the Canvas drawing policy // canvasView.drawingPolicy = PKCanvasViewDrawingPolicy(rawValue: <#T##UInt#>) if let window = view.window, let toolPicker = PKToolPicker.shared(for: window) { // As soon as user start integrating with the CanvasView, toolPicker will be visible toolPicker.setVisible(true, forFirstResponder: canvasView) toolPicker.addObserver(canvasView) } } |
Step – 5
Now add the delegate function for the canvas view in your view Controller
|
1 2 3 4 5 6 7 8 9 10 11 12 13 14 15 |
extension ViewController: PKCanvasViewDelegate { func canvasViewDrawingDidChange(_ canvasView: PKCanvasView) { print("drawing") } func canvasViewDidEndUsingTool(_ canvasView: PKCanvasView) { print("End using the PK tools") } func canvasViewDidFinishRendering(_ canvasView: PKCanvasView) { print("Completed the UI Event") } } |
Step – 6
Now add a view controller to view your image is created after drawing in the canvas view
|
1 2 3 4 5 6 7 8 9 10 11 12 13 14 15 16 17 18 19 20 |
class SecondViewController: UIViewController { @IBOutlet weak var trashBtn: UIButton! @IBOutlet weak var imgView: UIImageView! var image = UIImage() override func viewDidLoad() { super.viewDidLoad() imgView.image = image // Do any additional setup after loading the view. } @IBAction func trashBtnTapped(_ sender: UIButton) { self.dismiss(animated: true, completion: nil) } } |
Step – 7
Now add the navigation on the Image button in the View Controller in your project.
|
1 2 3 4 5 6 7 8 9 10 |
@IBAction func imageBtnTapped(_ sender: UIBarButtonItem) { // getting your image here let image = canvasView.asImage() if let secodVC = self.storyboard?.instantiateViewController(identifier: "SecondViewController") as? SecondViewController { secodVC.image = image self.navigationController?.present(secodVC, animated: true, completion: nil) } } |
Conclusion

We have the integration of the PencilKit in Swift. Please read more about pencilKit from here.
Please read my other blogs from here.

Be the first to comment.