In this blog you will learn about How to Move Up NavigationBar On Scrolling in Swift.
NavigationBar
NavigationBar is mostly used within a navigation controller. The UINavigationController object creates, displays, and manages its associated NavigationBar, and with the help of it’s attributes of the view controllers you add to control the content displayed in the NavigationBar.
In Swift, a NavigationBar is a fundamental UI element that provides way to navigate through different view or screen in an iOS app. it typically appears at the top of the screen and contains items such as a title, back button possibly other navigation related controls.
You may also check our Flutter App development services.
Benefits of Move Up Navigation On Scrolling
1. Maximizing Screen Real Estate
By hiding the navigation bar as the user scrolls down, you can provide more space for the actual content. This is especially useful in application where the screen space is limited, such as on mobile device.
2. Focus on Content
Hiding the navigation bar can help users focus more on the content of the application rather than the navigation controls. This is particularly beneficial when users are consuming media or reading articles.
3. Improved User Experience
The animation of the navigation bar moving up or down can enhance the overall user experience by providing a smooth and visually appealing transition.
4. Better Handling of Scrollable Content
In apps with a lot of scrolling content, such ad feeds or timelines, hiding the navigation bar can make the scrolling experience smoother, as it provide more space for the actual content.
Implementing Move Up NavigationBar On Scrolling
To implementing Move Up NavigationBar On Scrolling you need to follow below mention steps.
1. Create New Projects:
First of all we need to create a new project where you will implement Move Up NavigationBar On Scrolling.
2. Add TableView:
After that you need to add a TableView either programatically or using Storyboard.
|
1 2 |
@IBOutlet weak var tableView: UITableView! |
I this table view we will display count.
3. Create TableViewCell:
After that you need to create a TableViewCell with XIB file and in TableViewCell you need to add a label either programatically or using Storyboard.
|
1 2 |
@IBOutlet weak var label: UILabel! |
4. Register TableViewCell:
You need to register TableViewCell into ViewController class.
|
1 2 3 4 |
tableView.delegate = self tableView.dataSource = self tableView.register(UINib(nibName: "TableViewCell", bundle: .main), forCellReuseIdentifier: "tablecell") |
After that you need to create extension of ViewController and add below mention code in it.
|
1 2 3 4 5 6 7 8 9 10 11 12 13 14 15 16 17 |
extension ViewController: UITableViewDelegate, UITableViewDataSource{ func tableView(_ tableView: UITableView, numberOfRowsInSection section: Int) -> Int { 10 } func tableView(_ tableView: UITableView, cellForRowAt indexPath: IndexPath) -> UITableViewCell { let cell = tableView.dequeueReusableCell(withIdentifier: "tablecell", for: indexPath)as! TableViewCell cell.lable.text = "\(indexPath.row + 1)" print("cell.lable.text") return cell } func tableView(_ tableView: UITableView, heightForRowAt indexPath: IndexPath) -> CGFloat { 100 } } |
5. Move Up NavigationBar:
In this step we will see how to Move Up NavigationBar, we need to add below mention code inside viewDidLoad().
|
1 2 3 4 5 |
override func viewDidLoad() { self.navigationItem.title = "Mobikul Blog" navigationController?.hidesBarsOnSwipe = true super.viewDidLoad() } |
Above this code is helpful to Move Up NavigationBar On Scrolling.
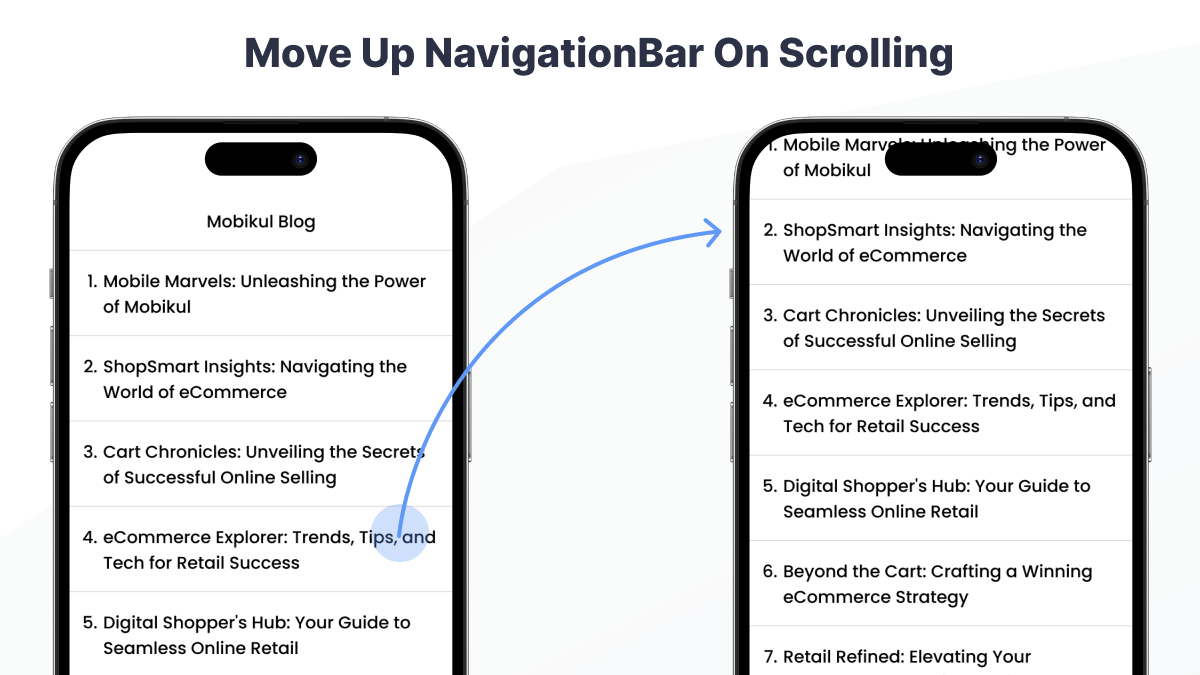
Output

Conclusion
In this article we have discussed about Move Up NavigationBar On Scrolling.
I hope this blog is helpful to understand this topic.
Thanks for reading this blog. You can also check other blogs from here for more knowledge.

Be the first to comment.