Firebase Push Notification using .P8 File
In iOS we use Push notification through APNs or Firebase, In Firebase there is 2 way to Handle the push Notification using .p12 or .p8 Apple Certificate file.
In .p12 file we have to create 2 APNs certificate as Dev & Production and it is created for every single app separately (every bundle there is separate .p12 file) as well as after 1 year it is expired so that we need to replace by a new one.
So it’s better to use .p8 file, it is created only once and used in every bundle of that developer account so there is no issue of creating a separate certificate for every bundle ID.
The benefit of .p8 file
.p8 Apple Push Notifications service (APNs) is created in the Apple developer account “keys” section. it is useful for handling the push notification for All bundle Id that is registered in developer account & there is no issue of expiry.
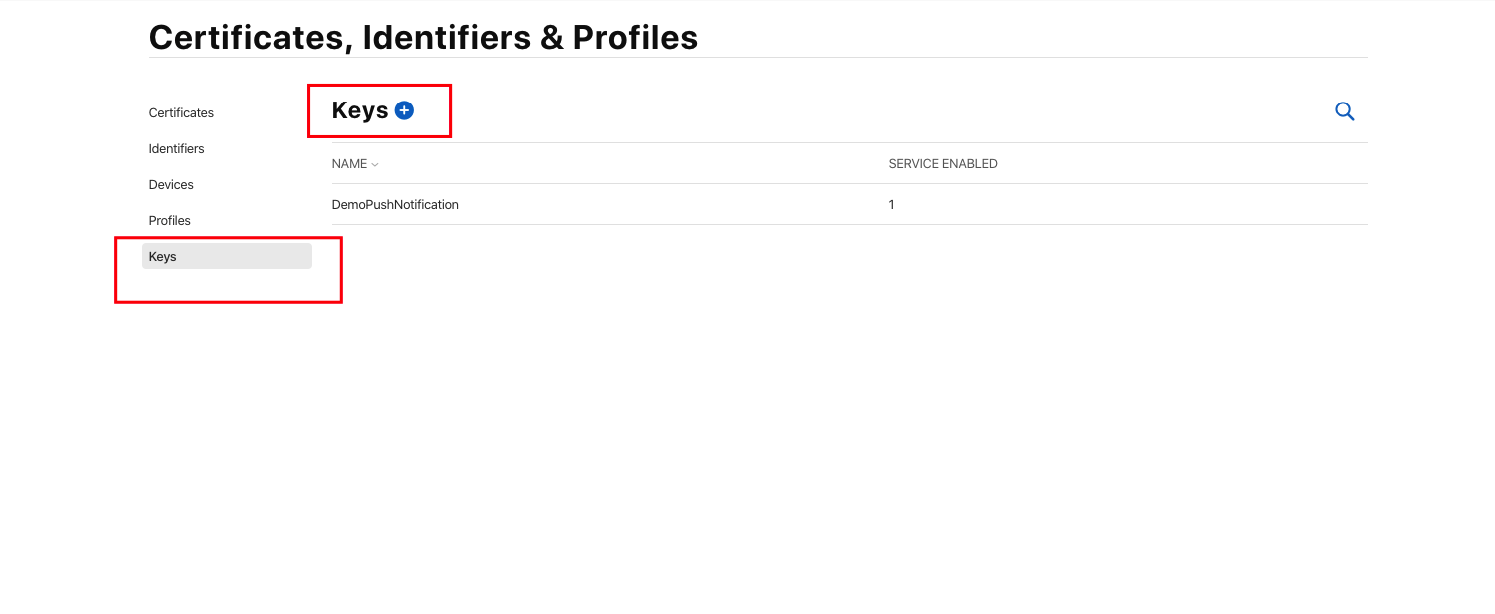
1: How To Create .p8 File:
1: Open Apple Developer account and click on “Keys”
2: After Click On this, give the Key Name & check the Apple Push Notifications service (APNs):
Ex: DemoPushNotification
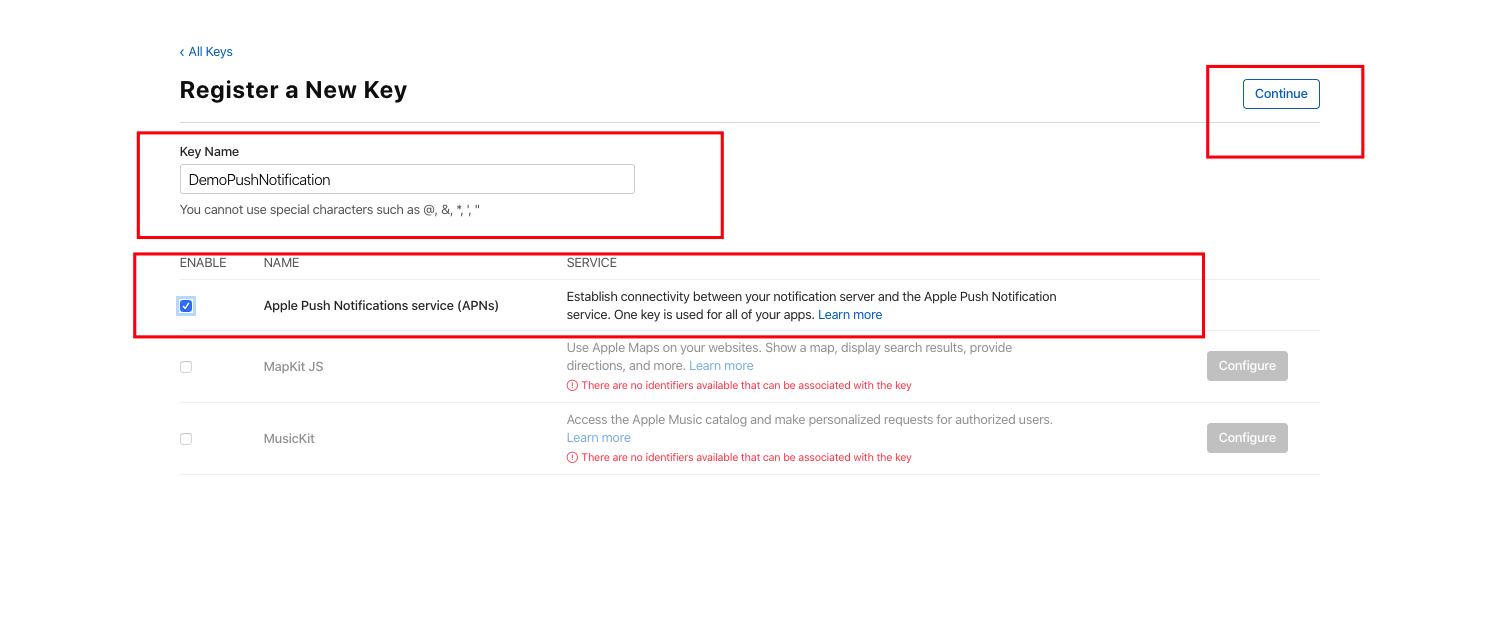
3: After Clicking Continue there is Key generated So Please download this & save for use in All places.
Note: It will not provide the next time to download .p8 file so download it first.

After Creating .p8 File you will see your key. Now its time to upload the .p8 file on your Firebase Account.
Ex: My Downloaded .p8 File is AuthKey_555639R33A.p8
2: Set Up FireBase Account.
1: open your Firebase Account & select your Firebase iOS project setting.
In Cloud Messaging you will see two Option
1: APNs Certificates
2: APNs Authentication Key
Here you have to use “APNs Authentication Key”
Please upload your .p8 file here

After Uploading your .p8 file.
You need 2 Value:
a: Key ID
b: Team ID
a: Key ID: Please open your Developer account & Select the Key that you have created, here you will get Key ID.

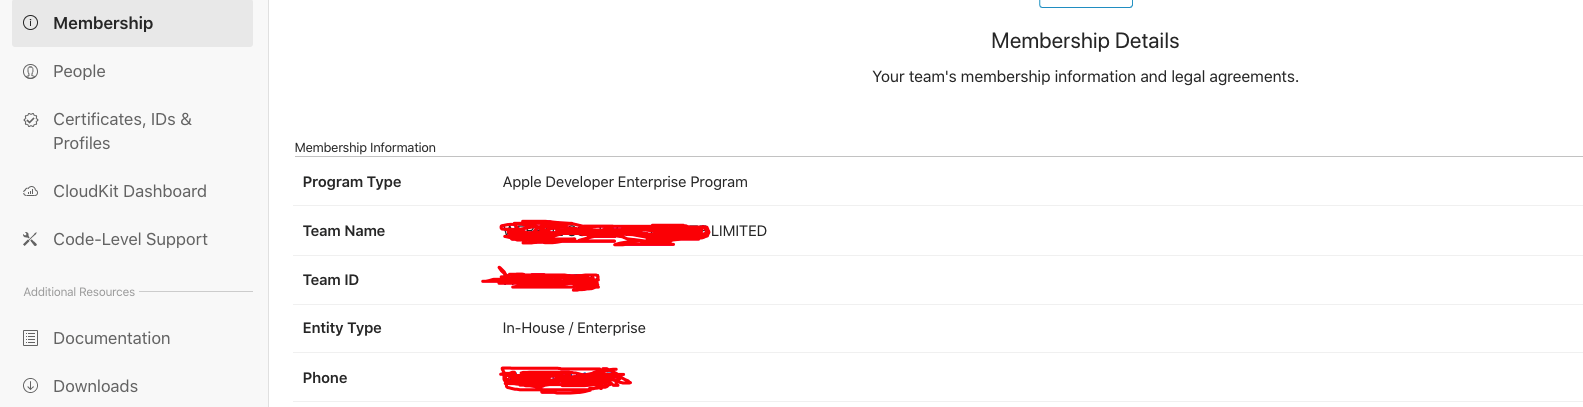
b: Team ID: Open your Developer account membership section here you will get Team ID value.
After Getting this value just select your .p8 File & upload it on Firebase account.

After uploading this just download GoogleService-Info.plist file & Add in your Project.
3: iOS project Setup
1: Add GoogleService-Info.plist in your Project.
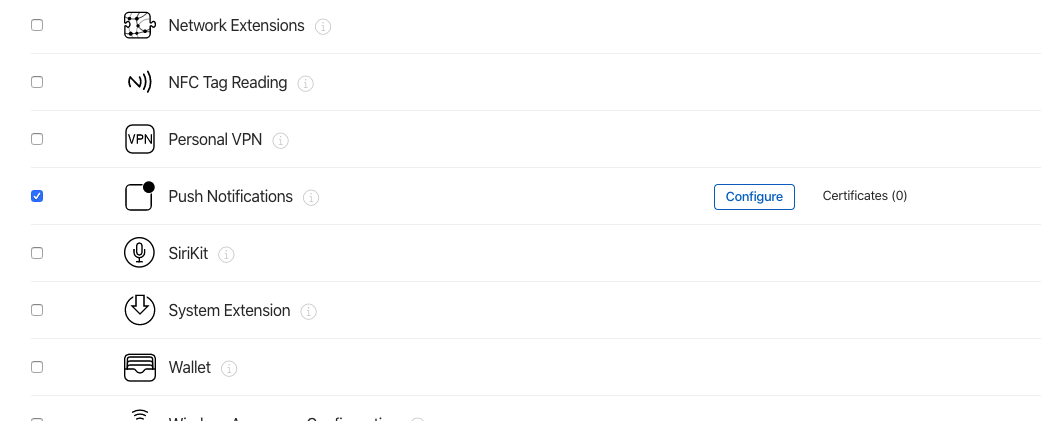
2: In Capabilities Add Push Notification
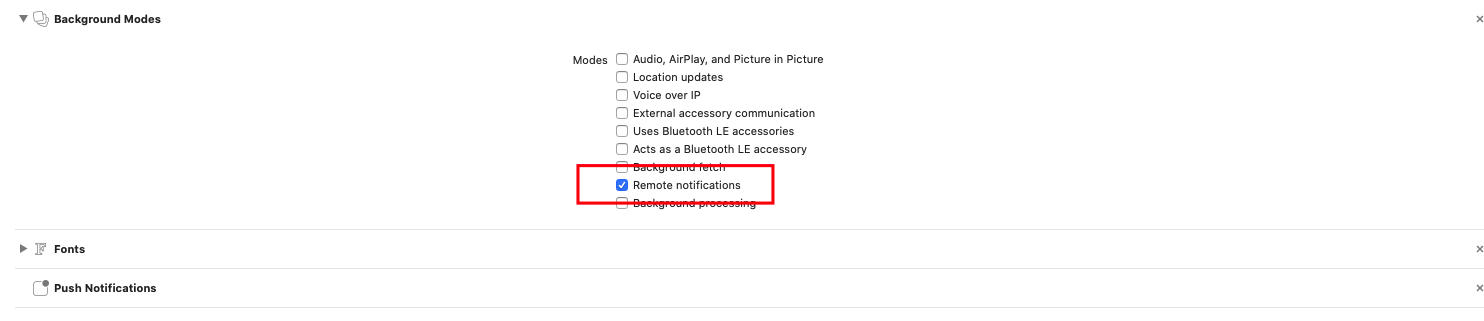
3: In Capabilities Add Background Mode and check to Remote notification.
4: your project’s Apple developer account look below the image. here you have to check only push notification is on & there is no need
to configure push notification. Actually .p8 file will work on behalf of this developer account’s bundle ID.
If You Need Any Kind Of Help Regarding Firebase Push notification using .p8 Lets Comment To Us.

Be the first to comment.