Macros in Swift programming are generally the block of code available to the developer as a single statement. A single block of code consists of a large number of statements or instructions. Hence making the development less tedious.
Please check here what Wiki says about the Macros.
Here we will be discussing Macros in Swift Programming. So let’s begin with this.
Macros in Swift Programming
As we all know that earlier to swift programming language developers used to do programming in Objective C language, this language is the legacy of the iOS development.
When Swift language is launched it became a tough task for the developers to regenerate the code written in the Objective C language to Swift language.
Apple knows that this may cause several issues and hence made Swift language work along with the legacy Objective C
Common Swift Macros
As in Apple Docs
The Swift compiler does not include a preprocessor. Instead, it takes advantage of compile-time attributes, builds configurations, and language features to accomplish the same functionality. For this reason, preprocessor directives are not imported in Swift.
Here are some preprocessor macros commonly used in Swift programming.
1.#define
In Objective C #define preprocessor is used to declare constants. The preprocessor macro #define is used in order to ease the code clarity.
Suppose you are working with any dimension box, you define the dimensions of the box that is length and width. If later you decide to change any value for the box you would only have to change it in the #define instead of finding and replacing it on the whole project.
When compiling, the preprocessor will replace all the defined names with the values in the code.
2.#if
|
1 2 3 4 5 6 7 |
#if FLAG1 // DO SOME STUFF #elseif FLAG2 // DO SOME OTHER STUFF #else // DO ANY OTHER STUFF #endif |
We can define any code inside the #if and #elseif preprocessor macros for multiple targets to be called based on the set Compiler Flag for the project.
3.#elseif
#elseif preprocessor macro is used to call the macro which is different from the macro defined by the #if
4.#else
#else macro is used if the defined macros are not found in the Build Settings of the project. It can be treated the same as the if-else conditions we use in our coding structure.
5.#endif
Do not forget to add #endif which symbolizes the end of the #if preprocessor.
6.#if DEBUG
This preprocessor macro is used to declare the environment of the application.
This macro is used to declare the runtime environment of the application.
|
1 2 3 4 |
#if DEBUG print("App is in Debug mode") #else print("App is in production mode") |
Please refer to the image for enabling any particular macros in runtime.
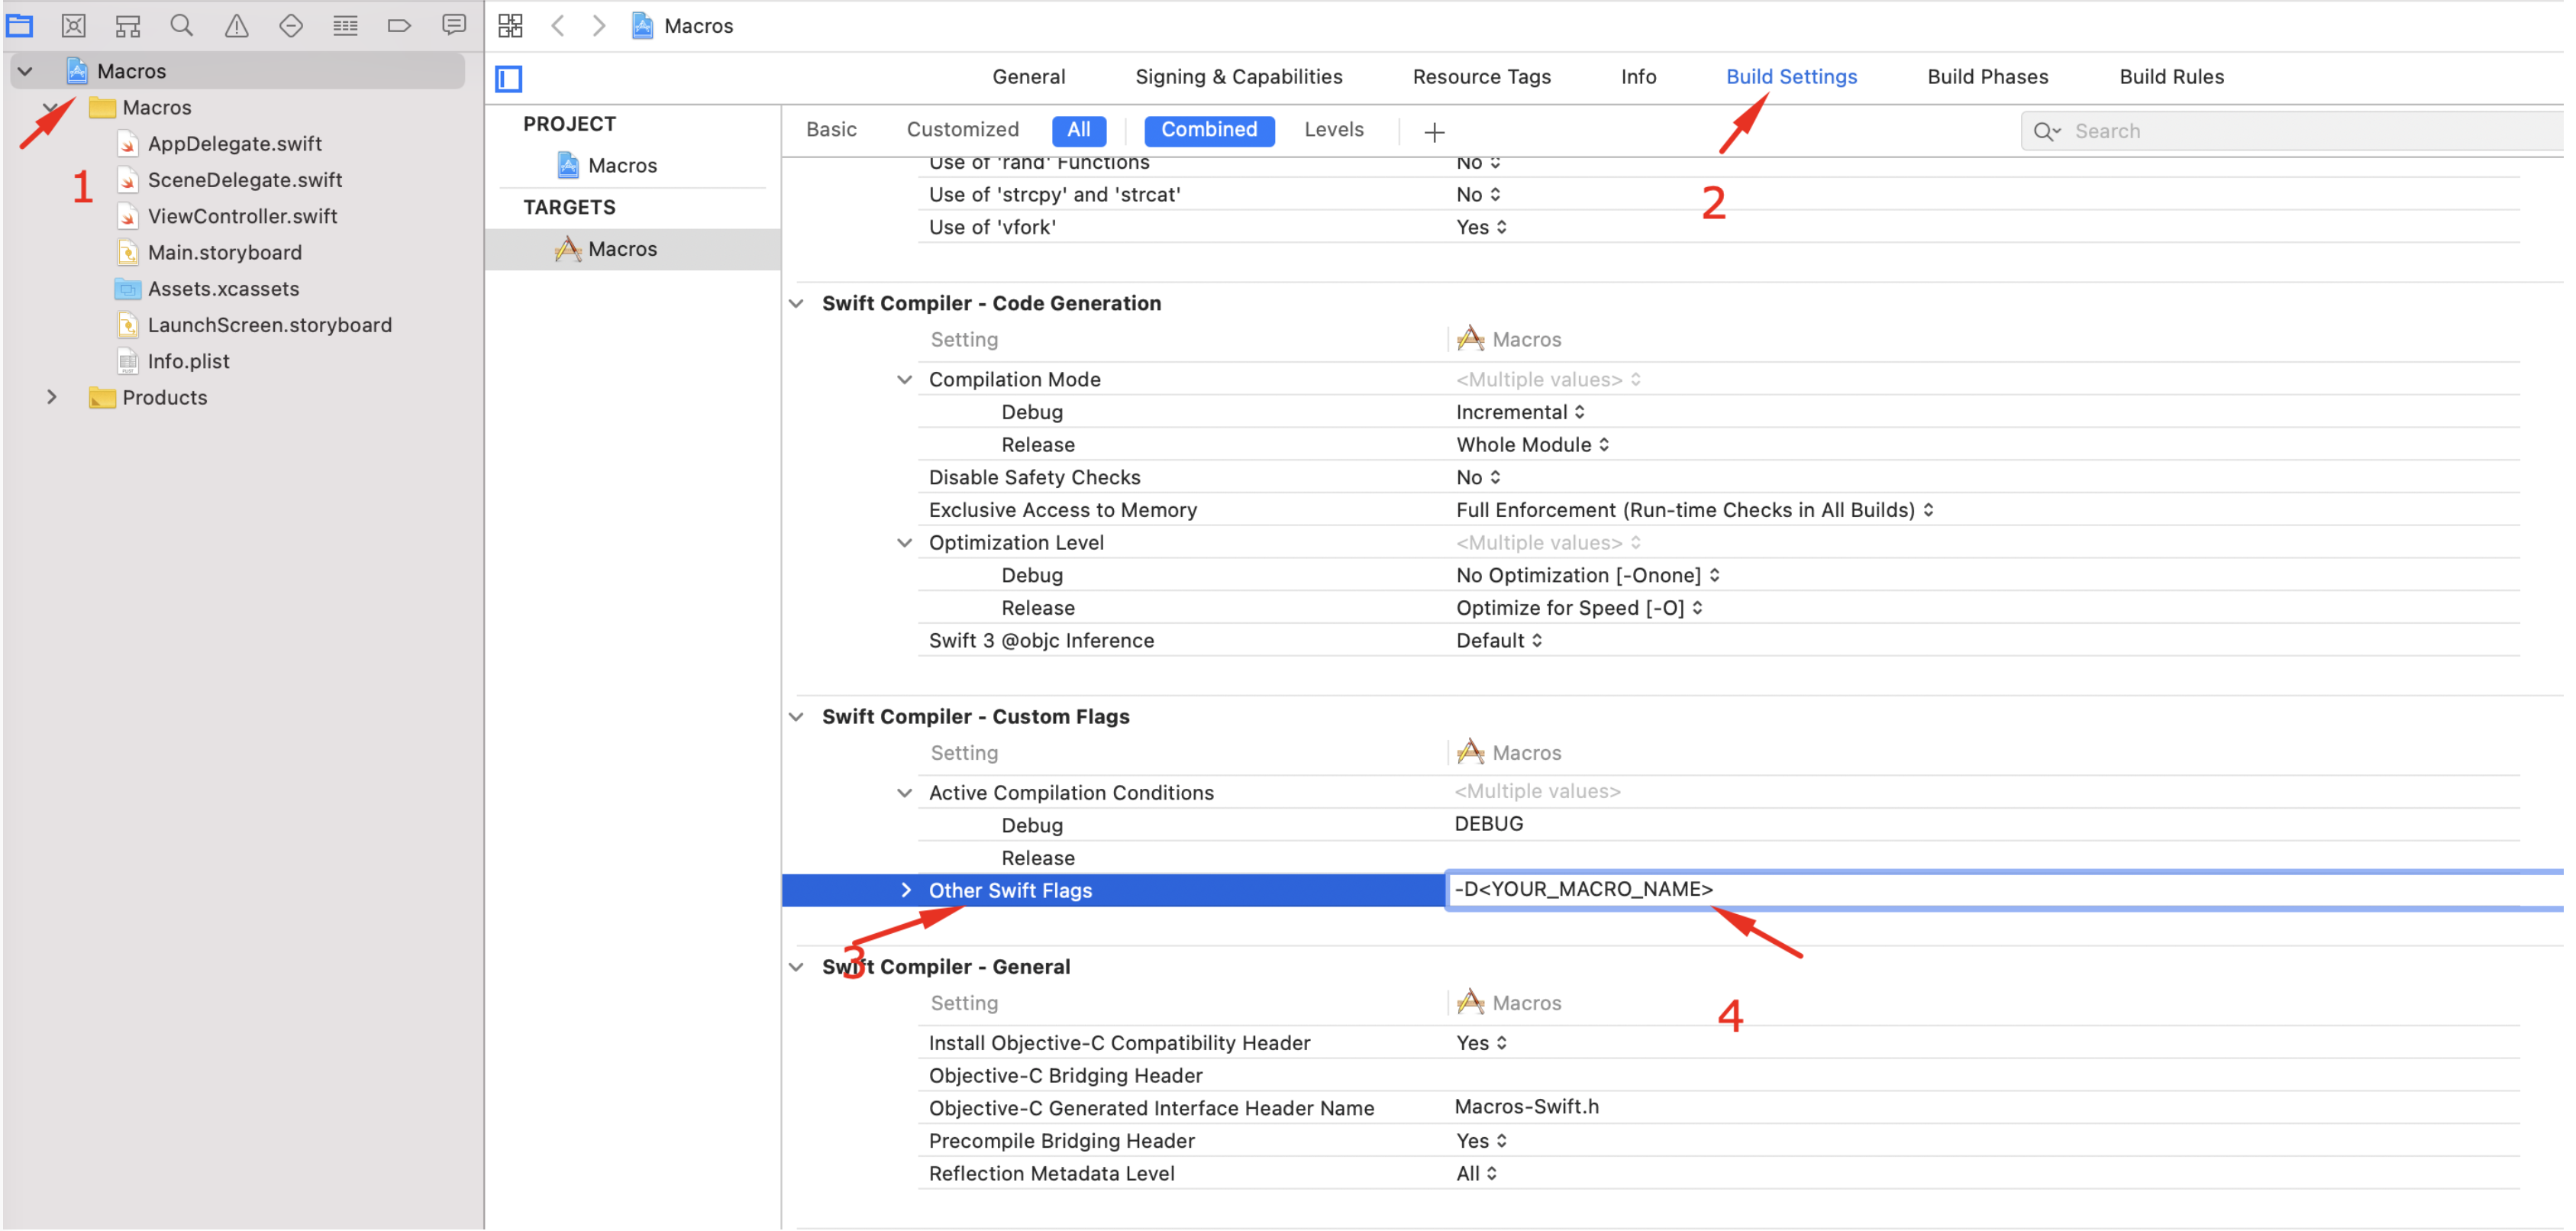
How to enable macros in the Project
Step 1. Navigate to your Target and then select the Build Settings.
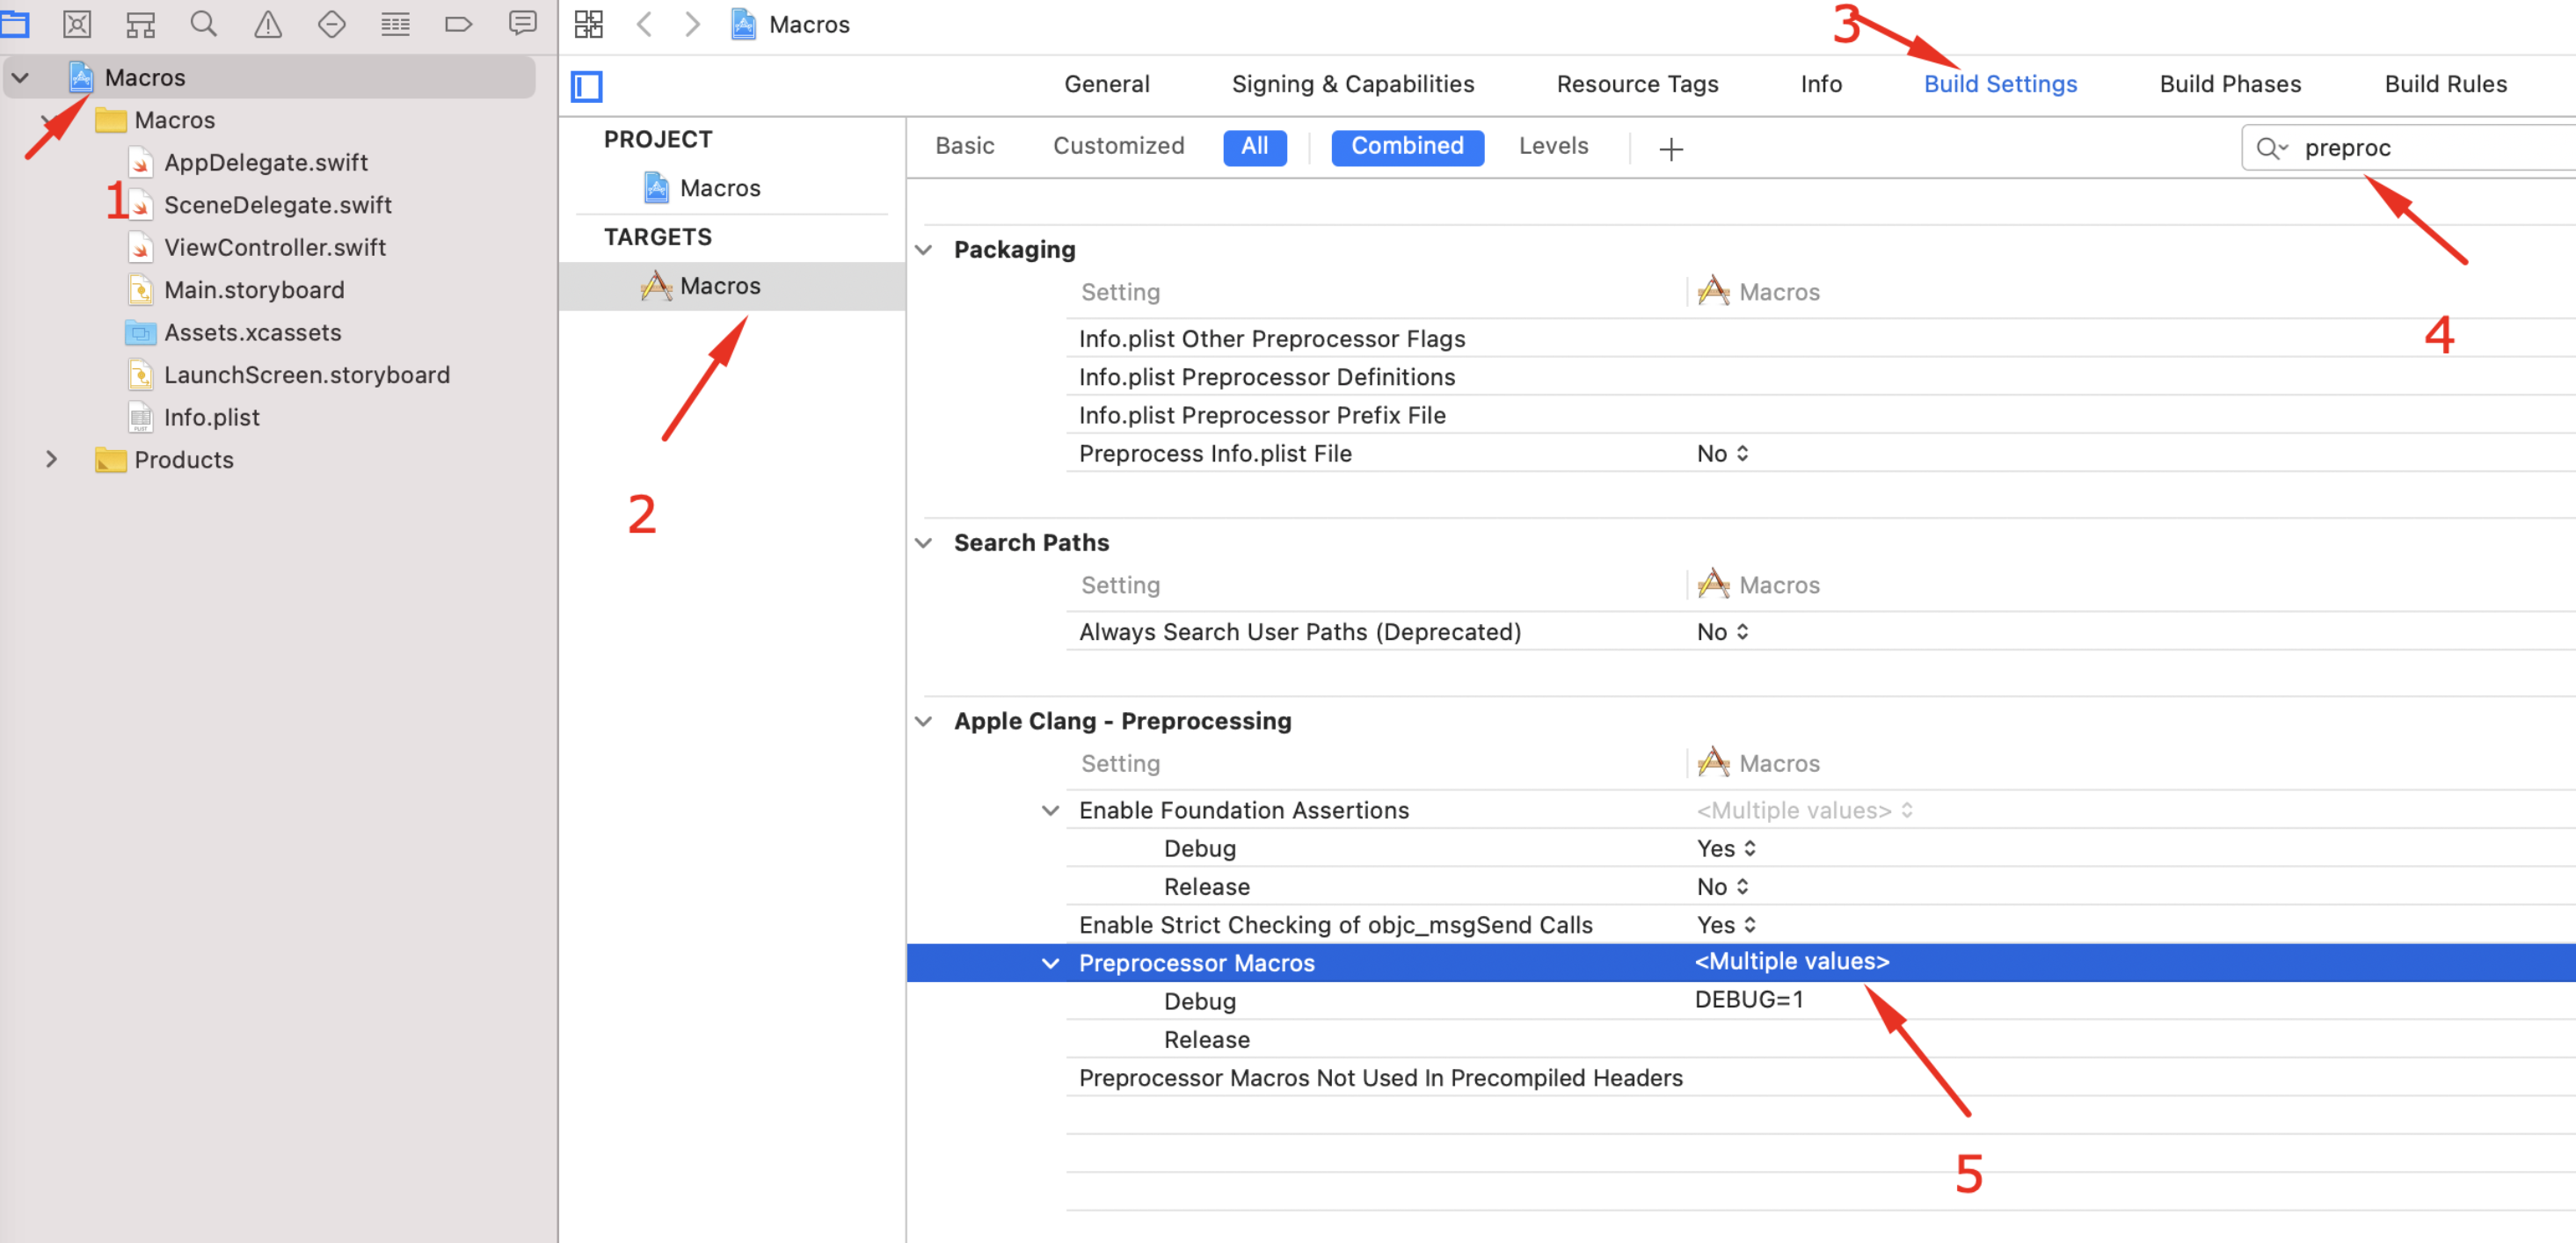
Step 2. In search bar type preprocessor, it will show you the Preprocessor macro.
Step 3. Enlist the macros you defined here.
Please refer to the image
Thanks for reading my blog. Happy coding.
For other blogs Please click here

Be the first to comment.