Dear Folks,
I hope you are doing well. Today I am going to explain each the process of integration of AccountKit in iOS App. Account Kit lets people quickly register for and log in to your app by using just their phone number or email address — no password needed. It’s reliable, easy to use.
Step 1: Just create an app in Facebook Developer account and register your app bundle id there. Fill Privacy Url -> Save Changes –> Publish App and make it available for public use.
Step 2: Add the following to your Podfile and install the library using Cocoapod
|
1 |
pod 'AccountKit' |
If your system doesn’t have Cocoapod install then follow this official guideline for installing -> https://guides.cocoapods.org/using/getting-started.html
Step 3: Add both your Facebook App ID and Account Kit Client Token to your fileInfo.plist as strings. Make sure you have enabled Account Kit in the App Dashboard. You’ll find the Account Kit client token in the Account Kit section of the App Dashboard. The application name will be used in the UI of the login screen.
|
1 2 3 4 5 6 7 8 9 10 11 12 13 |
<key>FacebookAppID</key> <string>{your-app-id}</string> <key>AccountKitClientToken</key> <string>{your-account-kit-client-token}</string> <key>CFBundleURLTypes</key> <array> <dict> <key>CFBundleURLSchemes</key> <array> <string>ak{your-app-id}</string> </array> </dict> </array> |
Remember to fill in your app ID for both the FacebookAppID and CFBundleURLSchemes keys.
Step 4: Add below Singleton class anywhere in your XCode Project.
|
1 2 3 4 5 6 7 8 9 10 11 12 13 14 15 16 17 18 19 20 21 22 23 24 25 26 27 28 29 30 31 32 33 34 35 36 37 38 39 40 41 42 43 44 45 46 47 48 49 50 51 52 53 54 55 56 57 58 59 60 61 62 63 64 65 66 67 68 69 70 71 72 73 74 75 76 77 78 79 80 81 82 83 84 85 86 87 88 89 90 91 92 93 94 95 96 97 98 99 100 101 102 103 104 105 106 107 108 109 110 111 112 113 114 115 116 117 118 119 120 121 122 |
import AccountKit final class MobikulAccountKit: NSObject { static let shared = MobikulAccountKit() static let didUserLogoutNotification = "MobikulAKManagerDidUserLogout" typealias Success = ((LoginType) -> Void)? typealias AccountSuccess = ((String, String?, String?) -> Void)? typealias Failure = ((Error?) -> Void)? typealias Cancellation = (() -> Void)? enum LoginType { case unknown case email case phoneNumber } private var accountKit: AKFAccountKit! fileprivate var loginType: LoginType = .unknown fileprivate var success: Success fileprivate var failure: Failure fileprivate var cancellation: Cancellation override private init() { super.init() accountKit = AKFAccountKit(responseType: .accessToken) } func login(withType type: LoginType, fromController controller: UIViewController, _ success: Success, _ failure: Failure, _ cancellation: Cancellation) { self.loginType = type self.success = success self.failure = failure self.cancellation = cancellation let state = UUID().uuidString var viewController: UIViewController? = nil switch type { case .email: viewController = accountKit.viewControllerForEmailLogin(withEmail: nil, state: state) case .phoneNumber: viewController = accountKit.viewControllerForPhoneLogin(with: nil, state: state) default: let error = NSError(domain: "AccountKitManager", code: 1, userInfo: ["description": "Unknown login type", "localizedDescription": "Unknown login type"]) failure?(error) } if viewController != nil { if let akViewController = viewController as? AKFViewController { akViewController.delegate = self controller.present(viewController!, animated: true, completion: nil) } } } func requestAccount(_ success: AccountSuccess, _ failure: Failure) { accountKit.requestAccount { (account, error) in if error != nil { failure?(error) } else { if let a = account { var email: String? var phone: String? if let e = a.emailAddress { email = e } if let phoneNumber = a.phoneNumber { phone = phoneNumber.stringRepresentation() } success?(a.accountID, email, phone) } else { failure?(nil) } } } } func accessToken() -> String? { guard let accessToken = accountKit.currentAccessToken else { return nil } return accessToken.tokenString } func hasAccessToken() -> Bool { return accountKit.currentAccessToken != nil } func logout() { NotificationCenter.default.post(name: NSNotification.Name(rawValue: MobikulAccountKit.didUserLogoutNotification), object: nil) accountKit.logOut() } } extension MobikulAccountKit: AKFViewControllerDelegate { func viewController(_ viewController: (UIViewController & AKFViewController)!, didCompleteLoginWith accessToken: AKFAccessToken!, state: String!) { success?(loginType) } func viewController(_ viewController: (UIViewController & AKFViewController)!, didFailWithError error: Error!) { failure?(error) } func viewControllerDidCancel(_ viewController: (UIViewController & AKFViewController)!) { cancellation?() } } |
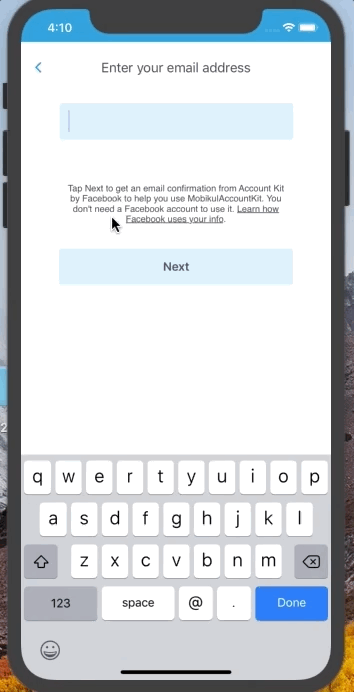
Step 5: Now Move to that particular class in which you want to add a button for email verification and SMS verification. Here I have added a notification observer to check whether the user has logged out after verification or not. If you have to perform any task just after his logging out, this will be helpful.
Add below line wherever you want to add an observer, Here I have added it in viewDidLoad() method.
|
1 2 3 4 5 6 7 8 9 |
override func viewDidLoad() { NotificationCenter.default.addObserver( self, selector: #selector(accountKitLoggedOut), name: NSNotification.Name(rawValue: "MobikulAKManagerDidUserLogout"), object: nil) } |
Step 6: Now create a class property for MobikulAccountKit Class.
|
1 |
let accountKit = MobikulAccountKit.shared |
Step 7: Add below the line for a method in which you want to write code for email verification.
|
1 2 3 4 5 6 7 8 9 10 11 12 13 14 15 16 17 |
accountKit.login(withType: .email, fromController: self, { (email) in self.accountKit.requestAccount({ (accountId, email, phoneNumber) in self.getAccountDetails(accountId: accountId, email: email ?? "", phoneNumber: phoneNumber ?? "") }, { (error) in if let gotError = error{ self.showErrorMessage(error: gotError.localizedDescription) } }) }, { (error) in if let gotError = error{ self.showErrorMessage(error: gotError.localizedDescription) } }) { self.showCancelledMessage() } |
Step 8: Add below the line for a method in which you want to write code for SMS verification.
|
1 2 3 4 5 6 7 8 9 10 11 12 13 14 15 |
accountKit.login(withType: .phoneNumber, fromController: self, { (email) in self.accountKit.requestAccount({ (accountId, email, phoneNumber) in self.getAccountDetails(accountId: accountId, email: email ?? "", phoneNumber: phoneNumber ?? "") }, { (error) in if let gotError = error{ self.showErrorMessage(error: gotError.localizedDescription) } }) }, { (error) in if let gotError = error{ self.showErrorMessage(error: gotError.localizedDescription) } }) { self.showCancelledMessage() } |

Step 9: Add these methods also to handle errors or success.
|
1 2 3 4 5 6 7 8 9 10 11 12 13 14 15 16 17 18 19 20 21 22 |
func getAccountDetails(accountId: String, email: String, phoneNumber: String){ print("Email Received: ", email) print("Unique Account Id: ", accountId) print("Verified Mobile Number: ", phoneNumber) accountKit.logout() } func showCancelledMessage(){ print("User has cancelled Verification Process") } func showErrorMessage(error: String){ print(error) } @objc func accountKitLoggedOut(){ print("User has successfully logged out.") } override func viewWillDisappear(_ animated: Bool) { NotificationCenter.default.removeObserver(NSNotification.Name(rawValue: "AccountKitManagerDidUserLogout")) } |
I hope you enjoyed this AccountKit tutorial, and if you have any questions just comment below. Thanks for reading. Keep coding!!

Be the first to comment.