In this blog, we will explore Bluetooth functionality with Flutter. I’ll assist you by outlining some fundamental ideas required to include Bluetooth capabilities in your app. Flutter introduced a new updated Bluetooth plugin flutter_bluetooth_serial by the parent plugin flutter_blue. the only Bluetooth plugin currently in use.
Bluetooth:
Bluetooth is a wireless communication technology standard that allows devices to exchange data and connect to each other over short distances using radio waves. We developed it to replace wired connections and simplify the process of connecting various electronic devices.
Read More About Flutter App Development From Mobikul.
Getting Started:
Before diving into the code, make sure you have Flutter installed and configured on your development machine.
Implementation:
First, you need to add this dependency/plugin to your flutter app pubs.yml file.
|
1 2 3 4 5 6 |
dependencies: flutter: sdk: flutter flutter_bluetooth_serial: ^0.2.3 # Use the latest version available |
Then, run flutter pub get to fetch the package.
Initialize Bluetooth Connection:
Now, let’s initialize the Bluetooth functionality in your Flutter app. We’ve created a basic Flutter app structure with a MyBluetoothPage widget. Now, let’s set up Bluetooth initialization in the MyBluetoothPage widget.
|
1 2 3 4 5 6 7 8 9 10 11 12 13 14 15 16 17 18 19 20 21 22 23 24 25 26 27 28 29 30 |
class MyBluetoothPage extends StatefulWidget { const MyBluetoothPage({super.key}); @override _MyBluetoothPageState createState() => _MyBluetoothPageState(); } class _MyBluetoothPageState extends State<MyBluetoothPage> { @override void initState() { super.initState(); _initBluetooth(); } Future<void> _initBluetooth() async { await FlutterBluetoothSerial.instance.requestEnable(); } @override Widget build(BuildContext context) { return Scaffold( appBar: AppBar( title: Text('Bluetooth Flutter App'), ), body: BluetoothScreen(), ); } } |
As we see in the above code, we’ve created an instance of FlutterBluetoothSerial and requested the user to enable Bluetooth if it’s not already enabled. now we are creating a Bluetooth screen widget to show all available devices list.
Scanning for Bluetooth Devices:
Now, let’s implement the functionality to scan for available Bluetooth devices. We’ll add a button that, when pressed, initiates the scan and displays the list of discovered devices.
|
1 2 3 4 |
FlutterBluetoothSerial _bluetooth=FlutterBluetoothSerial.instance; List<BluetoothDevice> _devices = []; |
As you can see in the above code we’ve created a FlutterBluetoothSerial instance and BluetoothDevice list.
|
1 2 3 4 5 6 7 8 9 |
Future<void> _startScan() async { _bluetooth.startDiscovery().listen((device) { setState(() { _devices.add(device.device); }); }); } |
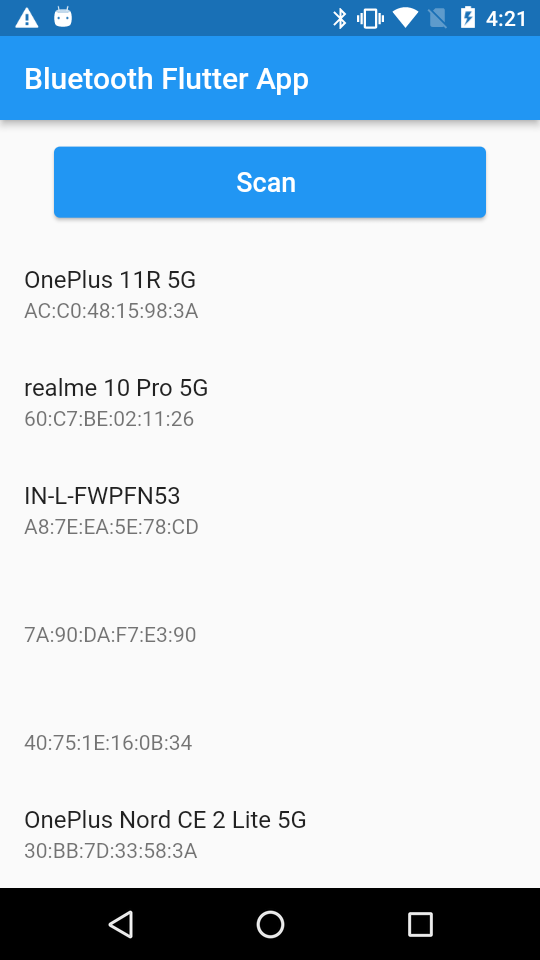
We are creating a function to trigger when the user presses the scan button. Bluetooth starts scanning devices, and the discovered devices are displayed in a list. At this stage, you can tap on a device to implement the connection logic.
Connecting to a Bluetooth Device:
When a user selects a device from the list, you can establish a connection to it. Here’s how you can modify the onTap function in the list item to connect to the selected device:
|
1 2 3 4 5 6 7 8 9 10 |
onTap: () async { try { await _devices[index].connect(); print('Connected to ${_devices[index].name}'); } catch (e) { print('Error connecting to ${_devices[index].name}: $e'); } }, |
This code attempts to establish a connection to the selected device and prints messages based on the result.
Sending and Receiving Data:
We have successfully connected with the Bluetooth device then we can send and receive data. In the below code, we are creating a function to send data with the help of Bluetooth. you can check our other blog related to file share.
|
1 2 3 4 5 6 |
void _sendDataFromBluetooth(BluetoothDevice myDevice, String myData) async { myDevice.write(Uint8List.fromList(myData.codeUnits)); } |
To receive data, we set up a function to receive data from Bluetooth.
|
1 2 3 4 5 6 7 8 9 |
void _listenForData(BluetoothConnection connection) { connection.input?.listen((data) { String text = String.fromCharCodes(data); print('Received data: $text'); }).onDone(() { print('Connection closed'); }); } |
Handling Permissions:
Remember to manage permissions, particularly on Android where Bluetooth capability may require location permission.
Output:
Conclusion:
We’ve seen in this blog , how to add Bluetooth functionality and perform actions to send, and receive data with the help of Bluetooth in Flutter.
Thanks for reading this blog. You can also check other blogs from here for more knowledge

Be the first to comment.