When it comes to working on Flutter Apps, flavors play an important role in order to set up multiple environments within the same codebase.
Flavors help us to define compile-time configurations and set parameters that are read at runtime to customize the app’s behavior.
Reach out for the best Flutter app development services offered by Mobikul

Let’s begin adding Flavors to our Flutter App
Flavoring Application in Flutter – Android
Here are a few steps to setup Flavor for the Android Application –
1.1 Firstly, we will need to go to our app-level build.gradle file i.e. android/app/build.gradle and add the code as mentioned below.
|
1 2 3 4 5 6 7 8 9 10 11 12 13 14 15 16 17 18 19 20 |
flavorDimensions "version" productFlavors { devFlavor { dimension 'version' applicationId "com.example.app" resValue "string", "app_name", "Example" versionCode 1 versionName "1.0.0" signingConfig signingConfigs.debug } prodFlavor { dimension 'version' applicationId "com.example1.app" resValue "string", "app_name", "Example1" versionCode 1 versionName "1.0.0" signingConfig signingConfigs.release } } |
Here, the flavorDimensions take a String value which combines multiple flavors into a group.
Within each flavor, we can add dimension, applicationId, resValue, versionCode, versionName, and signingConfig.
Values in a particular Flavor
- dimension – It specifies the flavorDimension name to which the particular flavor belongs.
- applicationId – It specifies the application id which is unique for each and every app.
- resValue – It is used to specify the application name
- versionCode – It specifies the build version of the app that we will publish.
- versionName – It specifies the version number that is displayed to the users once the app is live.
- signingConfig – It specifies the signing configuration for a particular flavor
1.2 Add the signingConfigs to the build.gradle file i.e. android/app/build.gradle
|
1 2 3 4 5 6 7 8 9 10 11 12 13 14 |
signingConfigs { debug { storeFile file('/Users/ABC/Desktop/example/keystore/example_keystore.jks') storePassword //Specify Store Password keyAlias //Specify Key Alias keyPassword //Specify Key Password } release { storeFile file('/Users/ABC/Desktop/example/keystore/example1_keystore.jks') storePassword //Specify Store Password keyAlias //Specify Key Alias keyPassword //Specify Key Password } } |
1.3 If each flavor requires a different google-services.json file, then we will need to create a folder within our android/app folder (e.g. android/app/devFlavor) and add the file to it.
1.4 We will need to add the resources folder to our flavor folder as well, in order to manage the app icons and the splash screens.
Note: Make sure the Folder name is correct as per the defined product Flavor.
1.5 In order to run the app based on flavor directly, we can set up the same in Android Studio as well.
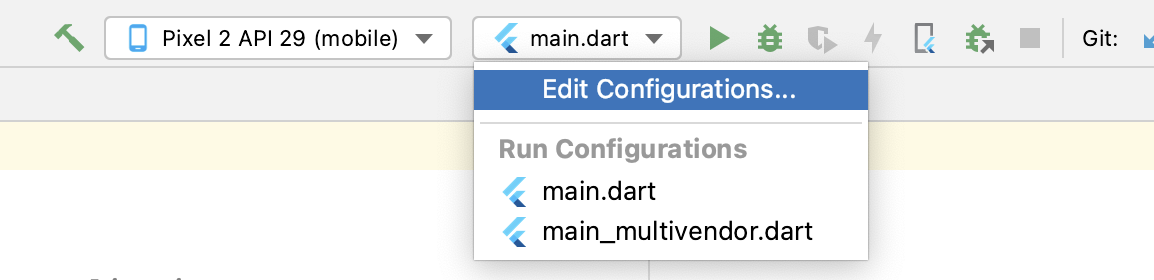
- Firstly, go to Android Studio Navigation Bar and click on main.dart.
![]()
- Go to Edit Configurations and click on the ‘+’ sign (i.e. Add New Configuration).
- Select Flutter and then you will need to add the Name, Dart EntryPoint & FlavorName. Finally, click on Apply Button.
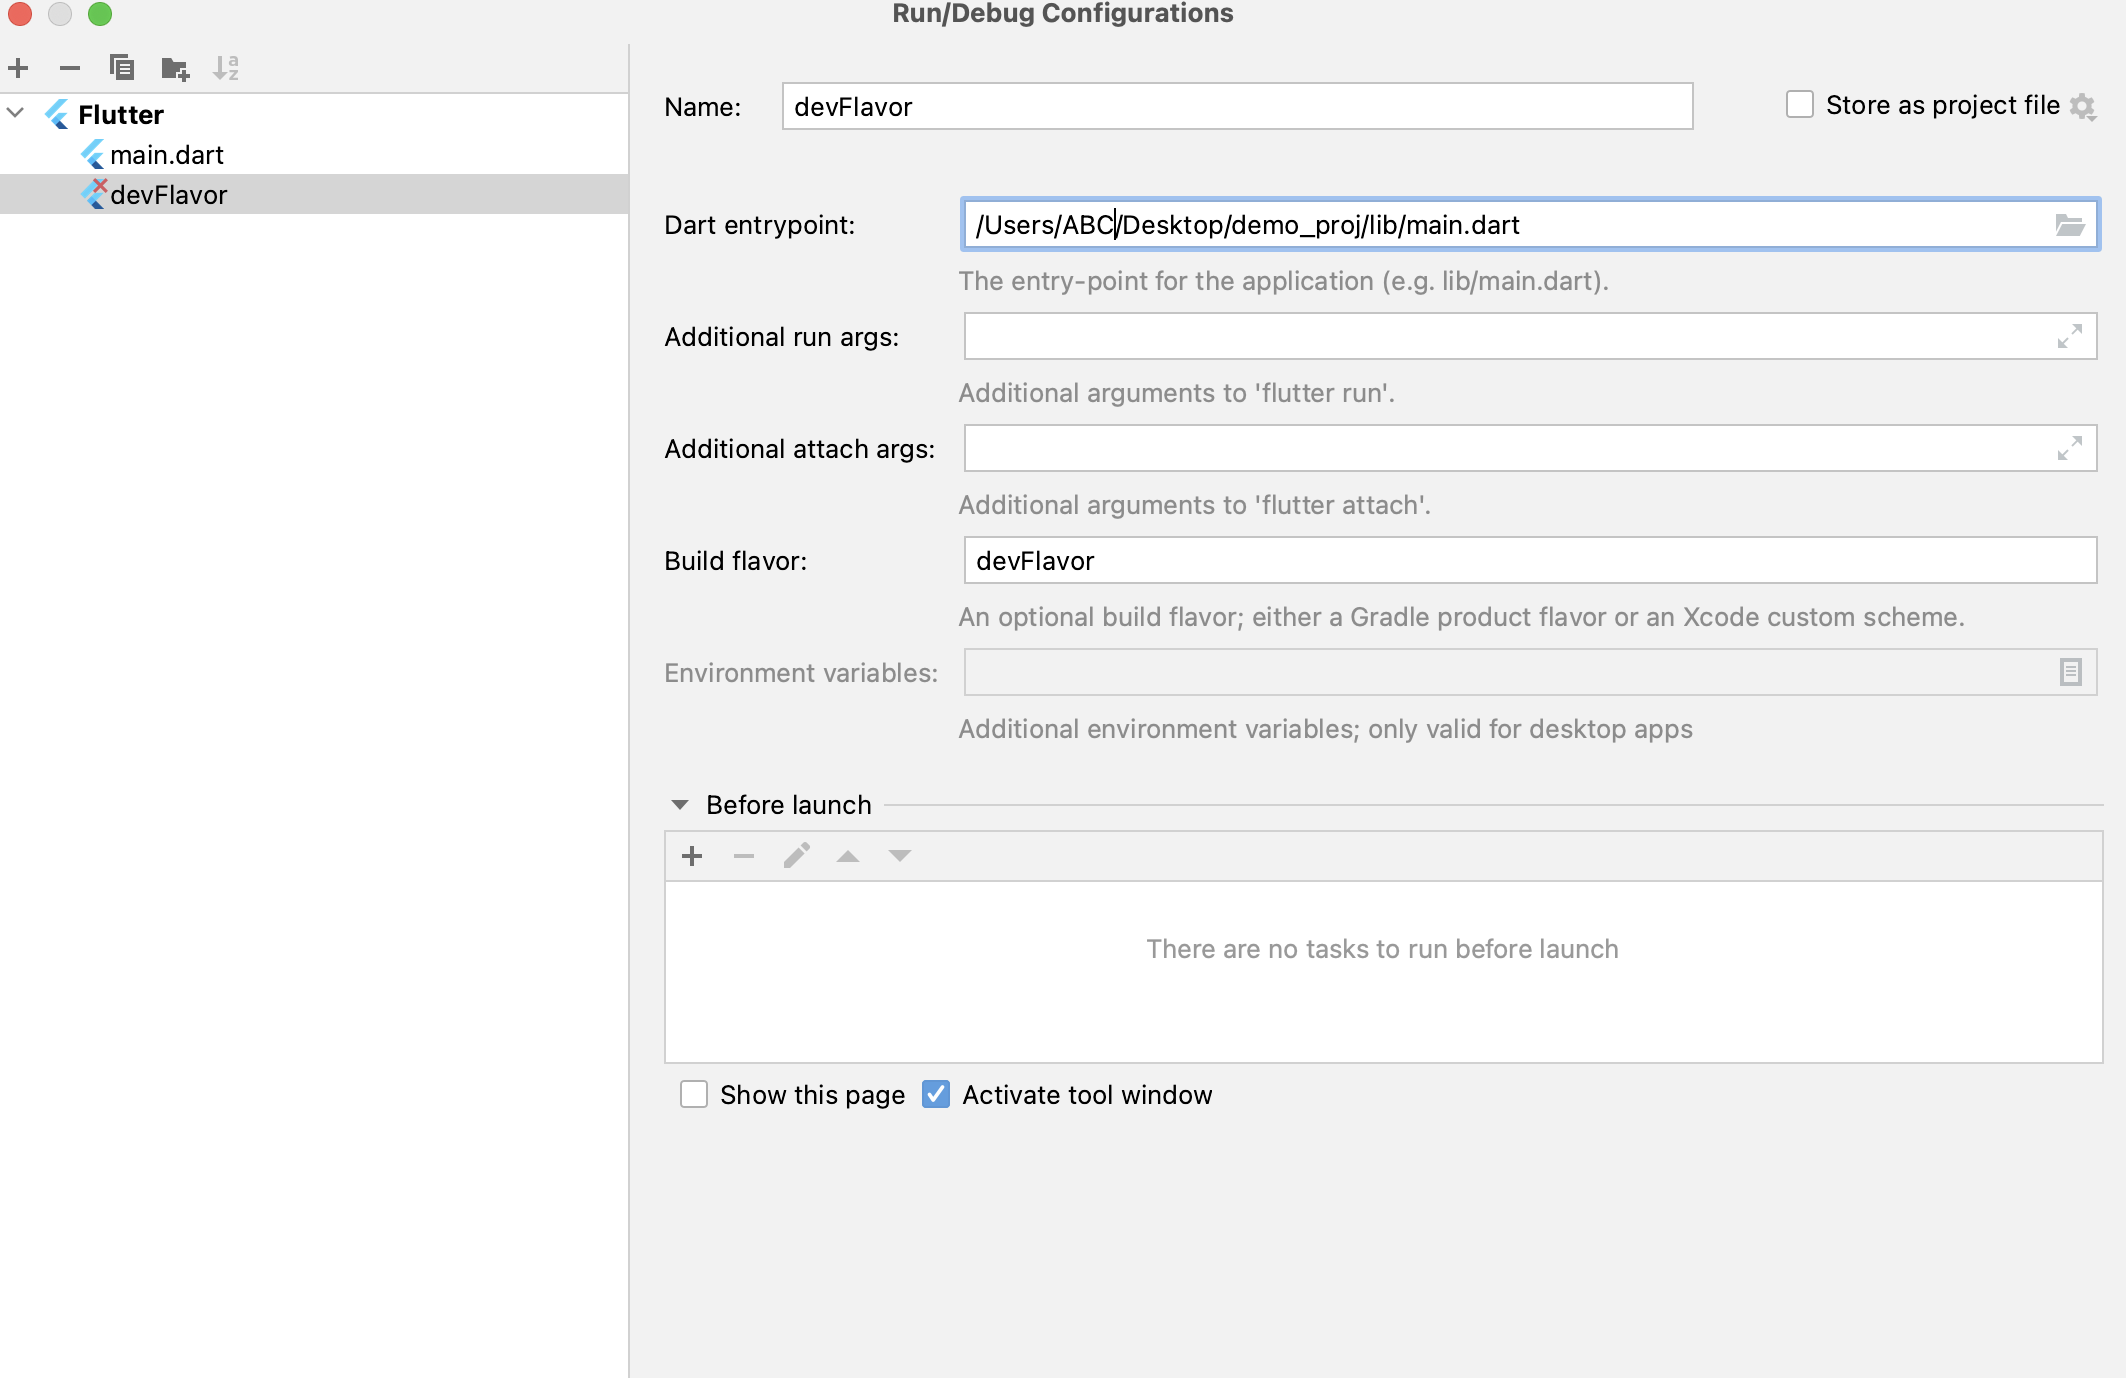
- Configuration will be created and now you can directly run the flavor without any hassle.
Flavoring Application in Flutter – iOS
1.1 Firstly, we will need to Add a New Scheme to our app.
If we want to generate the Scheme with the help of the already existing scheme, we can duplicate it and change the name as per our requirement.
1.2 If each flavor requires a different GoogleService-Info.plist file, then we will need to create a folder within our root directory for iOS (e.g. ios/files/${targetName}/GoogleService-Info.plist) and create subfolders as per the scheme and add it.
1.3 Once the files have been added, we need to add the path of these files to Build Phases -> Copy Bundle Resources for each target.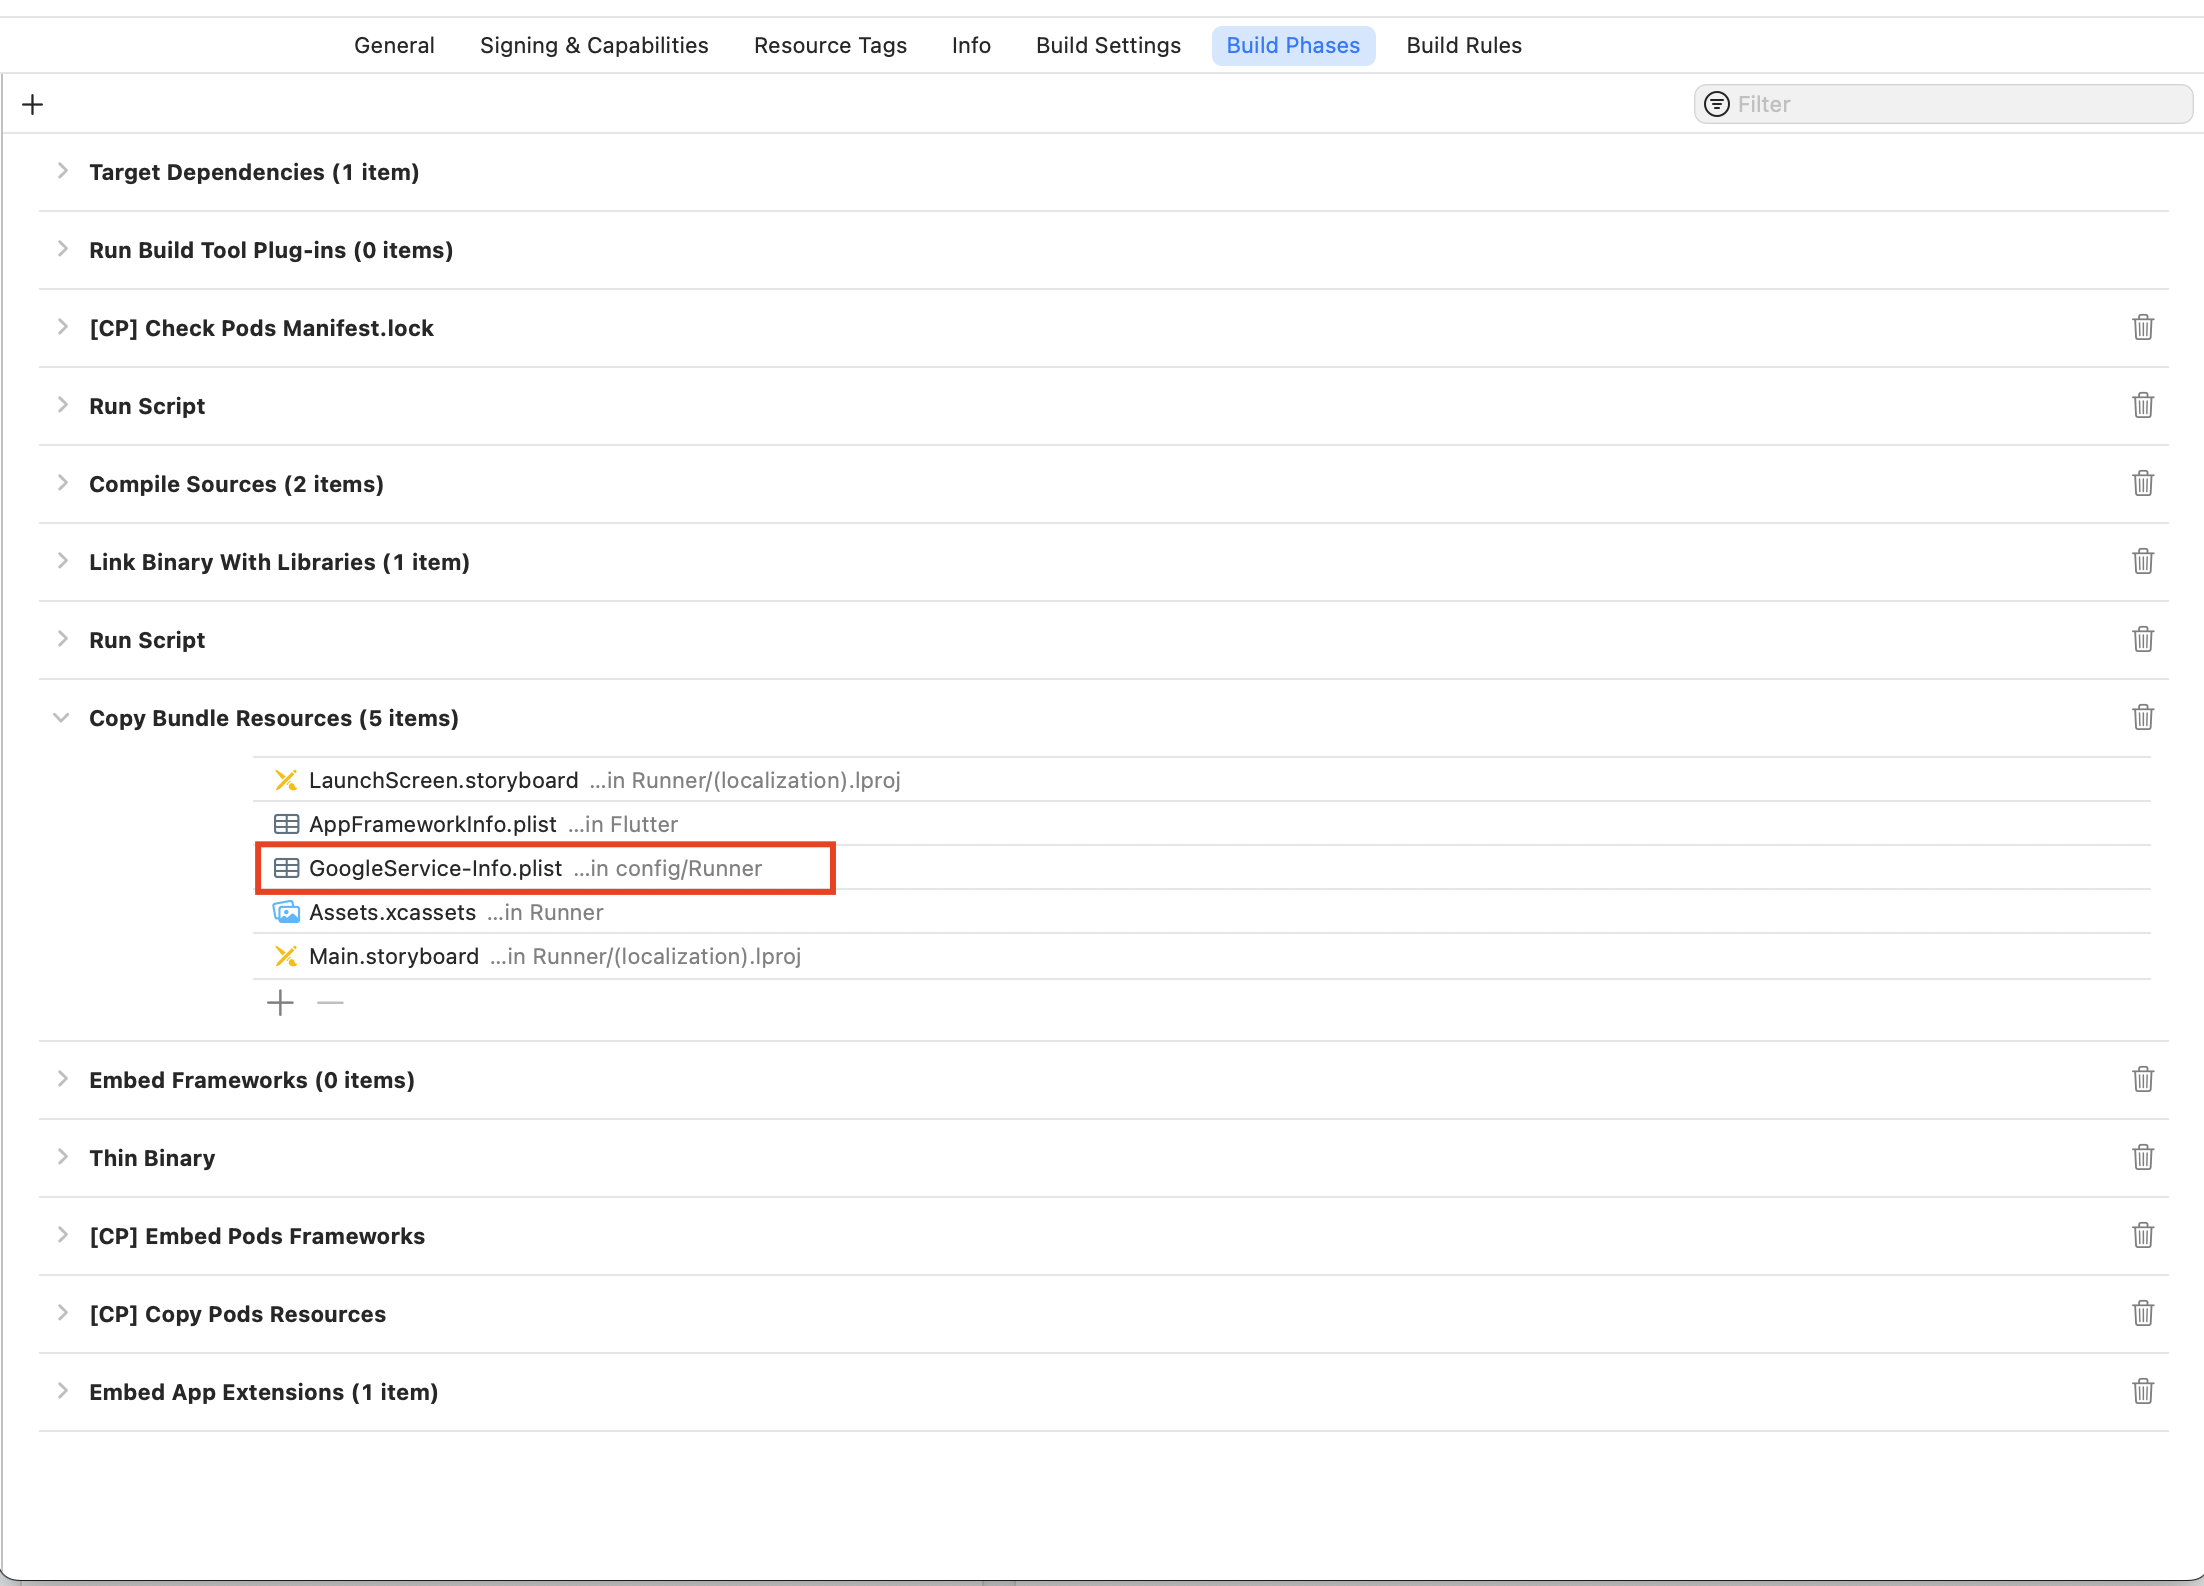
1.4 After that we will need to add the assets as per the target in our Runner -> Assets folder. Then we will need to set the App Icons within the General Settings as per the Target.

1.5 In Podfile, we may also need to add some code for our new target. Run ‘pod install’ after adding the code.
|
1 2 3 4 5 |
target 'Runner' do use_frameworks! use_modular_headers! flutter_install_all_ios_pods File.dirname(File.realpath(__FILE__)) end |
This code is customizable as per the requirement within the particular target scheme.
Finally, we have completed the setup for Flavoring our Flutter app for both Android as well iOS.
Conclusion
In this blog, we have discussed Flavoring Applications in Flutter.
I hope it will help you in getting started with the Flavors integration to Flutter Apps.
Read more interesting Flutter Blogs by Mobikul.
Looking forward to reading about Flavors in Android – https://mobikul.com/android-product-flavors/
Thanks for reading!!
References

Be the first to comment.