Today, We will implement multilevel UITableview (like display categories list) in swift 5 without any third party. The items can be expanded and collapsed by tapping them. We create a basic design you can implement according to your requirement.
In this section, we implement tableview inside a UItableViewcell and the cell will be n level depth. Click here for more details about UITableview. And also we will manage the height of tableviewcell
Here we have used a JSON file for the data source and a specific structure so that we can easily manage it.
Getting Started
Swift version: 5
iOS version: 13
Xcode: 11.3
Step 1: Create a project from Xcode.
File ▸ New ▸ Project…. Choose the iOS ▸ Application ▸ Single View App template and create a new project.
Step 2: Add a UITableview inside the view controller and create Outlet. Here I will use a custom tableview class that helps to manage the height of the cell.
|
1 2 3 4 5 6 7 8 9 10 11 12 |
class AutoHeightTableView: UITableView { override var intrinsicContentSize: CGSize { self.layoutIfNeeded() return self.contentSize } override var contentSize: CGSize { didSet{ self.invalidateIntrinsicContentSize() } } } |
Step 3: Create a UItableViewCell for the tableView.

Step 4: Now parse the data which we will use in tableview. We have used some specific format of json shown in below.
|
1 2 3 4 5 6 7 8 9 10 11 12 13 14 15 16 17 18 19 |
{ "id_category" : "3", "name" : "Clothes", "children" : { "category" : [ { "id_category" : "4", "is_selected" : "0", "name" : "Men" }, { "id_category" : "5", "is_selected" : "0", "name" : "Women" } ] }, "is_selected" : "0" } |
Create a class to parse the data.
|
1 2 3 4 5 6 7 8 9 10 11 12 13 14 |
class categoryList{ var isSelected = false var idCategory = "" var name = "" var isExpend = false var children = [categoryList]() init(data:JSON) { isSelected = data["is_selected"].boolValue idCategory = data["id_category"].stringValue name = data["name"].stringValue children = data["children"]["category"].arrayValue.map({categoryList(data: $0)}) } } |
Now add the Delegate and Datasource of the tableview.
|
1 2 3 4 5 6 7 8 9 10 11 12 13 14 15 16 17 18 19 20 21 22 23 24 25 26 |
var list = [categoryList]() var viewmodel: CategoryTableViewModel! override func viewDidLoad() { super.viewDidLoad() tableView.register(CategoryTableViewCell.nib, forCellReuseIdentifier: CategoryTableViewCell.identifier) guard let list = Bundle.main.url(forResource: "data", withExtension: "json"), let data = try? Data(contentsOf: list), let json = try? JSON(data: data) else { return } if let arr = json["category"].array{ list = arr.map({categoryList(data: $0)}) }else{ list = [categoryList(data: json["category"])] } viewmodel = CategoryTableViewModel(list: list, level: 1) DispatchQueue.main.async { self.tableView.delegate = self.viewmodel self.tableView.dataSource = self.viewmodel self.tableView.reloadData() self.tableView.layoutIfNeeded() } } |
Step 5: Now create a model class which handles tableview delegate and datasource. We will use a common class for both tableview.
|
1 2 3 4 5 6 7 8 9 10 11 12 13 14 15 16 17 18 19 20 21 22 23 24 25 26 27 28 29 30 31 32 33 34 35 36 37 38 39 40 41 42 43 44 45 46 47 48 49 50 51 52 53 54 55 56 57 58 59 |
class CategoryTableViewModel: NSObject,UITableViewDataSource,UITableViewDelegate { var list = [categoryList]() var obj : CategoryTableViewModel! var level = 0 init(list :[categoryList],level:Int) { self.list = list self.level = level } func tableView(_ tableView: UITableView, numberOfRowsInSection section: Int) -> Int { return list.count } func tableView(_ tableView: UITableView, cellForRowAt indexPath: IndexPath) -> UITableViewCell { if let cell = tableView.dequeueReusableCell(withIdentifier: CategoryTableViewCell.identifier) as? CategoryTableViewCell{ cell.titleLabel.text = list[indexPath.row].name cell.tableView.delegate = nil cell.tableView.dataSource = nil cell.expendBtn.setImage(nil, for: .normal) cell.leadingTableView.constant = CGFloat(level * 12) if list[indexPath.row].children.count>0{ if list[indexPath.row].isExpend{ obj = CategoryTableViewModel(list: list[indexPath.row].children, level: level+1) cell.tableView.delegate = obj cell.tableView.dataSource = obj cell.expendBtn.setImage(UIImage(named: "openArrow"), for: .normal) cell.separator(hide: true) // Shows separator }else{ cell.tableView.delegate = nil cell.tableView.dataSource = nil cell.expendBtn.setImage(UIImage(named: "closeArrow"), for: .normal) cell.separator(hide: false) } }else{ cell.tableView.delegate = nil cell.tableView.dataSource = nil } cell.tableView.reloadData() cell.callCack = { self.list[indexPath.row].isExpend = !(self.list[indexPath.row].isExpend) self.getParentTableView(tableView: tableView).reloadData() } cell.layoutIfNeeded() return cell } return UITableViewCell() } func getParentTableView(tableView:UITableView)->UITableView{ if let _tableView = tableView.superview?.superview?.superview as? UITableView{ return getParentTableView(tableView: _tableView) } else{ return tableView } } } |
And the same model will use in UITableView. UITableViewCell code attached below.
|
1 2 3 4 5 6 7 8 9 10 11 12 13 14 15 16 17 18 19 20 21 22 23 24 25 |
class CategoryTableViewCell: UITableViewCell { @IBOutlet weak var expendBtn : UIButton! @IBOutlet weak var titleLabel : UILabel! @IBOutlet weak var leadingTableView : NSLayoutConstraint! @IBOutlet weak var tableView : AutoHeightTableView! var callCack:(()->Void)? override func awakeFromNib() { super.awakeFromNib() tableView.isScrollEnabled = false tableView.register(CategoryTableViewCell.nib, forCellReuseIdentifier: CategoryTableViewCell.identifier) } static var identifier : String{ return String(describing: self) } static var nib : UINib{ return UINib(nibName: identifier, bundle: nil) } @IBAction func ependBtnPress(_ sender : UIButton){ callCack?() } } |
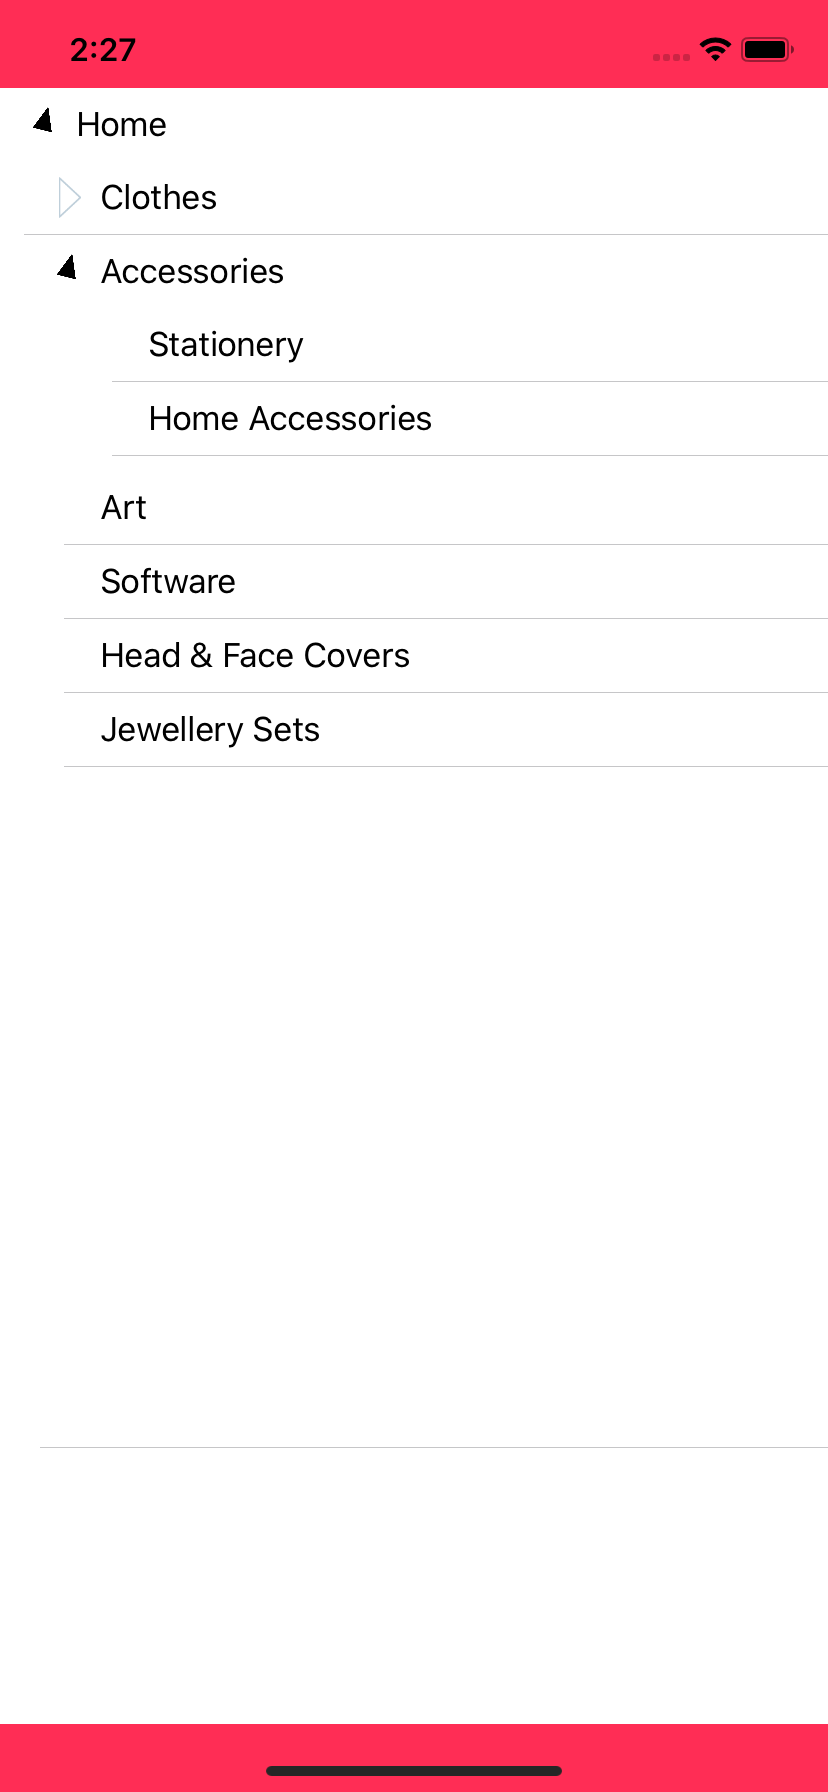
Step 6: Now run the app in the simulator or a real device.
I hope this code will help you better to understand multilevel UITableview. If you feel any doubt or query please comment below.
Thank you.

8 comments
https://github.com/SwiftyJSON/SwiftyJSON