In this blog, we are going to learn about “Add and Remove custom views in Android”.For an example you can use these view functionality for the application to play video in webview so I’ll teach you how to use webivew to play the video by URL and control all functionality by the separate screens. You must first construct a webview in an XML file before adding web view functionality to a class.
Create Chrome client
To show and hide the custom view when loading the webview, you must first establish a WebViewCromeClient and after the create ChromeClient you are creating a empty view to loading screen. this view are added in the container before the webview is loading state and then ‘getVideoLoadingProgressView’ function is given call back is view are empty.
|
1 2 3 4 5 6 7 8 9 10 11 12 13 14 15 16 17 18 19 20 21 22 23 24 25 26 27 28 29 30 31 32 33 34 35 36 37 38 39 40 41 42 43 44 45 46 |
inner class MyWebChromeClient(mContext: ProductDetailsActivity) : WebChromeClient() { private val mDefaultVideoPoster: Bitmap? = null private var mVideoProgressView: View? = null override fun onShowCustomView( view: View, requestedOrientation: Int, callback: CustomViewCallback ) { onShowCustomView(view, callback) } override fun onShowCustomView(view: View, callback: CustomViewCallback) { if (mCustomView != null) { callback.onCustomViewHidden() return } mCustomView = view webView?.visibility = View.GONE mContext.mContentViewBinding.customViewContainer.visibility = View.VISIBLE mContext.mContentViewBinding.customViewContainer?.addView(view) customViewCallback = callback } override fun getVideoLoadingProgressView(): View? { if (mVideoProgressView == null) { val inflater = LayoutInflater.from(mContext) mVideoProgressView = inflater.inflate(R.layout.video_progress, null) } return mVideoProgressView } override fun onHideCustomView() { super.onHideCustomView() if (mCustomView == null) return webView?.visibility = View.VISIBLE mContext.mContentViewBinding.customViewContainer?.visibility = View.GONE mCustomView?.visibility = View.GONE mContext.mContentViewBinding.customViewContainer?.removeView(mCustomView) customViewCallback?.onCustomViewHidden() mCustomView = null } } |
The ‘onShowCustomView‘ function to operate the perform call back to video view functionality is visible in the view.
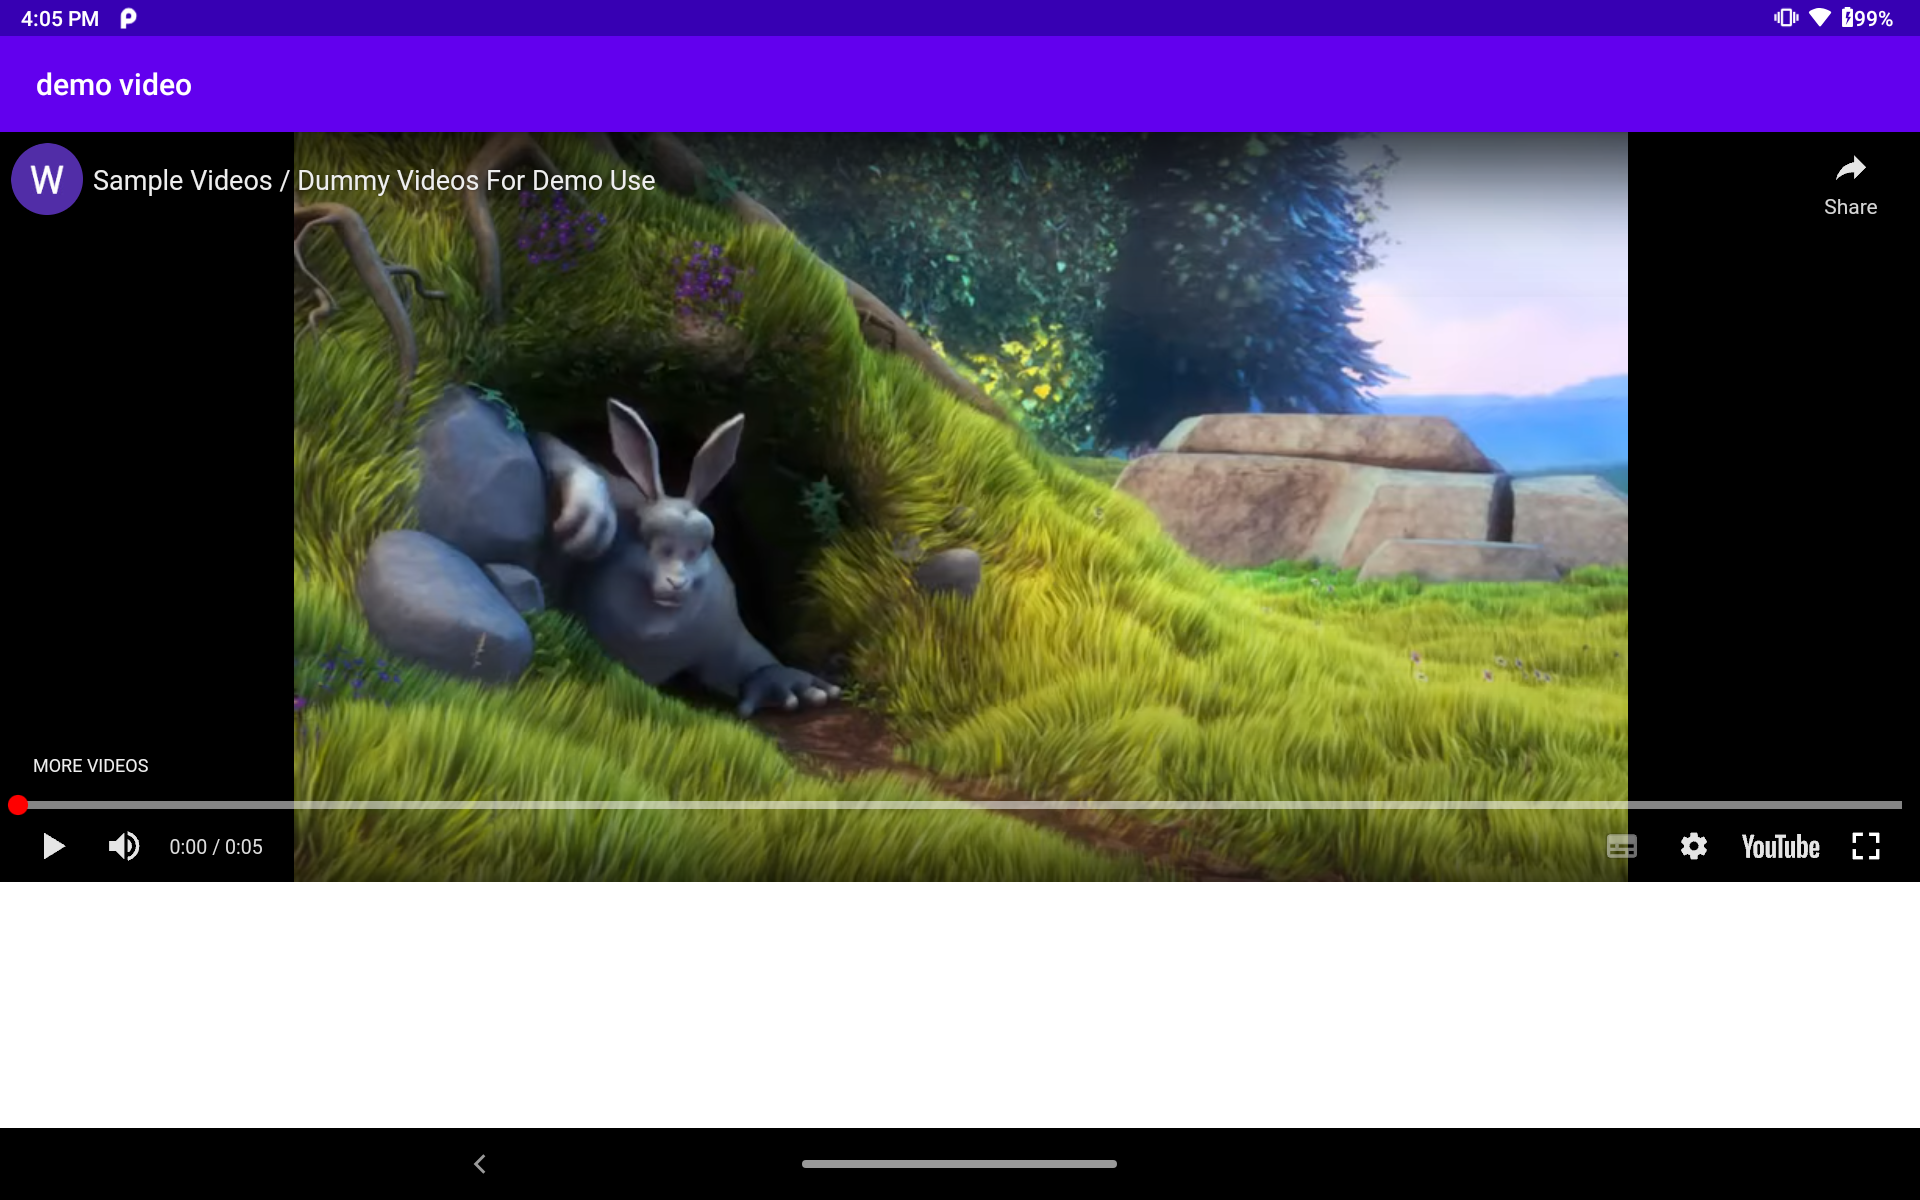
if we can control the screen size while playing a video in a webview when using this method, click the full-screen button to receive a callback.
|
1 2 3 4 5 6 7 8 9 10 11 12 |
override fun onShowCustomView(view: View, callback: CustomViewCallback) { if (mCustomView != null) { callback.onCustomViewHidden() return } mCustomView = view webView?.visibility = View.GONE mContext.mContentViewBinding.customViewContainer.visibility = View.VISIBLE mContext.mContentViewBinding.customViewContainer?.addView(view) customViewCallback = callback } |
then we can check the view is empty or null . so we are performing the container visiblity on and add the custom view in the container on full screen mode.
|
1 2 3 4 5 6 7 8 9 10 |
override fun onHideCustomView() { super.onHideCustomView() if (mCustomView == null) return webView?.visibility = View.VISIBLE mContext.mContentViewBinding.customViewContainer?.visibility = View.GONE mCustomView?.visibility = View.GONE mContext.mContentViewBinding.customViewContainer?.removeView(mCustomView) customViewCallback?.onCustomViewHidden() mCustomView = null } |
‘onHideCustomView‘ function is the webview call back when the load view in full screen and hide the custom container view. function are check the view is null or empty if the view is null they are return and it will no show webview. if the view in not null they are showing custom view in the container that it will hide the webview and all view are remove from the container.
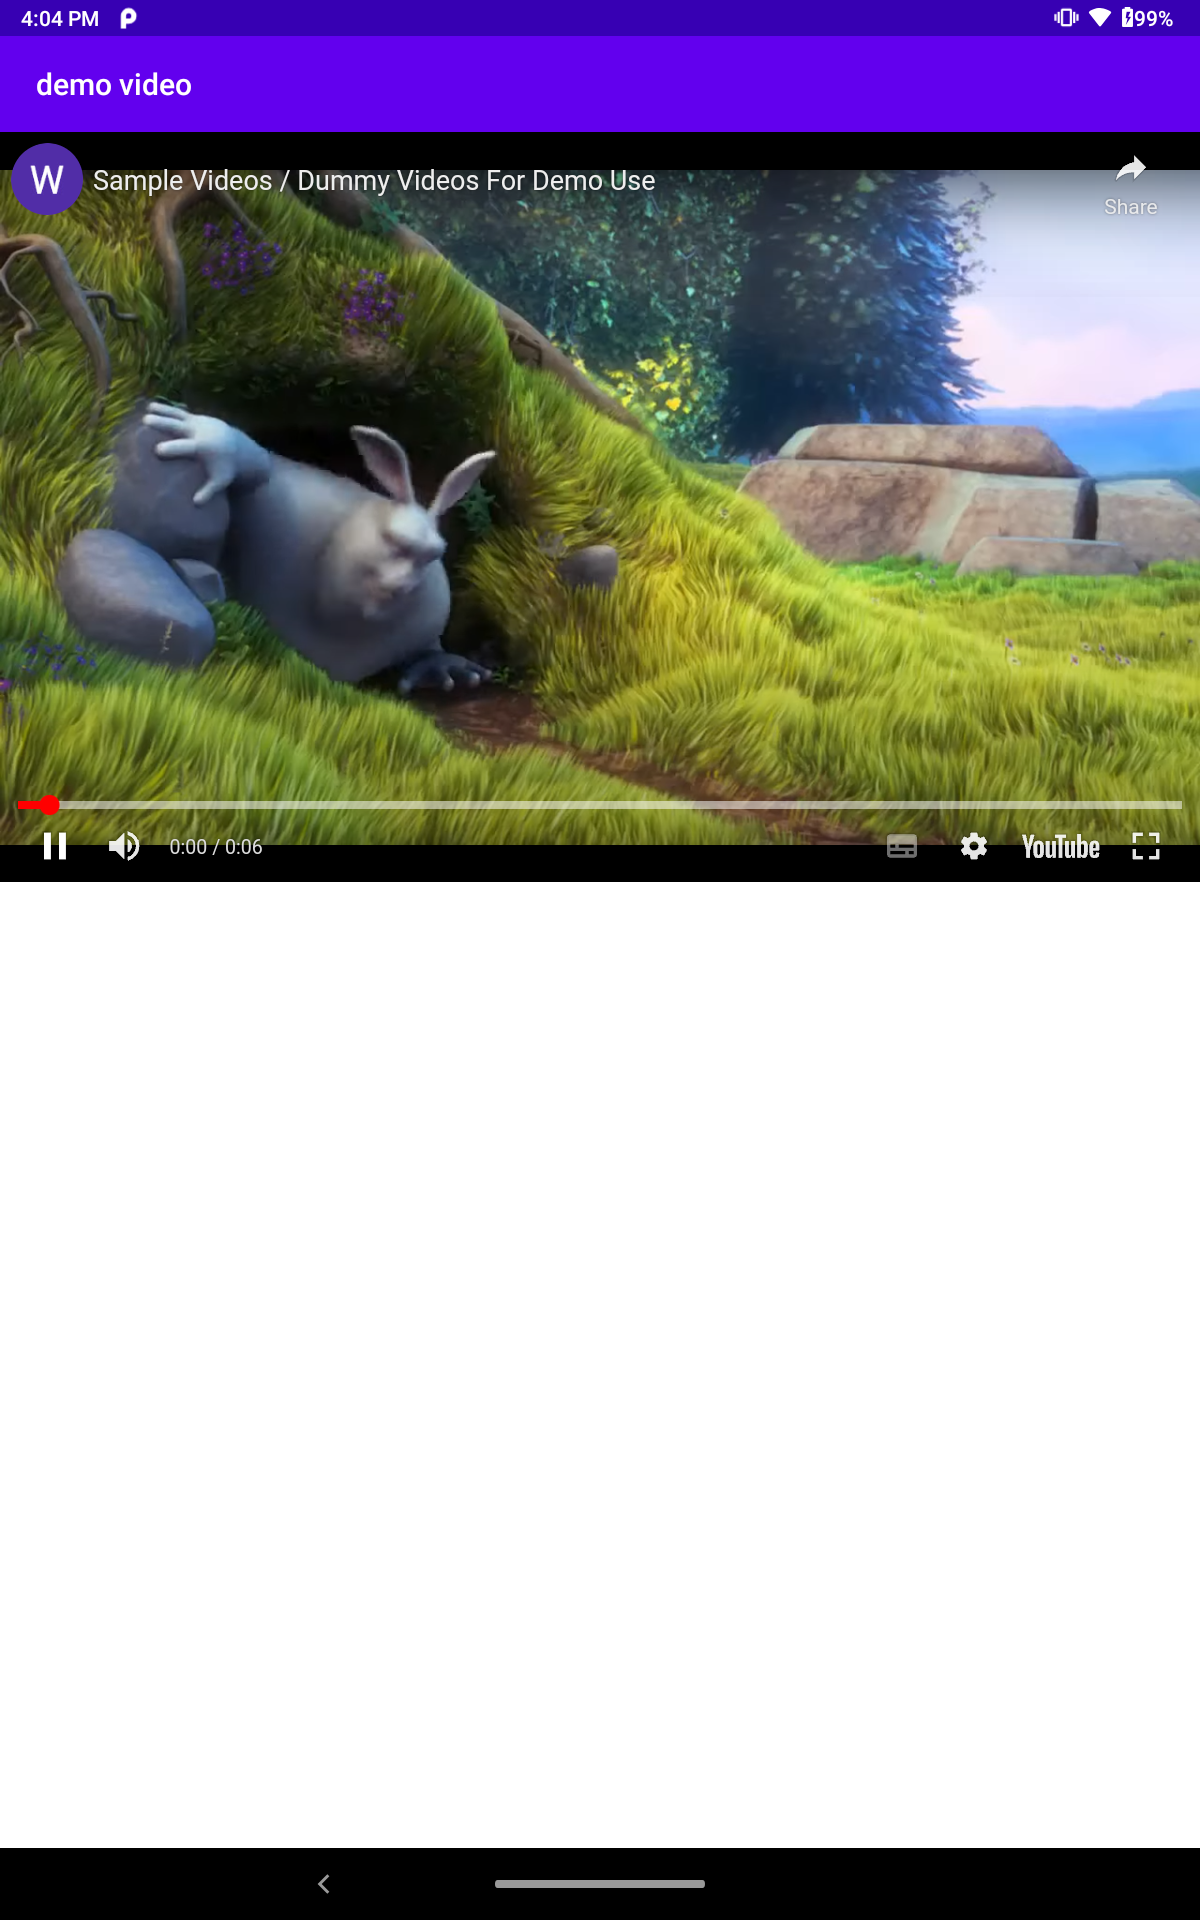
Preview
Conclusion
We learned about the ‘Add and Remove custom view in the webview’ in this blog.
Visit the link for additional information on the Webivew in Android and how to use these custom view override functions.
Thanks for reading this blog. You can also check other blogs from here for more knowledge.
Always be ready for learning 🙂

Be the first to comment.