Updated 28 April 2023
A filter chip is a type of Material Design chip. Filter chips use tags or descriptive words as a way to filter content.
A collection of filter chips is usually used where the user can select multiple options. Creating filter chips in Flutter can be done using the FilterChips widget which is very easy to use.
Read more about Flutter app development services from Mobikul.
1.) Create a Scaffold.
2.) Create the filter chips as you desire.
3.) Do create a layout by using selected, onSelected property.
Inside Scaffold widgets, it Implements the basic material design visual layout structure. First, initialize the main app as a stateless widget.
This class provides APIs for showing drawers and bottom sheets. We can add the background color inside the scaffold widget.
It also supports special Material Design components, such as Drawers, AppBars, and SnackBars.
|
1 2 3 4 5 6 7 8 9 10 11 12 13 14 15 16 17 |
void main() { runApp(MyApp()); } class MyApp extends StatelessWidget { @override Widget build(BuildContext context) { return MaterialApp( title: 'Demo Flutter Chips', theme: ThemeData( primarySwatch: Colors.green, ), home: MyHomePage(), ); } } |
Now, use to create a filter chip in the flutter we have to call the constructor of the FilterChip class provided by the flutter.
|
1 2 3 4 5 6 7 |
class MyHomePage extends StatefulWidget { @override _MyHomePageState createState() { return _MyHomePageState(); } } |
Creating filter chips here are two required properties for the FilterChip widget which are label and onSelected callback.
Without using these properties we cannot create a filter chip.
The FilterChips use this property to update the selected or unselected state of choice chip and also perform some actions.
By using onSelected, It is called when the chip should change between selected and deselected states. When the state of the filterchips changes, the widget calls the onSelected callback.
The onSelected and TappableChipAttributes.onPressed callbacks must not both be specified at the same time.
|
1 2 3 4 5 6 7 8 9 10 11 12 13 14 15 16 17 18 19 20 21 22 23 24 25 26 27 28 29 30 31 32 33 34 35 36 37 38 39 40 41 42 43 44 45 46 47 48 49 50 51 52 53 54 55 56 57 |
class Tech { String label; Color color; bool isSelected; Tech(this.label, this.color, this.isSelected); } class _MyHomePageState extends State<MyHomePage> { bool selected = false; List<Tech> _chipsList = [ Tech("India", Colors.brown, false), Tech("Canada", Colors.deepPurple, false), Tech("London", Colors.red, false), Tech("Paris", Colors.cyan, false), Tech("Japan", Colors.black54, false), Tech("Maldives", Colors.blueAccent, false), Tech("Switzerland", Colors.lightGreen, false) ]; @override Widget build(BuildContext context) { return Scaffold( appBar: AppBar( title: Text("Flutter Chips"), ), body: Wrap( spacing: 8, direction: Axis.horizontal, children: techChips(), ) ); } List<Widget> techChips () { List<Widget> chips = []; for (int i=0; i< _chipsList.length; i++) { Widget item = Padding( padding: const EdgeInsets.only(left:10, right: 5), child: FilterChip( label: Text(_chipsList[i].label), labelStyle: TextStyle(color: Colors.white), backgroundColor: _chipsList[i].color, selected: _chipsList[i].isSelected, onSelected: (bool value) { setState(() { _chipsList[i].isSelected = value; }); }, ), ); chips.add(item); } return chips; } } |

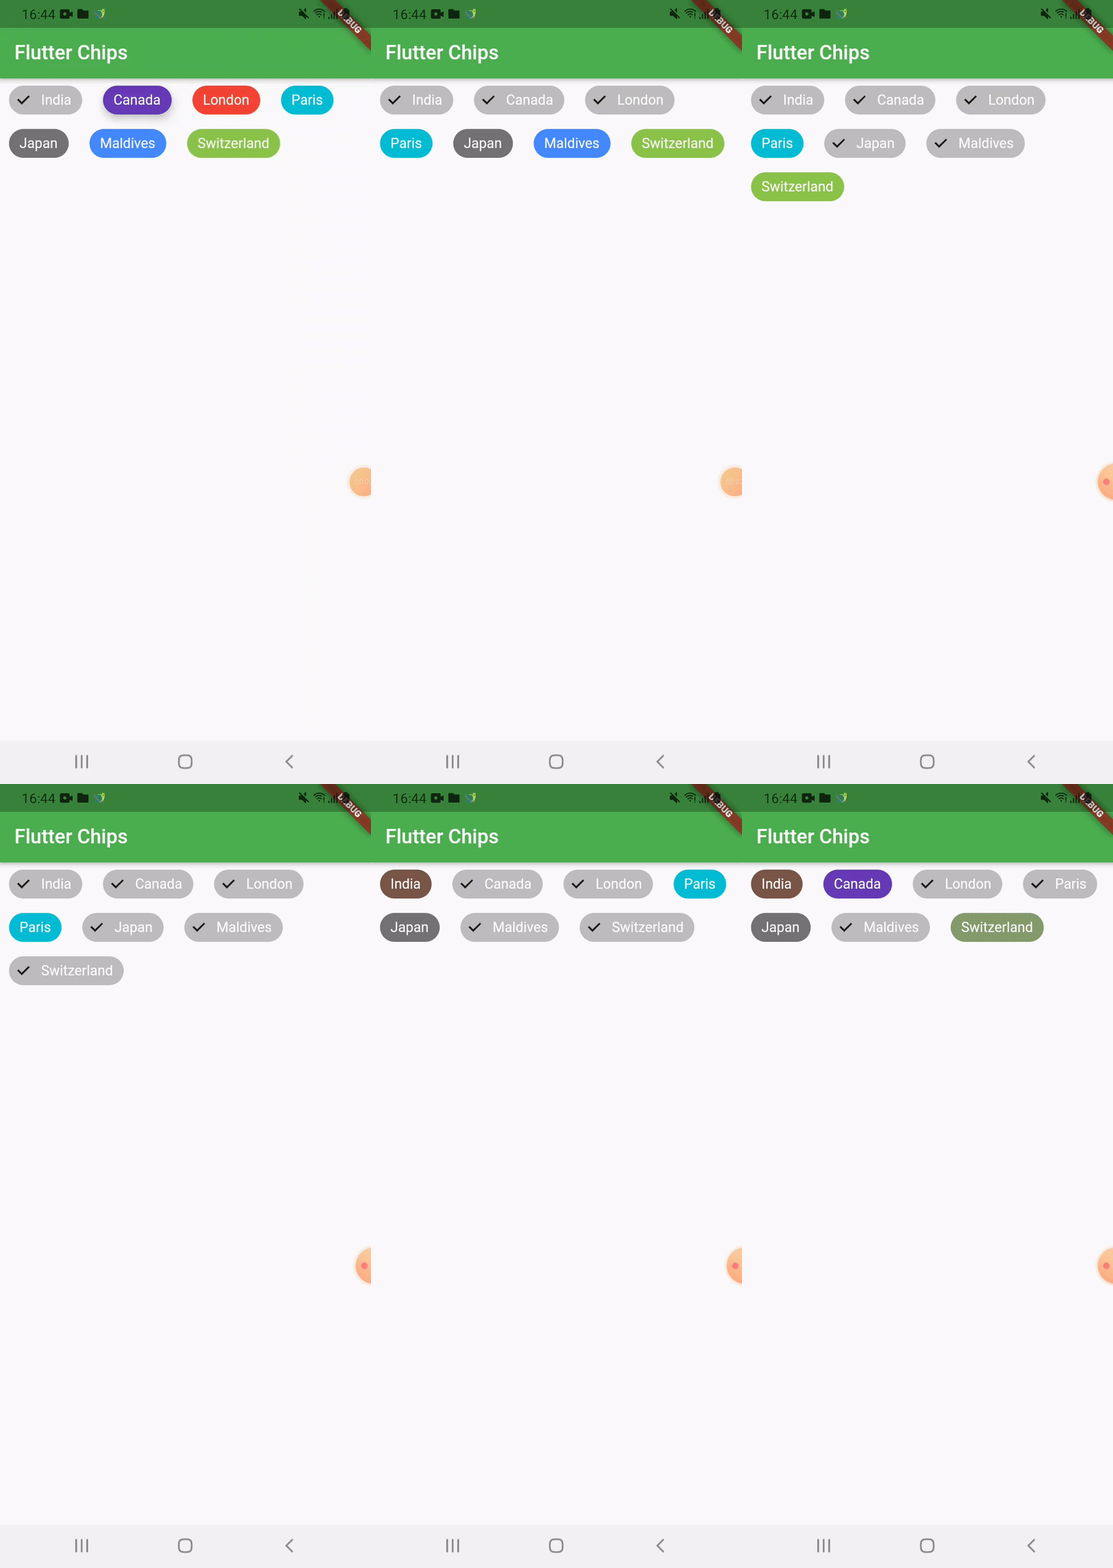
We can now run the app on how to create filter chips in a flutter.
Hope this blog helps you to create filter chips in a flutter.
So, I hope it will help you out in understanding and getting a brief idea about it.
For more understanding please can go through this Link:
That’s all, You can enjoy your Filter chips implementation in a flutter.
Thank you very much.
If you have more details or questions, you can reply to the received confirmation email.
Back to Home
Be the first to comment.