Uses of UITableViewHeaderFooterView in iOS to manage the header and footer content of your table’s sections efficiently. A header-footer view is a reusable view that you can subclass or use as is.
To configure the content and appearance of a header-footer view, you can set its contentConfiguration and backgroundConfiguration.
To promote the reuse of your header-footer views, register them by calling the register(_:forHeaderFooterViewReuseIdentifier:) or register(_:forHeaderFooterViewReuseIdentifier:) method of the table view. In the tableView(_:viewForHeaderInSection:) or tableView(_:viewForFooterInSection:) method of your delegate object, call the table view’s dequeueReusableHeaderFooterView(withIdentifier:)method to create your view. That method returns a recycled view (if one is available) or creates a new view using the information you registered.
A simple alternative to creating custom header-footer views is to implement the tableView(_:titleForHeaderInSection:) and tableView(_:titleForFooterInSection:) methods of your data source object. When you implement those methods, the table view creates a standard header or footer view and displays the text you supply.
UITableViewHeaderFooterView, Introduced in iOS 6, UITableViewHeaderFooterView takes the reuse Dynamic table view cells can be designed directly from a Storyboard.
Uses of UITableViewHeaderFooterView in iOS provide the help to add section with table.
Uses of UITableViewHeaderFooterView in iOS provide the help to make the header customizable
Using the below steps we will add header and footer view with the table.
1-> First Create the subclass of UITableViewHeaderFooterView with name Demo.swift.
2-> Then create the empty .xib file with the same name.
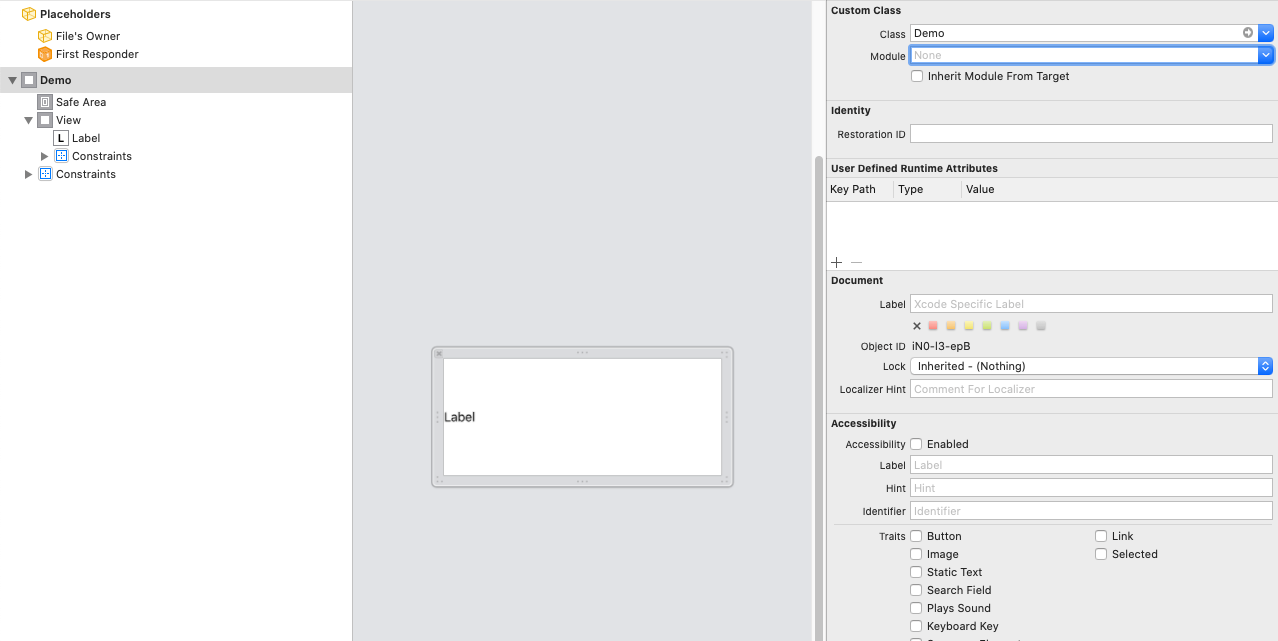
3-> Then assign the UITableViewHeaderFooterView Demo.swift class with xib.
4-> Then connect the outlets with Demo.swift class.

|
1 2 3 4 5 6 7 8 9 10 11 12 |
class Demo: UITableViewHeaderFooterView { @IBOutlet weak var titleNAme: UILabel! static var nib: UINib { return UINib(nibName: identifier, bundle: nil) } static var identifier: String { return String(describing: self) } } |
5-> Register and use UITableViewHeaderFooterView in UITableView
|
1 |
tableView.register(Demo.nib, forHeaderFooterViewReuseIdentifier: Demo.identifier) |
6-> Add Below delegate for Header.
|
1 2 3 4 5 6 7 8 9 10 |
func tableView(_ tableView: UITableView, viewForHeaderInSection section: Int) -> UIView? { if let headerView = tableView.dequeueReusableHeaderFooterView(withIdentifier: Demo.identifier) as? Demo { headerView.titleName.text = "webkul" return headerView } return nil } |
7-> Now Add height of header with below delegate.
|
1 2 3 |
func tableView(_ tableView: UITableView, heightForHeaderInSection section: Int) -> CGFloat { return 50 } |
8-> Now run the app and you can get header your table.

Conclusion
Thanks for reading this blog, this will help you to add the section on your table header You can know more from here!
So pls follow the above step and And if you have any issue or suggestion you can leave your message in the comment section I will try to solve this.

Be the first to comment.