StaggeredGridView is the one which supports multiple columns with rows of different sizes and also helps in providing a better UI Design for the applications.
With the help of StaggeredGridView , we can configure the main-axis and cross-axis margins between the tiles.
Looking out for App Development, check out our flutter app development
It consists of two constructors i.e., countBuilder and extentBuilder which are used to define the layout.
Let’s begin, in order to use this package we need to add ‘flutter_staggered_grid_view’ in our pubspec.yaml file. For finding out, the updated version of package you can go to https://pub.dev/packages/flutter_staggered_grid_view
![]()
After that, I have created the file name ‘product_card.dart’ file containing the basic design for the card.
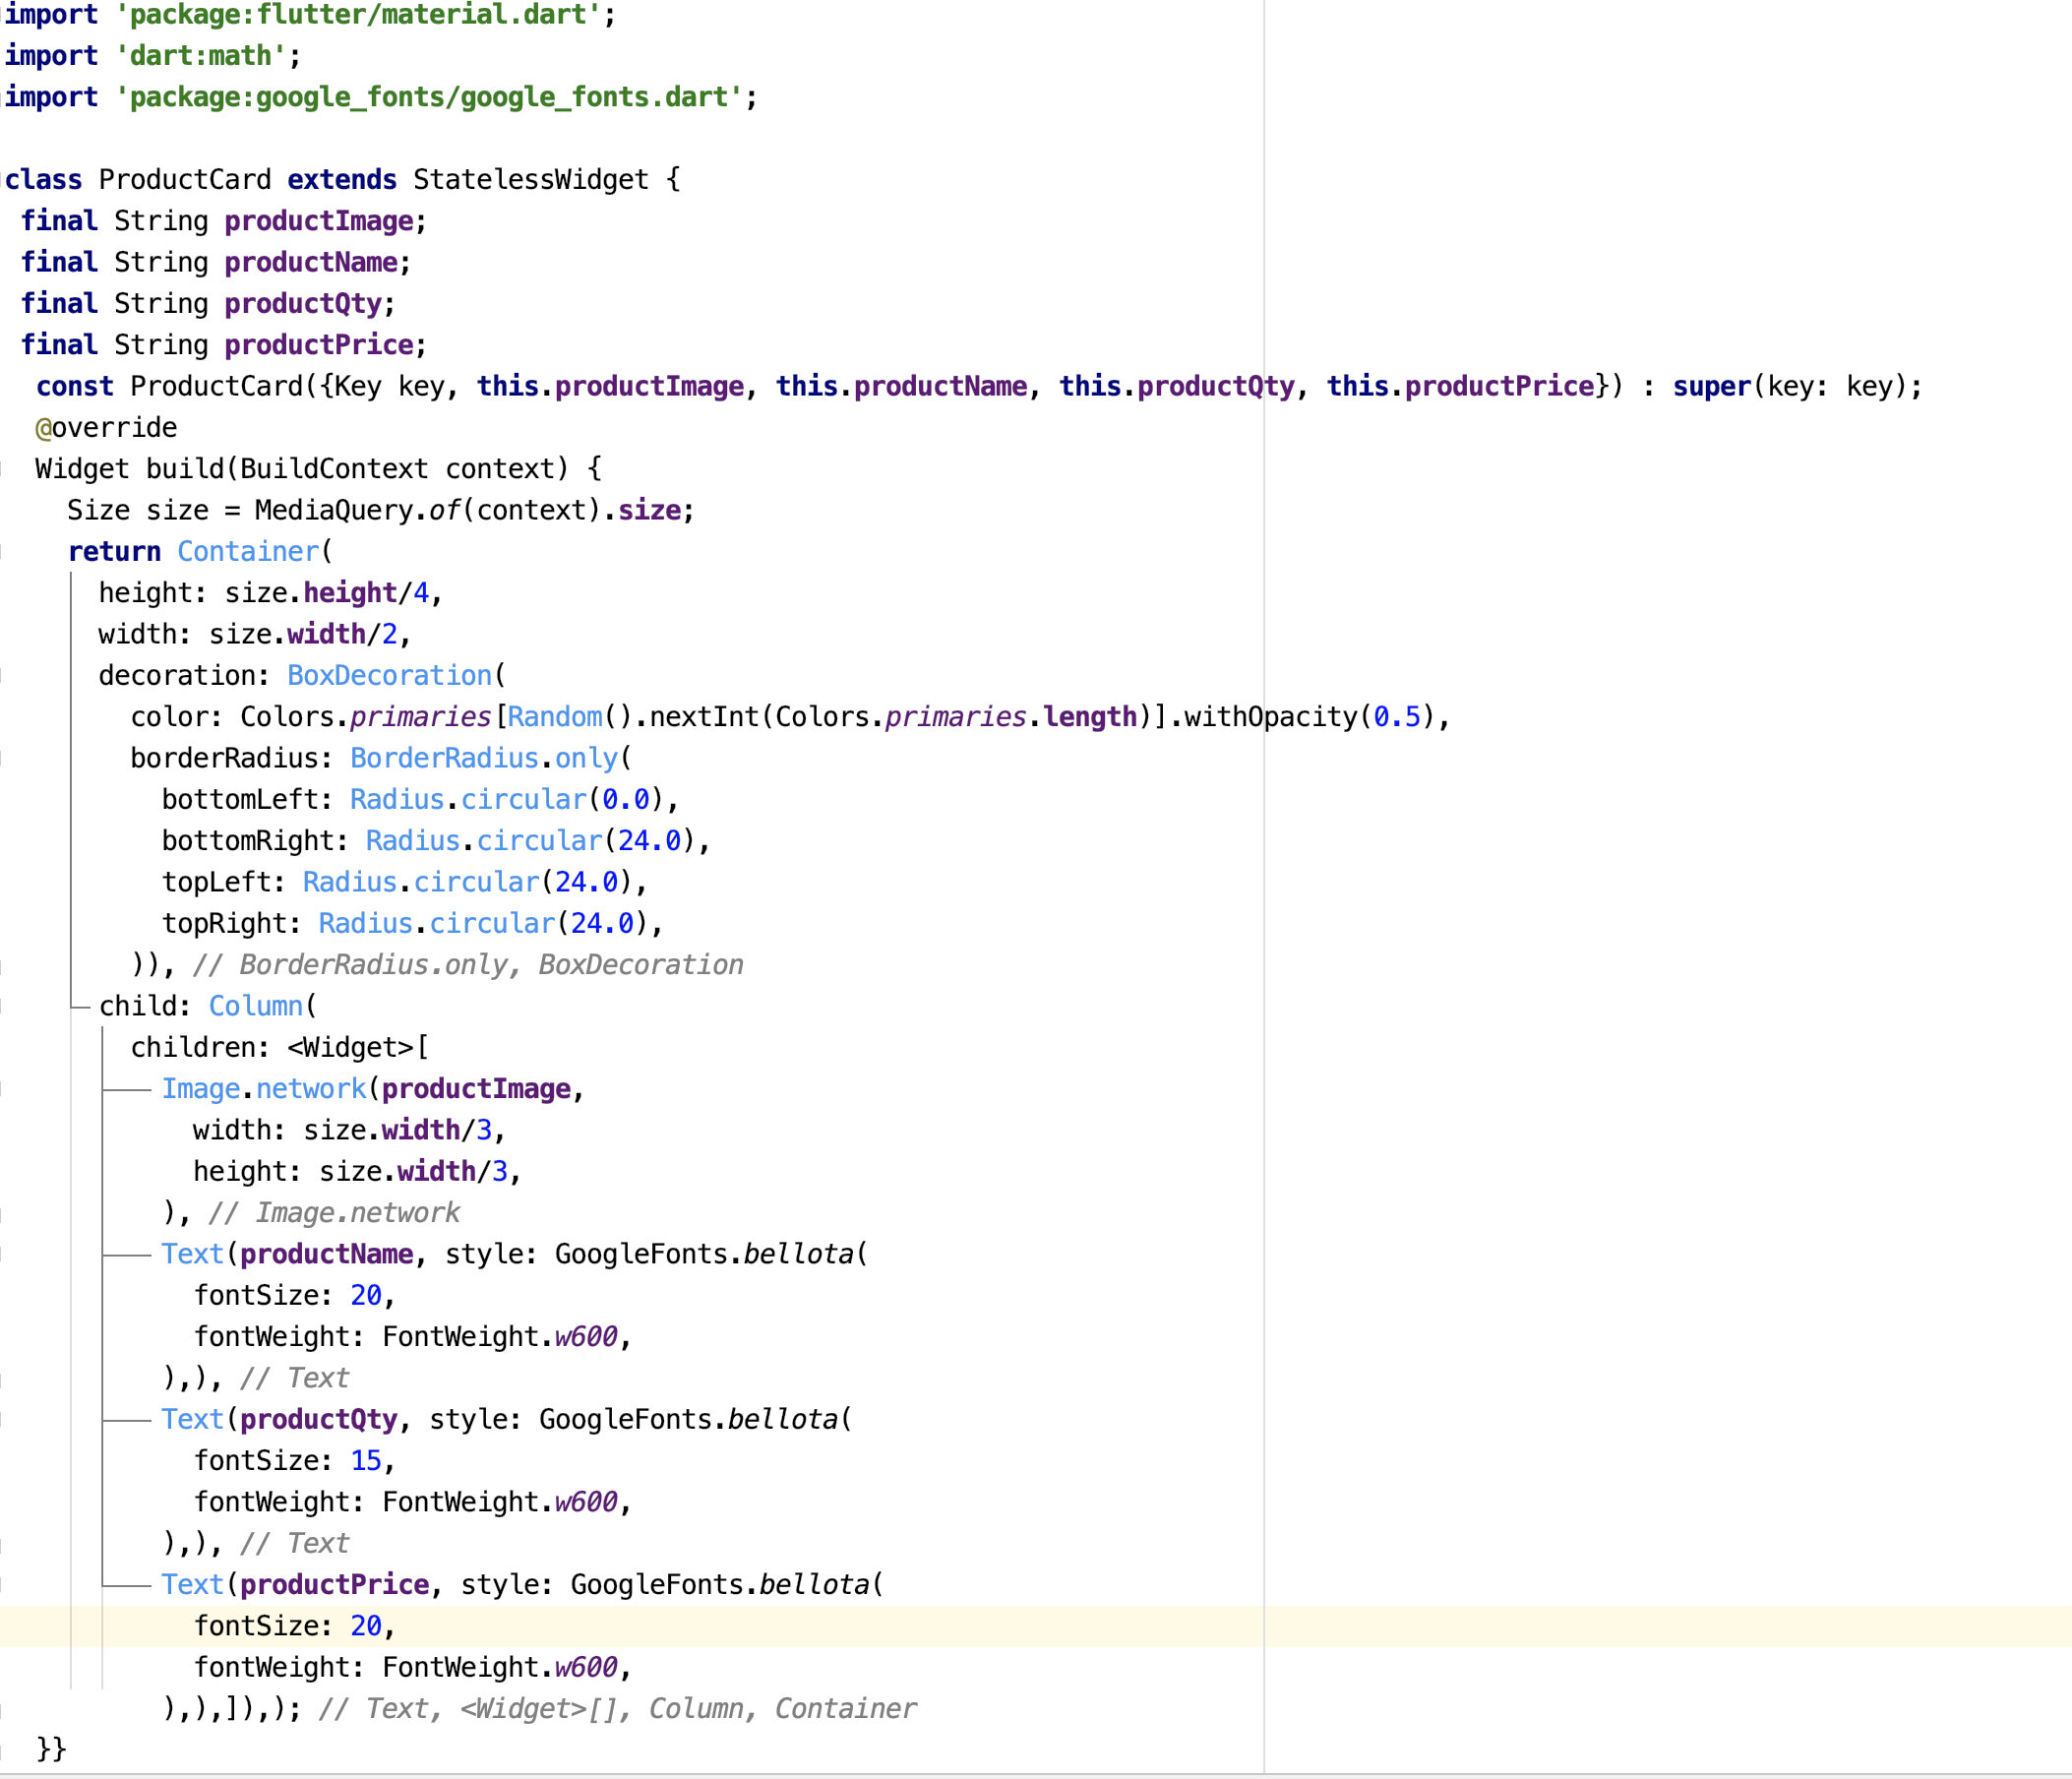
For the font style we have used the ‘google_fonts’ package, as it provides us the easy access to all Google Fonts.
For the colour of the Container, we have used the Random() from dart:math class, in order to generate random colours on runtime.
In ‘main.dart’ file , we have imported the flutter_staggered_grid_view package.

While using StaggeredGridView, it is necessary to specify some properties other than itemBuilder, that are , crossAxisCount, itemCount and staggeredTileBuilder, otherwise it will throw an error.
In staggeredTileBuilder, it is necessary to specify the number of cells we need in crossAxis. In order to specify mainAxis extent , we can use StaggeredTile.count, StaggeredTile.extent and StaggeredTile.fit
Now, the body of our Scaffold contains StaggeredGridView.countBuilder and we can return any widget within its itemBuilder. As of now, we have returned our ProductCard().

Finally, we get the output as-

Conclusion
StaggeredGridview is similar to GridView in flutter but it offers some special features which makes it look more attractive in terms of UI Design.
I hope this blog will help you out in learning about StaggeredGridView and will also provide you an easy way of implementing it in the applications.
You can also check our other blogs – https://mobikul.com/blog/
Thank you

Because i need to add gesture detectors for each grid. Thank you