Designing for iOS used to be simple because previously, there was only one phone size. Fast forward to the present day; we now have an array of iPhone and iPad devices, all with different screen sizes and orientations. Aside from the physical devices, themselves, we also have software features that increase the number of sizes your application can appear in, like Split View and Slider Over. To help designers and developers manage these various permutations, Apple has introduced Size Classes which organize all of these screen sizes for each device and orientation into two categories.
What are Size Classes?
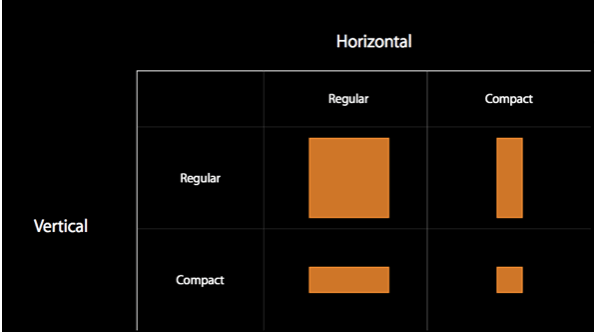
In iOS, Size Classes are groups of screen sizes that are applied to the width and height of the device screen. The two Size Classes that exist currently are Compact and Regular.
The Compact Size Class refers to a constrained space. It is denoted in Xcode as wC (Compact width) and hC (Compact height).
The Regular Size Class refers to a non-constrained space. It is denoted in Xcode as wR (Regular width) and hR (Regular height).
What is adaptive layout:
The adaptive layout is a method of building the apps based on the size and characteristics of the container instead of a targeting a particular device. We can create a single layout to work on all devices instead of writing a platform specific code. Adaptive layout includes size classes and trait collection etc.
Before size, a class has been introduced developers were using following approaches to developing the UI.
-Universal storyboards. Unique storyboard for iPhone and iPad.
-Monitoring the orientation change API for dynamic layout during device rotation.
-Using layout constraints to manage different size within single device class.
To avoid these apple has introduced size classes after iOS8.
About Size classes:
Size class identifies relative amount of display space for the height and width or vertically and horizontally. Size class categorizes each dimension into two terms.
– Compact: As the name indicates, if the container space is small to display the content then it is called as compact.
– Regular: If there is enough space in the container to display the content then this is called as Regular.
Using the size class, one can retrieve the general information about the device in its current orientation.
Working with Size Classes
To introduce trait variations, first make sure that you select a Compact Heightconfiguration (e.g. an iPhone SE in landscape), then click on the Vary for Traitsbutton to the right of the Trait chooser menu.
Here you can choose a size class to customize and introduce variations based on width and height:

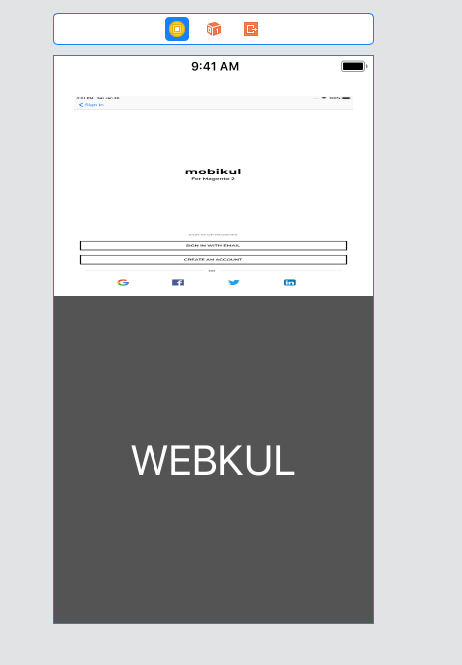
Your current layout doesn’t work properly for compact heights. To fix this, choose Height in the Vary for Traits menu:

You’ll immediately notice the bottom bar turning a rather fetching shade of blue. This indicates, that you’re now working on a size-class specific layout.
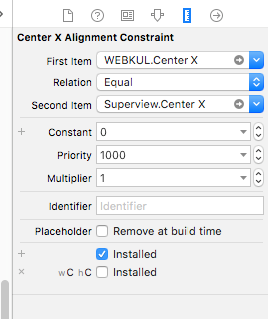
In order to change the layout, you’ll need to temporarily change a few constraints. In Auto Layout terminology this is known as installing and uninstalling constraints. A constraint is installed if it is currently active, whereas an uninstalled constraint is not currently active within the current size class.
Note: You might have to toggle from This Size Class to All in the Size Inspector to see the uninstalled constraint.
Double click on the uninstalled constraint in the Size Inspector to select the constraint . There’s an additional line at the bottom as shown below:
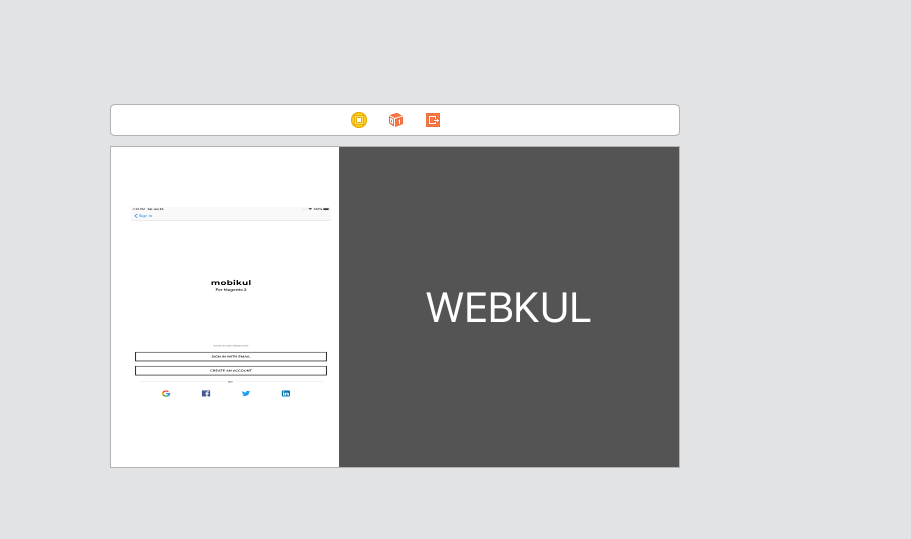
After set the new constraint runs the project and check on landscape mode and portrait view and then you will see below layout format.
Conclusion
So pls follow the above step and And if you have any issue or suggestion you can leave your message in the comment section I will try to solve this.

Be the first to comment.