Hello guys, Today we learn about Segment Control In Swift.
Overview Of Segment Control:-
“Segment control is a set of two or more segments, which is used to perform multiple tasks on the same screen. Segment working same as a button.”
Property of segment control:–
- All segment width is equal, in the controller.
Example Of Segment Control :-
In this tutorial, we create 2 segments inside the segment controller and change the view color of each segment
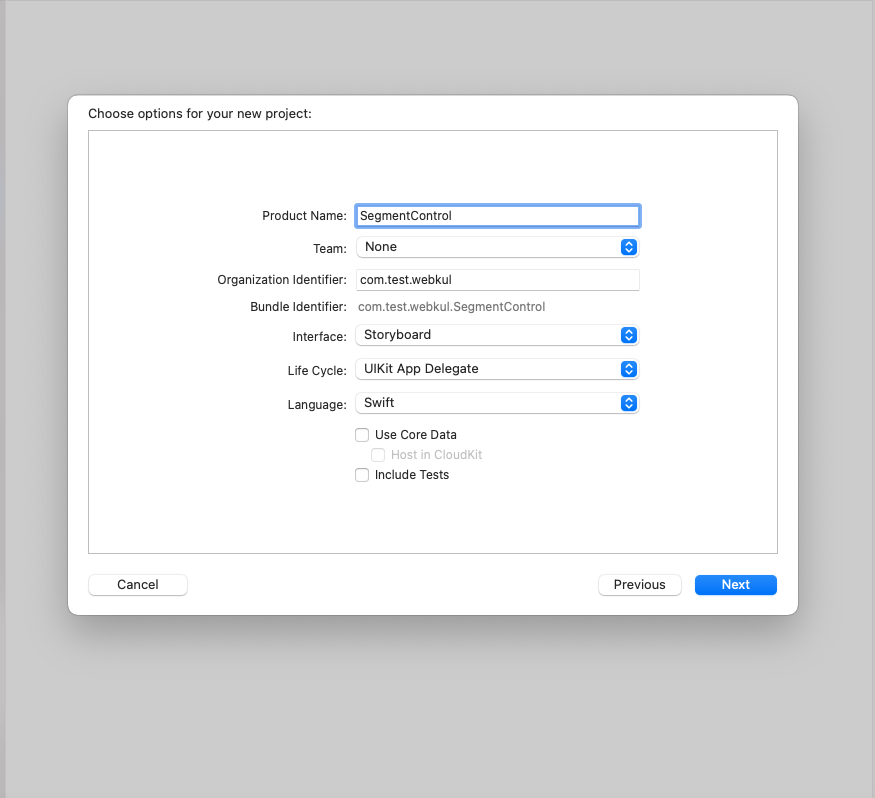
Step 1:- Open Xcode and create a new App and click on the Next button
Step 2:- Now add your project name like I am taking my project name is SegmentControl and click on the Next button.

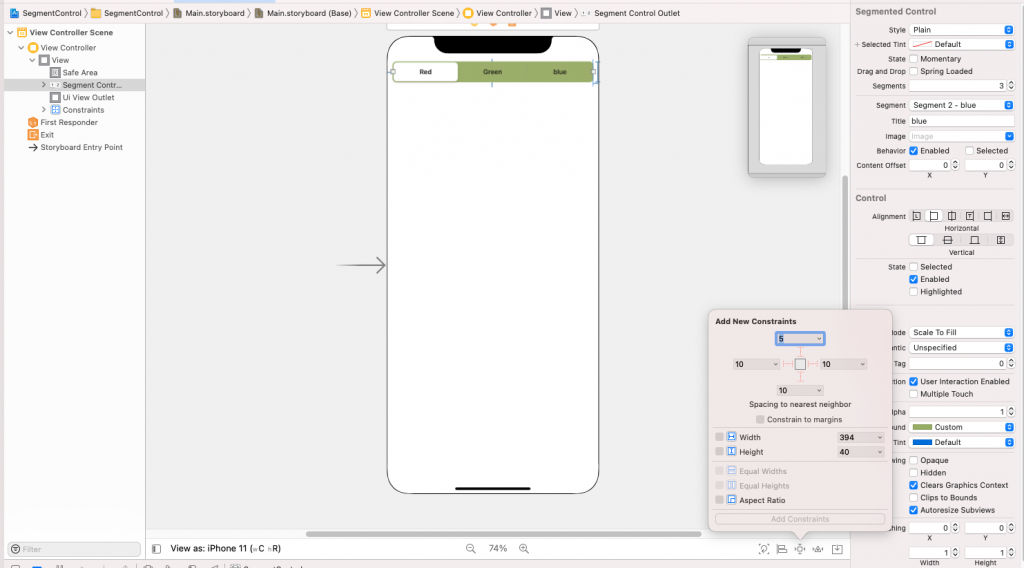
Step 3:- Take a segment control into the view Controller and set the constraint in storyboard.

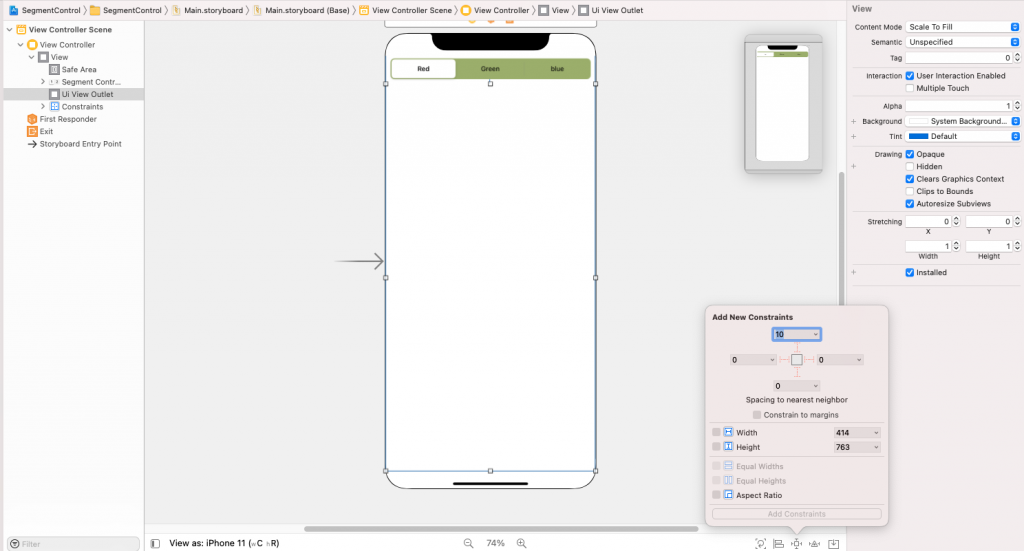
Step 4:- Take UIVIew into the view controller and set the constraint on the storyboard.

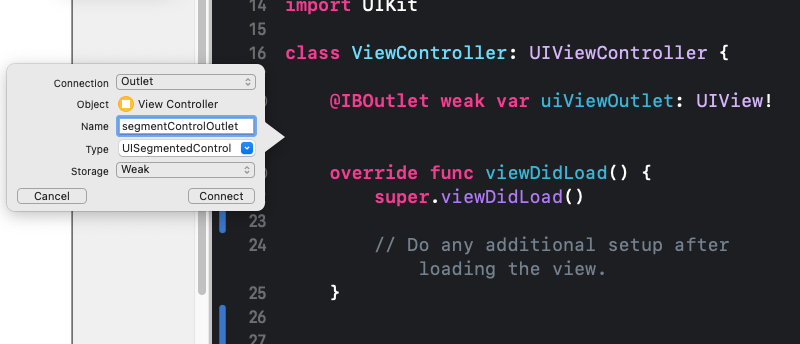
Step 5:- Create the outlet of segment control and UIView in the view controller class.

Step 6:- Add code according to the segments action
|
1 2 3 4 5 6 7 8 9 10 11 12 13 14 15 16 17 18 19 20 21 22 23 24 25 26 27 28 29 30 31 32 33 34 35 |
import UIKit class ViewController: UIViewController { @IBOutlet weak var uiViewOutlet: UIView! @IBOutlet weak var segmentControlOutlet: UISegmentedControl! override func viewDidLoad() { super.viewDidLoad() uiViewOutlet.backgroundColor = .red segmentControlOutlet.backgroundColor = .red } @IBAction func segmentControllClick(_ sender: Any) { switch segmentControlOutlet.selectedSegmentIndex { case 0: uiViewOutlet.backgroundColor = .red segmentControlOutlet.backgroundColor = .red case 1 : uiViewOutlet.backgroundColor = .green segmentControlOutlet.backgroundColor = .green case 2: uiViewOutlet.backgroundColor = .blue segmentControlOutlet.backgroundColor = .blue default: break } } } |
Now run the program and see the output
Output:-
Conclusion:-
In this blog, we discussed Segment Control In Swift
I hope this blog will help you to get about segment control
Thanks for reading!!

Be the first to comment.