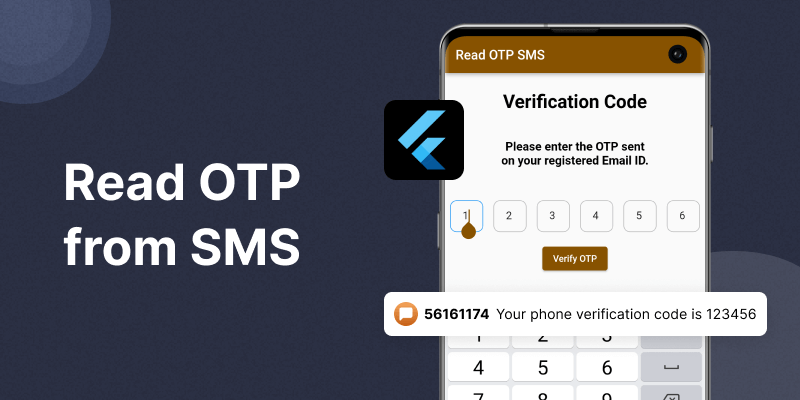
In this comprehensive guide, we’ll explore the process of integrating incoming message reading capabilities into Flutter apps, we will look how to read OTP from sms and auto fill the OTP field.
From sending sms in emulator to message retrieval and processing, we’ll cover all the essential steps to seamlessly implement this functionality.
Need for SMS Reading
Imagine a scenario where a user needs to verify their identity using a one-time password (OTP) sent via SMS.
Traditionally, users would have to switch between their messaging app and the authentication screen, manually entering the OTP.
This process is not only cumbersome but also prone to errors.
By enabling Flutter apps to read incoming messages, developers can streamline such interactions, offering users a more intuitive and efficient experience.
Before we dive into the code, you can also check our Flutter app development company page.
Implementation
1. Firstly, create a new project and add dependency (sms_autofill) into pubspec.yaml file as
|
1 |
sms_autofill: ^2.3.1 |
2. Create a basic User interface to show the OTP and submit button as below code
|
1 2 3 4 5 6 7 8 9 10 11 12 13 14 15 16 17 18 19 20 21 22 23 24 25 26 27 28 29 30 31 32 33 34 35 36 37 38 39 40 41 42 43 44 45 46 47 48 49 50 51 |
@override Widget build(BuildContext context) { return Scaffold( appBar: AppBar( title: const Text('Read OTP SMS'), ), body: Padding( padding: const EdgeInsets.all(30.0), child: Column( crossAxisAlignment: CrossAxisAlignment.stretch, children: [ const Text( "Verification Code", textAlign: TextAlign.center, style: TextStyle( fontSize: 28.0, color: Colors.black, fontWeight: FontWeight.bold), ), const SizedBox(height: 60), const Text( "Please enter the OTP sent\non your registered Email ID.", textAlign: TextAlign.center, style: TextStyle( fontSize: 18.0, color: Colors.black, fontWeight: FontWeight.w600), ), const SizedBox(height: 50), Center( child: PinFieldAutoFill( currentCode: otpCode, codeLength: 6, onCodeChanged: (code) { print("on CodeChanged called $code"); otpCode = code.toString(); }, decoration: BoxLooseDecoration( strokeColorBuilder: PinListenColorBuilder(Colors.blue.shade300, Colors.black26), bgColorBuilder: const FixedColorBuilder(Colors.white), strokeWidth: 1, ) ), ), const SizedBox(height: 50), ElevatedButton(onPressed: (){}, child: const Text("Verify OTP")) ], ), ), ); } |
In above code we have created UI view with the help of :
- Text widgets to show the message on screen
- PinFieldAutoFill widget to show the OTP input fields and added some decoration in input fields.
- Elevated button to show the verify code text and the implementation of this button is not defined yet, as we are not verifying the OTP.
format the textFormField input in Flutter
3. Create a method (listenOtp) to register a listener that listen for incoming sms and call from initState as :
|
1 2 3 4 5 6 7 8 9 10 11 |
@override void initState() { super.initState(); listenOtp(); } void listenOtp() async { var appSignatureID = await SmsAutoFill().getAppSignature; await SmsAutoFill().listenForCode(); print("appSignatureID -- $appSignatureID"); } |
listenOtp method initialize a listener that listen for incoming OTP :
getAppSignature : It will return your app signature in a String format, you have to add it at the end of your sms while sending sms to this device.
listenForCode : create and register a listener.
4. Unregister the listener in dispose method with (unregisterListener) :
|
1 2 3 4 5 |
@override void dispose() { SmsAutoFill().unregisterListener(); super.dispose(); } |
Complete code
Complete code for the implementation
|
1 2 3 4 5 6 7 8 9 10 11 12 13 14 15 16 17 18 19 20 21 22 23 24 25 26 27 28 29 30 31 32 33 34 35 36 37 38 39 40 41 42 43 44 45 46 47 48 49 50 51 52 53 54 55 56 57 58 59 60 61 62 63 64 65 66 67 68 69 70 71 72 73 74 75 76 77 78 79 80 81 82 83 |
import 'package:flutter/material.dart'; import 'package:sms_autofill/sms_autofill.dart'; class VerifyOTPScreen extends StatefulWidget { const VerifyOTPScreen({Key? key}) : super(key: key); @override State<VerifyOTPScreen> createState() => _VerifyOTPScreenState(); } class _VerifyOTPScreenState extends State<VerifyOTPScreen> { String otpCode = ""; @override void initState() { super.initState(); listenOtp(); } void listenOtp() async { var appSignatureID = await SmsAutoFill().getAppSignature; await SmsAutoFill().listenForCode(); print("appSignatureID -- $appSignatureID"); } @override void dispose() { SmsAutoFill().unregisterListener(); super.dispose(); } @override Widget build(BuildContext context) { return Scaffold( appBar: AppBar( title: const Text('Read OTP SMS'), ), body: Padding( padding: const EdgeInsets.all(30.0), child: Column( crossAxisAlignment: CrossAxisAlignment.stretch, children: [ const Text( "Verification Code", textAlign: TextAlign.center, style: TextStyle( fontSize: 28.0, color: Colors.black, fontWeight: FontWeight.bold), ), const SizedBox(height: 60), const Text( "Please enter the OTP sent\non your registered Email ID.", textAlign: TextAlign.center, style: TextStyle( fontSize: 18.0, color: Colors.black, fontWeight: FontWeight.w600), ), const SizedBox(height: 50), Center( child: PinFieldAutoFill( currentCode: otpCode, codeLength: 6, onCodeChanged: (code) { print("on CodeChanged called $code"); otpCode = code.toString(); }, decoration: BoxLooseDecoration( strokeColorBuilder: PinListenColorBuilder(Colors.blue.shade300, Colors.black26), bgColorBuilder: const FixedColorBuilder(Colors.white), strokeWidth: 1, ) ), ), const SizedBox(height: 50), ElevatedButton(onPressed: (){}, child: const Text("Verify OTP")) ], ), ), ); } } |
Output of the example code
Read OTP From sms
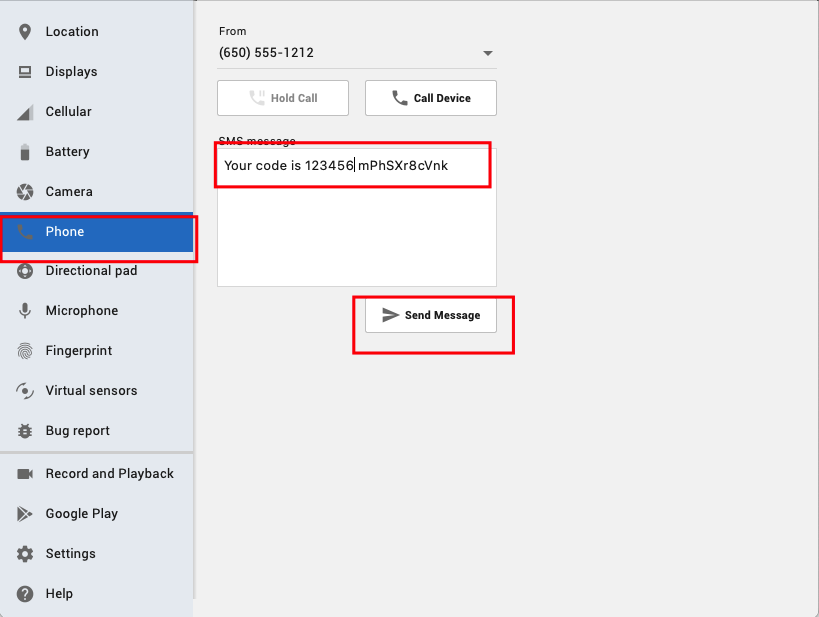
For sending the OTP in emulator you can use the emulator control settings options, choose phone option from left menu and then write your message click on send message button as shown below :
Conclusion
Thanks for reading this article ❤️
I hope this blog will help you to learn about how to read OTP from sms in Flutter and you will be able to implement it.
For more updates, make sure to keep following Mobikul Blogs to learn more about mobile app development.
Happy Learning ✍️
Other blogs you may like…
Firebase phone OTP authentication


Be the first to comment.