In this blog we are going to discuss implementation of Order Tracker Widget in Flutter.

Introduction
Order tracking is a process of monitoring and tracking your orders placed online and delivering real-time order status updates to customer.
Order tracking helps to customers check where exactly there order is and when they should expect it to arrive.
It is helpful to track the order status.
You may also check our Flutter App Development services.
Implementation
We are going to use how to Implement Order Tracker Widget .
For implementation it please follow below steps:
First of all we need to create a new flutter project and add the following dependency in pubspec.yaml file.
|
1 |
order_tracker: ^0.0.2 |
order_tracker:->
It’s dependency to add Order Tracker functionality in flutter.
Add latest version of these dependency in your flutter project.
After that we need to create a StatefulWidget (OrderTrackerDemo) and call from main.dart and import below package on this Widget class.
|
1 |
import 'package:order_tracker/order_tracker.dart'; |
So After importing library and package we need to add following code inside OrderTrackerDemo class.
|
1 2 3 4 5 6 7 8 9 10 11 12 13 14 15 16 17 18 19 20 21 22 23 24 25 26 27 28 29 30 31 32 33 34 35 36 37 38 39 40 41 42 43 44 45 46 |
class OrderTrackerDemo extends StatefulWidget { const OrderTrackerDemo({super.key, required this.title}); final String title; @override State<OrderTrackerDemo> createState() => _OrderTrackerDemoState(); } class _OrderTrackerDemoState extends State<OrderTrackerDemo> { List<TextDto> InitialOrderDataList = [ TextDto("Your order has been placed", ""), ]; List<TextDto> OrderShippedDataList = [ TextDto("Your order has been shipped",""), ]; List<TextDto> OrderOutOfDeliveryDataList = [ TextDto("Your order is out for delivery",""), ]; List<TextDto> OrderDeviveredDataList = [ TextDto("Your order has been delivered",""), ]; @override Widget build(BuildContext context) { return Scaffold( appBar: AppBar( title: Text(widget.title), ), body: Padding( padding: const EdgeInsets.all(30), child:OrderTracker( status: Status.delivered, activeColor: Colors.blue, inActiveColor: Colors.grey[300], orderTitleAndDateList: InitialOrderDataList, shippedTitleAndDateList: OrderShippedDataList, outOfDeliveryTitleAndDateList: OrderOutOfDeliveryDataList, deliveredTitleAndDateList: OrderDeviveredDataList, ), ), ); } } |
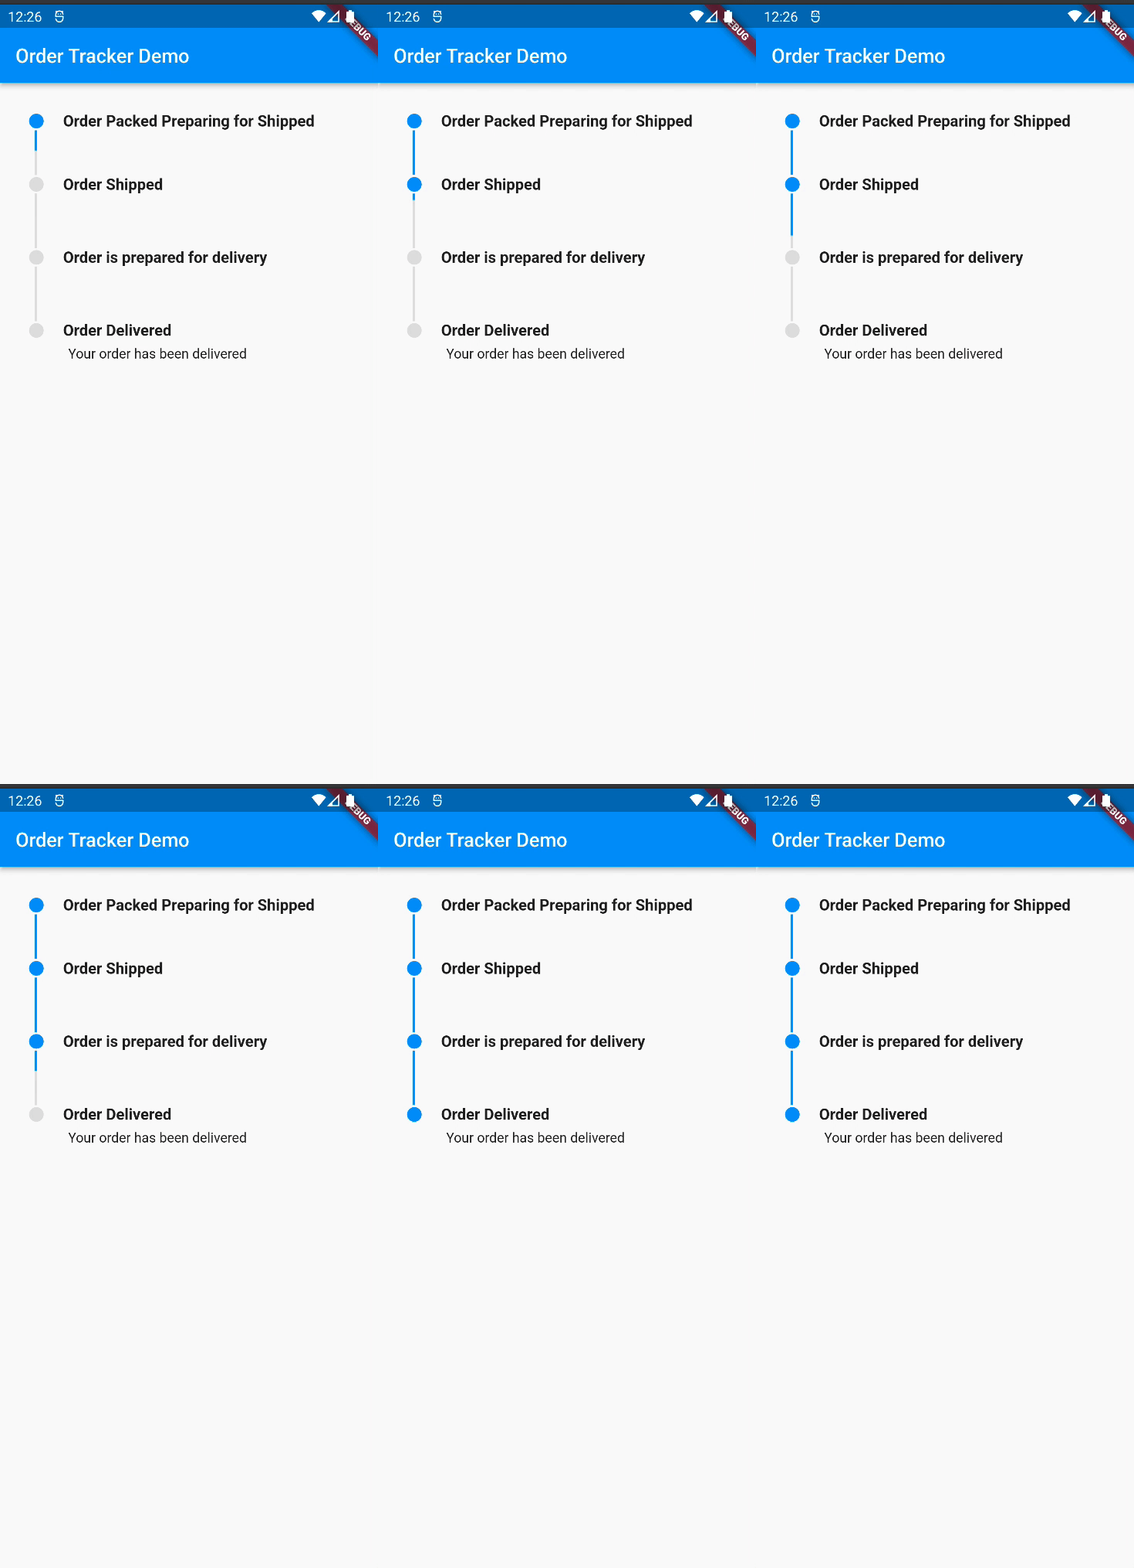
After adding this code in your OrderTrackerDemo class now let’s go to check output of code.
Output

Conclusion
For more knowledge related to order tracker widget you can check here.
In this blog we have discussed about Order Tracker in Flutter and for more deep knowledge about Order Tracker Widget you can check there.
Thanks for reading this blog you can also check other blogs from here for more knowledge.

Be the first to comment.