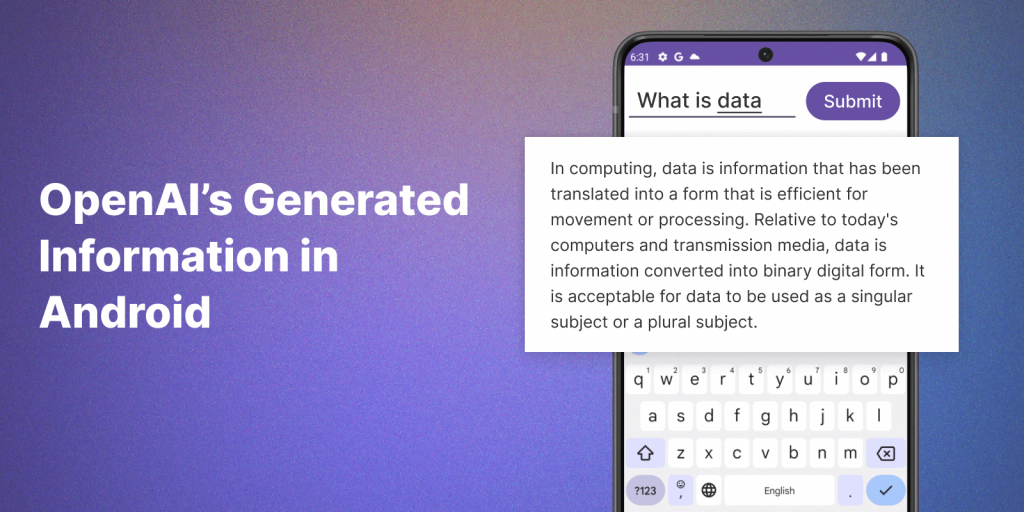
In this blog, we are learning that the ‘Open AI ‘ in Android apps. OpenAI is an AI research and deployment company. OpenAI launches a standalone ChatGPT app for Android to get one too. so we are creating an app with chat GPT API in this blog. OpenAI’s API can be integrated with other platforms, such as mobile apps, websites, or other software. This allows developers to use the powerful AI capabilities provided by the API in conjunction with other technologies to build more advanced apps.
First, we are adding internet permission in the manifest section.
|
1 |
<uses-permission android:name="android.permission.INTERNET"/> |
After adding permission we need to add dependency in the build. gradle.
|
1 2 3 4 5 |
dependencies { implementation 'com.squareup.retrofit2:retrofit:2.9.0' implementation 'com.squareup.retrofit2:converter-gson:2.9.0' implementation 'com.google.code.gson:gson:2.8.8' } |
User interface
Now we are creating a user interface to search our queries and results, we are creating an edit text to enter your query and a button to submit.
|
1 2 3 4 5 6 7 8 9 10 11 12 13 14 15 16 17 18 19 20 21 22 23 24 25 26 27 28 29 30 31 32 33 34 35 36 37 38 39 40 41 42 43 44 45 46 47 48 49 |
<layout> <LinearLayout xmlns:android="http://schemas.android.com/apk/res/android" xmlns:app="http://schemas.android.com/apk/res-auto" xmlns:tools="http://schemas.android.com/tools" android:layout_width="match_parent" android:layout_height="match_parent" android:padding="15dp" android:orientation="vertical" tools:context=".MainActivity"> <LinearLayout android:layout_width="match_parent" android:layout_height="wrap_content" android:orientation="horizontal" android:gravity="center_vertical" tools:ignore="MissingConstraints"> <EditText android:id="@+id/etMessage" android:layout_width="wrap_content" android:layout_weight="8" android:layout_height="wrap_content" android:hint="Please enter Query" android:inputType="textCapSentences" /> <Button android:id="@+id/btnSend" android:layout_weight="2" android:layout_width="wrap_content" android:layout_height="wrap_content" android:text="Submit" /> </LinearLayout> <TextView android:id="@+id/tvResponse" android:layout_width="match_parent" android:layout_height="match_parent" android:text="Out response here !!" app:layout_constraintBottom_toTopOf="@+id/etMessage" app:layout_constraintEnd_toEndOf="parent" app:layout_constraintStart_toStartOf="parent" app:layout_constraintTop_toTopOf="parent" /> </LinearLayout> </layout> |
In the above code, you can see.
We are creating an edit text for enter your search query and a button to submit and hit the API for the result.
Implementation
|
1 2 3 4 5 6 7 8 9 10 11 12 13 14 15 16 17 18 19 20 21 22 23 24 25 26 27 28 29 30 31 32 33 34 35 36 37 38 39 40 41 42 43 44 45 46 47 48 49 50 51 52 53 54 55 56 57 58 59 60 61 62 63 64 65 66 67 68 69 70 71 72 73 74 75 76 77 78 79 80 81 82 |
package com.example.openaidemo import OpenAIApiService import OpenAIRequest import OpenAIResponse import android.os.Bundle import android.util.Log import androidx.appcompat.app.AppCompatActivity import androidx.databinding.DataBindingUtil import com.example.openaidemo.databinding.ActivityMainBinding import retrofit2.Call import retrofit2.Callback import retrofit2.Response import retrofit2.Retrofit import retrofit2.converter.gson.GsonConverterFactory class MainActivity : AppCompatActivity() { lateinit var mContentBind: ActivityMainBinding //sk-xxxxxxxxxxxxxxxxxxxxxxxxxxxxxxx genrated key override fun onCreate(savedInstanceState: Bundle?) { super.onCreate(savedInstanceState) mContentBind = DataBindingUtil.setContentView(this, R.layout.activity_main) setContentView(mContentBind.root) createInstance() } private fun createInstance() { val retrofit = Retrofit.Builder() .baseUrl("https://api.openai.com/") .addConverterFactory(GsonConverterFactory.create()) .build() // Create the service val service = retrofit.create(OpenAIApiService::class.java) // Construct the request val request = OpenAIRequest() request.prompt = mContentBind.etMessage.text.toString() request.max_tokens = 100 mContentBind.btnSend.setOnClickListener { callapi(service, request) } } fun callapi(service: OpenAIApiService, request: OpenAIRequest) { // Make the API call val call: Call<OpenAIResponse?>? = service.getCompletion( "Bearer sk-xxxxxxxxxxxxxxxxxxxxxxxxxxxxxxx", request ) call?.enqueue(object : Callback<OpenAIResponse?> { override fun onResponse( call: Call<OpenAIResponse?>?, response: Response<OpenAIResponse?> ) { if (response.isSuccessful()) { val apiResponse: OpenAIResponse? = response.body() if (apiResponse != null) { val generatedText: String = apiResponse.choices?.get(0) ?: "" mContentBind.tvResponse.text = generatedText Log.d("Data---->", generatedText) } } else { Log.d("Data---->", "Error") } } override fun onFailure(call: Call<OpenAIResponse?>?, t: Throwable?) { // Handle network or request error } }) } } |
Sign up and get API credentials: First, sign up for an OpenAI account and obtain your API credentials. You’ll need the API key to make requests to the OpenAI API.
After getting the API key from the open an account then you need to create a function to call the API then you will pass the search query and API key.
- Add dependencies: In your Android project’s
build.gradlefile, add the necessary dependencies for making HTTP requests and JSON parsing. You can use libraries like Retrofit and Gson:
|
1 2 |
Remember to replace 'Bearer YOUR_API_KEY' with your actual API key obtained from the OpenAI platform. Note: The code provided is a basic example to get you started. You may need to customize it based on your specific requirements and the API endpoints you want to use. |
Conclusion
Congratulations!! 🤩 Now, You have Learned about OpenAI’s API in Android.
For more information about the Open AI API, visit this link.
Thanks for reading this blog. You can also check other blogs from here for more knowledge.
Always be ready for learning 🙂


Be the first to comment.