Opencart Hybrid Mobile App is an app that will convert the website into a simply accessible app. The app is constructed on the most recent hybrid technology on the native instrumentation.
Being an app owners one will simply set up the module from the backend. Thus, during this section, we are going to be discussing the configuration of the app from the admin finish.
Before configuration, the admin will simply install the module as shown below.
Installation
Installation Process –
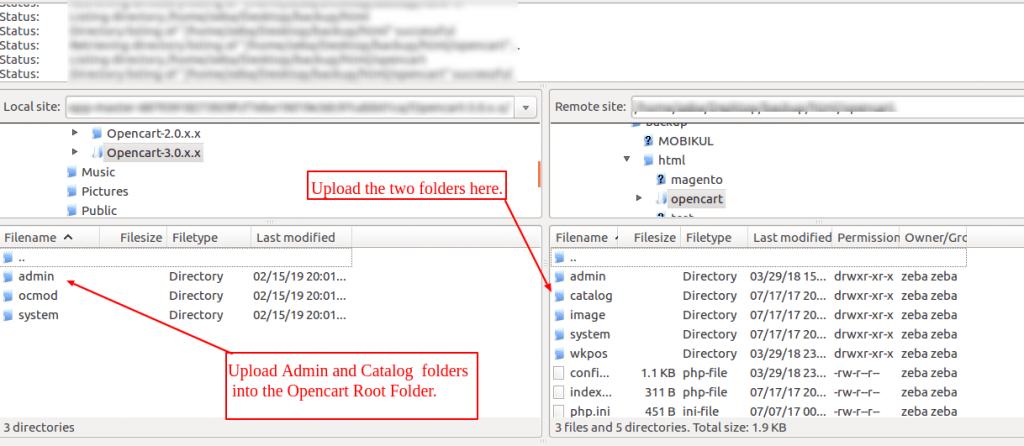
Customers will get a zip folder for installing the module. They will unzip this folder on their system and choose the version according to the Opencart version that you want to install.
So, to install this module version, first, you need to transfer the admin & catalog folders into the Opencart root folder on the server.
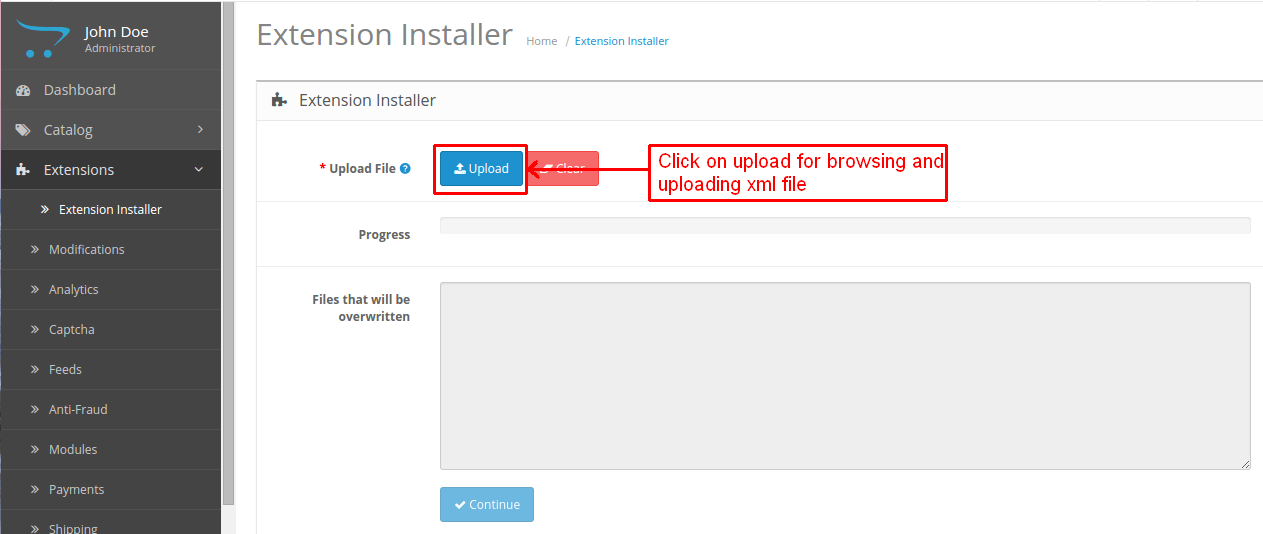
After transferring the folders, use extension installer for uploading the XML files- hybrid-app.ocmod.xml which you will find in ocmod folder.
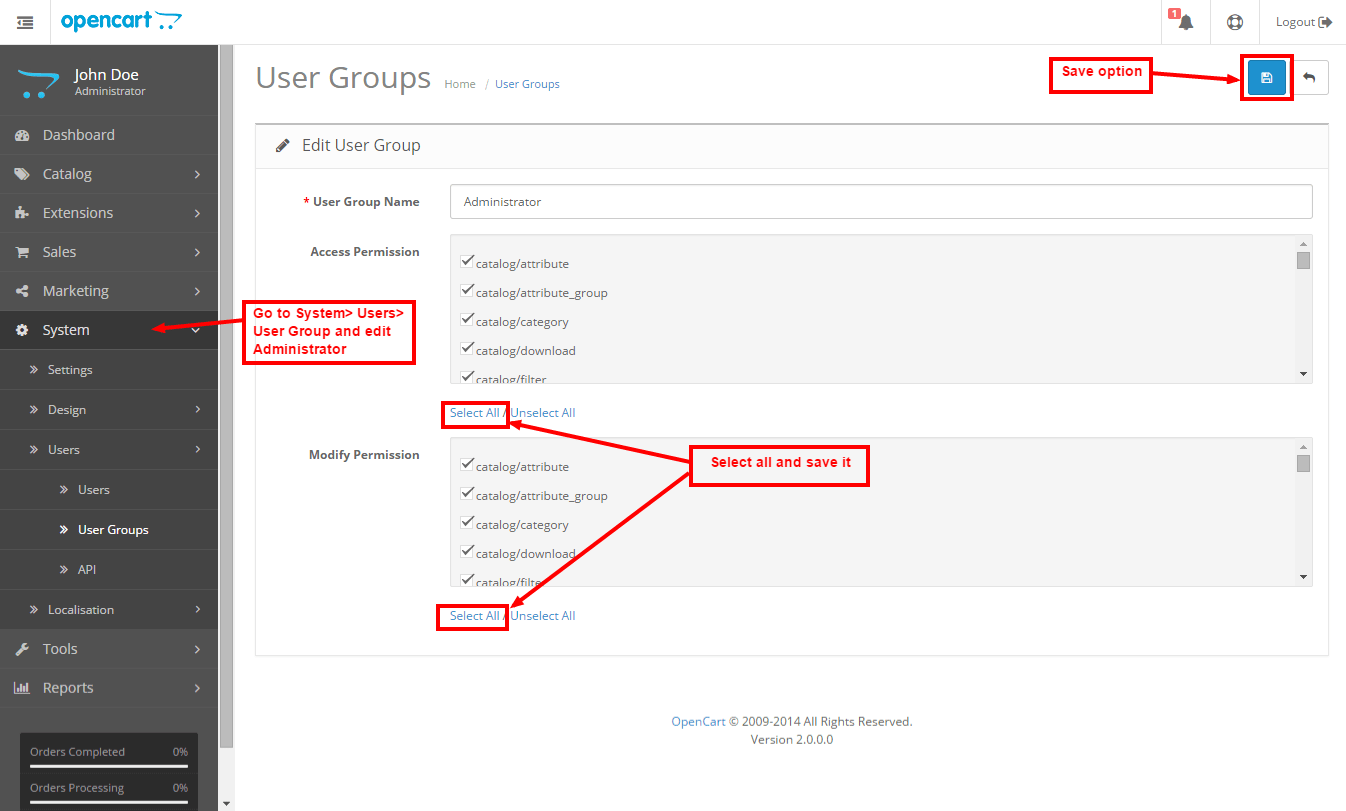
After that in Admin panel go to System -> Users -> Usergroup and edit ‘Administrator’ and choose select all for both Access and Modify Permission and save it.
Admin Configuration
The admin can click on the Edit button to set the configure the module for the hybrid app.
Hybrid Store- The admin can select the name of the store will have the app.
General Settings-
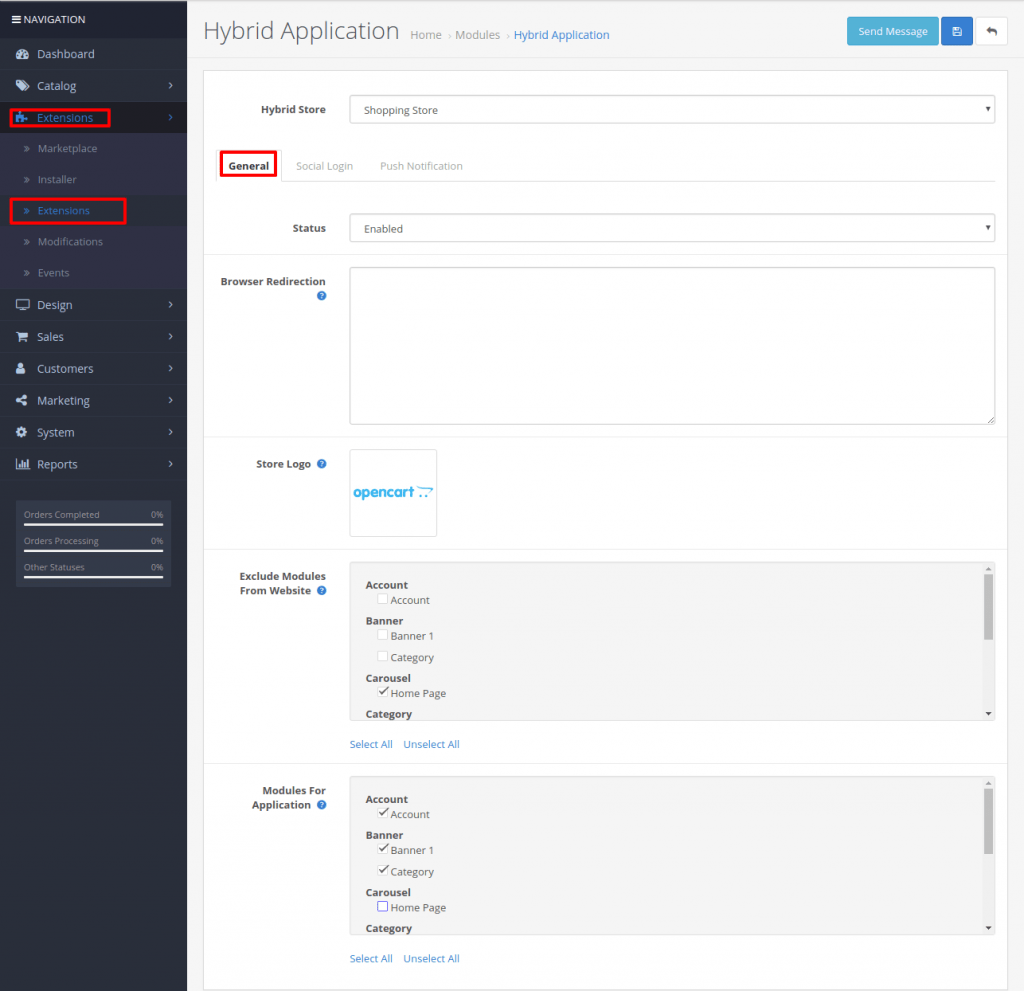
- Status- The admin can set this field as ‘Enable’ to use the app.
- Store Logo- The admin can add the logo of the store. The admin needs to mention the logo if the application logo is different from that of the website.
- Exclude Modules From Website- The admin can select here those apps which are part of the app but must not be a part of the website.
Likewise, if there is a module for WhatsApp chat then it can be part of the mobile app but it has no relevance in the website.
- Modules For Application-The admin can check on those which module that is present in the app irrespective of the website.
Social Login-
This section will have the details which will allow social login via various social media login platforms-

Facebook –
- The admin will set the status Enable to make the Facebook social login live.
- The admin needs to enter the Application Id and Secret key for enabling the Facebook login in the app.
Twitter-
- The admin can Enable the Twitter Login from this section.
- The admin even needs to enter the consumer key and secret key.
Google-
- The admin will set the status Enable to make the Google login live.
- The admin even needs to enter the Client Id and secret key.
LinkedIn-
- The admin will set the status Enable to allow login via LinkedIn.
- The admin even needs to enter the consumer key and secret key.
Thus, allowing a facility to the customer for fast login functionality. This will remove the requirement of remembering any extra login details.
Push Notifications-
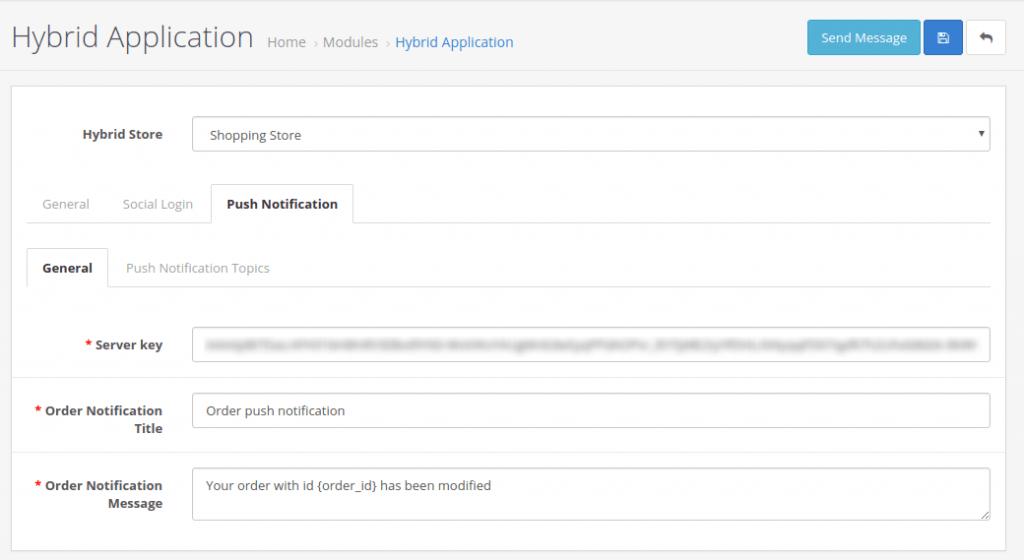
- Server Key- The Firebase server key needs to be entered here, for sharing of push notifications.
- Order Notification Title- In case of Order the customer will receive a notification for which the admin will mention the title here.
- Order Notification Message- The admin will mention here the message for the placed order.
Push Notification Topics-
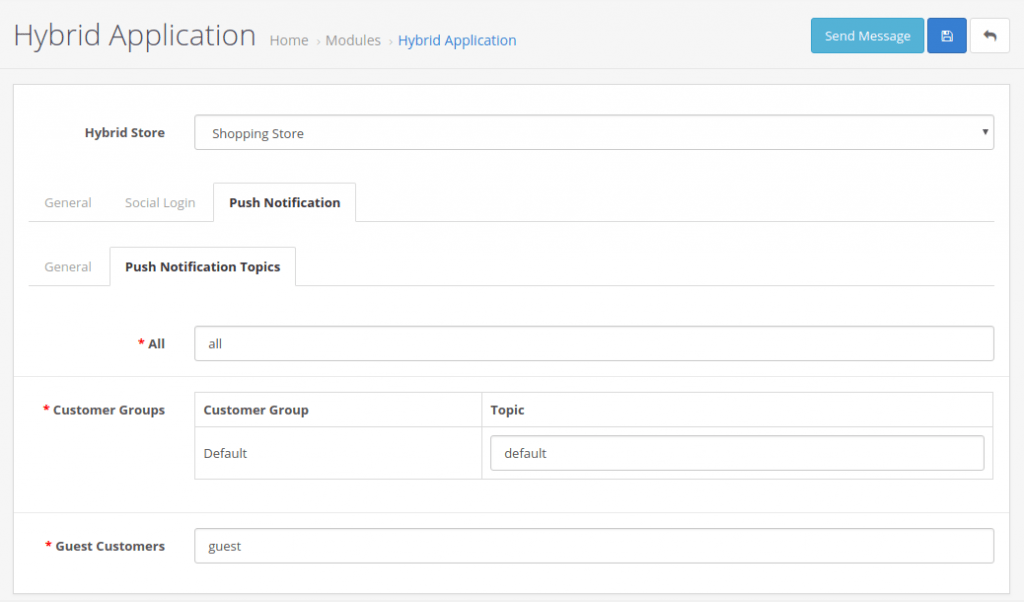
- All- The admin will mention here the notification topics that will be sent to all the customer on the store.
- Customer Group-The admin will mention here the notification topic as per the customer group.
- Guest customer- The admin will mention the notification topics which will be sent to the Guest Customer.
However, here the customer can share the notification by clicking on- Send Message.
The admin can fill in the Push Notification details to create a notification whoch could be shared with the customer.
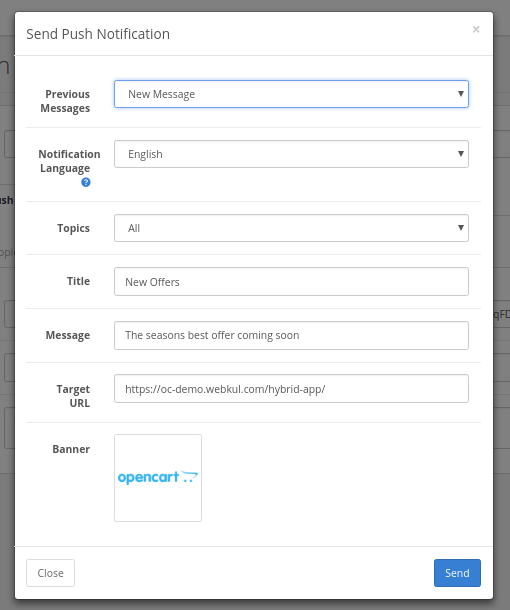
- Previous Message– This will allow the admin to share the same message as in some previous message.
- Notification Language– The language in which the admin wishes to share the notification. This will increase the interest of the customer.
- Topics– The admin can select the customer with whom the notification could be shared.
- Title– The complete title of the notification concern to the notification.
- Message– The complete detail of the notification in the form of the message.
- Banner– The banner that is having the information about the notification.
Finally, the admin can click on send to share the notification with the customer.
Thus, the admin can enter these configure the app to make the store usable.
That’s all, still, have any issue feel free to add a ticket here – webkul.uvdesk.com and let us know your views to make the app better.
Be the first to comment.