If you have a Mobikul PrestaShop Application working on Mobikul Web Module V3 then you can add many functionalities in your application through your admin panel. So here we will cover all the extra functionalities provided by Mobikul back-end module.
Configuration
Configuration helps you to configure all the other functionalities in the application. It is further subdivided into various parts:
App Configuration
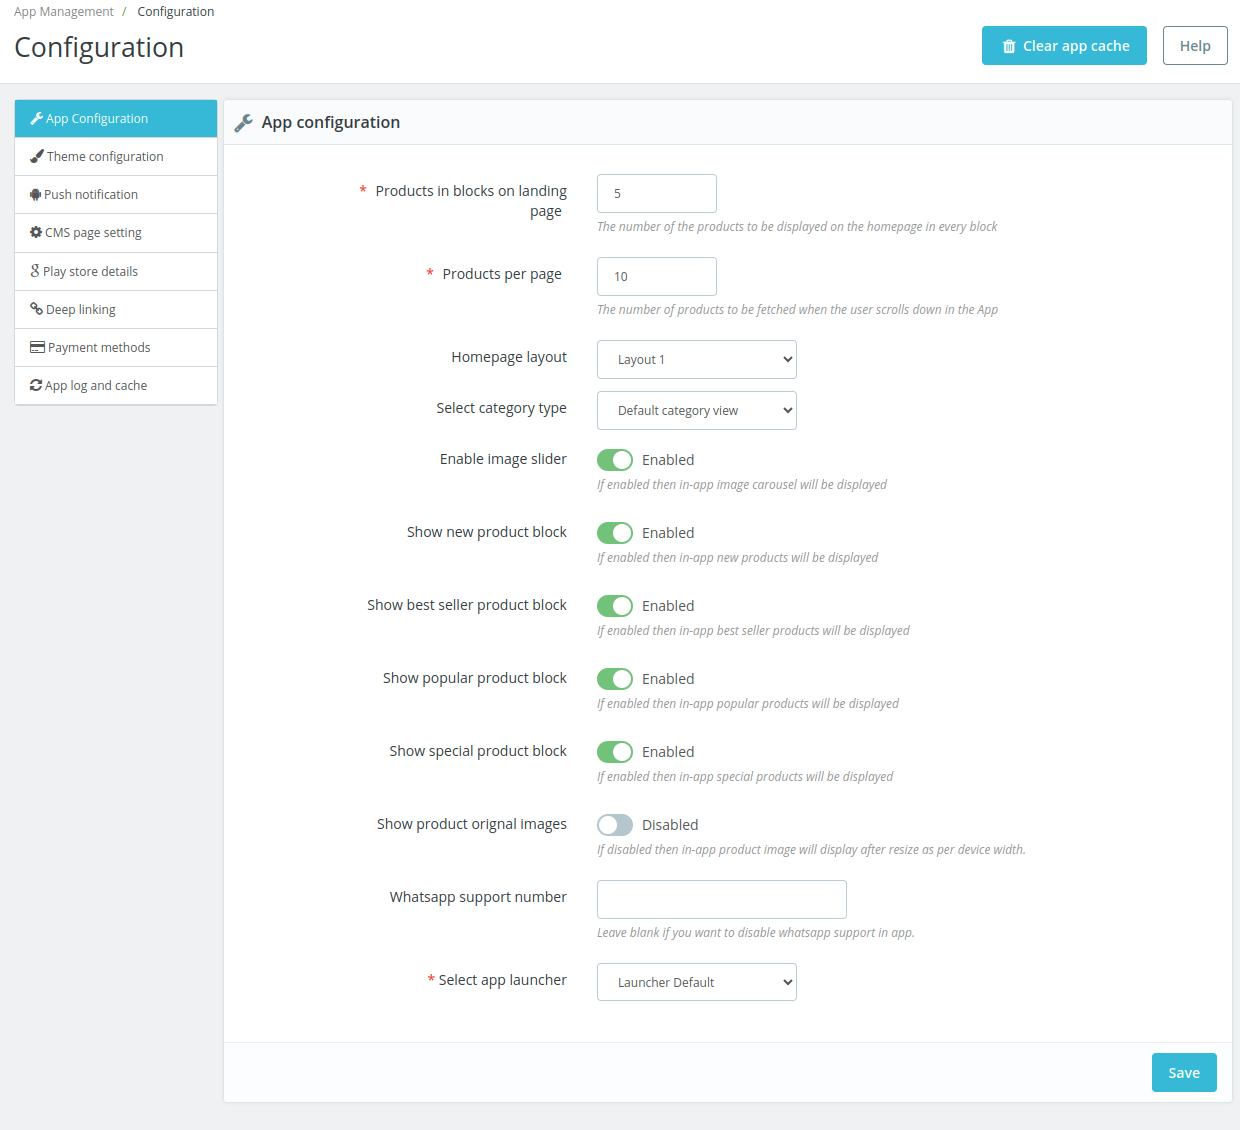
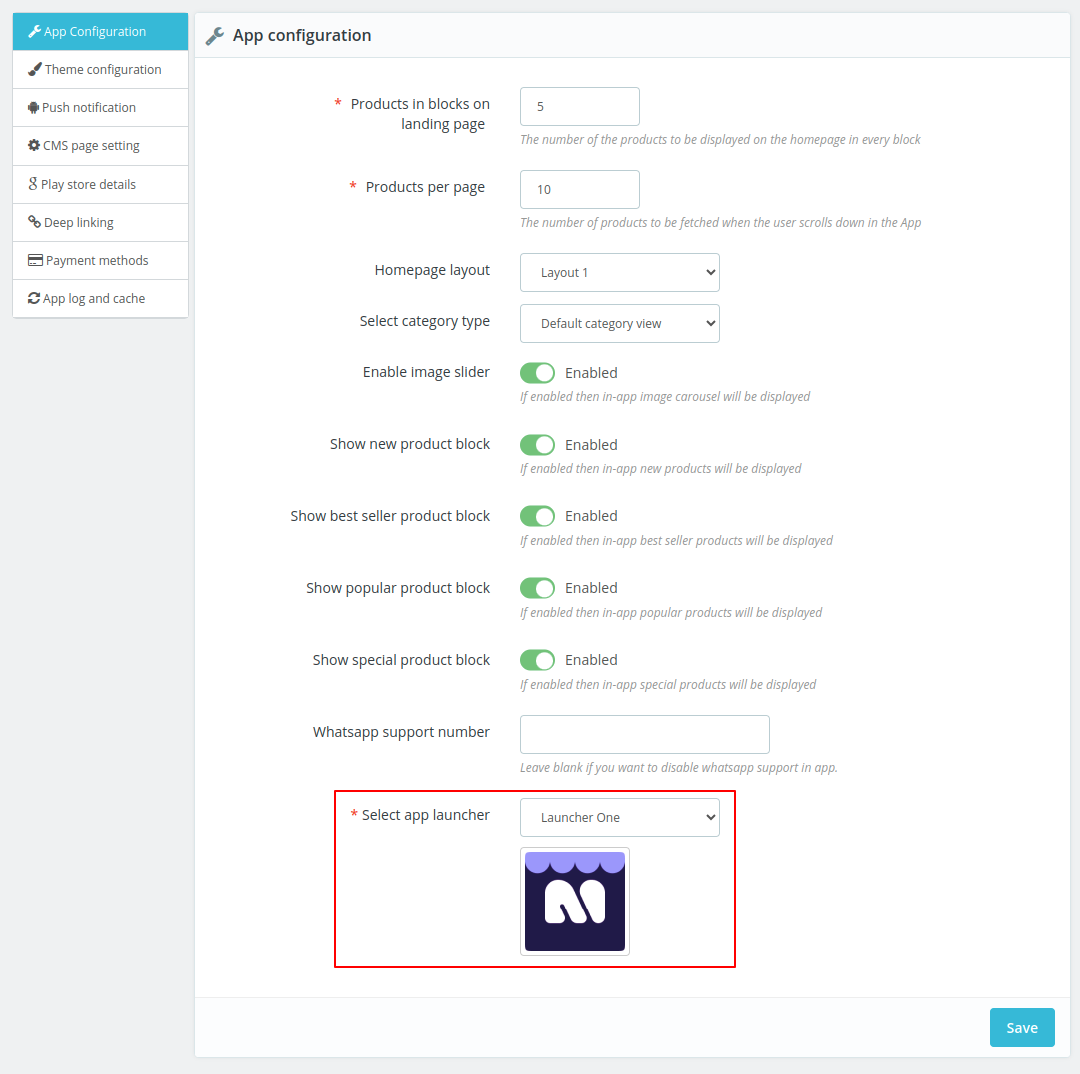
Products in blocks on landing page: Enter the number of products to display on the home page in each block.
Products per page: Set the number of products to be fetched when the user scrolls down in the app.
Homepage layout: Select the layout for homepage.
Select category type: Select the view in which you want to display categories in app. You can select default category view or tab category view.
Enable image slider: If enabled, then an image carousel will appear within the app.
Show new product block: The app will display new products if enabled.
Show best seller product block: App best-seller products will display if this setting is enabled.
Popular product block: Popular app products will display if enabled.
Show special product block: If enabled, the app’s special products will display.
Show product original images: If enabled, then product images will not be resized and display as it is irrespective of device width. And, if disabled, then in-app product image will display after resize as per device width.
WhatsApp support number: If number is filled in this field, then WhatsApp icon will display in the app. Customers can click on this icon and chat with admin.
Select app launcher: When app launches, the selected app launcher will display.
Theme Configuration
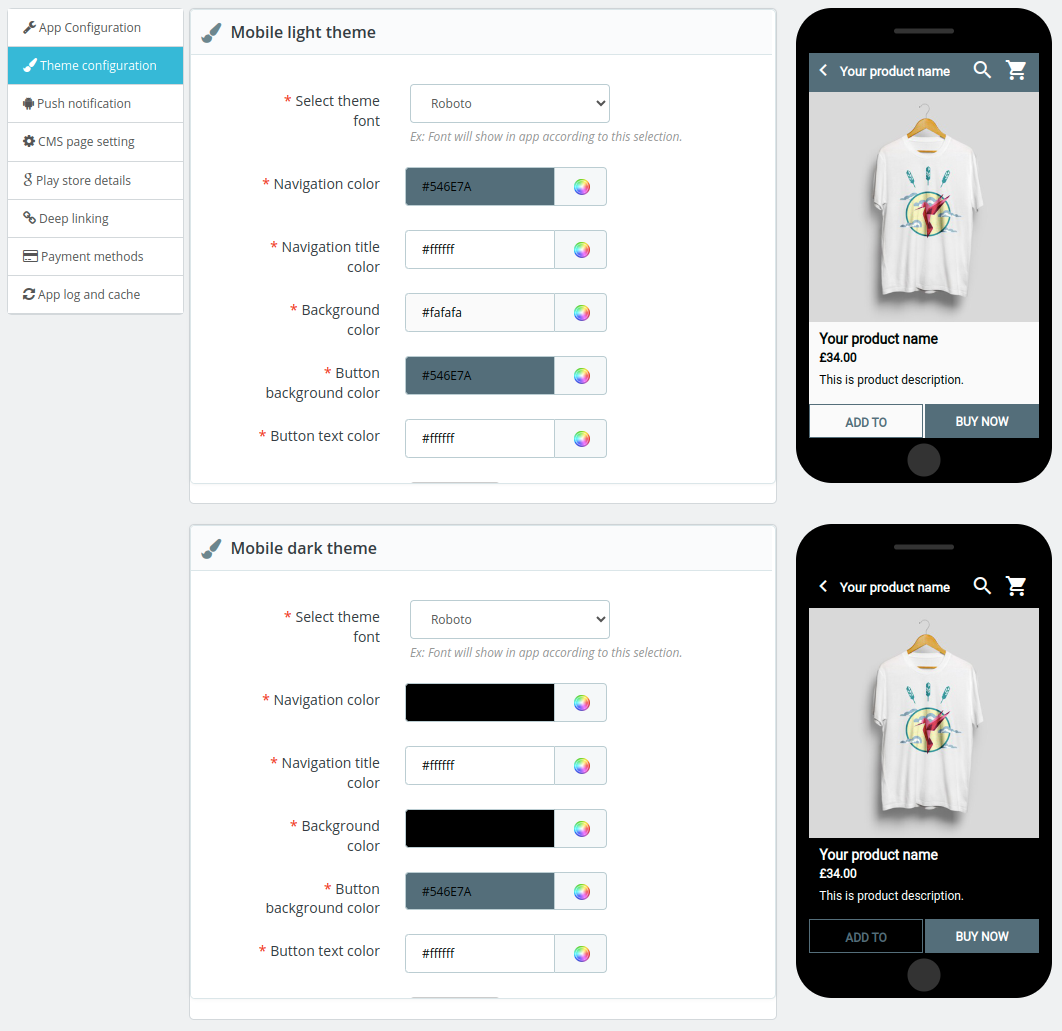
Mobile light theme
You can change your application theme dynamically. The next time the user launches your app it will be in the theme you choose from the back-end.
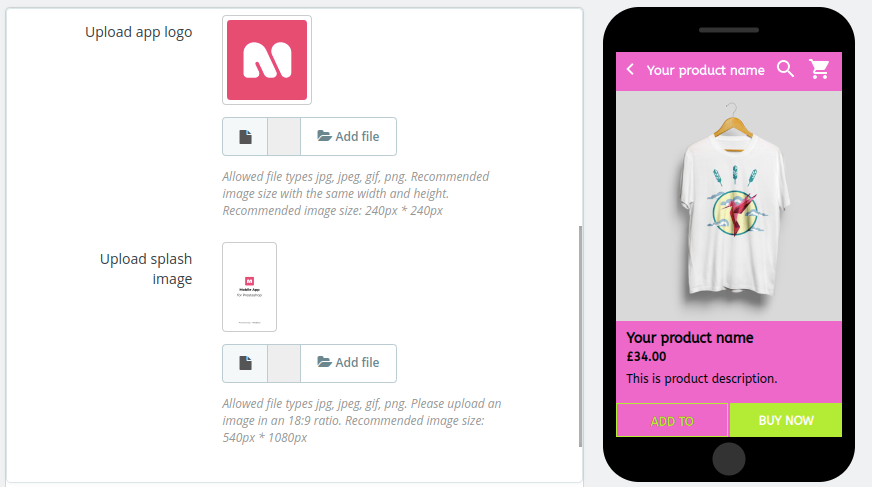
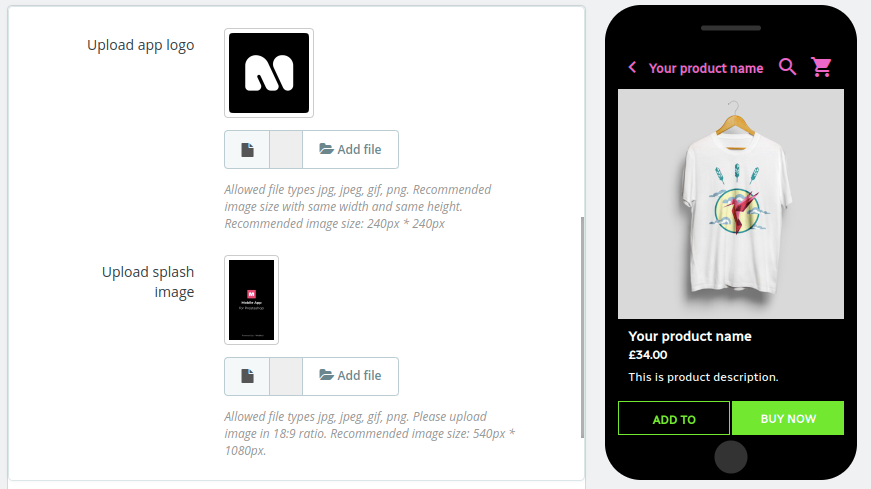
The admin can customize the theme by setting theme font, navigation color, navigation title color, background color, button background color, button text color, uploading logo, and splash image.
While making the changes, the admin can preview them on the page and does not have to necessarily view the app everytime he make changes to the theme.
Mobile dark theme
Most of the UI’s dark surfaces are displayed when using the dark theme. You can change your application theme dynamically. The next time the user launches your app it will be in the theme you choose from the back-end.
The admin can customize the theme by setting theme font, navigation color, navigation title color, background color, button background color, button text color, uploading logo, and splash image.
Push notification
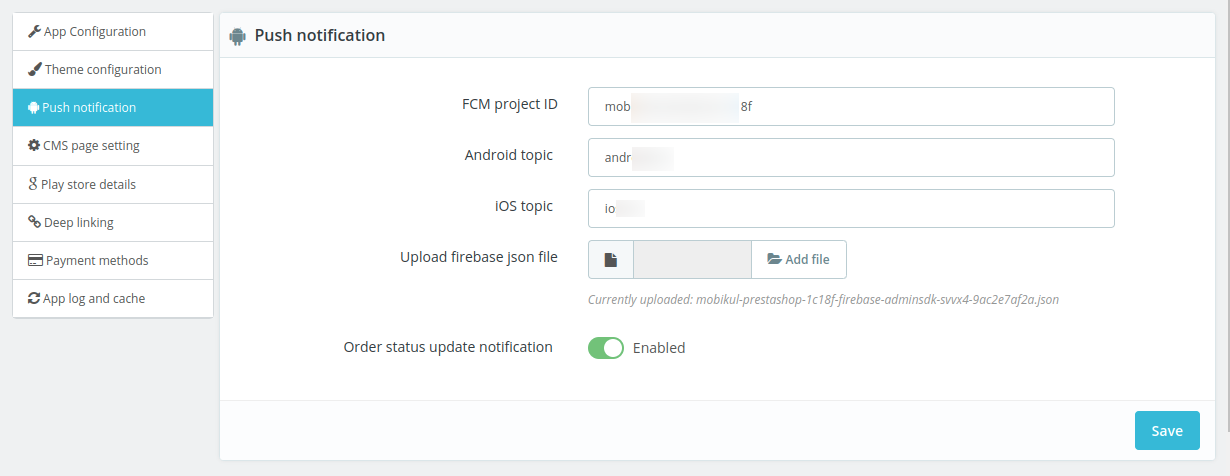
In this section, you have to enter FCM project ID and upload firebase json file. Enter topic name for Android and iOS to send notifications to respective devices. Enable the setting to send order status update notification to customers.
How to Get FCM Project ID
Firstly, the admin needs to create a Firebase project.
For this, visit firebase console site and log in with your Google account.
Now, click on ‘Get started with a Firebase project’.

Enter project name and accept the Firebase terms of service. Click on continue button.

If you want Google Analytics for your project, enable it during the setup process. Click on “Continue” button to proceed.

Choose your Google Analytics location, accept the terms and conditions, and click on “Create project.”

Once the project is created, you’ll see a confirmation screen. Click on “Continue” to proceed to your project’s dashboard.

In the Firebase Console, select the project you just created.

On the Firebase project dashboard, click on the “Android” or “iOS” icon to configure Firebase for your app.

Now, Register Your App.
For Android: Enter your Android app package name (e.g., com.example.appname).
For iOS: Enter your iOS app’s Bundle ID.
Give your app a nickname for easier identification and click on “Register app”.

After registering your app, download the google-services.json file.
For iOS, download GoogleService-Info.plist.
Add this file to your project:
- For Android: Place
google-services.jsonin theandroid/appdirectory. - For iOS: Place
GoogleService-Info.plistin your Xcode project.

Set Up Firebase in Your App:
Follow the instructions on the Firebase Console to integrate the Firebase SDK into your Flutter app.
Ensure the firebase_core and firebase_messaging dependencies are added to your pubspec.yaml file.

Once the Firebase SDK is integrated, click on “Next” in the Firebase Console to complete the setup.

Click on “Continue to the console” to go back to your project overview.

In the Firebase Console, go to the “Project Overview” and then select “Project settings.”

Now, Go to the “Service accounts” tab. Click on “Generate new private key” to download the service account JSON file.

This JSON file contains the necessary credentials to configure server-side modules (e.g., Firebase Admin SDK) to send notifications or manage other Firebase services.
CMS page setting
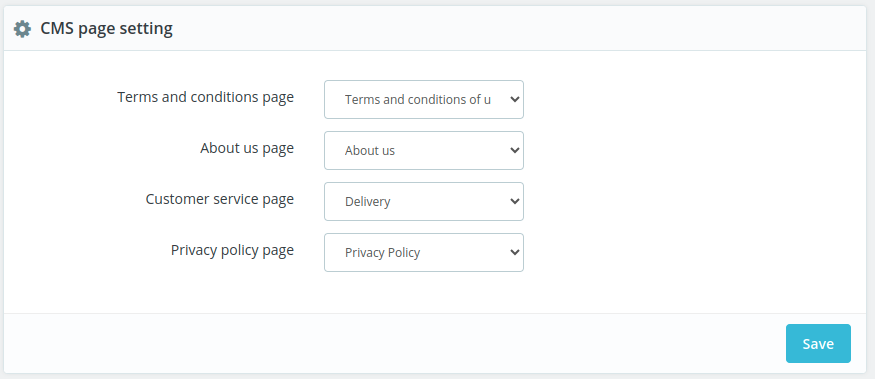
Enable the pages you want to add to the application. Once enabled, these pages will show in the left drawer of the Application under the “More” tag.
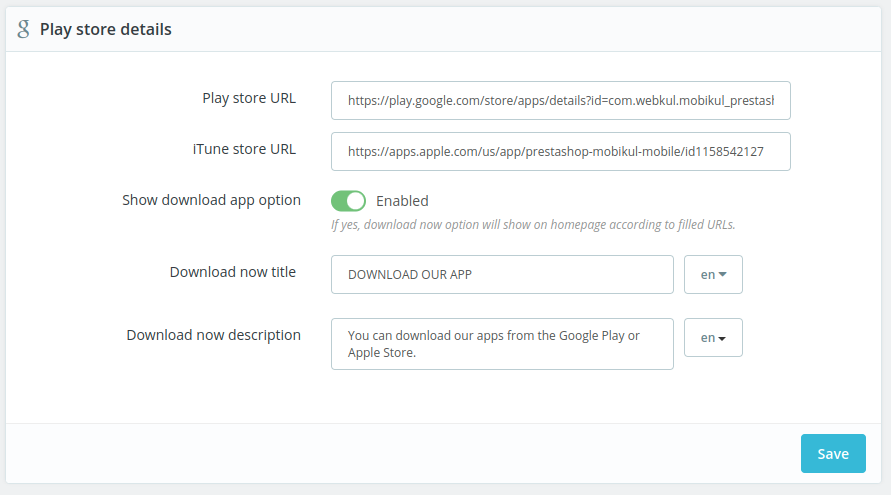
Play store details
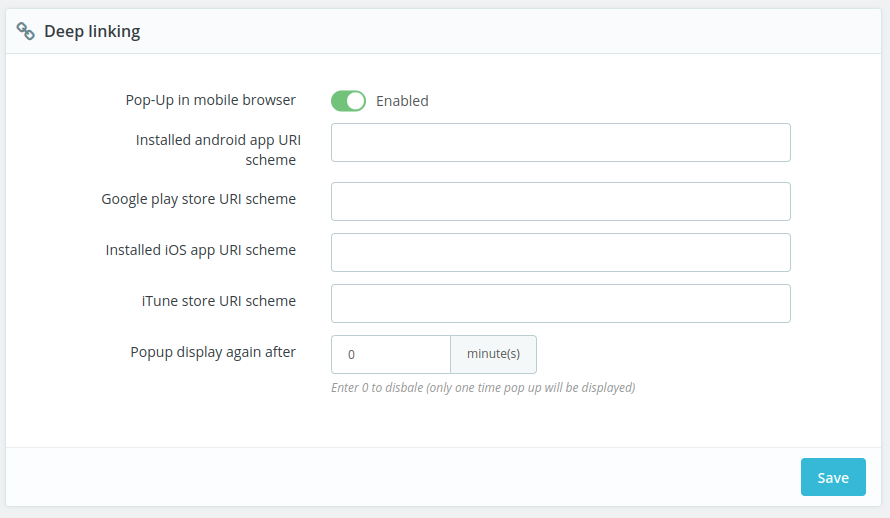
Under this tab, the admin needs to specify the Google Play and ITUNE store URLS. Icons will display for Google Play and App store in the front end. Customers will be redirected to the respective store by clicking on the link and install the app.
Also, the admin can set custom text for ‘download now title’ and download now description’ that will display in the front.
Front end view

Deep linking
A pop-up window asking the user to open the page in the app appears in the mobile browser. Afterward, the admin can add the following details.
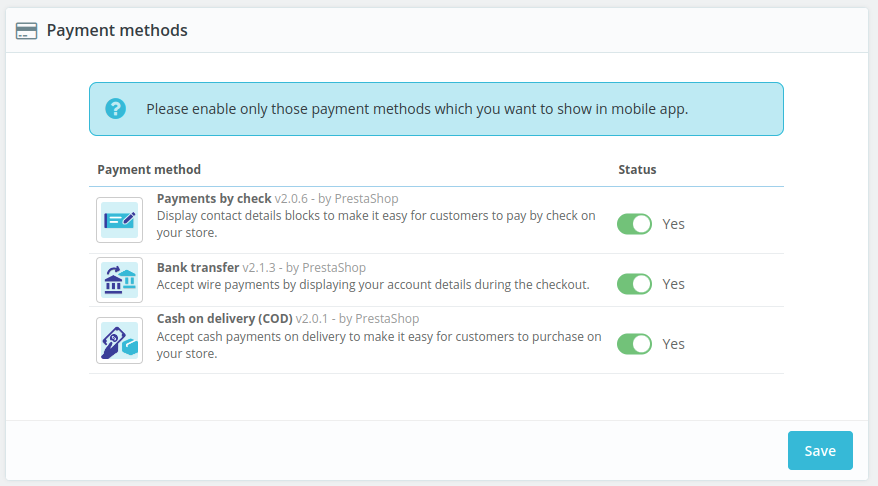
Payment methods
Under this tab, the admin can enable the payment methods which he wants to show in the app.
App log and cache
API access log – Enable this field to log all POST/PUT/GET operations. Enable app cache – Enable this to manage the app response using cache. Clear app cache instantly – If enabled, then the app cache will clear instantly when any modifications are done in the objects selected in “Select backoffice object(s)” field. Select backoffice object(s) – App cache will clear instantly when modifications are done in the selected objects from the back office.

Banners
The admin can configure banners from this section. In this way, the admin can configure data like an image, sorting order, or a category or product link for the banner. Now, the app owner can manage the banner images by adding, editing, and deleting banner images.
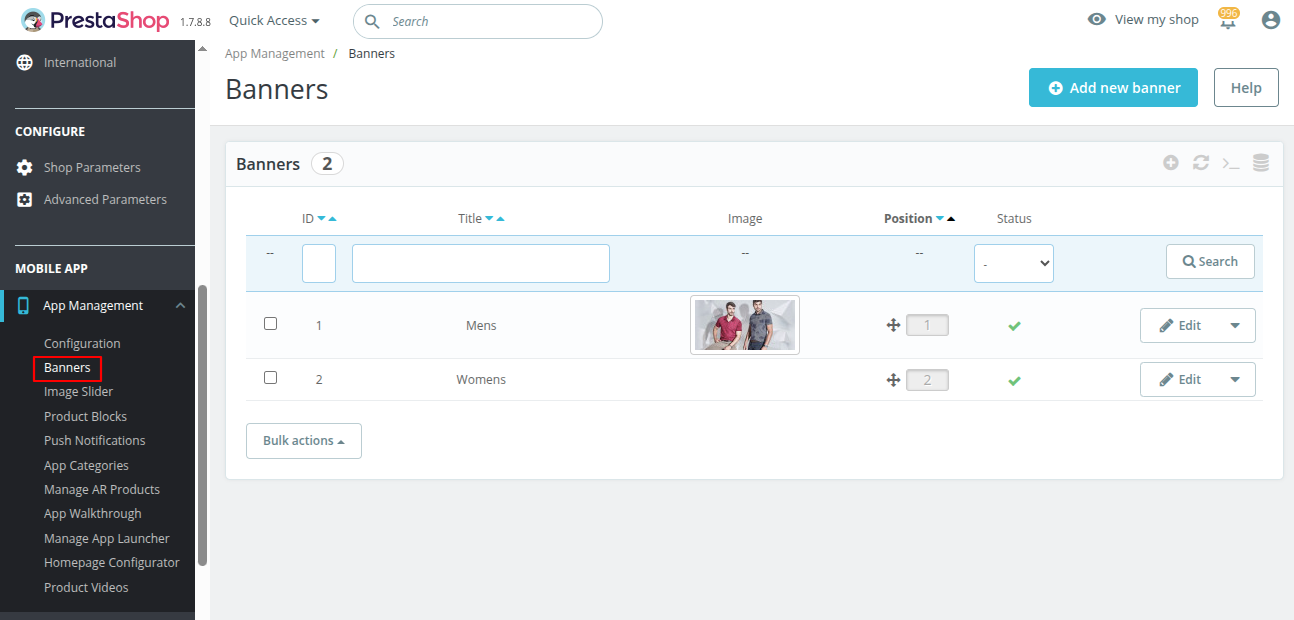
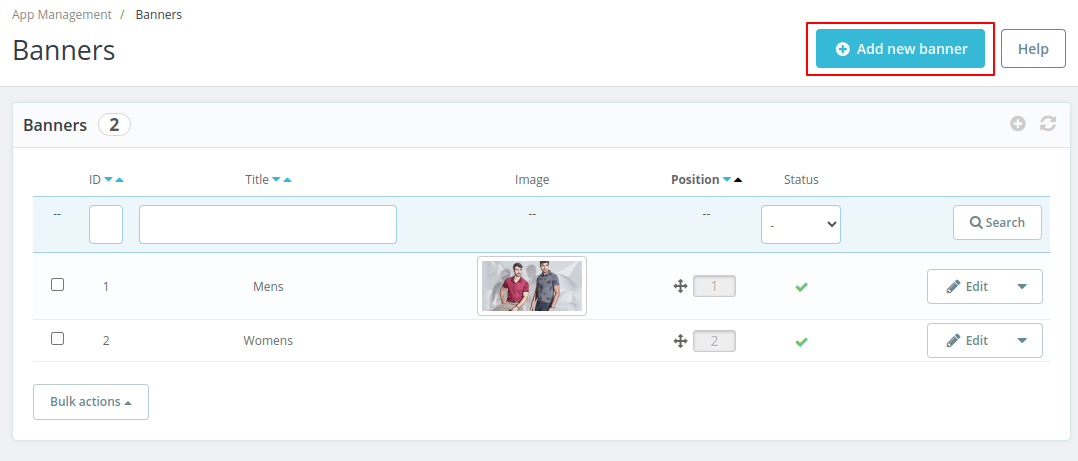
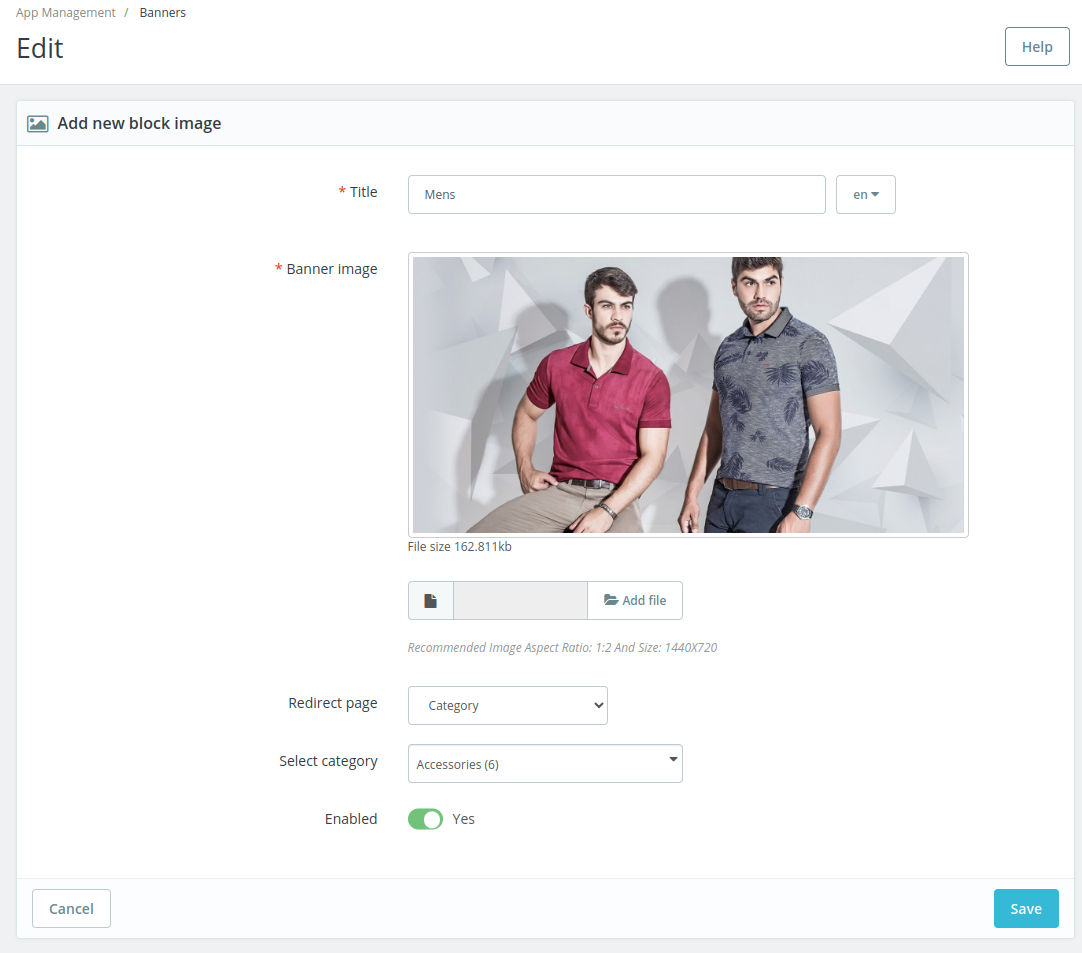
Add new banner
For adding a banner image, click on the “Add new banner” button. By setting up the banner information, you can customize the banner image to meet your needs.
Click on the Edit option to edit the banner image as per your requirement.
Title: Here you need to enter the title of the banner image. Banner Image: Here the user needs to upload the banner image. Redirect Page: The admin can designate a category or product in this section to specify the type of banner to be displayed. Enabled: From here the user can enable or disable the banner image.
Delete Banner Image
For deleting the banner image the admin needs to click on the Delete option as per the below screenshot.
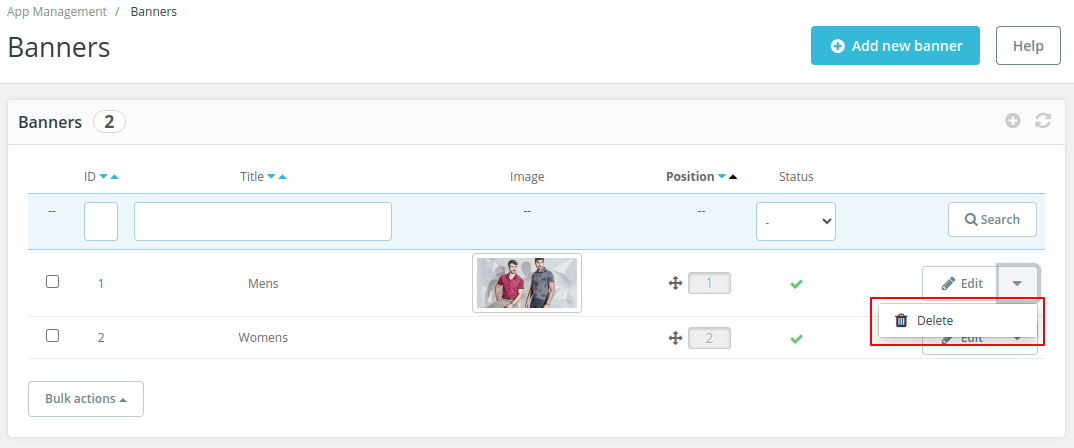
Image Slider
The admin can add or edit an image slider under this section.
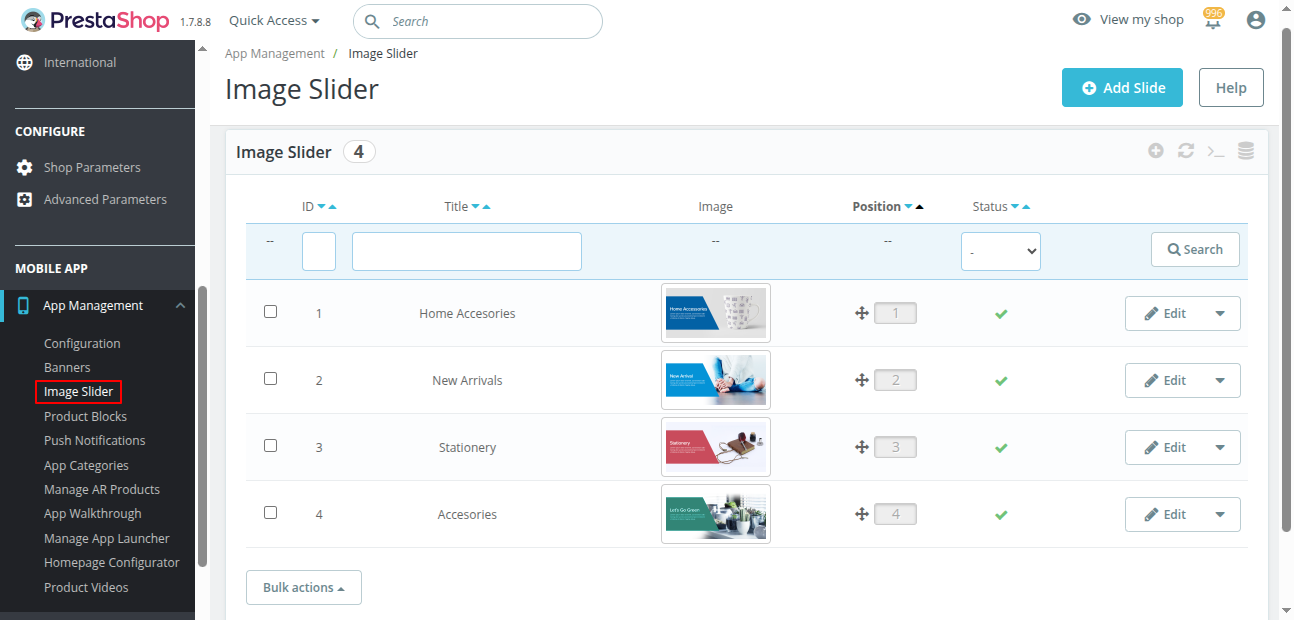
Click on “Add Slide” button to add a new image in the slider. However, the admin can select the edit option and make changes by entering the following details and clicking on the save button.

Product Blocks
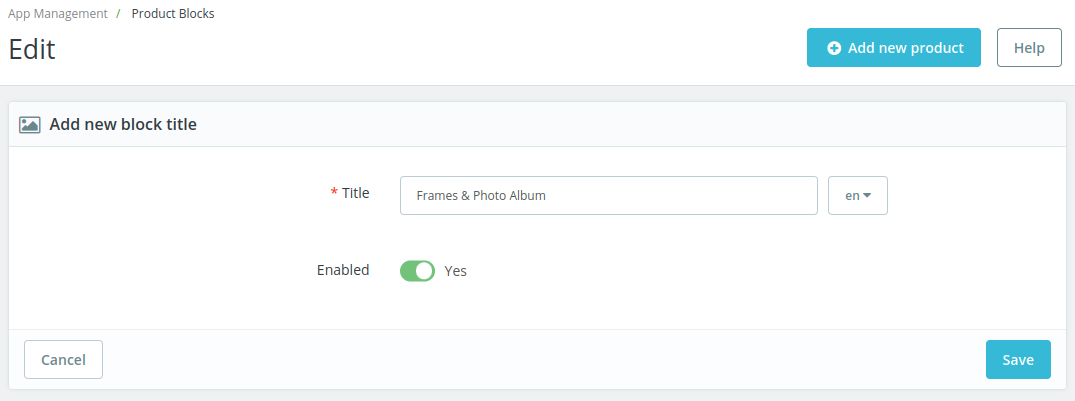
These are just like PrestaShop default product blocks e.g New Products, BestSellers, etc. You can create a new block with any title and then add products to that block.

Adding Block: Add a block with the desired names like Frames & Photo Album.
Add Product: Now add the product by selecting the Block in which you want to add the product. To add products to the block the admin needs to click on “Add new product” button.
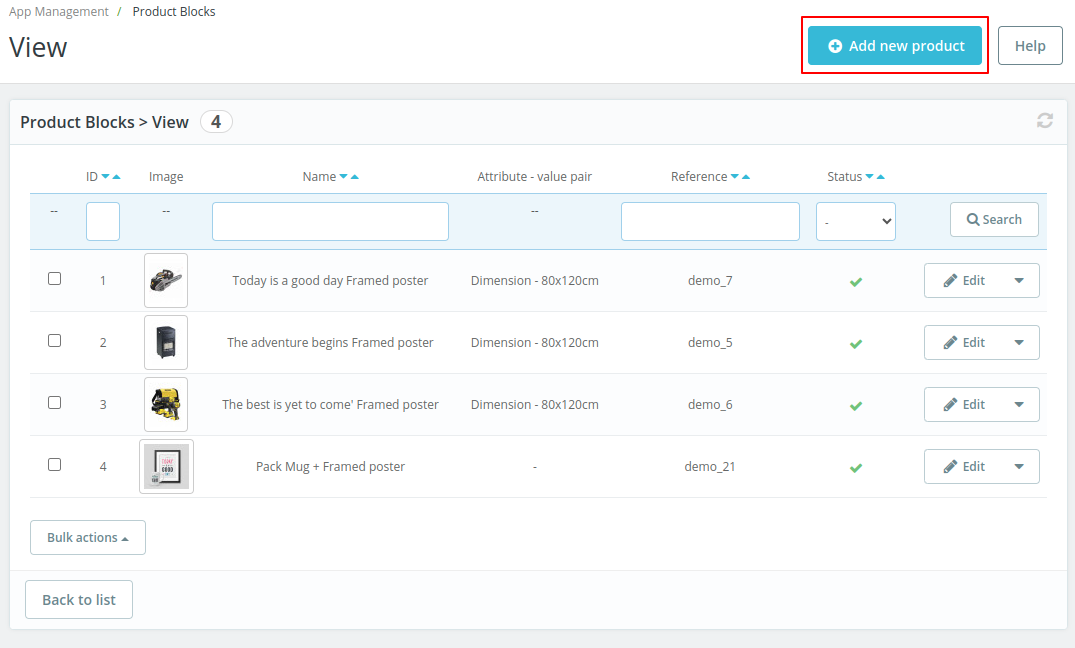
Select Block: Here the admin needs to select the block name in which he wants to add products. Product: The admin can search the products by the product name and add the searched products to the list. Afterward, the admin needs to click on the save button.

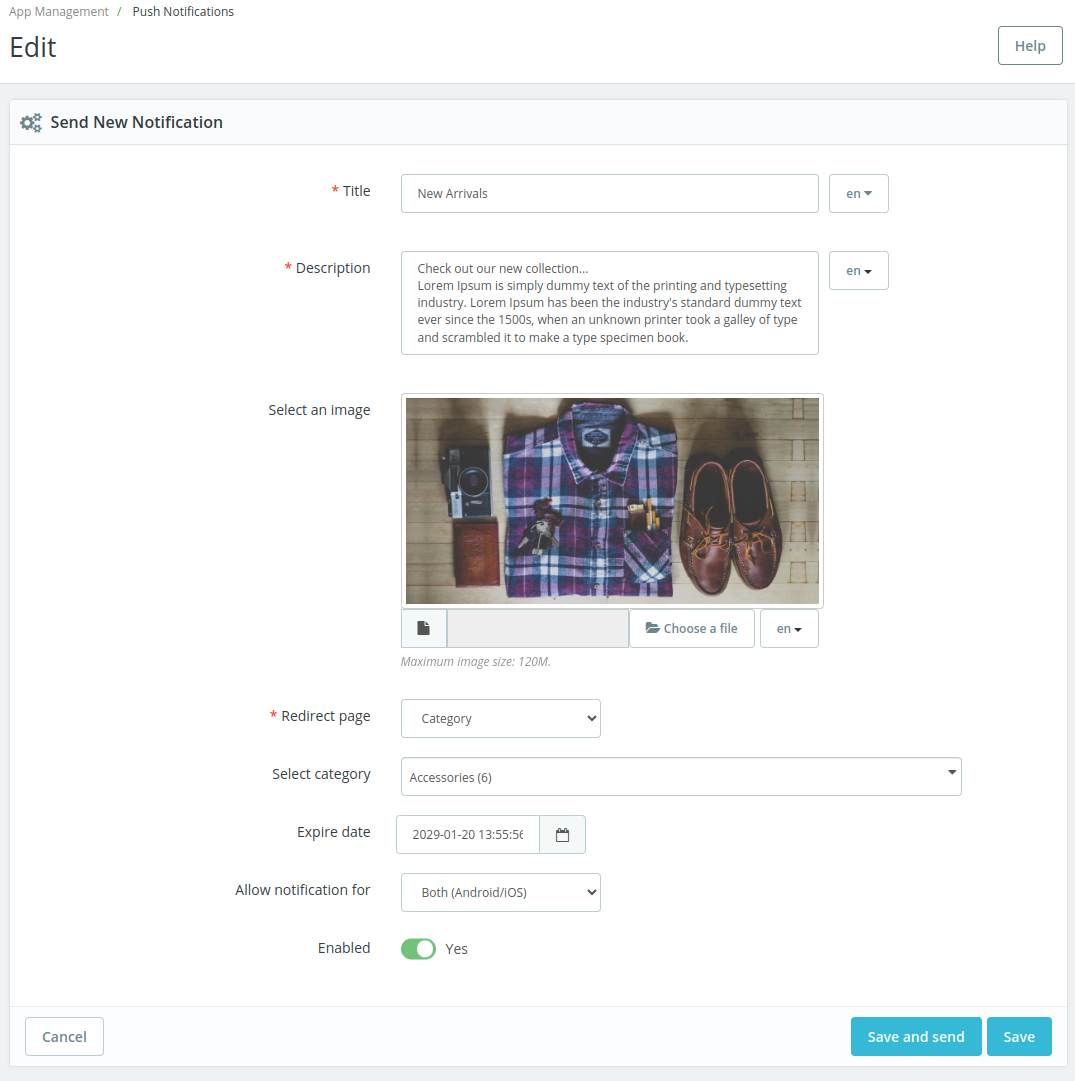
Push Notifications
From this part of the panel, you can send Push notifications to all the application users. Just Create a new Notification and add the desired action like Product Page or Category Page, then select a particular product or category and send it to everyone.
Also please make sure that the expiry date is a valid future date and the status of the notification is active.

Allow notification for: In this field, the admin can choose whether he wants to send notifcation on android, iOS, or both the devices.
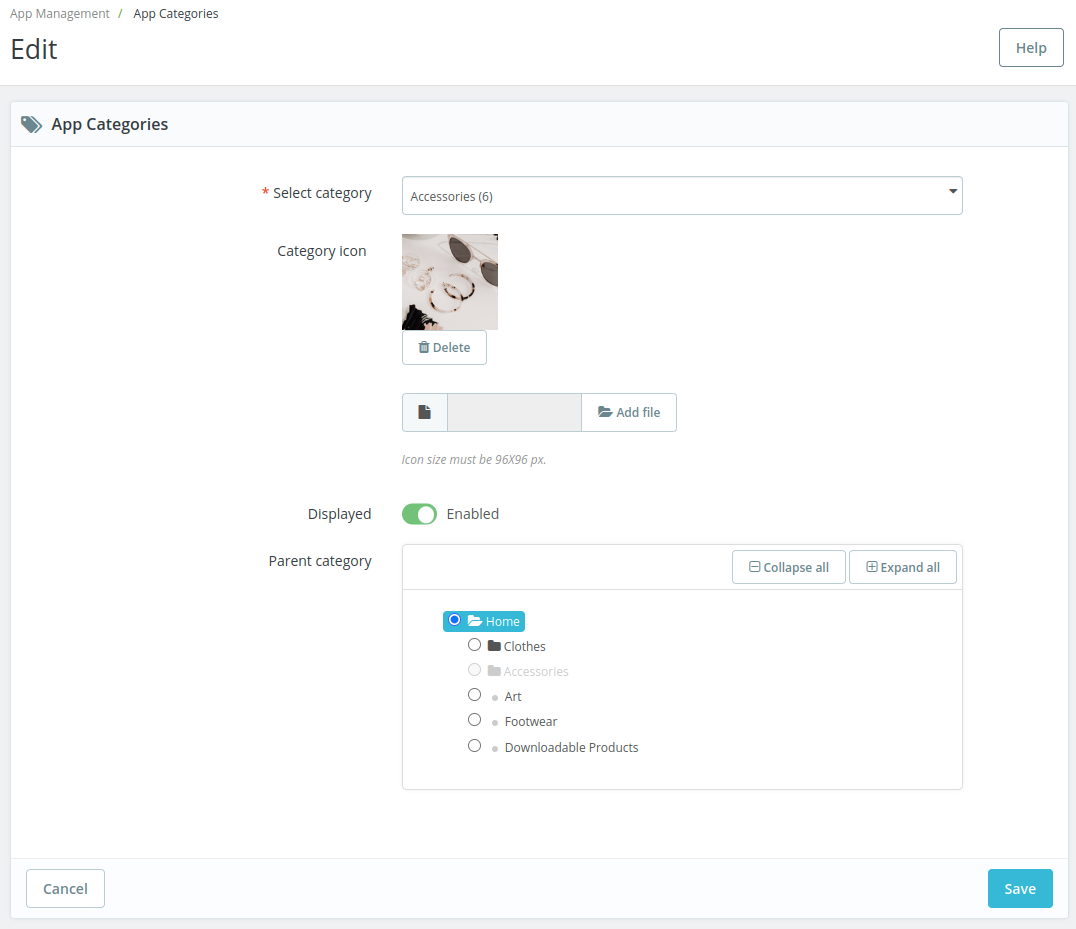
App Categories
In App Categories, the admin can select all the categories as well as subcategories that he wants to add to the application. The admin can see the list of all the categories as well as add new categories by clicking on the Add new category button.

Afterwards, the admin needs to enter the following details and select categories and sub-categories.
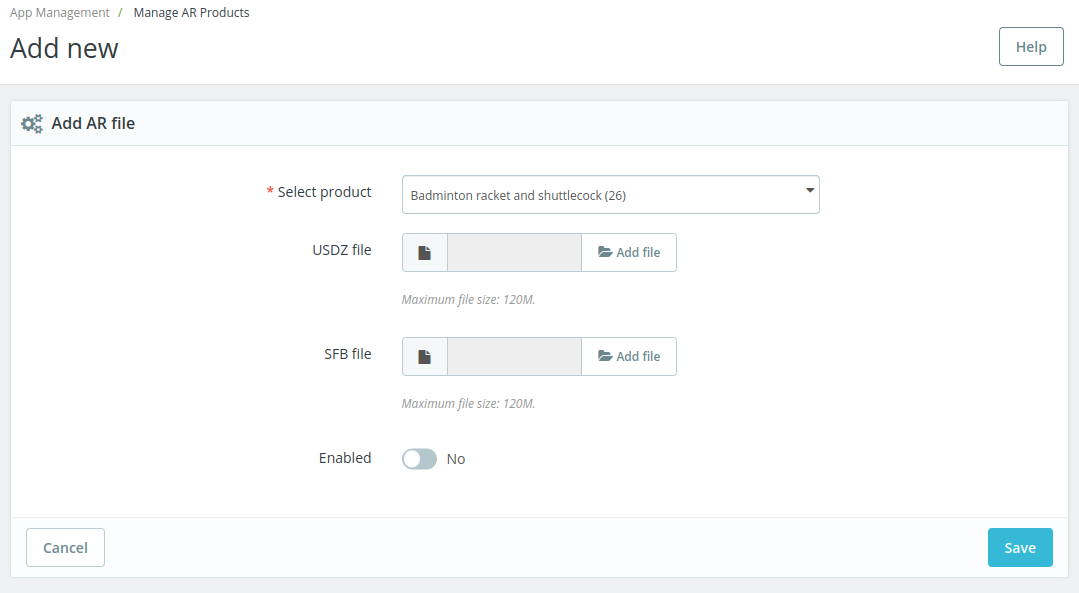
Manage AR Products
With the help of augmented reality (AR) technology, you can more clearly display all of the product’s images as well as give customers a more accurate impression. By selecting Add AR File, the admin can manage AR products.
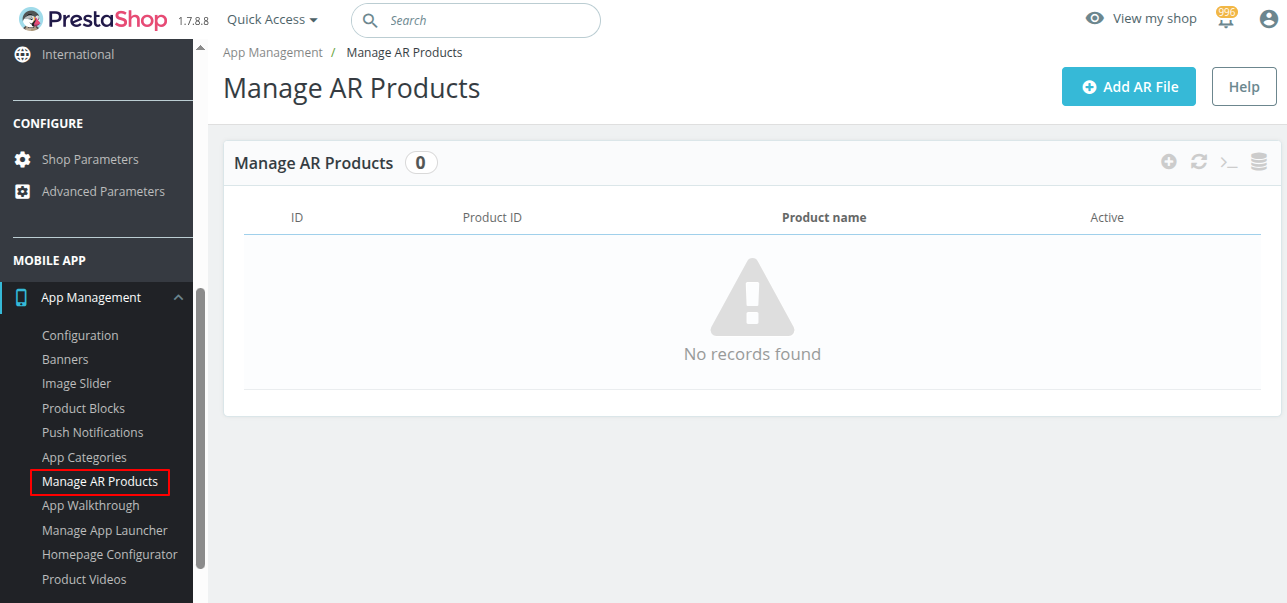
Afterward, the admin needs to select the product and upload USDZ and SFB files.
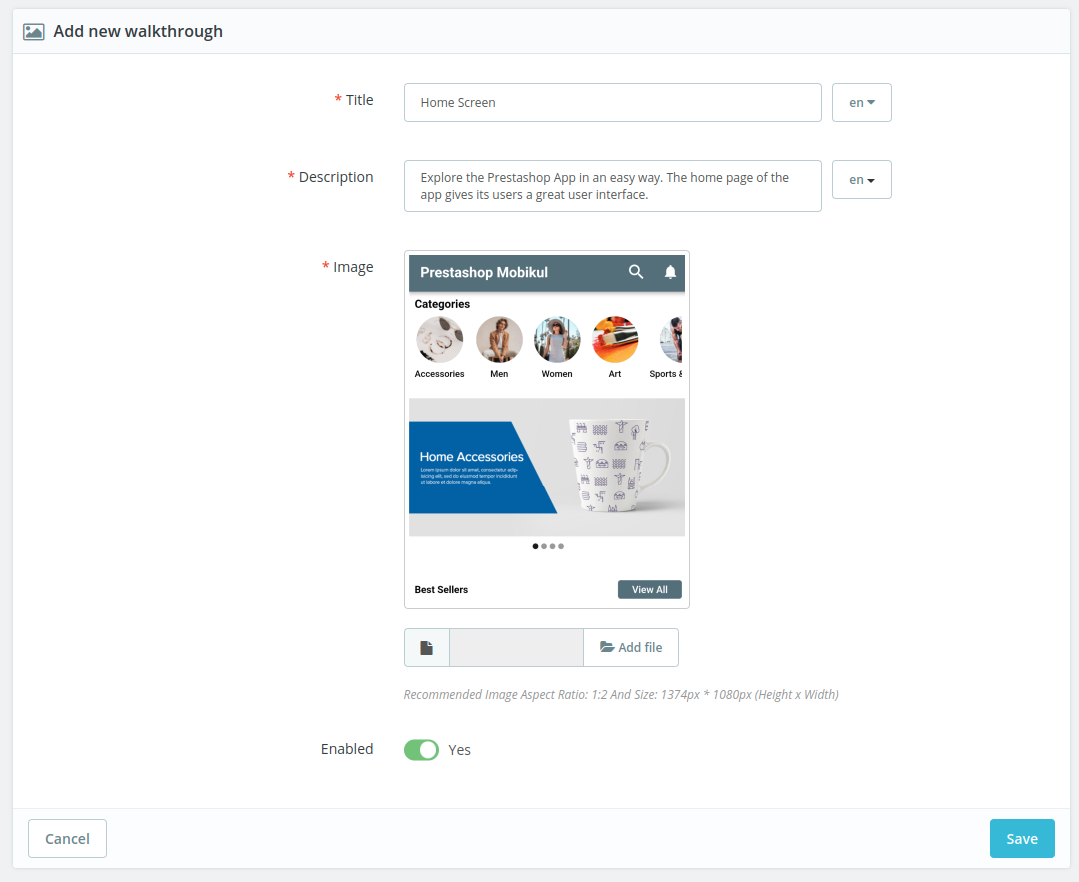
App Walkthrough

The admin can create the new walk-through by clicking on the Add New button available in the top right corner. Further, the admin needs to provide basic details like Walk Through Title, Description, and Image.
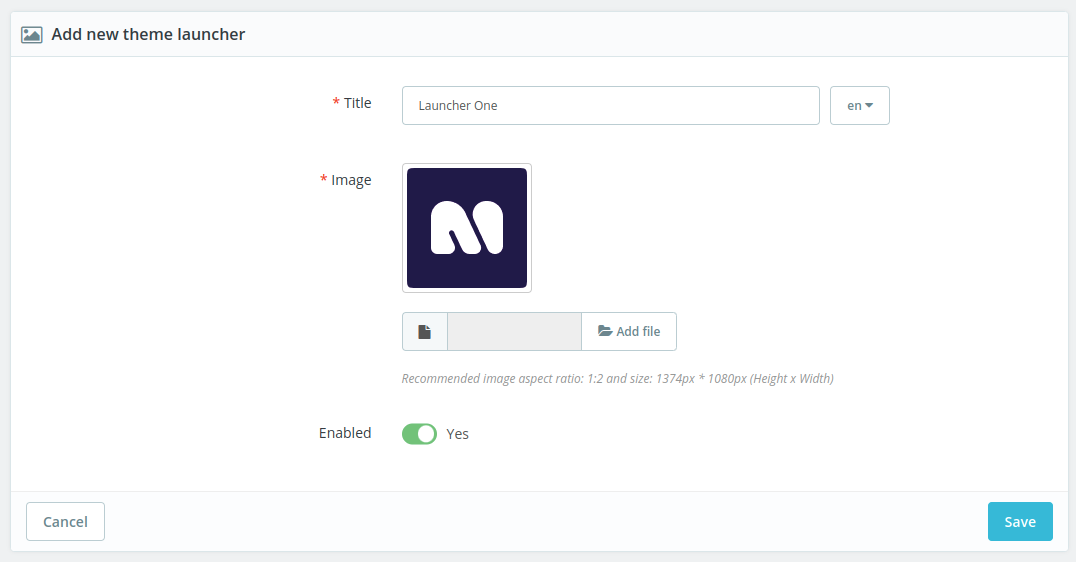
Manage App Launcher

Under Manage App Launcher tab, the admin can add an image that will display when app launches.
Click on the ‘Add new’ button to add a new launcher.
The admin can select one of the launchers he added while configuring the app settings.
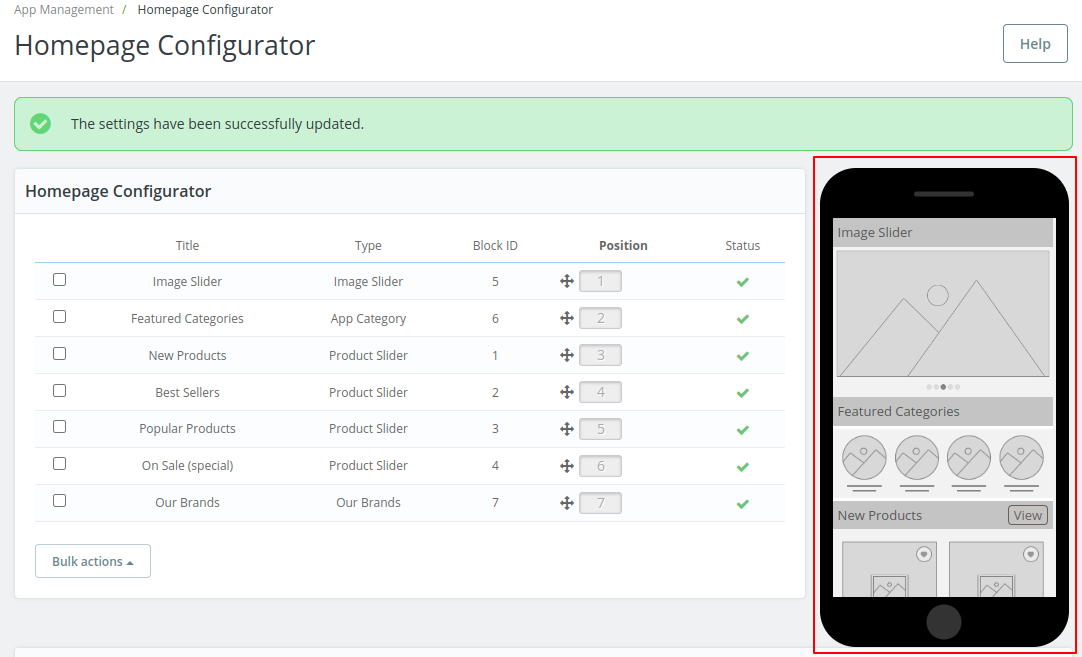
Homepage Configurator
This tab enables the admin to customize the layout of the homepage.

Homepage Configurator
The admin can set the position in which he wants to display the blocks on the homepage. Admin can change the position of the blocks and preview it in the run time in the right side under Homepage Configurator.
Product Videos

Under this tab, the admin can add videos for the products. Click on ‘Add product video’ button.

Click on ‘Add file’ to upload video for the product from the system.
Configuration
If admin has enabled “Want to show custom layout”, then blocks on the homepage will show according to list shown in the above screenshot. And if disabled, then default layout will show on the homepage.
This was all about Mobikul Prestashop V3 Admin Panel. I hope this document will help you in checking the functionality of the module in a better way. Also, do let us know about your views in the comments.
Support
For any kind of technical assistance or query, please raise a ticket or send us a mail at [email protected]
Be the first to comment.