If you have a Mobikul Opencart Application working on Mobikul Web Module then you can add and modify many functionalities in your application through your admin panel. So here we will cover all the extra functionalities provided by Mobikul back-end module.
There are Mobikul all the functionalities,

Part 1: Banner
We can set the Banners on top of the Home page in Application. The ideal size for banners is in ration 2:1 (width: height). You can add any number of banners and attach a redirect property to them. You can also add different images for the same banner as per languages.
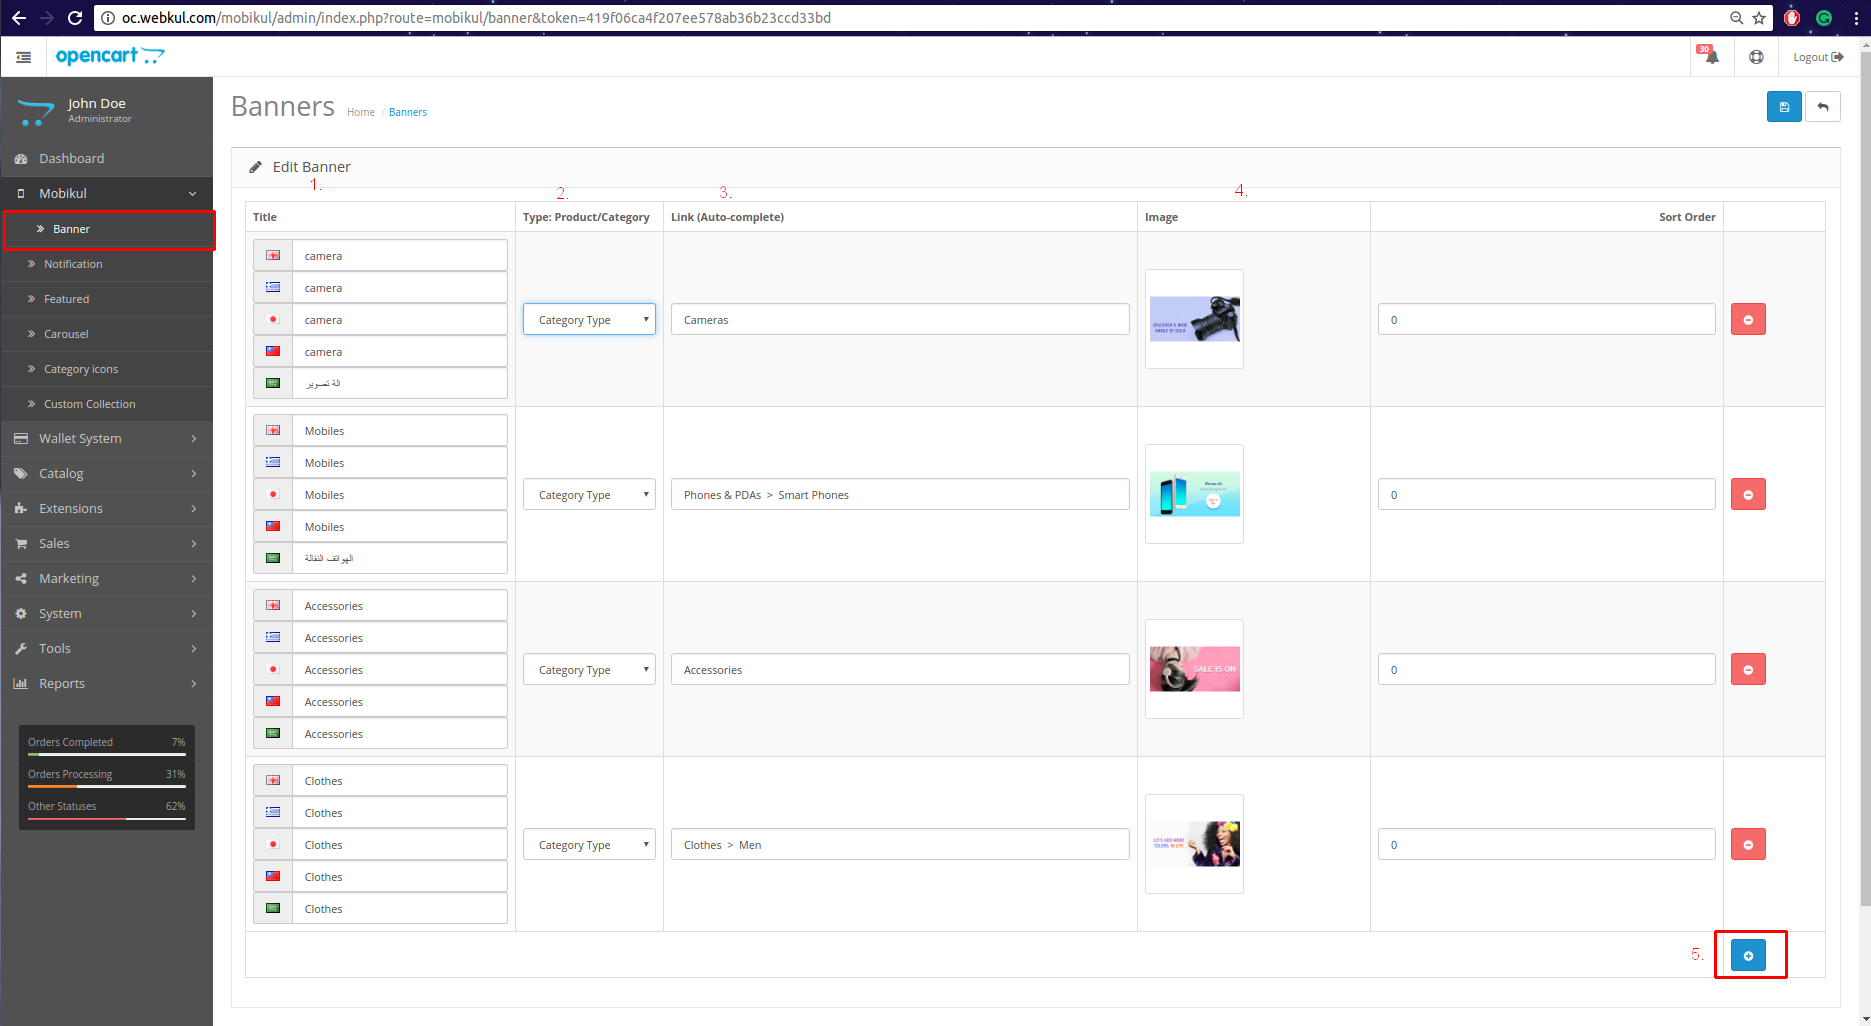
- Title: You can set the title of the Banner in different languages.
- Type- Product/Category: You can attach the redirect property to you banner either product Type or Category type.
- Product Type: If you select the product type then you have to attach any Product with the banner when you click the banner by App then it will open that specific Product which you have attached to the banner.
- Category Type: If you select the category type then you have to attach any category with the banner when you click the banner by App then it will open that specific category which you have attached to the banner.
- Link (Auto-Complete): Here we can attached the product or category.
- Image: We can set the image or delete the attached image banner.
- Add button: We can add more banner.
Part 2: Notification
From this part of the panel, you can send Push notifications to all the app users. Just Create a new Notification and add the desired action like want to open Product or category or custom collection, then select particular product and category and send it to everyone.

There is a + symbol to add the notification,
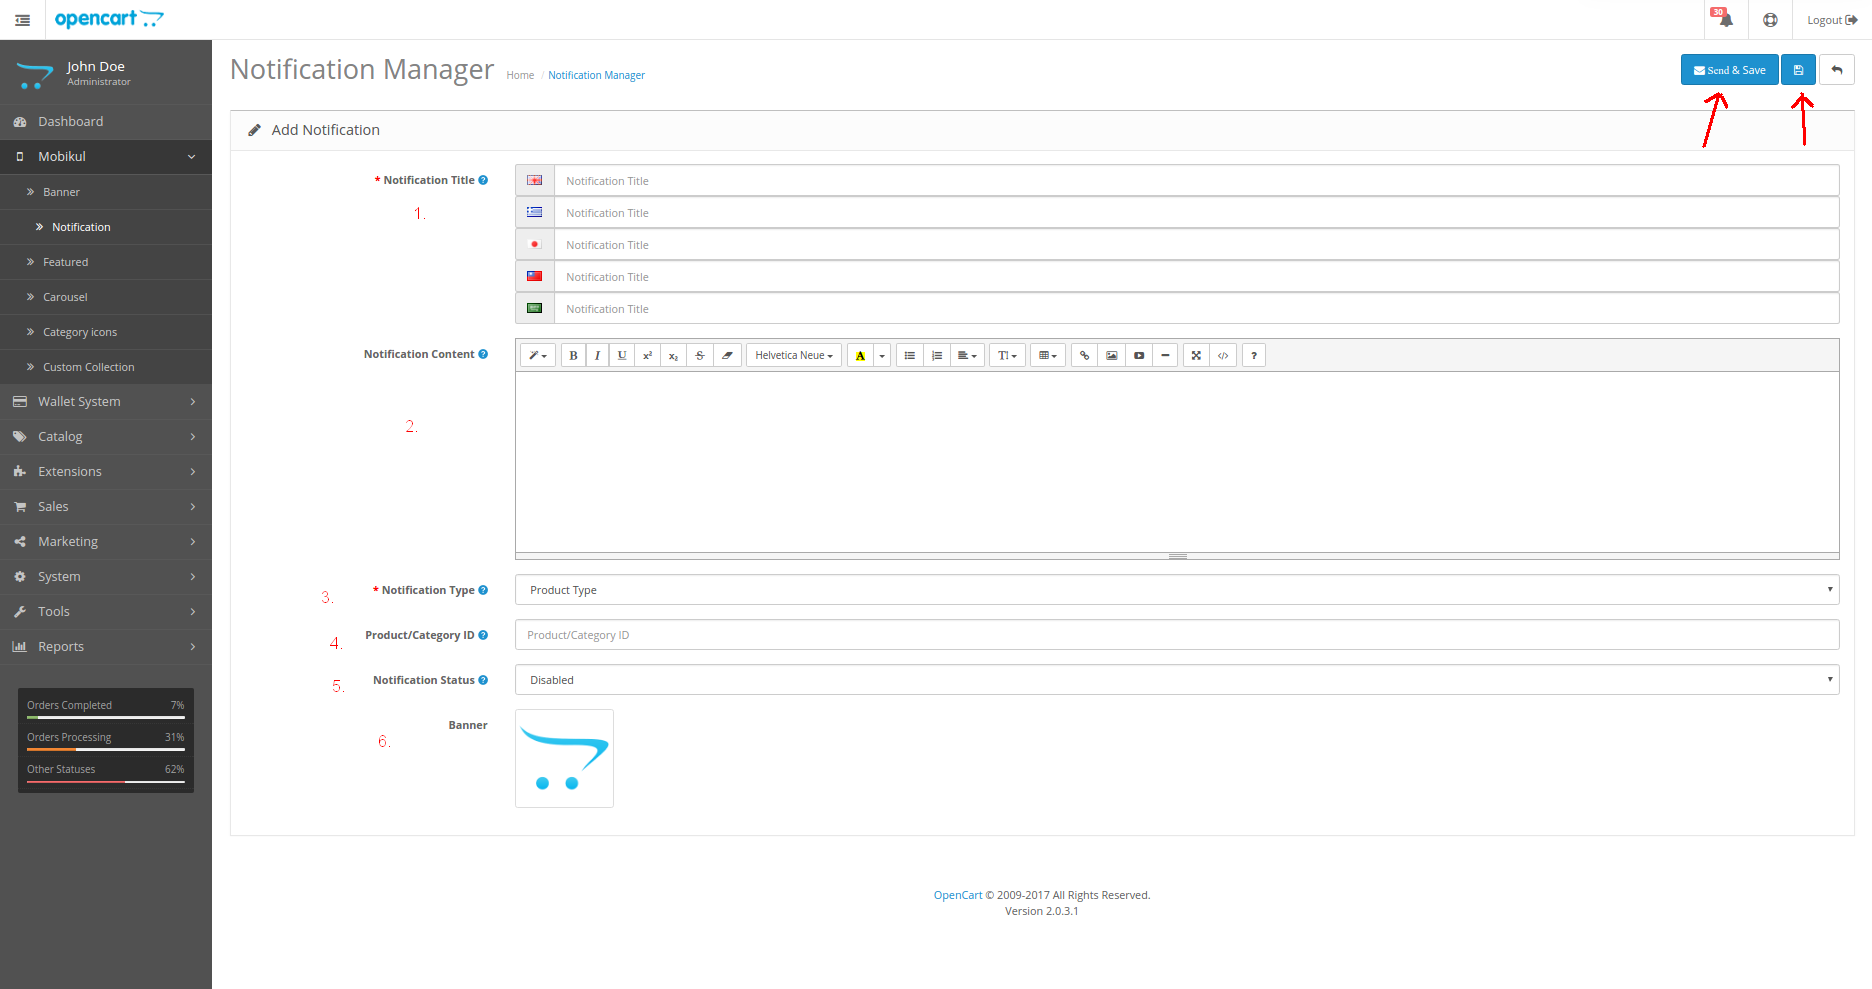
- Notification Title: Set the notification title in the different languages.
- Notification Content: This the description part of the push notification.
- Notification Type: Here you can select the type of notification like the Banner type (Product/Category) but here you can send the notification of custom category type.
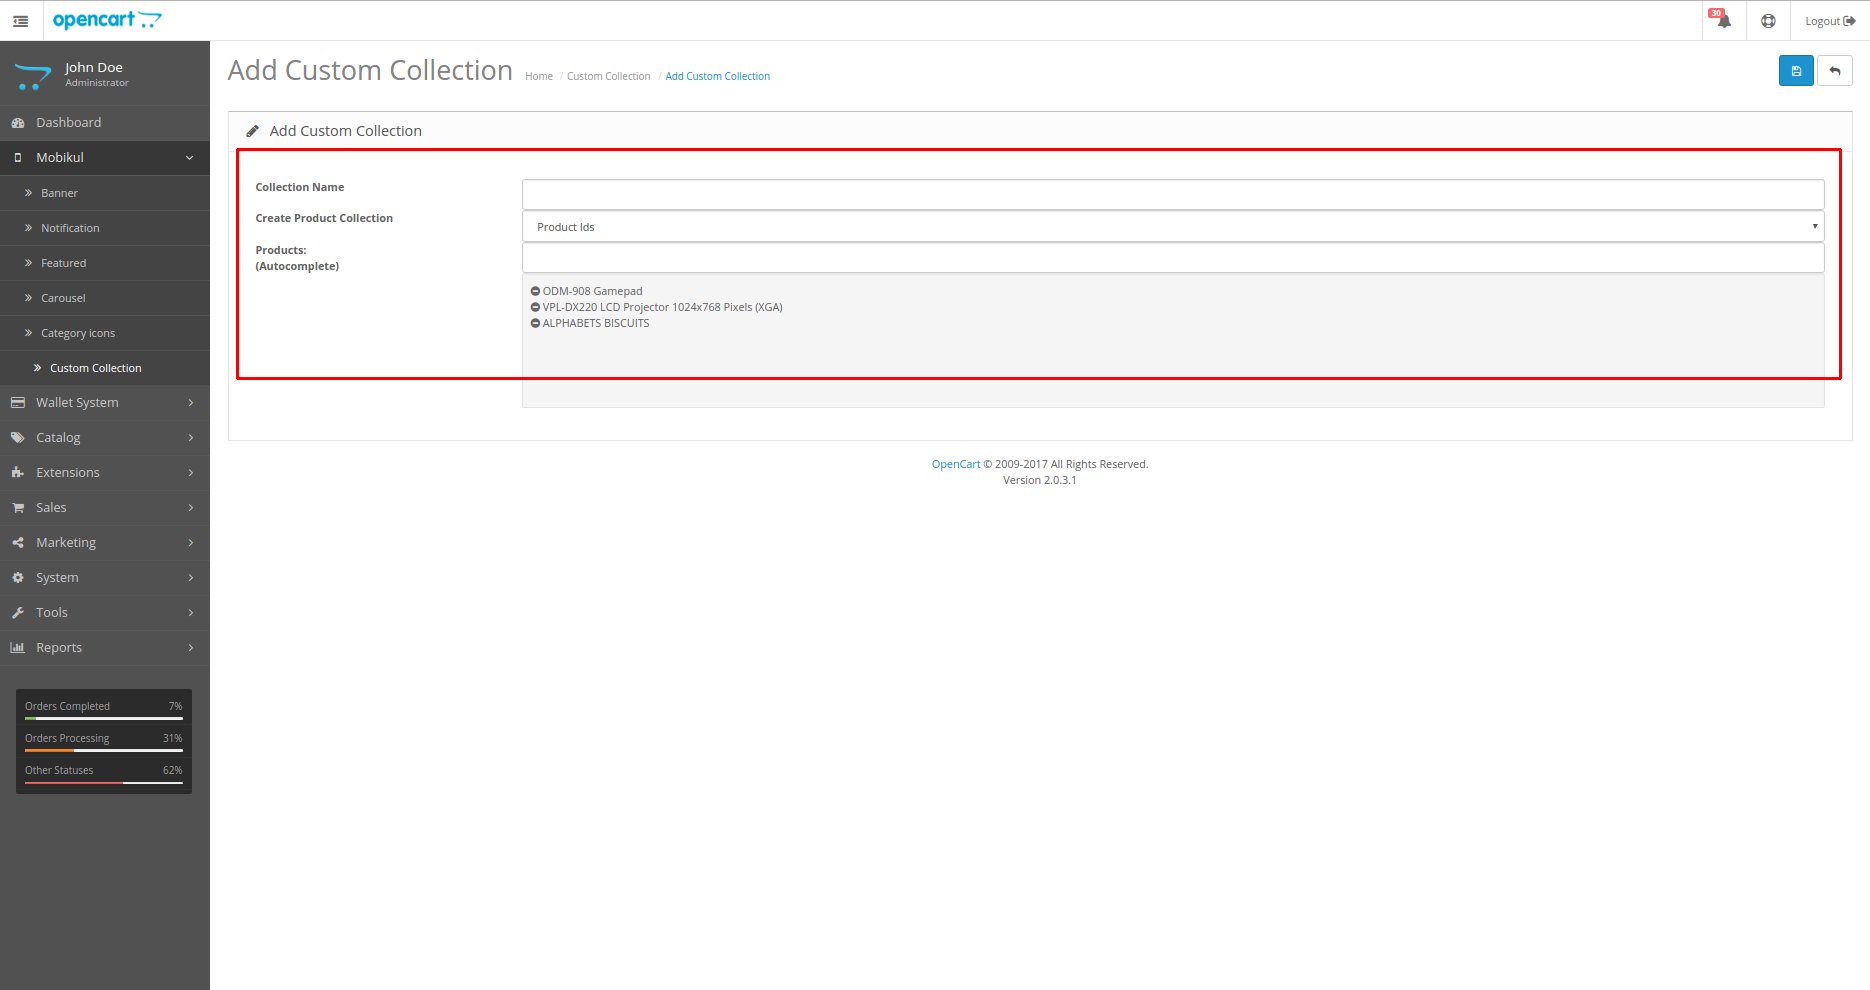
- Custom Category: Here we can set the random set products and send it to the app.

- Custom Category: Here we can set the random set products and send it to the app.
- Product/Category ID: Attached the product.category id with the push notification like in the banner part.
- Notification Status: You can enable and disable the Notification.
- Banner: You can also set the banner to your push notification.
Then click on “Send & Save”(send the notification as well as save your notification for the next time) and “Save”.
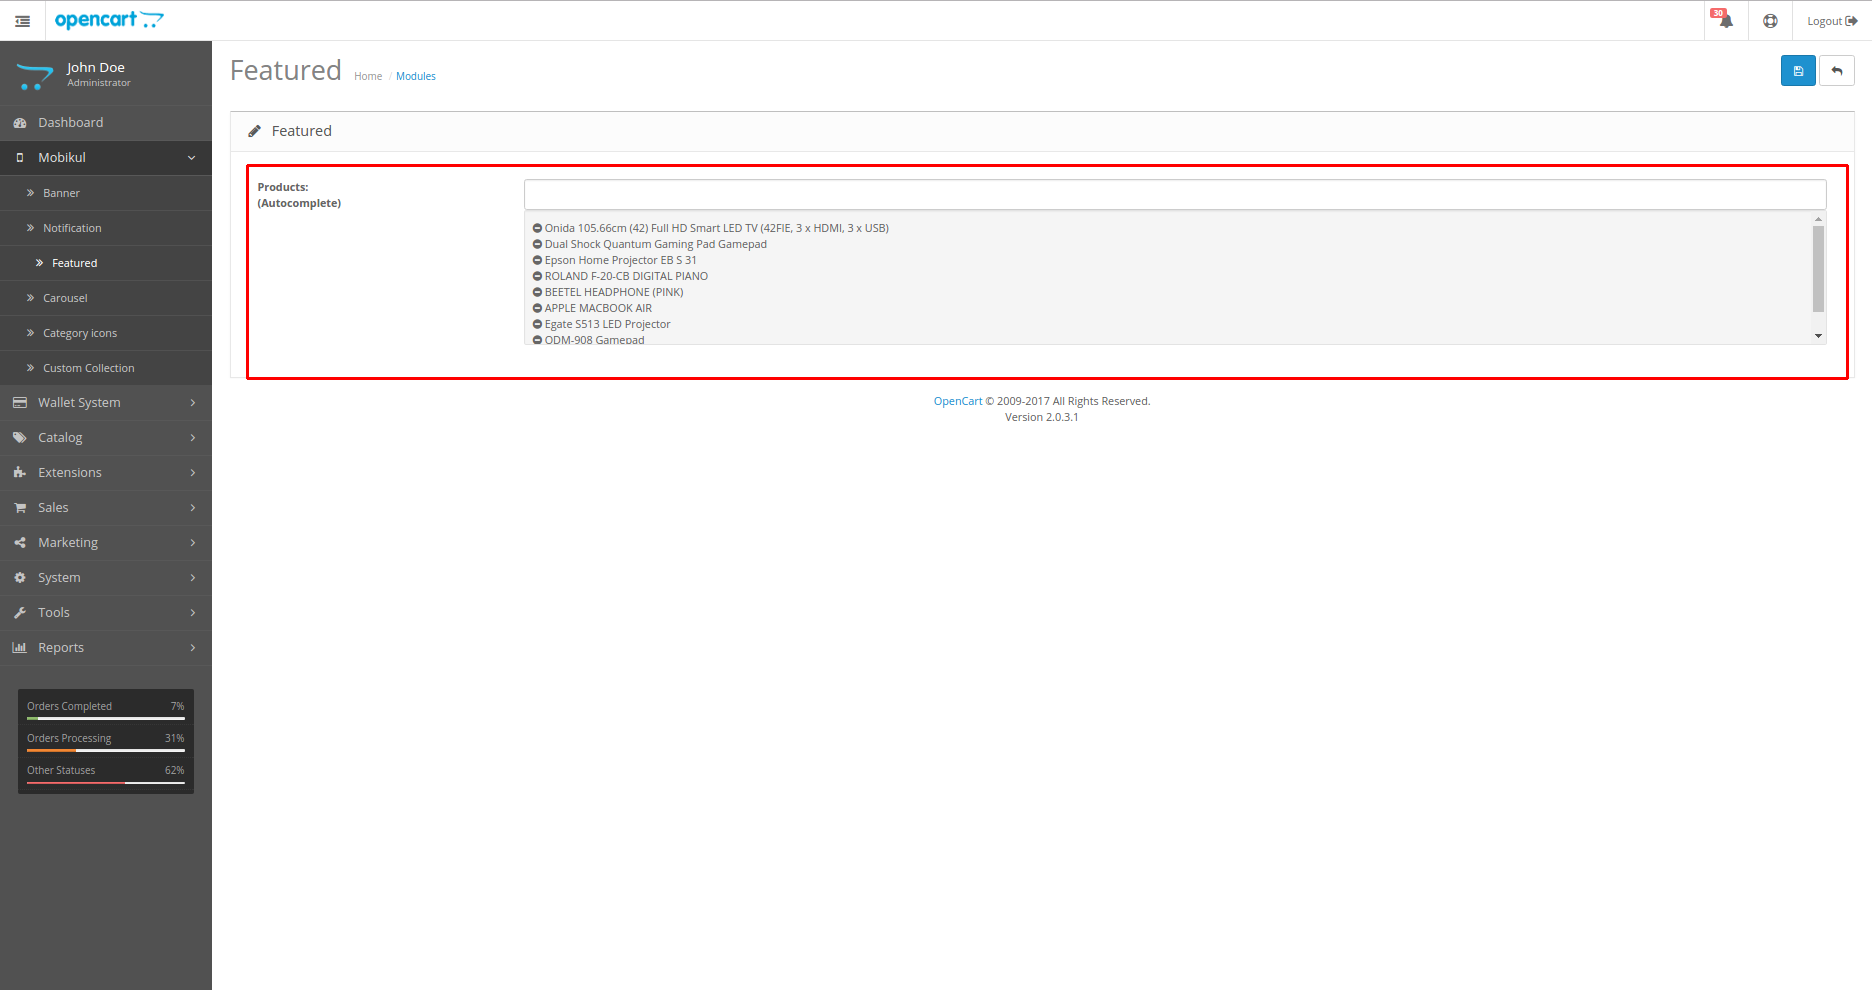
Part 3: Featured
By this part of the panel, you can set the list of products which are shown in the application home page.
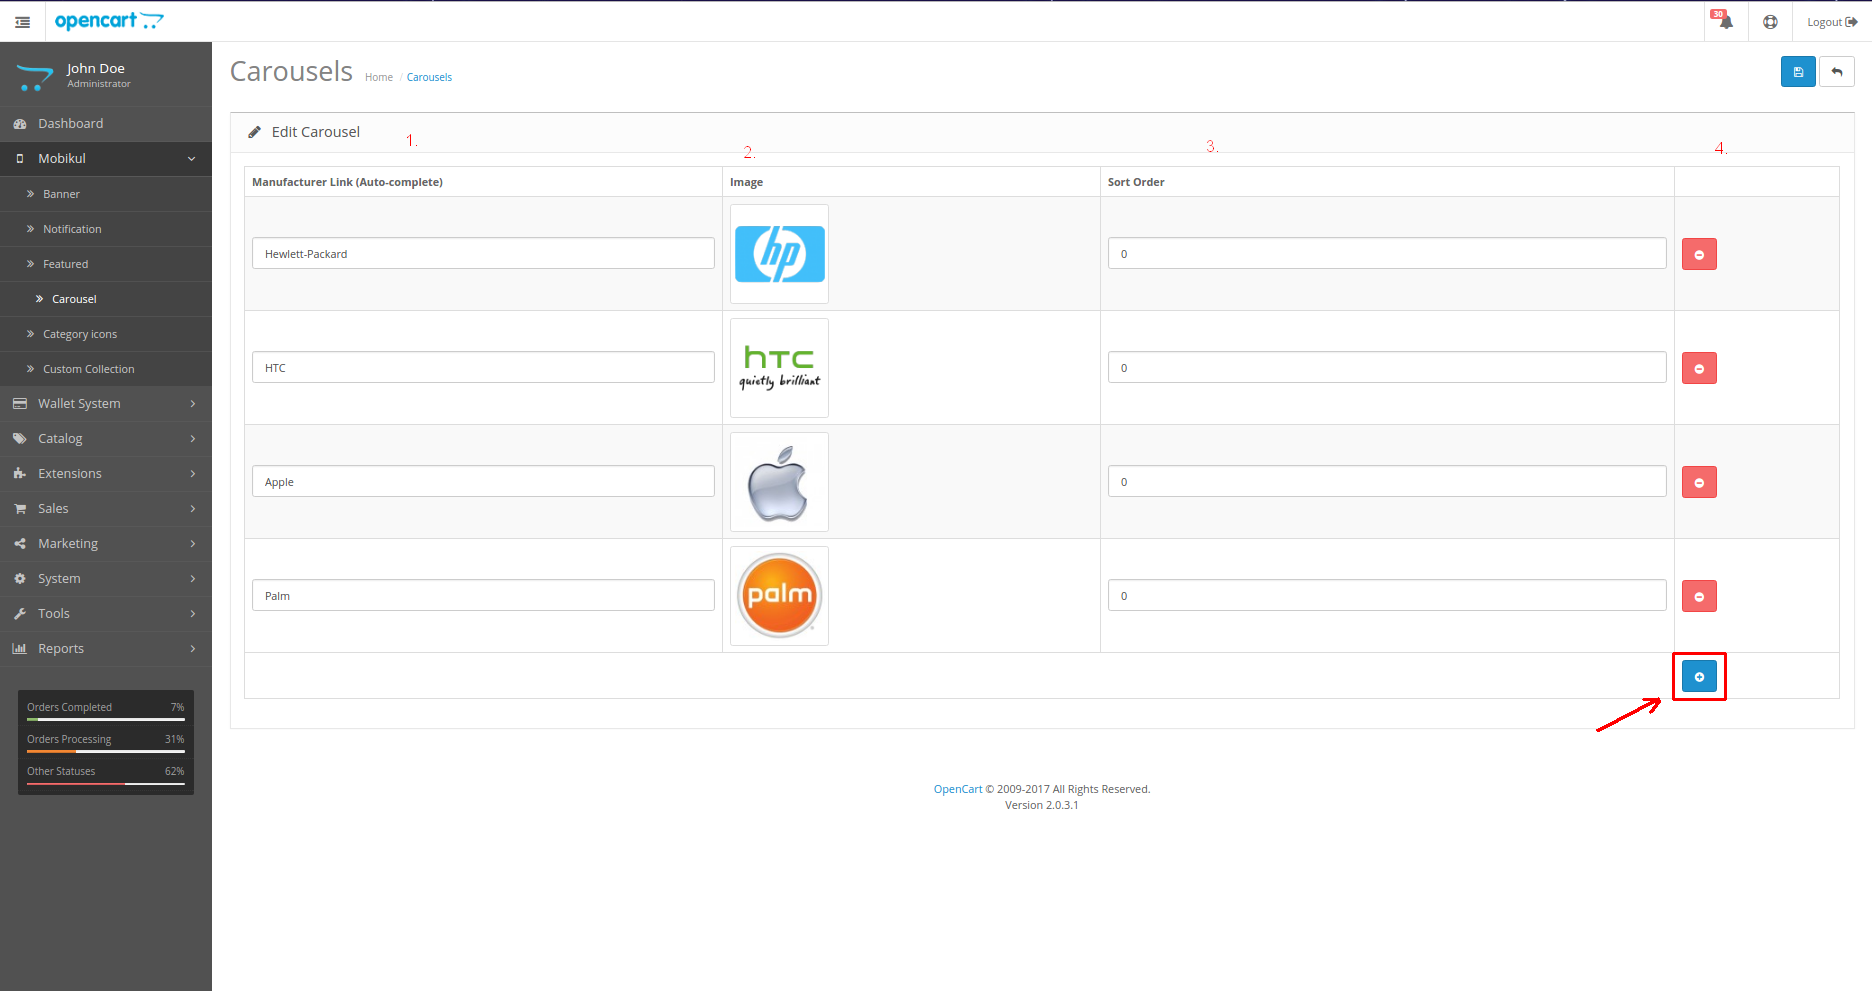
Part 4: Carousel
This is the part where we can set the brands which is shown in the bottom of the Application same as open cart store.

in admin panel,
By the help of this add button, we can add the multiple carousel for the app.
Part 5: Category Icons
We can set the icons corresponding to the categories which is shown in the app left drawer and also on the home page.

Part 6: The Configuration part
The last part of the admin panel is configuration part where we can manage all the functions which we want to show on the Home page.
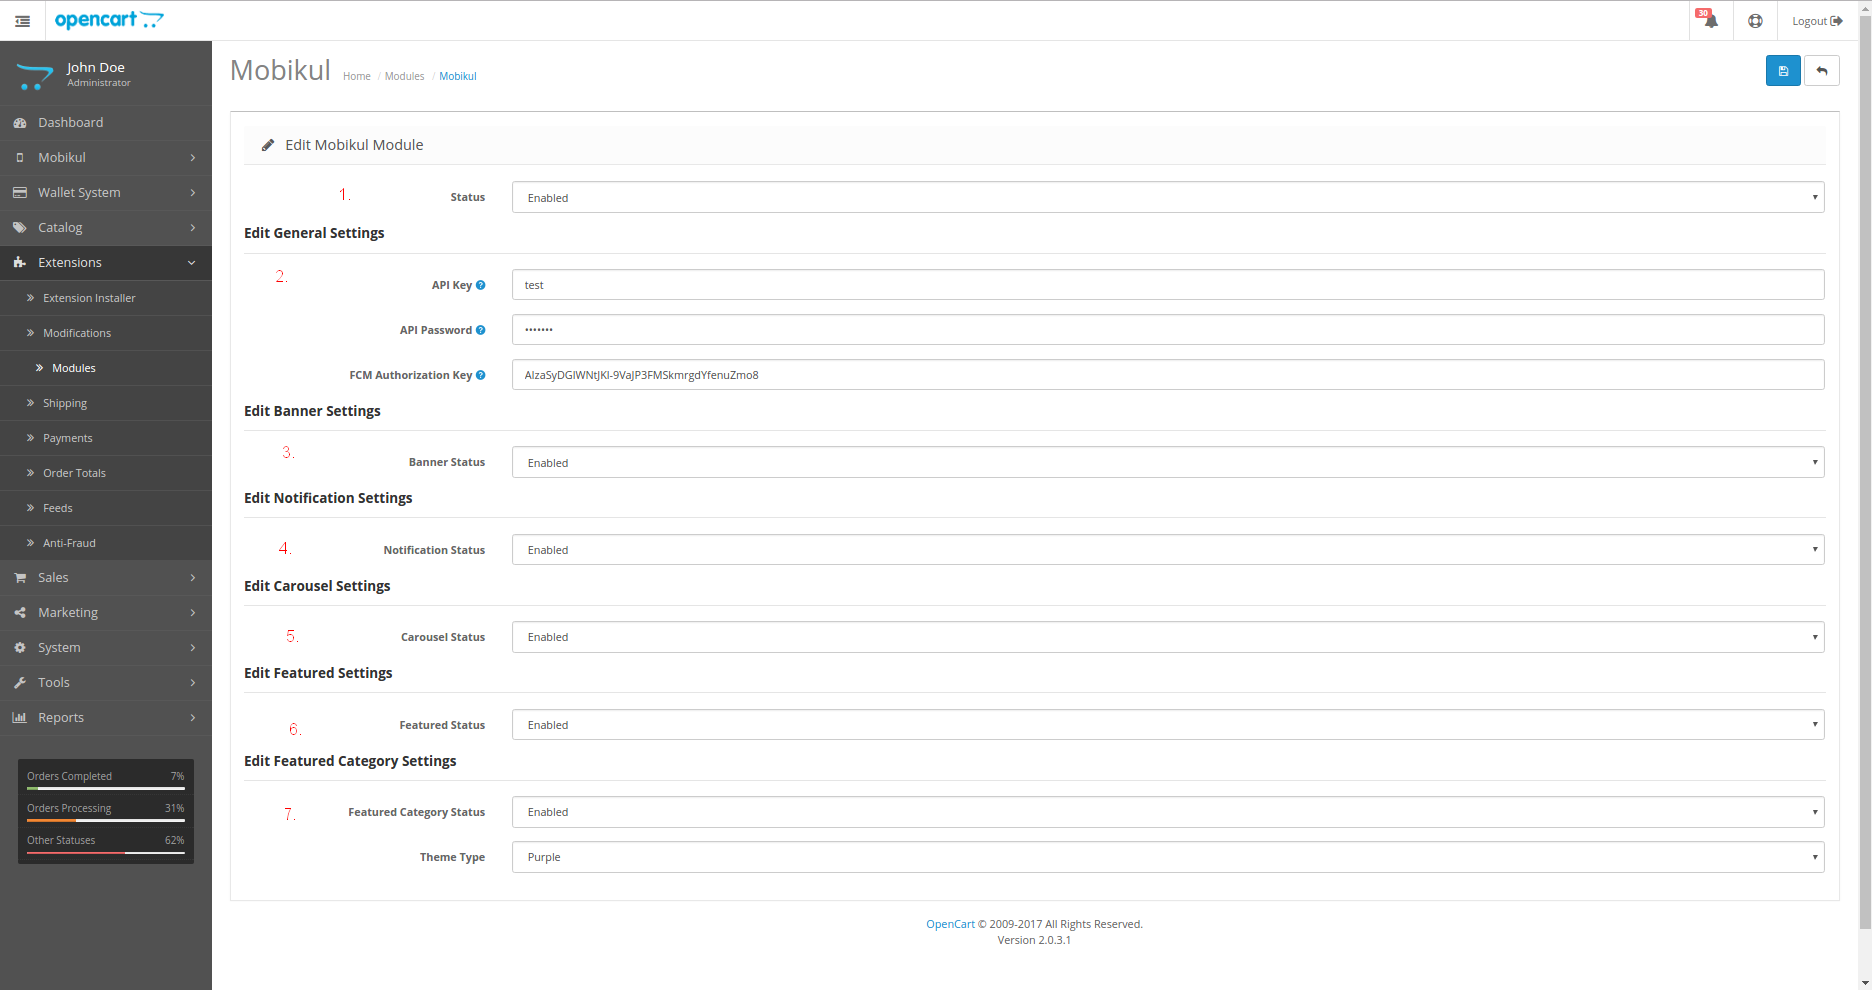
- Status: Enable the Mobikul API status.
- Edit General Settings: API key and password which is used for the authentication of the request.
- FCM Key: For enable the notification we have to use the FCm authorization key.
Thanks may be this information will use full for you.
Be the first to comment.