After the successful installation of server side code on your Magento server.
First, you need to flush the existing Magento cache.
This can be done by going to System->Cache Management. On this Screen, first, click on “Select All” option provided on the left hand corner of the screen.
Then click the “Flush Magento Cache” button.
And After this, from the Actions, choos the “Refresh” option and click the “Submit” Button.
You will see an additional tab with the name of “Mobikul” appearing on your Magento admin panel.
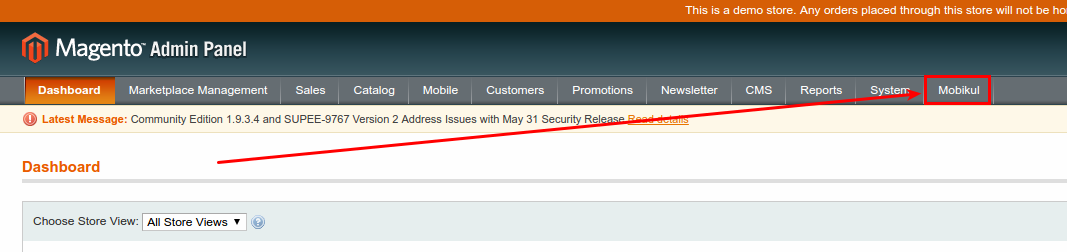
If you just hover over this tab you will find a list of options, namely:
- Add /Manage Banner Images
- Add/ Manage Notifications
- Featured Categories
- Add /Manage Category’s Banner n Images
- Mobikul Configuration
Let us see how to use these, one by one:
Part 1: Add/ Manage Banner Images
From this option, you can add banners to the home page of your mobile application.
On this page, you will see a button with the label “Add Images ” on the top right corner of the page.
Click on this button.
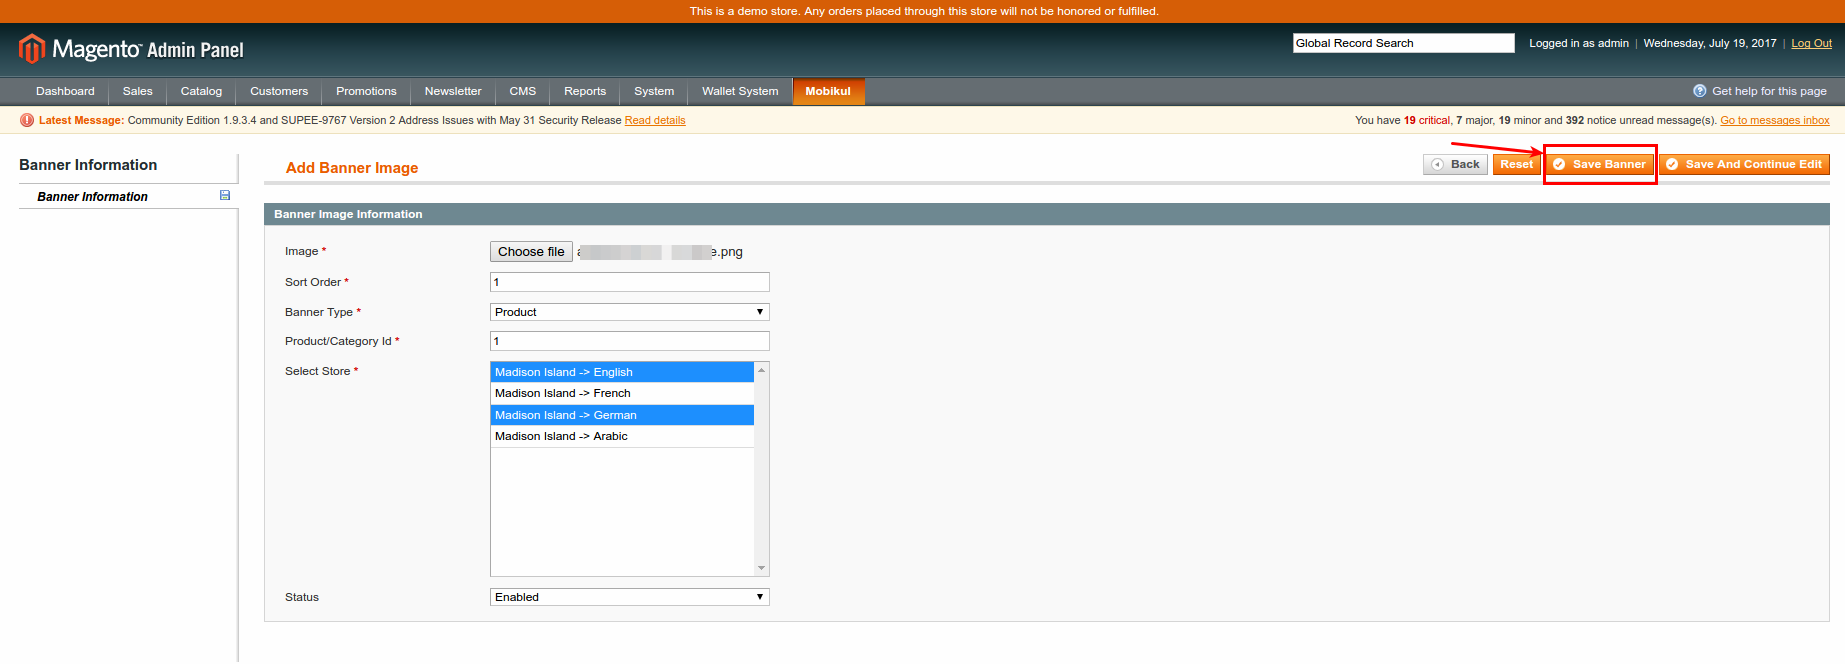
You will redirect to banner Image Manager Page.

When you click on this option, a new screen will appear.
- Upload a banner pic with a constraint ratio (width: height) of 2:1.
Recommended Image size: 800 x 400 or greater. - Set the sort order (order in which you want the images to appear)
- Select Banner Type (It has two Options viz. Product and Category). This will be used to redirect the user to the option selected when a user clicks on the banner in your mobile application.
You need to set a valid product/category Id, else the mobile app might not be able to redirect and can also lead to crash of the mobile application as there would be no proper action defined.
NOTE: A Valid Product/ Category Id is the one that is currently existing in your Magento Database. - Select the store on which you want this banner to be visible, from the list of stores.
- Change the status to “enabled” if you wish to enable the banner.
After you fill in all the details properly you need to click on the Save Banner button on the top right corner of the page.
Part 2: Add/ Manage Notifications
From this option, you can add notifications that you can send anytime you want to the users of your mobile application.
On this page, you will see a button with the label “Add Notification ” on the top right corner of the page.
Click on this button.
You will redirect to Notification Manager Page.
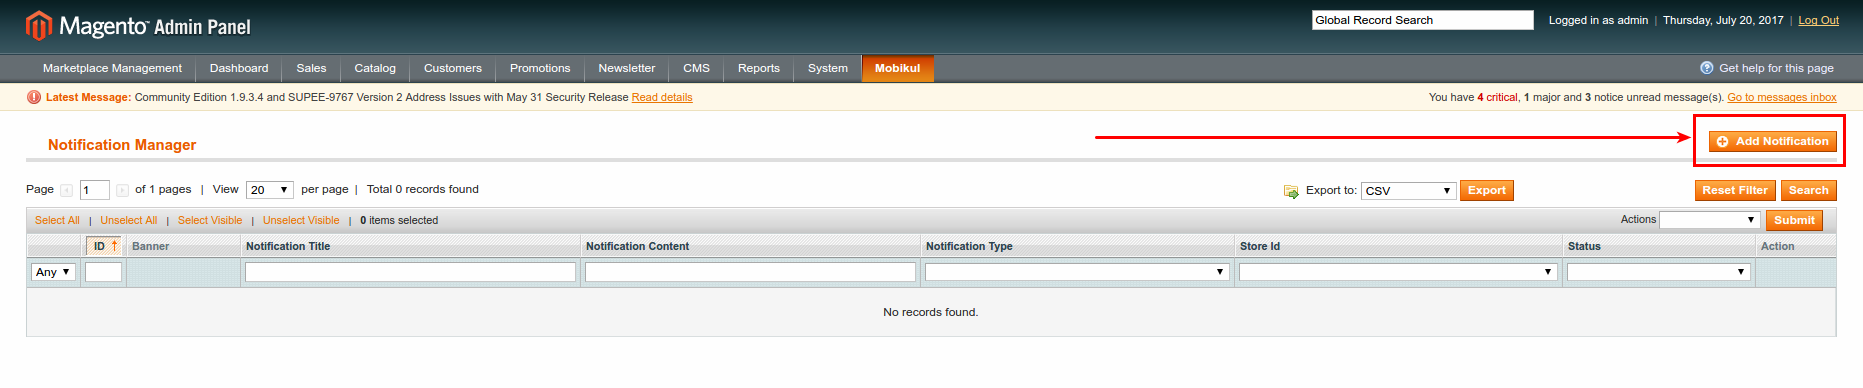
When you click on this option, a new screen will appear.
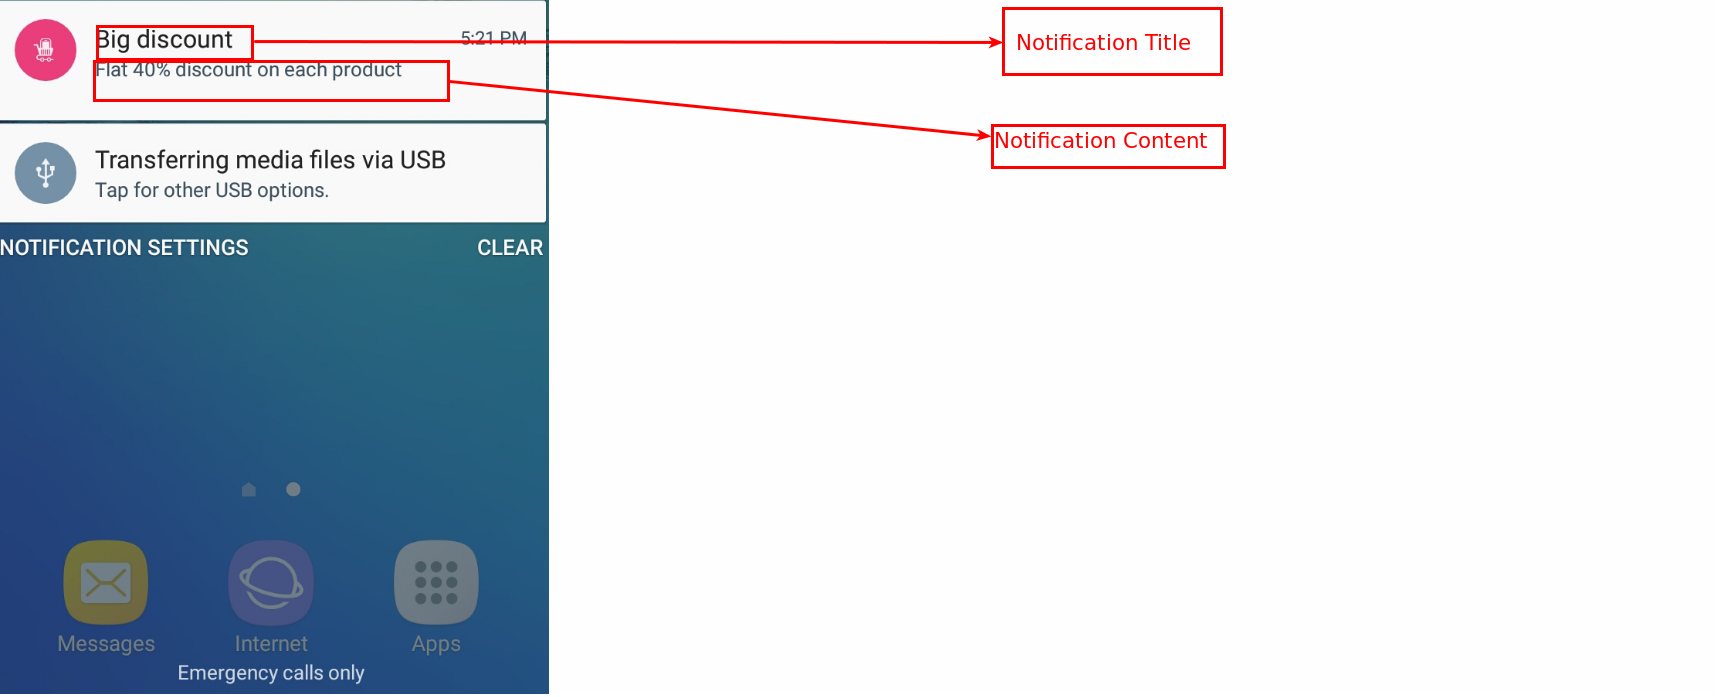
- Set the notification title.
This will appear as the title of the notification on the screen of mobile user - Set the notification content
This will appear as the content of the notification

- Select the notification type
This will define the page onto which the user will be redirected upon clicking the notification. - Upload a banner pic with a constraint ratio (width: height) of 2:1.
Recommended Image size : 800 x 400 or greater. - Select the store on which you want this notification to be visible, from the list of stores.
- Change the status to “enabled”.
You can additionally save the notification related data by clicking the button “Save Notification” on the top right corner of your screen.
Whenever you want to send the notification to all the users of your application, all you need to do is select the notification and in the actions option select the “push” option and then click on the “Submit” button.

For more details on push notification, you can read this article
Part 3: FeaturedCategories
Featured categories are the categories that will be displayed on the home page of your mobile application.
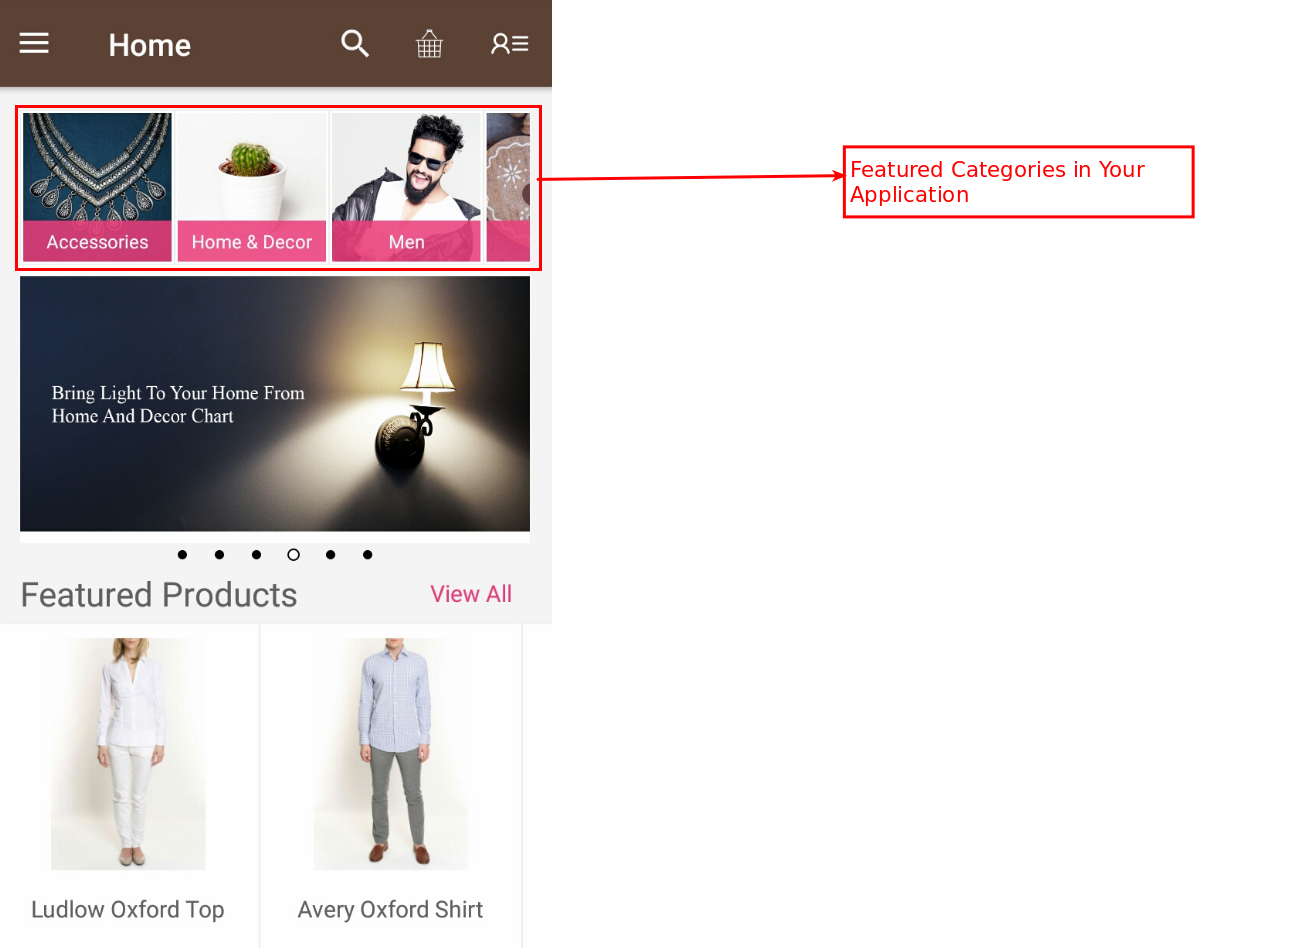
These categories provide an easy access to your customer to see all the items in a particular category.
When you select this option from the Mobikul menu, you will be redirected to the Featured Categories Manager page.
Click on the “Add Featured Categories” button on the top right corner of the page.

When you click on this button, you will be redirected to the “Create Featured Category” page.
- Upload the Image for the Category that will be used to display on the home screen of your mobile application.
The constraint ratio (width: height) of the image should be 4:3.
Preferable Image Size: 800 x 600 or greater. - Set the sort order for your category.
This order will define the position in which they will appear in your application.(minimum being the first one to be displayed). - Select the stores on which you want to enable this category from the list of the stores.
- Set the status to enabled for all the categories that you want to include in your application.
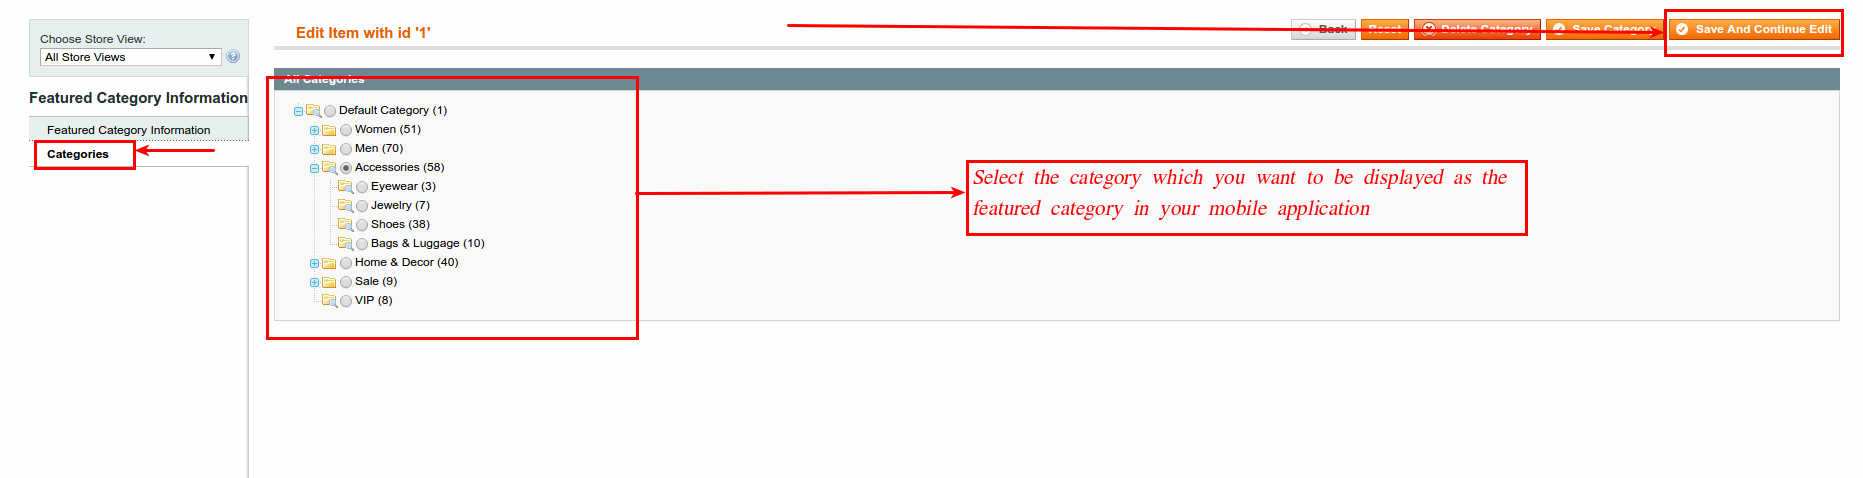
After completing this page click on the “Save And Continue Edit” button on the top right side of your screen.
Now come to the left side screen panel and select the option “Categories”.
Select the category which you want to be displayed as the Featured Category in your mobile application.
For more detailed information on creating and managing featured categories in your mobile application, you can read this article
Part 4: Add/Manage Category’s Banners n Images
From this option, you can set the images that will be displayed as the icons for the categories in the left drawer of your mobile application and the banner that will be displayed if the user selects a particular category.
Note: We only support the first child of the default category under this option.This is because First Childs of default category will be displayed as the main categories in your application.
When you select this option from the mobikul menu, you will be redirected to “Add/Manage Category’s Banners n Images” page.
On this page, you will see a button with label “Add Images to Category”, on the top right corner of your screen.
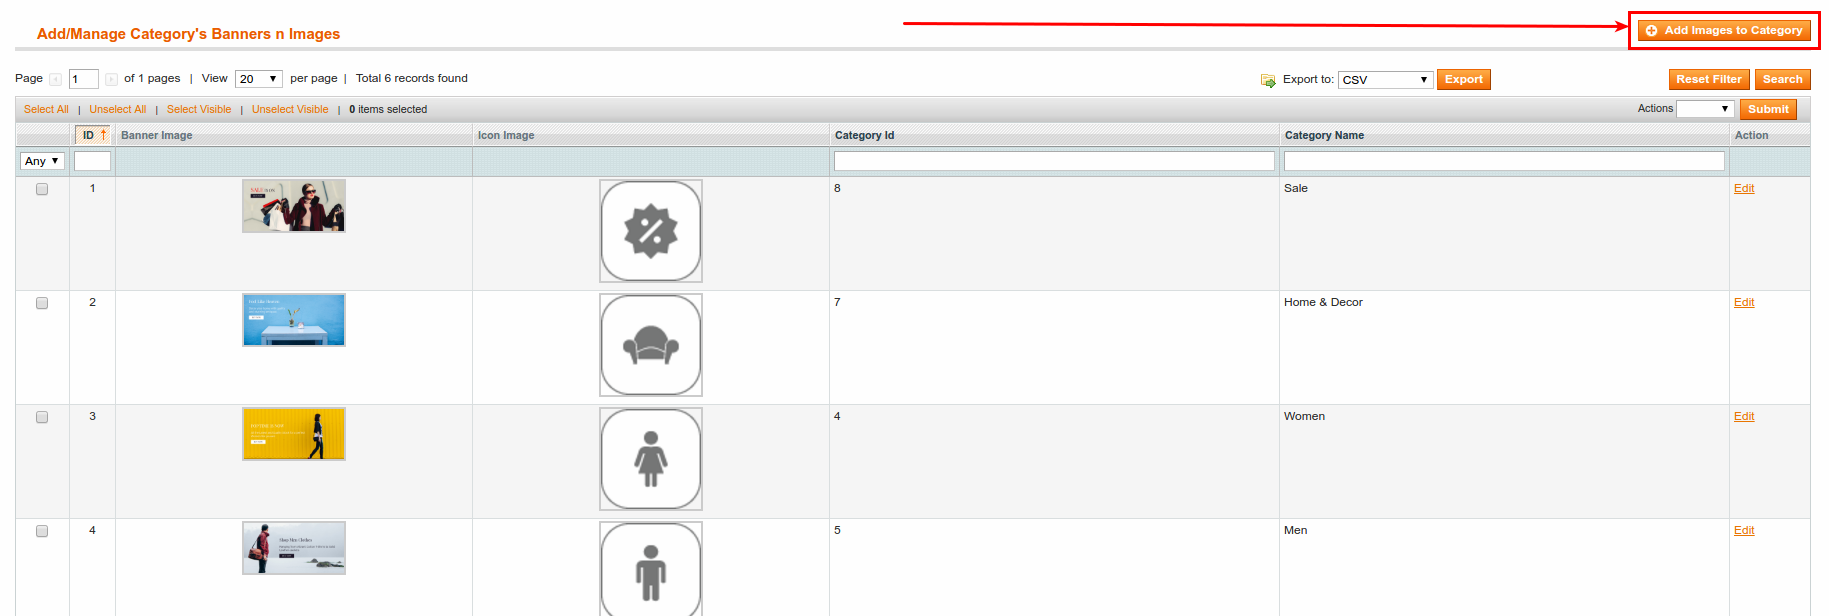
When you click on this button, you will be redirected to “Add Category Image” page.
On this page, you need to upload two things:
- Banner: This will be the banner of the category.
Constraint Ratio (width: height ) should be 2:1.
Preferable Image Size: 800 x 400. - Icon: This will be the icon of your category and will be displayed in the left-hand side drawer of your mobile application.
Constraint Ratio should be 1:1.
Preferable Image Size: 144 x144.

![]()
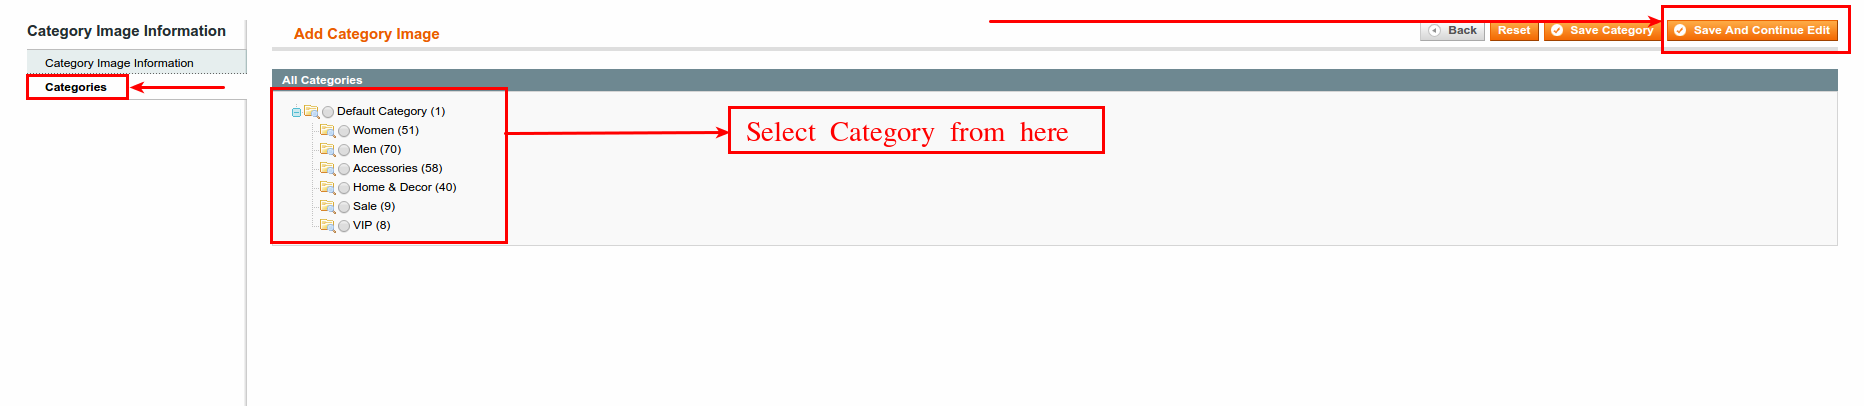
When you upload both the images then click on the “Save And Continue Edit” button on the top right corner of your screen.
After this, select the option “Categories” from the left-hand side Menu.
Choose the category from the list of categories with which you want to associate the uploaded images.
Part 5: Mobikul Configuration
This is the part that helps in connecting your mobile application to your server.
This part itself contains four blocks, namely:
- Mobikul Api Configuration
- Push Notification Parameters
- Basic Configuration
- Search Setting
Mobikul Api Configuration:
This part is exactly responsible for making the connection with your Magento server.
You should never change the values for any field under this block.
Push Notification Parameters:
This part is responsible for delivering the push notification to the users of your application.

FCM API key is the server key you receive when you create an account on firebase console. A slight change in the value of this field can stop the working of push notification on your application.
Well, although you can change the topic whenever you want to from your admin panel, it is not advised to do so after the publication of the application on play store.
Further, whenever you change this value you should let your developer know on an immediate basis.
Basic Configuration:
This is the setting which you can change in order to manage the content on the home page of your application.
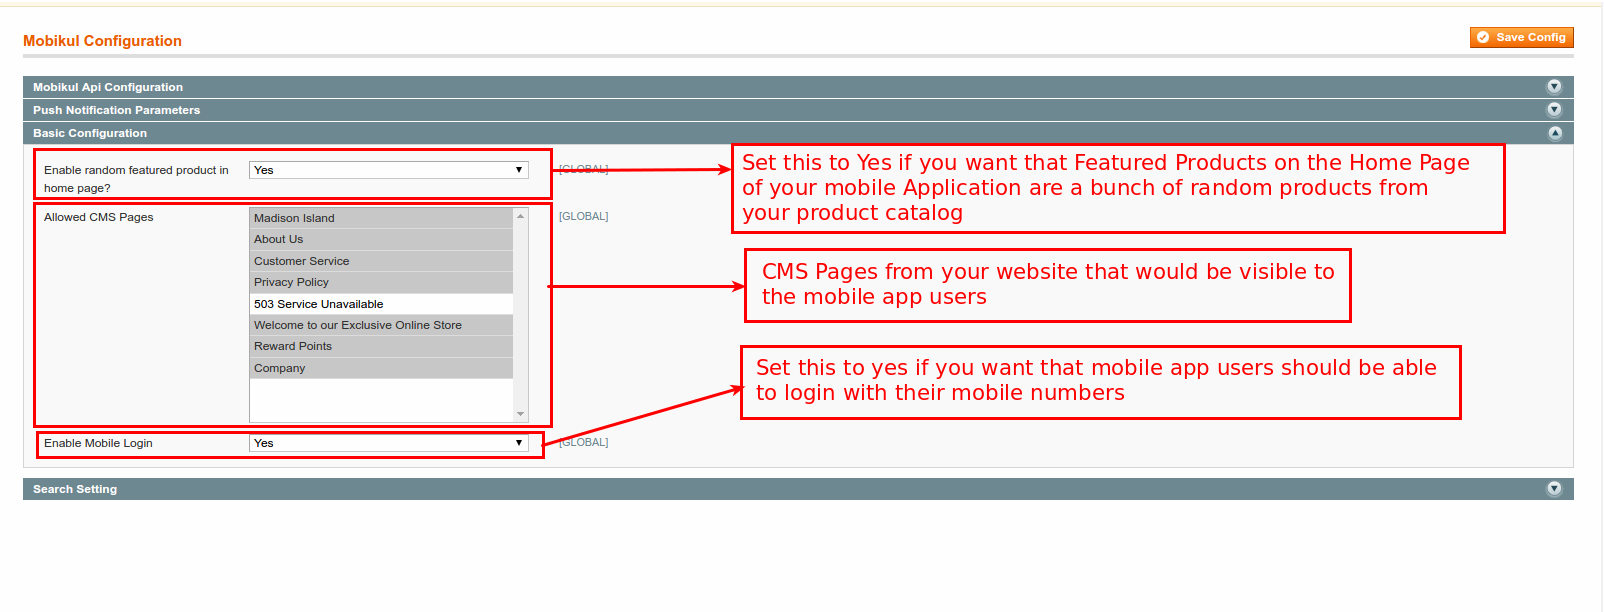
It has three options:
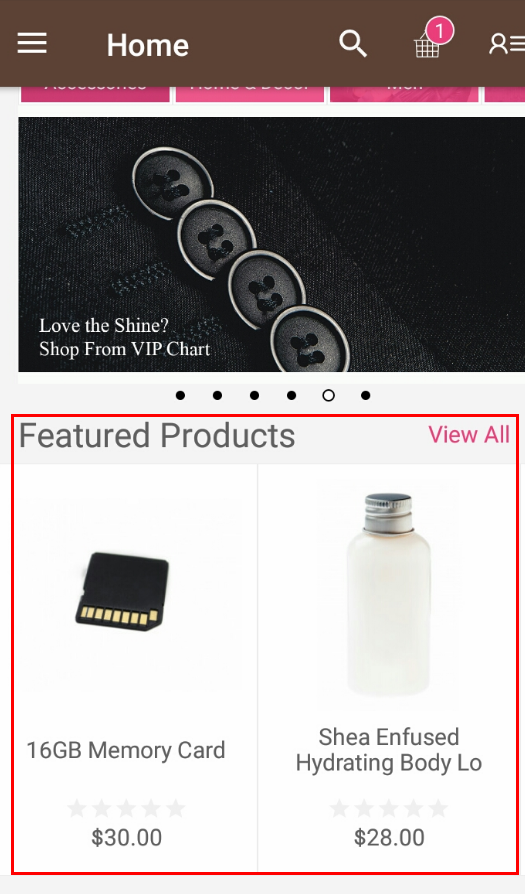
- Enable random featured product in home page?
Set this option to yes if you want to have some random products under “Featured Products” on the homepage of your mobile application.
If you set this option to “No”, then only the products that have the “Is featured for Mobikul” set to yes will be visible in this category.
- Allowed CMS Pages
From this menu, you can control the CMS Pages that you wish to include into your mobile application.NOTE: We support only HTML tags under this option. If you need to include any other CSS script, then you need to inform us. - Enable Mobile Login
This feature allows you to enable the users to log in to their accounts using their mobile numbers.


Search Setting:

Below image will give you an idea of how tags and products in search are visible to mobile app users.

Be the first to comment.