Step 1:
Login to https://console.firebase.google.com/. Then you need to create the project by clicking on the “Create a Project” button.

Step 2:
After that, you need to enter your project name as per your business need and then click on the “Continue” button.

Step 3:
Then, if you want to use Google Analytics for your Firebase project, then you need to click on the “Create Project” button after enabling the same.
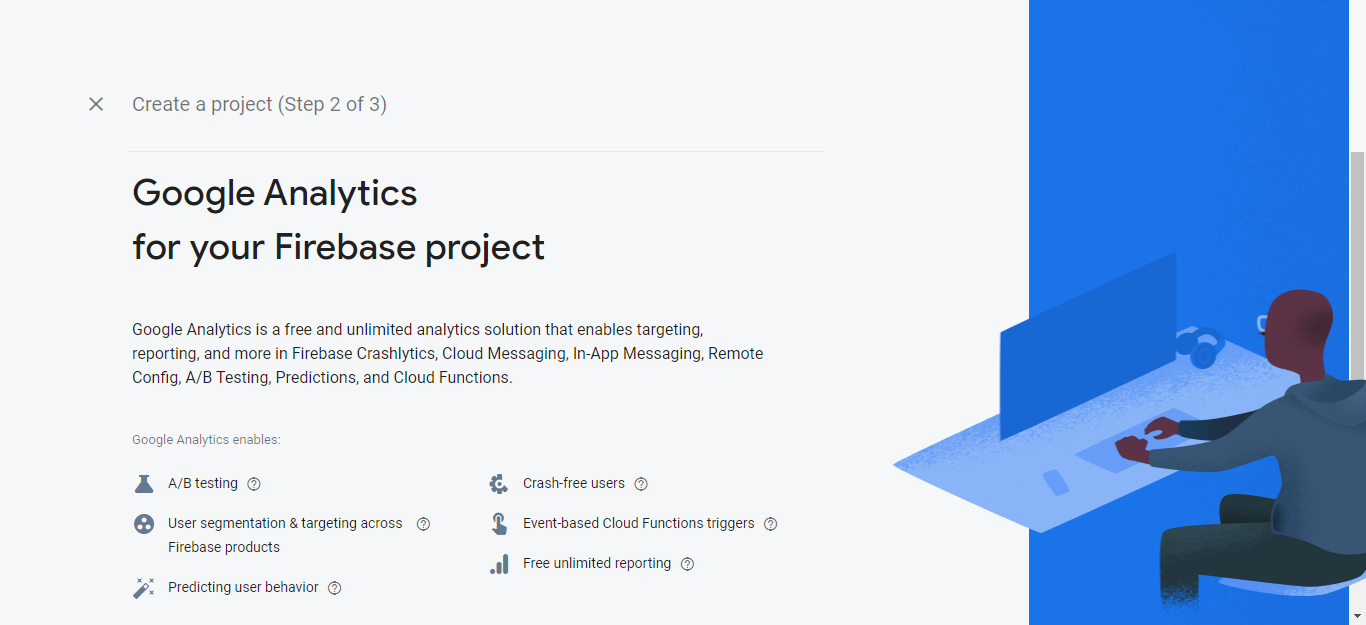
Otherwise, you just need to disable it and then you can create the project.
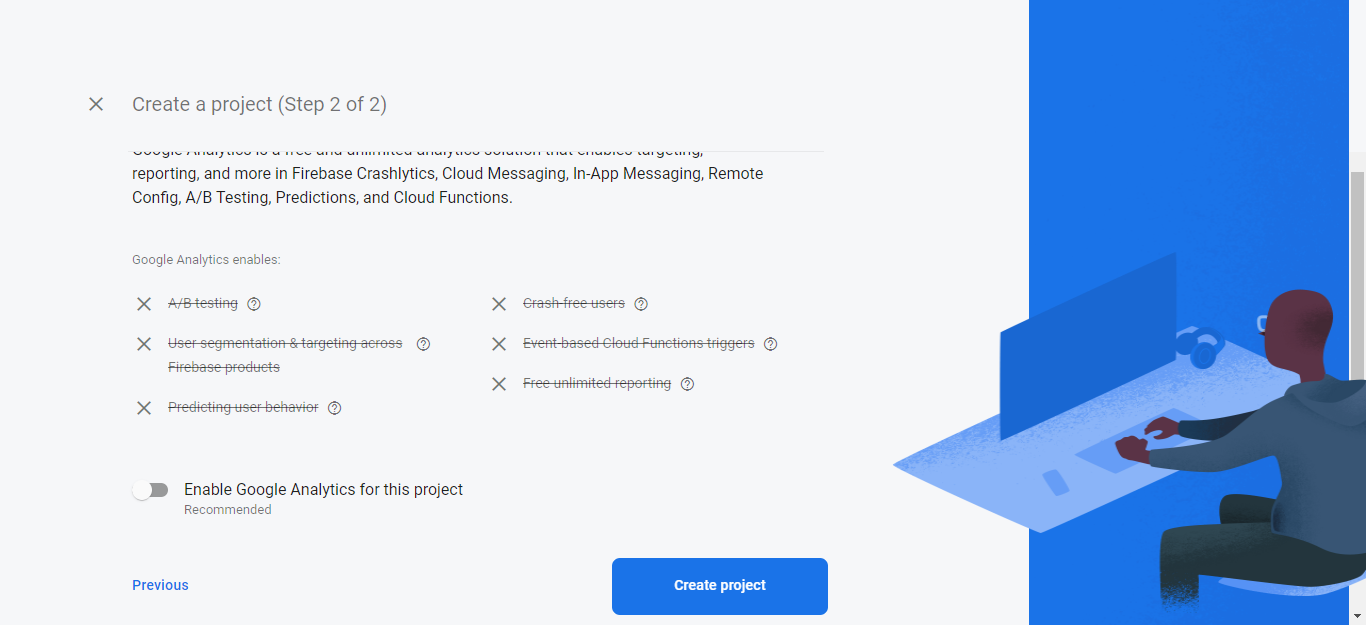
After the successful project creation, you’ll see a screen like the below image. To continue you need to click on the “Continue” button.

Step 4:
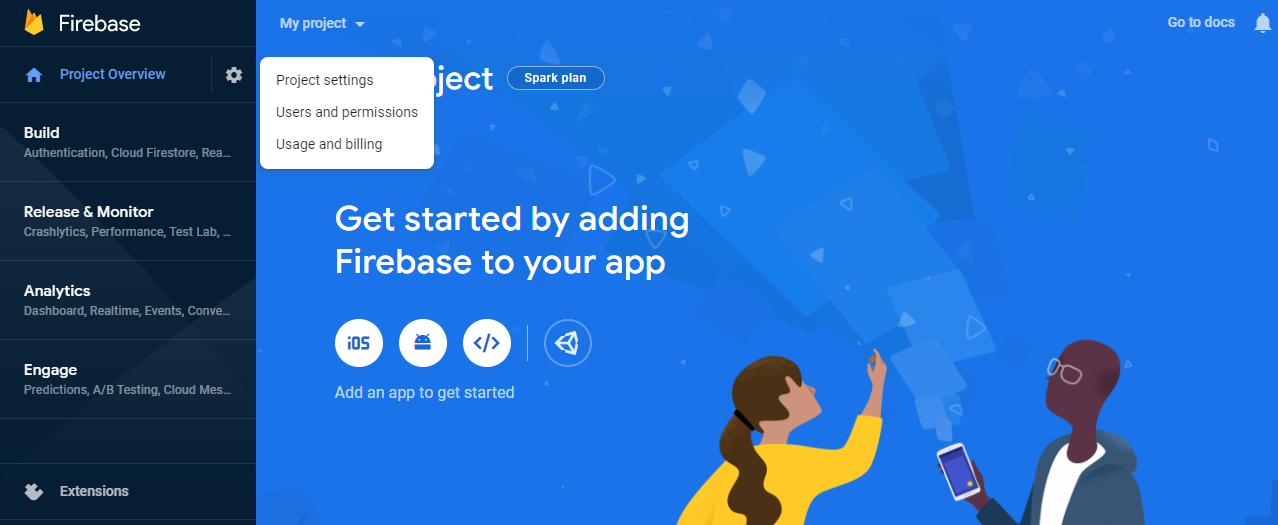
Once the project is created, you need to go to the Project setting as per the below image:
Step 5:
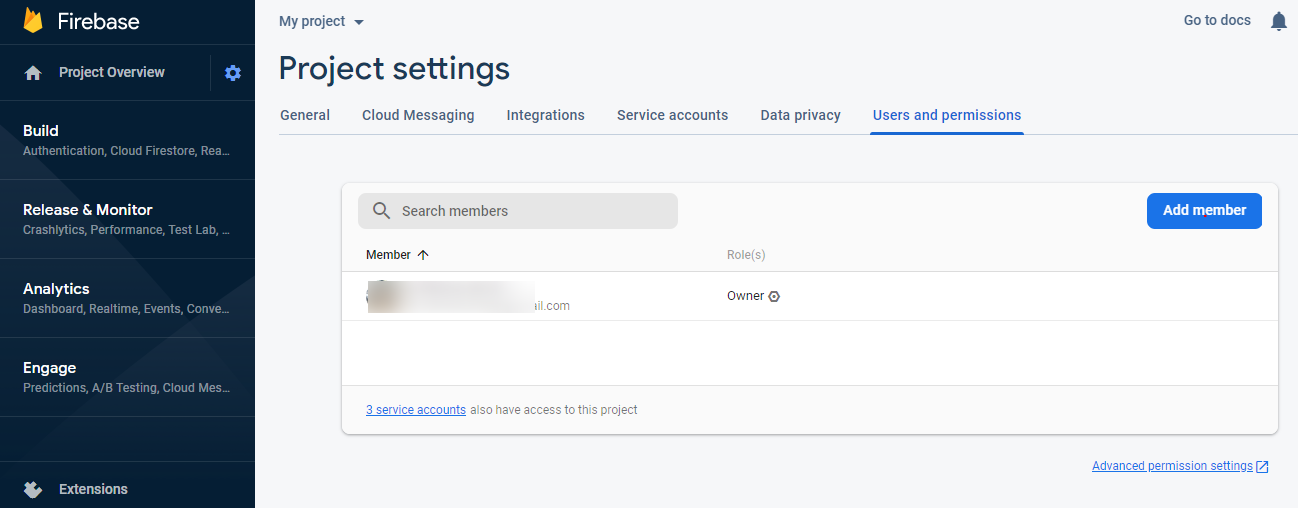
Under Project settings, you need to click on the Users and permissions to give Firebase User Permission. After that, you need to click on the “Add member” button as per the below image:
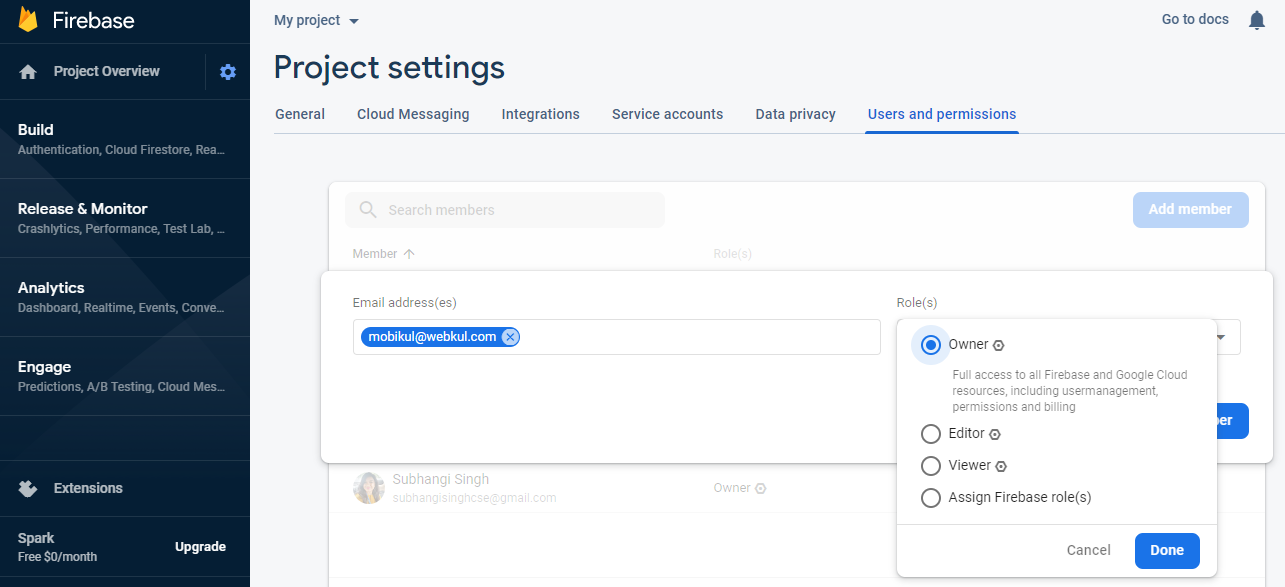
Step 6:
Here, under Email address enter [email protected], and in Role select Owner. Then click on the Done button.
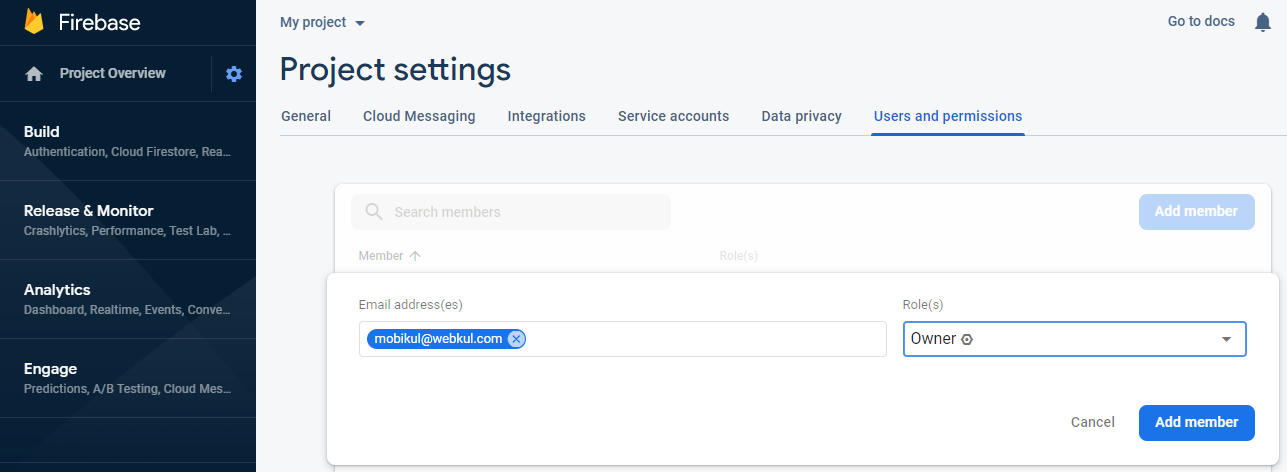
Step 7:
Once, entering the Email address and the Role, you need to click on the Add member button.
After that, you’ll be able to see the member in the list:
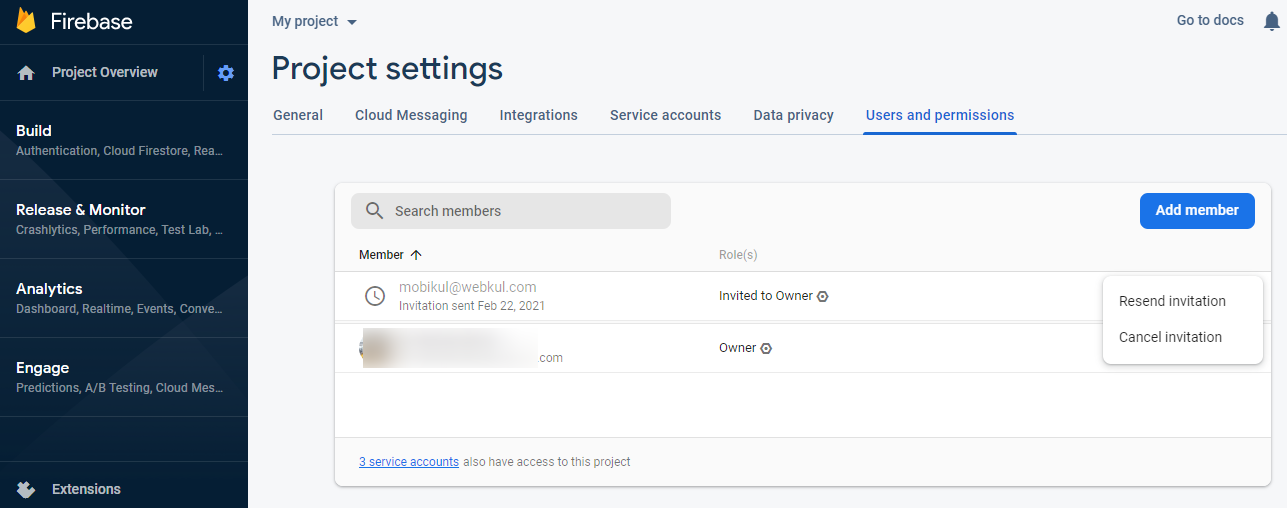
From here, you can Resend the invitation and also can cancel the invitation.
Be the first to comment.