Jetpack Navigation
In this blog, we are going to learn Jetpack Navigation, We will clarify what is Jetpack navigation, it’s benefits, and how to use it.
It simplifies implementing navigation, while also helping you visualize your app’s navigation flow. The library provides a number of benefits, including:
- Automatic handling of fragment transactions so that easy to navigate between fragments.
- Correctly handling up and back by default to easy the back navigation.
- Default behaviors for animations and transitions for UI.
- Deep linking as a first-class operation.
- Implementing navigation UI patterns (like navigation drawers and bottom nav) with little additional work
- Type safety when passing information while navigating
- Android Studio tooling for visualizing and editing the navigation flow of an app
The Navigation component requires Android Studio 3.3 or higher and is dependent on Java 8 language features.
Overview

Overview
The Navigation Component consists of three key parts:
- NavHostFragment (Layout XML view) ? This is a special widget you add to your layout. It displays different destinations from your Navigation Graph.
- NavController (Kotlin/Java object) ? This is an object that keeps track of the current position within the navigation graph. It orchestrates swapping destination content in the NavHostFragment as you move through a navigation graph.
- NavGrapgh (XML resource) This is the resource that contains all navigation-related information in one place so you can easily check the whole app flow in Graph. This includes all the places in the app called destination because it relates to pages in the app.
Integration
Just include the following code in the dependencies block of your module-level build.gradle file.
|
1 2 3 4 5 6 7 8 |
def nav_version = "2.2.2" // Java language implementation implementation "androidx.navigation:navigation-fragment:$nav_version" implementation "androidx.navigation:navigation-ui:$nav_version" // Kotlin implementation "androidx.navigation:navigation-fragment-ktx:$nav_version" implementation "androidx.navigation:navigation-ui-ktx:$nav_version" |
Navigation Graph
First, we will create a file that will contain our navigation graph. In the res, directory create a new android resource file as follows.
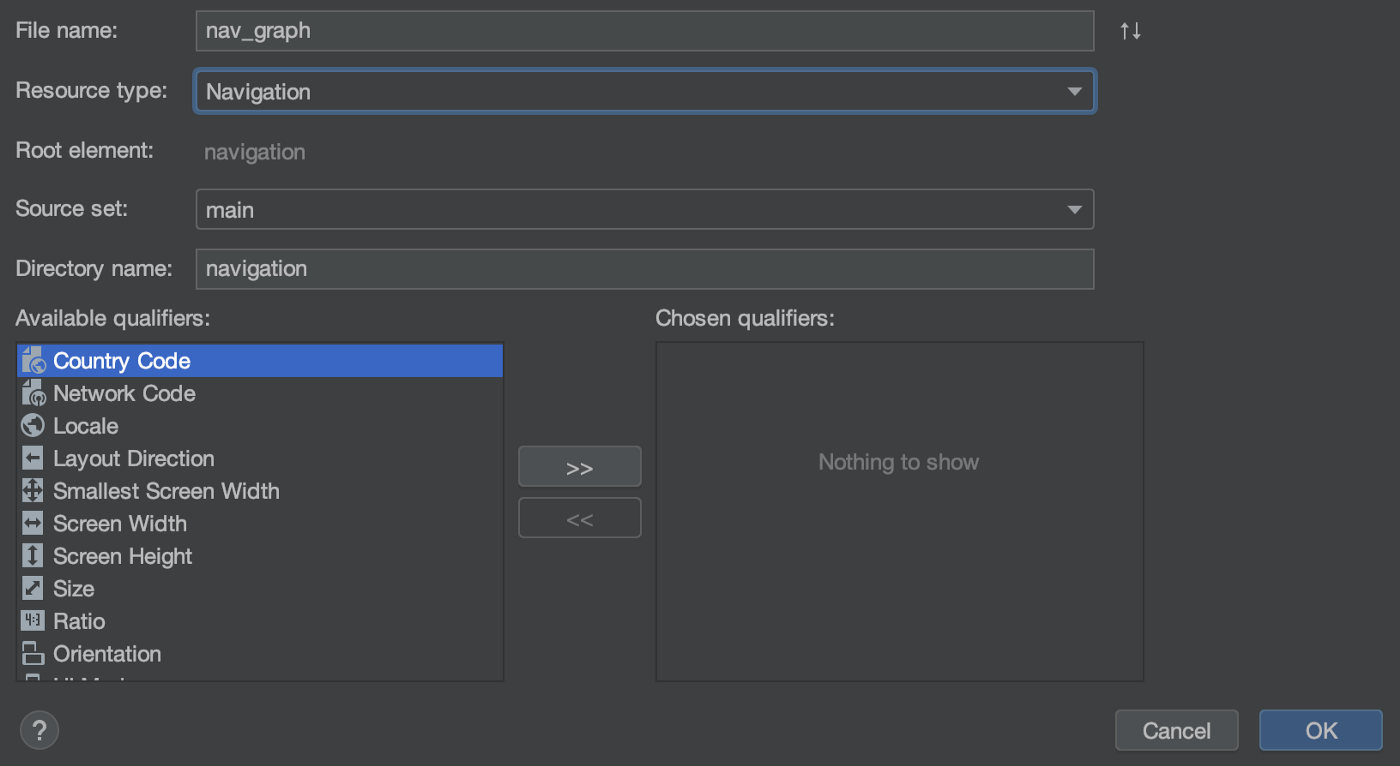
This will create an empty resource file named nav_graph.xml under the navigation directory.
We define these fragments in the navigation graph below.
|
1 2 3 4 5 6 7 8 9 10 11 12 13 14 15 16 17 18 19 20 21 22 23 |
<navigation xmlns:android="http://schemas.android.com/apk/res/android" xmlns:app="http://schemas.android.com/apk/res-auto" xmlns:tools="http://schemas.android.com/tools" android:id="@+id/nav_graph" app:startDestination="@id/nav_first_fragment"> <fragment android:id="@+id/nav_first_fragment" android:name="app.navigationcomponentexample.FirstFragment" tools:layout="@layout/fragment_first"> <action android:id="@+id/action_first_to_second" app:destination="@id/nav_second_fragment"/> </fragment> <fragment android:id="@+id/nav_second_fragment" android:name="app.navigationcomponentexample.SecondFragment" tools:layout="@layout/fragment_second"/> </navigation> |
Here the root tag named navigation has a parameter called startDestination which has the id of our first fragment. This defines that the first fragment will be loaded in the NavHostFragment automatically.
The Navigation Component introduces the concept of a destination. A destination is any place you can navigate to in your app, usually a fragment or an activity.
These are supported out of the box, but you can also make your own custom destination types if needed.
Notice that for first fragment we have defined an action with the following attributes:
|
1 2 |
android:id="@+id/nav_first_fragment" app:destination="@id/nav_second_fragment" |
Each action should have a unique id which we will use to navigate to the required destination.
Here the destination points to the id of the second fragment defined in the nav graph, which means that with this action we will navigate to the second fragment.
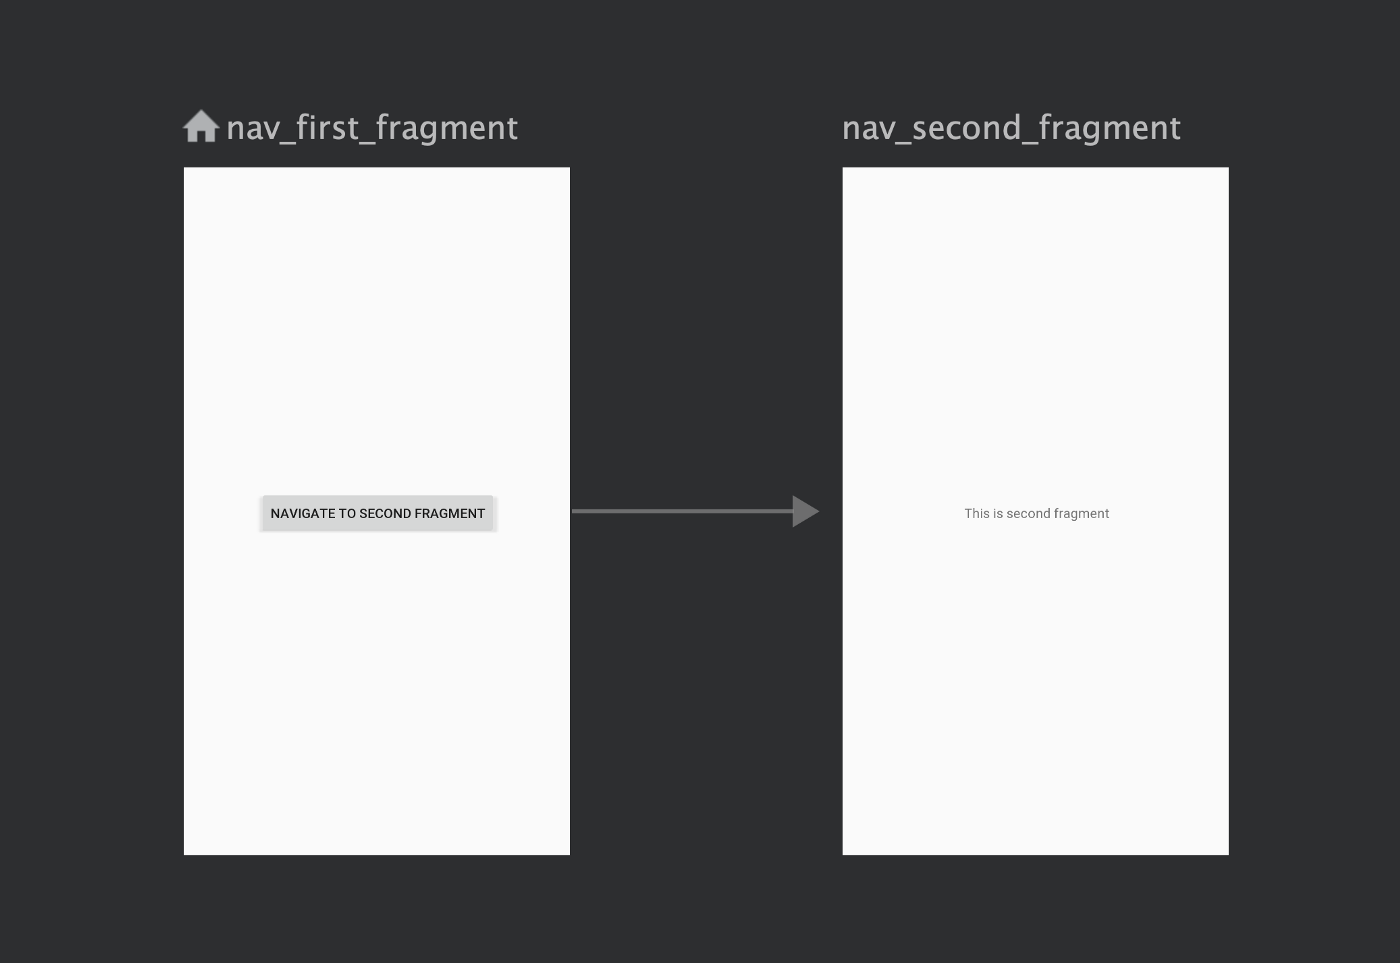
After this step when you open the nav_graph.xml and switch to the design tab, it should look like the following.
Navigation types
1. Navigation using destination Id
We can provide the id of the destination fragment to navigate to it, like the following
|
1 2 3 |
button.setOnClickListener { findNavController().navigate(R.id.nav_second_fragment) } |
2. ClickListener
For views, we can also use createNavigateOnClickListener() method.
|
1 |
button.setOnClickListener(Navigation.createNavigateOnClickListener(R.id.nav_second_fragment, null)) |
3. Navigation using Actions
As in the above nav graph, we have defined action in the first fragment, we can use the id of the action as follows
|
1 2 3 |
button.setOnClickListener { findNavController().navigate(R.id.action_first_to_second) } |
Define the NavHostFragment. It is a special widget it will display the different destinations defined in the nav graph. To load the FirstFragment then copy the following code and paste it in the layout of the activity.
|
1 2 3 4 5 6 7 |
<fragment android:id="@+id/nav_host_fragment" android:layout_width="match_parent" android:layout_height="match_parent" android:name="androidx.navigation.fragment.NavHostFragment" app:navGraph="@navigation/nav_graph" app:defaultNavHost="true"/> |
Jetpack another library – Android Jetpack Compose
Thank you!

Be the first to comment.