Image filtration with motion layout
In this blog, we are going to learn some cool features of motion layout. Image filtration is one of them.
MotionLayout:-
Motion Layout is a new class available in the ConstraintLayout 2.0 library. By using this class we can manage motion and widget animation in their application.
First of all, we have to implement dependency.
|
1 |
implementation 'androidx.constraintlayout:constraintlayout:2.0.0-alpha2' |
Implement this in your build.greadle (app) file.
Lets’s start some code:-
Now open your layout file in my case it is activity_main.xml.
|
1 2 3 4 5 6 7 8 9 10 11 12 13 14 15 16 17 |
<?xml version="1.0" encoding="utf-8"?> <androidx.constraintlayout.motion.widget.MotionLayout xmlns:android="http://schemas.android.com/apk/res/android" xmlns:app="http://schemas.android.com/apk/res-auto" xmlns:tools="http://schemas.android.com/tools" android:id="@+id/motion_layout" android:layout_width="match_parent" android:layout_height="match_parent" app:layoutDescription="@xml/demo_motion" tools:context=".MainActivity"> <androidx.constraintlayout.utils.widget.ImageFilterView android:id="@+id/image" android:layout_width="100dp" android:layout_height="100dp" app:srcCompat="@drawable/sun_set" /> </androidx.constraintlayout.motion.widget.MotionLayout> |
In this layout file, We have MotionLayout as a view group and ImageFilterView as a child view. To perform Image filtration we need to use ImageFilterView.
|
1 |
app:layoutDescription="@xml/demo_motion" |
In this layout file, we use layoutDescription attribute and parse a layout file motion demo_motion in it. Because layoutDesciption holds a reference of your motion_scene layout file.
|
1 2 3 4 5 6 7 8 9 10 11 12 13 14 15 16 17 18 19 20 21 22 23 24 25 26 27 28 29 30 31 32 33 34 35 36 37 38 39 40 41 42 43 44 45 46 |
<?xml version="1.0" encoding="utf-8"?> <MotionScene xmlns:android="http://schemas.android.com/apk/res/android" xmlns:motion="http://schemas.android.com/apk/res-auto"> <Transition motion:constraintSetEnd="@id/end" motion:constraintSetStart="@id/start" motion:duration="1000" motion:interpolator="linear"> <OnSwipe motion:dragDirection="dragRight" motion:touchAnchorId="@+id/image" motion:touchAnchorSide="right" /> </Transition> <ConstraintSet android:id="@+id/start"> <Constraint android:id="@id/image" android:layout_width="100dp" android:layout_height="100dp" android:layout_marginStart="8dp" motion:layout_constraintBottom_toBottomOf="parent" motion:layout_constraintStart_toStartOf="parent" motion:layout_constraintTop_toTopOf="parent"> <CustomAttribute motion:attributeName="saturation" motion:customFloatValue="1" /> </Constraint> </ConstraintSet> <ConstraintSet android:id="@+id/end"> <Constraint android:id="@id/image" android:layout_width="100dp" android:layout_height="100dp" android:layout_marginEnd="8dp" motion:layout_constraintBottom_toBottomOf="parent" motion:layout_constraintEnd_toEndOf="parent" motion:layout_constraintTop_toTopOf="parent"> <CustomAttribute motion:attributeName="saturation" motion:customFloatValue="0" /> </Constraint> </ConstraintSet> </MotionScene> |
This is the file that defines the type of motion/animation we want and what the starting/ending constraints are.
Here we defined a Transition (the animation) with duration & a start/endpoint to the layouts. And also a swipe Trigger on the image (with up direction) — which adds interactivity.
Specifying the saturation can be done simply by using a CustomAttribute:
|
1 |
<CustomAttribute motion:attributeName="saturation" motion:customFloatValue="1" /> |
Therefore we define saturation values 1 and 0 to get the filter effect.
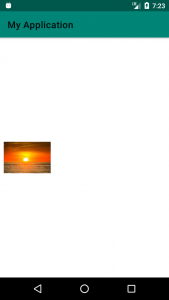
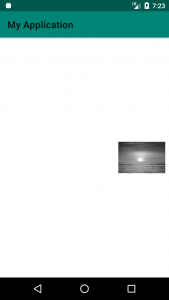
As a result of saturation manipulation, we get a filter effect on our image.
We define two ConstraintSet children in our xml. Start and end positions of that image.
Finally, we have achieved Image filtration with motion layout.


Be the first to comment.