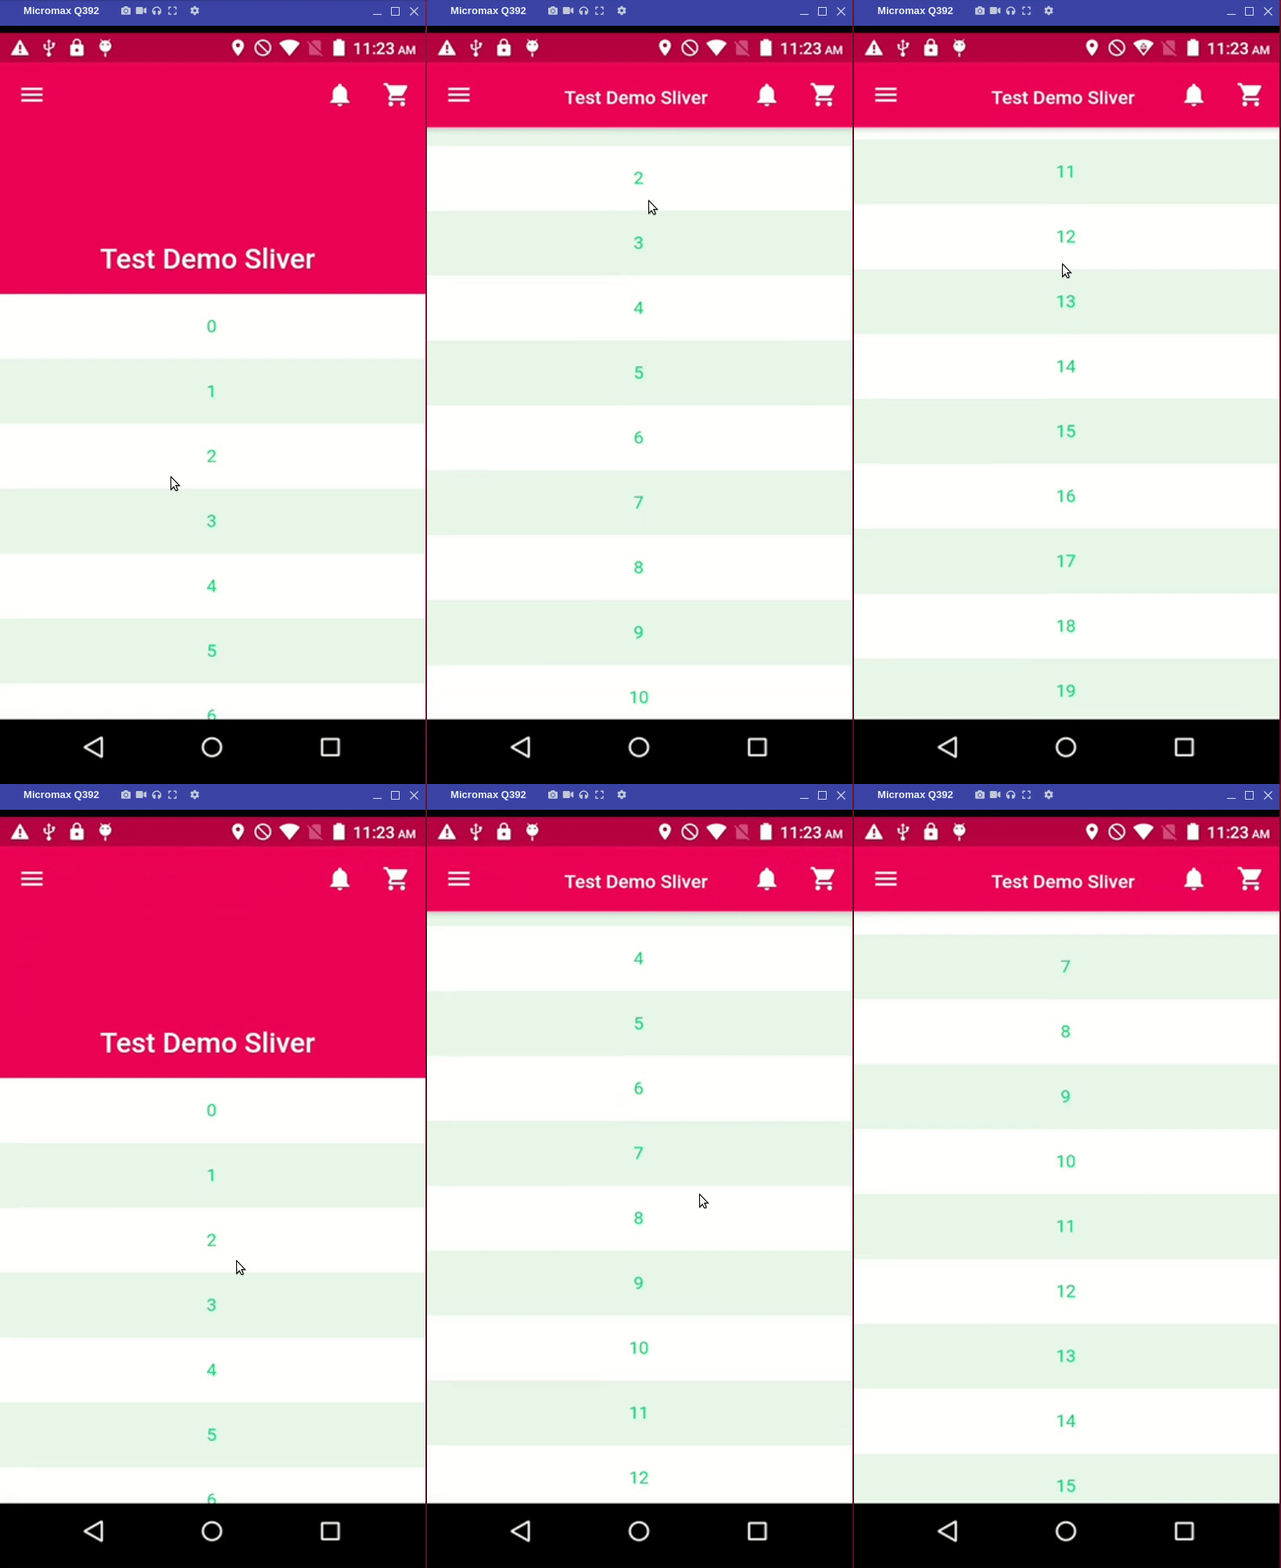
In this blog, we are going to learn about how to create a sliver app bar in a flutter. So let’s get started.
A Material Design sliver app bar, that integrates with a CustomScrollView.
SliverAppBar is a Material Design widget in flutter which gives scrollable or collapsible app-bar. The word Sliver is given to scrollable areas here.
The Sliver app bar consists of a Tabbar and a FlexibleSpaceBar.
The word Sliver is given to scrollable areas here.
You may also check our Flutter app development company.
To Implement a sliver app bar do follow below steps mentioned.
1.) Create a Scaffold.
2.) Display the sliver app bar.
3.) Provide an optional action.
1.) Create a Scaffold. :
Inside Scaffold widgets, it Implements the basic material design visual layout structure.
This class provides APIs for showing drawers and bottom sheets. We can add the background color inside the scaffold widget.
It also supports special Material Design components, such as Drawers, AppBars, and SnackBars.
We have the main function which calls the MyApp class through the runApp method.
Then by using the Widget build(BuildContext context), started describing the UI of the app.
We have provided the example below.
|
1 2 3 4 5 6 7 8 9 10 11 12 13 14 15 16 17 18 19 20 |
import 'package:flutter/material.dart'; void main() => runApp(MyApp()); class MyApp extends StatelessWidget { @override Widget build(BuildContext context) { final title = 'Test Demo Sliver '; return MaterialApp( home: Scaffold( body: CustomScrollView() ), //Scaffold debugShowCheckedModeBanner:false, // Remove debug banner for proper // view of setting icon ); //MaterialApp } } |
2.) Display the sliver app bar.
First, create an CustomScrollView, for making the sliver app bar, then display it using ScaffoldMessenger.
We have slivers property that takes a list of widgets and makes them scrollable.
The first three properties snap is false, pinned is true and floating is false.
|
1 2 3 4 5 6 7 8 9 10 11 12 13 14 15 16 17 18 19 20 21 22 23 24 25 26 27 28 29 30 31 32 33 34 35 36 37 38 39 40 41 42 43 44 45 46 47 48 49 50 51 52 53 54 55 56 57 58 59 60 |
return MaterialApp( home: Scaffold( body: CustomScrollView( slivers: <Widget>[ SliverAppBar( snap: false, pinned: true, floating: false, flexibleSpace: FlexibleSpaceBar( centerTitle: true, title: Text("$title", style: TextStyle( color: Colors.white, fontSize: 16.0, ) //TextStyle ), //Text ), //FlexibleSpaceBar expandedHeight: 200, backgroundColor: Colors.pinkAccent[400], leading: IconButton( icon: Icon(Icons.menu), tooltip: 'Menu', onPressed: () {}, ), //IconButton actions: <Widget>[ IconButton( icon: Icon(Icons.notifications), tooltip: 'Notification Icon', onPressed: () {}, ), //IconButton IconButton( icon: Icon(Icons.shopping_cart), tooltip: 'Cart Icon', onPressed: () {}, ), //IconButton ], //<Widget>[] ), //SliverAppBar SliverList( delegate: SliverChildBuilderDelegate( (context, index) => ListTile( tileColor: (index % 2 == 0) ? Colors.white : Colors.green[50], title: Center( child: Text('$index', style: TextStyle( fontWeight: FontWeight.normal, fontSize: 15, color: Colors.greenAccent[400]) //TextStyle ), //Text ), //Center ), //ListTile childCount: 51, ), //SliverChildBuildDelegate ) //SliverList ], //<Widget>[] ) //CustonScrollView ), //Scaffold debugShowCheckedModeBanner:false, // Remove debug banner for proper // view of setting icon ); |
3.) Provide An Optional Action.
Now, we need to provide an action to the user when the Sliver app bar is displayed.
The full code is mentioned below.
|
1 2 3 4 5 6 7 8 9 10 11 12 13 14 15 16 17 18 19 20 21 22 23 24 25 26 27 28 29 30 31 32 33 34 35 36 37 38 39 40 41 42 43 44 45 46 47 48 49 50 51 52 53 54 55 56 57 58 59 60 61 62 63 64 65 66 67 68 69 70 71 72 |
import 'package:flutter/material.dart'; void main() => runApp(MyApp()); class MyApp extends StatelessWidget { @override Widget build(BuildContext context) { final title = 'Test Demo Sliver '; return MaterialApp( home: Scaffold( body: CustomScrollView( slivers: <Widget>[ SliverAppBar( snap: false, pinned: true, floating: false, flexibleSpace: FlexibleSpaceBar( centerTitle: true, title: Text("$title", style: TextStyle( color: Colors.white, fontSize: 16.0, ) //TextStyle ), //Text ), //FlexibleSpaceBar expandedHeight: 200, backgroundColor: Colors.pinkAccent[400], leading: IconButton( icon: Icon(Icons.menu), tooltip: 'Menu', onPressed: () {}, ), //IconButton actions: <Widget>[ IconButton( icon: Icon(Icons.notifications), tooltip: 'Notification Icon', onPressed: () {}, ), //IconButton IconButton( icon: Icon(Icons.shopping_cart), tooltip: 'Cart Icon', onPressed: () {}, ), //IconButton ], //<Widget>[] ), //SliverAppBar SliverList( delegate: SliverChildBuilderDelegate( (context, index) => ListTile( tileColor: (index % 2 == 0) ? Colors.white : Colors.green[50], title: Center( child: Text('$index', style: TextStyle( fontWeight: FontWeight.normal, fontSize: 15, color: Colors.greenAccent[400]) //TextStyle ), //Text ), //Center ), //ListTile childCount: 51, ), //SliverChildBuildDelegate ) //SliverList ], //<Widget>[] ) //CustonScrollView ), //Scaffold debugShowCheckedModeBanner:false, // Remove debug banner for proper // view of setting icon ); //MaterialApp } } |


Be the first to comment.