Transferring iOS application form one developer account to another
We need to follow some steps before transferring the application to the app store.
1. whether the app can be transferred or not:
Before transferring the application you must meet up with all the criteria of the apple developer team. Click here to see all criteria.
2. Gather the Apple ID and Team ID of the account holder upon which you have to transfer the application.
- Apple ID: This is the email ID from which you login into the account.
- Team ID: This the unique ID of the apple developer account. You can find the team ID from the membership page of the apple developer account.
3. Get Started with App Transfer:
You need to log in from the developer account upon which the application is already live. Then follow the below-mentioned steps.
3.1. Login To App Store Connect and click on “My APP”.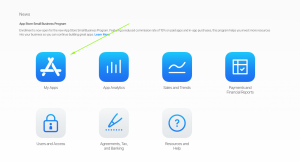
3.2. Open the Application which you want to transfer, then “App Information” from “General Tab”, and then click on “Transfer App”.
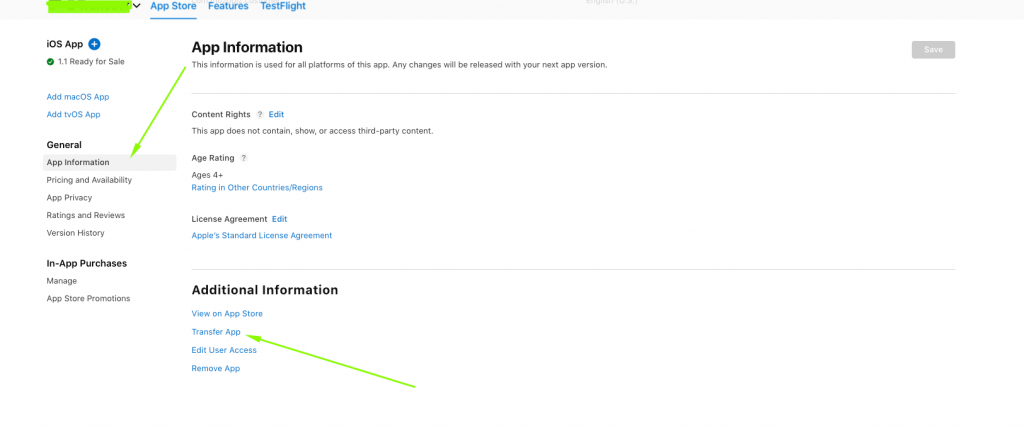
3.3. Now Verify that your application satisfies all the criteria and then click on “Continue”
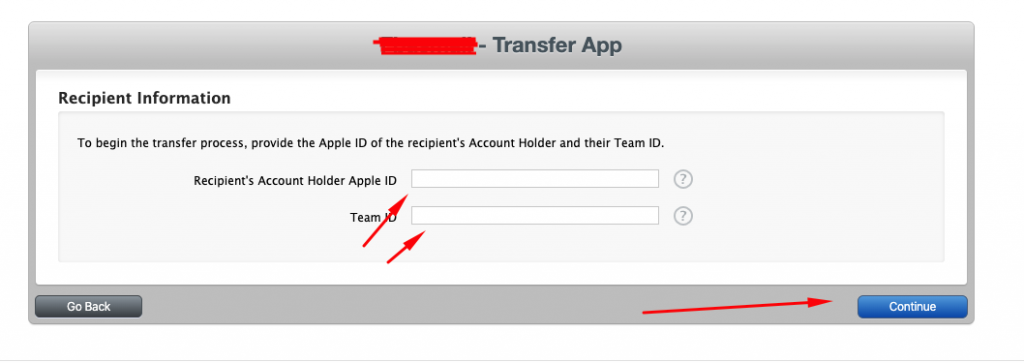
3.4. Now Enter The Apple ID and Team ID of the account upon which you want to transfer the application.
3.5. Now you need to Agree to the Apple Terms and Condition and click on “Request Transfer”.
4. Now Login To Account Upon which the transfer request is sent and follow the below mention steps:
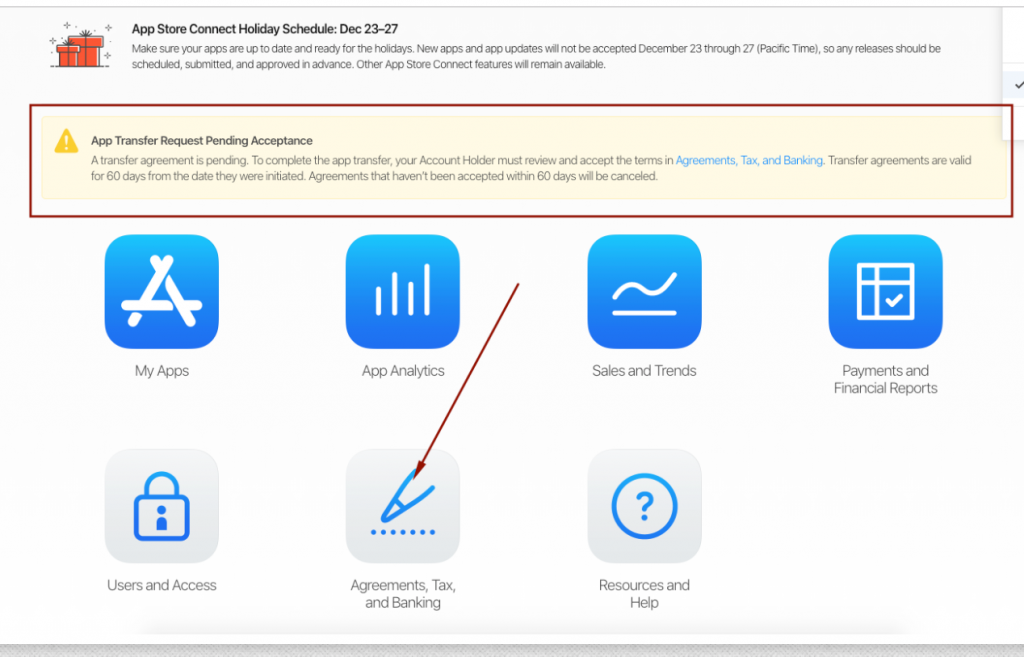
When you log in to the account then you will see a notice of “App Transfer Request Pending Acceptance”. You need to accept the transfer request within 60 days of its initiation otherwise the request will be rejected.
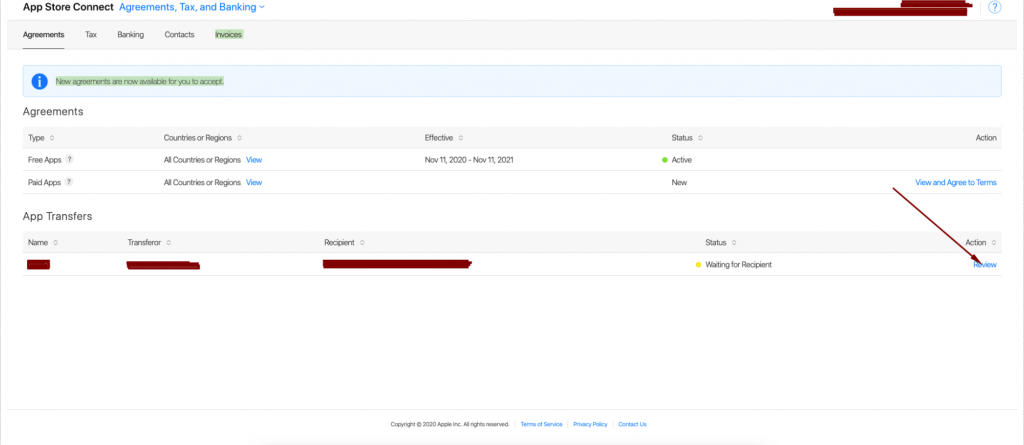
4.1. Click on Agreements, Tax & Banking
4.2. Now Click on Review
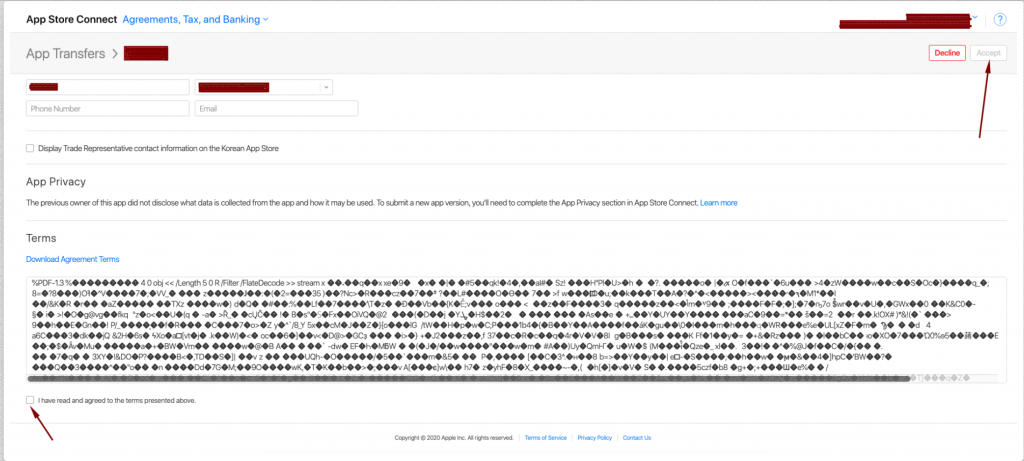
4.3. Now Scroll Down and Fill in all the metadata and then agree on terms and click on Accept.
Once all the above-mentioned steps will be completed. Then it can take up to two business days for the app transfer to complete, during which the app status is Processing App Transfer.
When the transfer is complete, the app will appear in the new account and the app no longer appears in the original App Store Connect account.
Thank you for reading this article.

Be the first to comment.