Hey freaks, In this tutorial I am going to show you how to debug your application over Wifi step by step.
Why did I need,
I was working on a USB printer some days back, that was connected to my device, and simultaneously I would need to run my app again.
So how to run it, need to plug out the printer USB and then plug in the USB cable and after completing the build and again plug in the printer USB and if you get crash while Printing things then again switch the cable ….blah blah ….waste a lot of time…… that was very hectic.
So I have searched some WIFI option to Run the application and then I found a very simple solution to Do it. Using ADB wifi plugin.
What is ADB Wifi?
ADB Wifi is the android studio plugin that allows the developer to run/debug app over wifi from android studios.
How To Install
Followings are very simple steps to install the plugin,
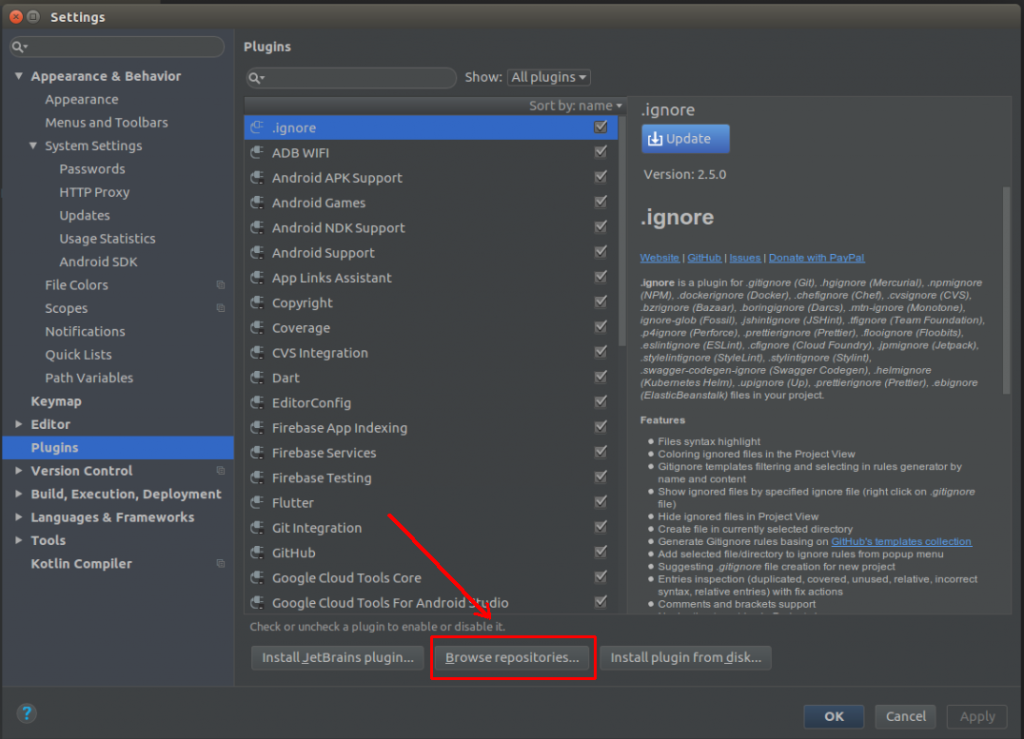
Step 1: Go to File -> Settings -> Select the Plugin Option

Open plugin and go for Browse repositories,

Step 2: Search the ADB Wifi,

And Install the First one (ADB Wifi) I preferred this one.
Step 3: Wow, the Installation is Completed. Restart your Android Studio IDE.
After restarting you can see an option in Tools -> ADB WIFI

How to Use
These steps are also very easy,
- Connect the device via USB and make sure debugging is working;
adb tcpip 5555. This makes the device to start listening for connections on port 5555;- Look up the device IP address with
adb shell ifconfigon 6.0 and higher; - You can disconnect the USB now;
adb connect <DEVICE_IP_ADDRESS>:5555. This connects to the server we set up on the device on step 2;- Now you have a device over the network with which you can debug as usual.
- Go to Tools -> ADB WIfi -> ADB USB to Wifi
- Then for the next time, you only have to run the App without the USB.
Note: Your test android device and system both connected via same wifi network.
Now done, You have switch successfully from cable to WIfi.
Happy Coding.
Stay cool And Stay updated.

Be the first to comment.