In this blog, we will learn about how to add style on google maps in flutter.
Sometimes we need or we want to modify the map style according to our own choice.So, here is the solution.
Without wasting time let’s implement the style in google map very quickly.
Check our Flutter app development page.
Step1:-Add the google map dependency.
First add the google_maps_flutter package dependency in Pubspec.yaml file.Then create the map using GoogleMap widget as shown below.
Note:-Don’t forget to add google API key in your AndroidManifest.xml file.
|
1 2 3 4 5 6 7 8 9 10 11 12 13 14 15 16 17 |
GoogleMap( myLocationButtonEnabled: true, myLocationEnabled: true, zoomControlsEnabled: true, scrollGesturesEnabled:true, initialCameraPosition: CameraPosition( target: cameraLocation, zoom: 16.0, ), onMapCreated: (GoogleMapController controller) { _controller = controller; }, onCameraMove: (positions) { }, ), |
You have created your map successfully.Now you are getting the as shown below.
Step2:- Add the style files.
In Flutter, we need to add style files for both i.e. for iOS and Android separately.
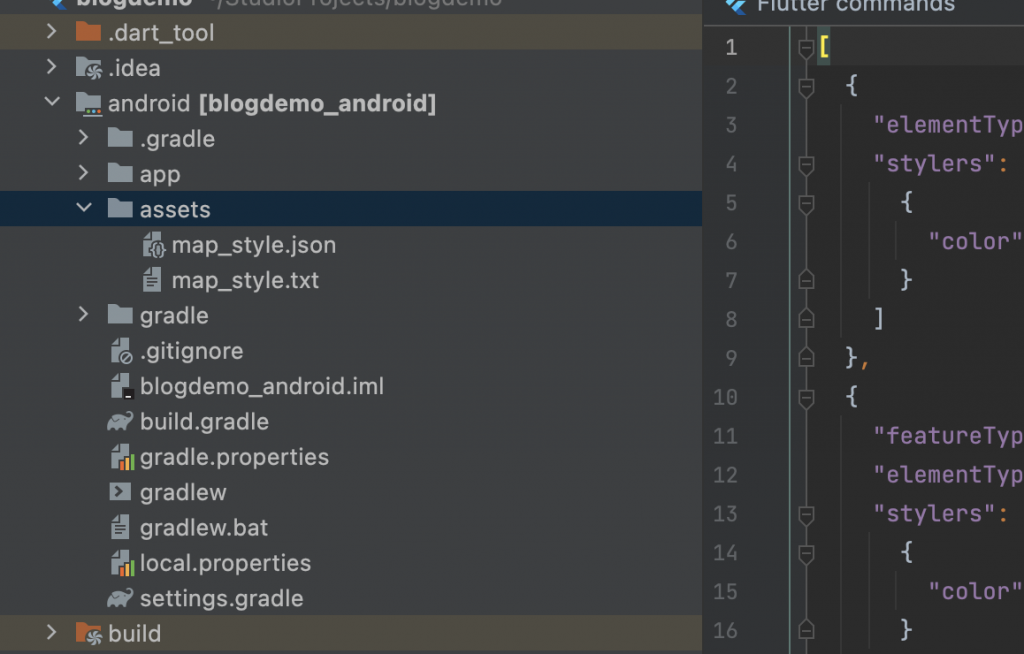
For Android we will add .txt extension file and for iOS we will add .json extension file in the assets folder.
As shown in the below image, Io have added map_style.json and map_style.txt for iOS and Android respectively.
you can create your style with the link https://mapstyle.withgoogle.com/ .
You can use any of the pre-made themes, or create your own style in detail.
Step3:-Parse the style files
Initially, you need to add the asset file path in your pubspec.yaml file and the run pub get command.
Now,parse the files in your initistate method and pass the style to the controller with platform check.
|
1 2 3 4 5 6 7 8 9 10 11 |
@override void initState() { rootBundle.loadString('assets/map_style.txt').then((string) { _mapStyle = string; }); rootBundle.loadString('assets/map_style.json').then((string) { _mapStyleIos = string; }); super.initState(); } |
|
1 2 3 4 5 6 |
onMapCreated: (GoogleMapController controller) { _controller = controller; Platform.isAndroid? _controller?.setMapStyle(_mapStyle): _controller?.setMapStyle(_mapStyleIos); }, |
Now, we are done.Run the project and check the output.
Step4:-Check the Output
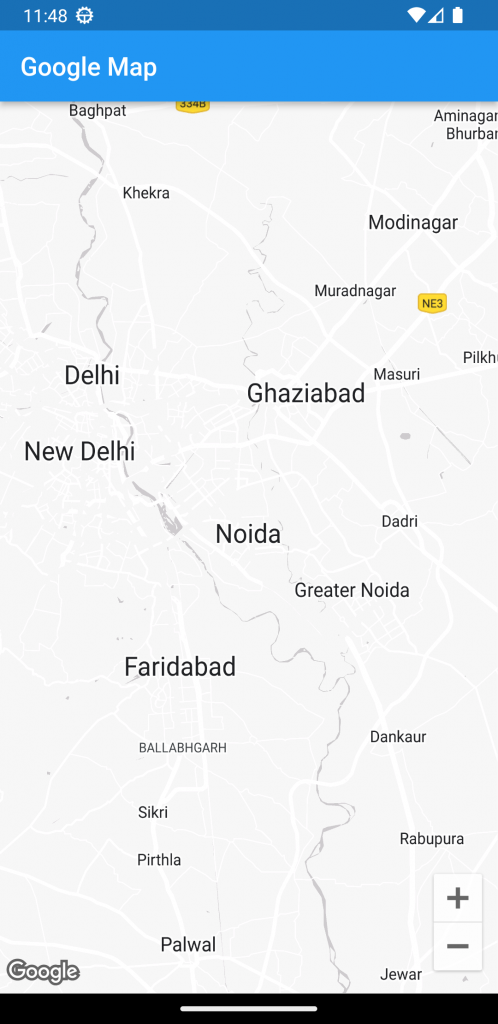
for Android, the output will be like as show shown in below image.
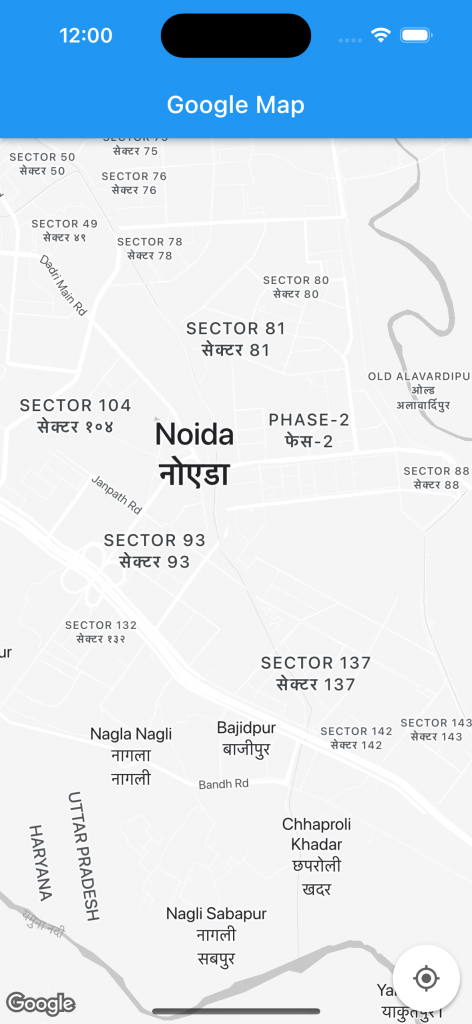
For iOS,it will be like as shown in the below image.
As you can see for android and iOS both we have change the view of map completely by adding our own style.
Using this we can add your own style in your flutter application.
Congratulations!!!! you have learned how to implement style in google maps in Flutter.
For more interesting blogs check out here – https://mobikul.com/blog/
Hope this blog helped you with a better understanding of the implementation of style in google maps in Flutter.
Thanks for reading.😇
References
https://developers.google.com/maps/documentation/android-sdk/styling


Be the first to comment.