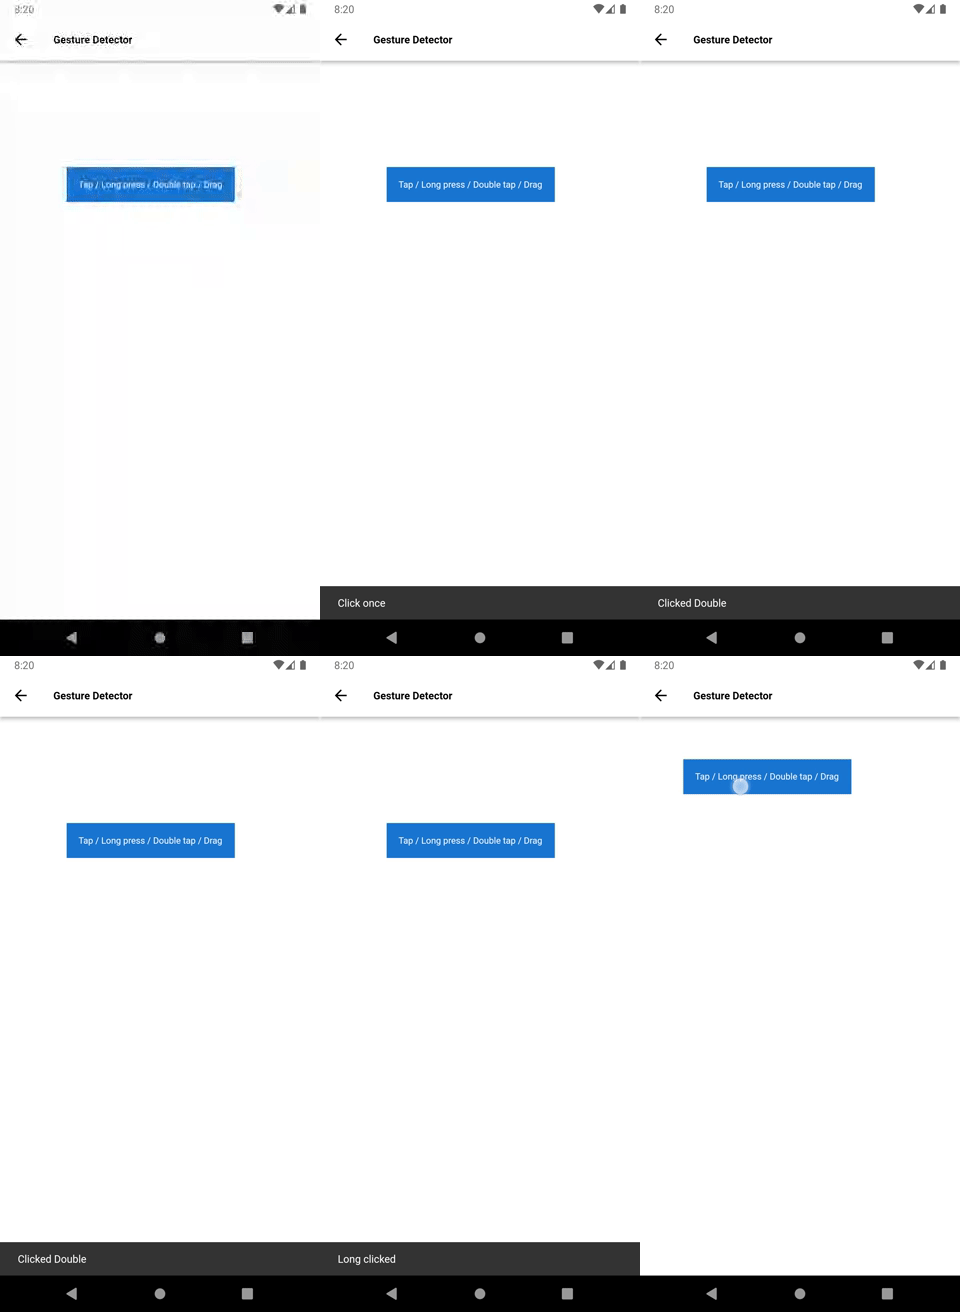
Use Gesture Detector in the Flutter class as a widget to detect the user’s gestures on the application. It is a non-visual widget. It Attempts to acknowledge gestures that correspond to its non-null callbacks.
The Gesture Detector widget works by recognizing gestures that have callbacks defined and responding accordingly to the event. If a gesture is to be disabled, a null value is passed to the callback.
You can find out more about the Flutter app development services page.
To implement the Gesture Detector follow the steps mentioned below.
1.) Create a Scaffold.
2.) Create the Gesture Detector to display action buttons.
3.) Use the Gesture Detector widget.
1.) Create a Scaffold. :
Inside Scaffold widgets, it Implements the basic material design visual layout structure. First, initialize the main app as a stateless widget.
This class provides APIs for showing drawers and bottom sheets. We can add the background color inside the scaffold widget.
It also supports special Material Design components, such as Drawers, AppBars, and SnackBars.
|
1 2 3 4 5 6 7 8 9 10 11 12 13 14 15 16 17 18 19 20 21 |
void main() { runApp(const MyApp()); } class MyApp extends StatelessWidget { const MyApp({Key? key}) : super(key: key); // This widget is the root of your application. @override Widget build(BuildContext context) { return MaterialApp( debugShowCheckedModeBanner: false, title: 'Gesture Detector', theme: ThemeData( primarySwatch: Colors.blue, ), home: _GestureDetectorScreen(), ); } } |
2.) Create the Gesture Detector to display action buttons.
By default a Gesture Detector with an invisible child ignores touches. This behavior can only be controlled with behavior.
Gesture Detector also listens for accessibility events and maps them to the callbacks.
Create a variable to put the button on the screen with left and top positions.
|
1 |
double _top = 140, _left = 90; |
3.) Use the Gesture Detector widget.
The gesture system in Flutter has two separate layers.
The first layer has raw pointer events that describe the location and movement of pointers (for example, touches, mice, and style) across the screen.
The second layer has gestures that describe semantic actions that consist of one or more pointer movements.
The full code is mentioned below.
|
1 2 3 4 5 6 7 8 9 10 11 12 13 14 15 16 17 18 19 20 21 22 23 24 25 26 27 28 29 30 31 32 33 34 35 36 37 38 39 40 41 42 43 44 45 46 47 48 49 50 51 52 53 54 55 56 57 58 59 60 61 62 63 64 65 66 67 68 69 70 71 72 73 74 75 76 77 78 79 80 81 82 |
import 'package:flutter/material.dart'; void main() { runApp(const MyApp()); } void main() { runApp(const MyApp()); } class MyApp extends StatelessWidget { const MyApp({Key? key}) : super(key: key); // This widget is the root of your application. @override Widget build(BuildContext context) { return MaterialApp( debugShowCheckedModeBanner: false, title: 'Gesture Detector', theme: ThemeData( primarySwatch: Colors.blue, ), home: _GestureDetectorScreen(), ); } } class _GestureDetectorScreen extends StatelessWidget { double _top = 140, _left = 90; @override Widget build(BuildContext context) { return Center( child: Stack( children: [ Positioned( top: _top, left: _left, child: GestureDetector( onPanUpdate: (DragUpdateDetails data) { _top = max(0, _top + data.delta.dy); _left = max(0, _left + data.delta.dx); setState(() {}); }, onTap: () { ScaffoldMessenger.of(context).showSnackBar( const SnackBar( content: Text('Click once'), ), ); }, onDoubleTap: () { ScaffoldMessenger.of(context).showSnackBar( const SnackBar( content: Text('Clicked Double'), ), ); }, onLongPress: () { ScaffoldMessenger.of(context).showSnackBar( const SnackBar( content: Text('Long clicked'), ), ); }, child: Container( color: Theme.of(context).primaryColorDark, child: const Padding( padding: EdgeInsets.all(16.0), child: Text( 'Tap / Long press / Double tap / Drag', style: TextStyle( color: Colors.white, ), ), )), ), ), ], ), ); } } |

We can now run the app on how to create GestureDetector in a flutter.
Finally, we have implemented the flow of creating GestureDetector in a flutter.
Hope this blog helps you to create Gesture Detector in a flutter.
So, I hope it will help you understand and get a brief idea about it.
You can also check these links.
Another mentioned URL.
For more understanding please can go through this Link :
That’s all.
Thank you very much.

Be the first to comment.