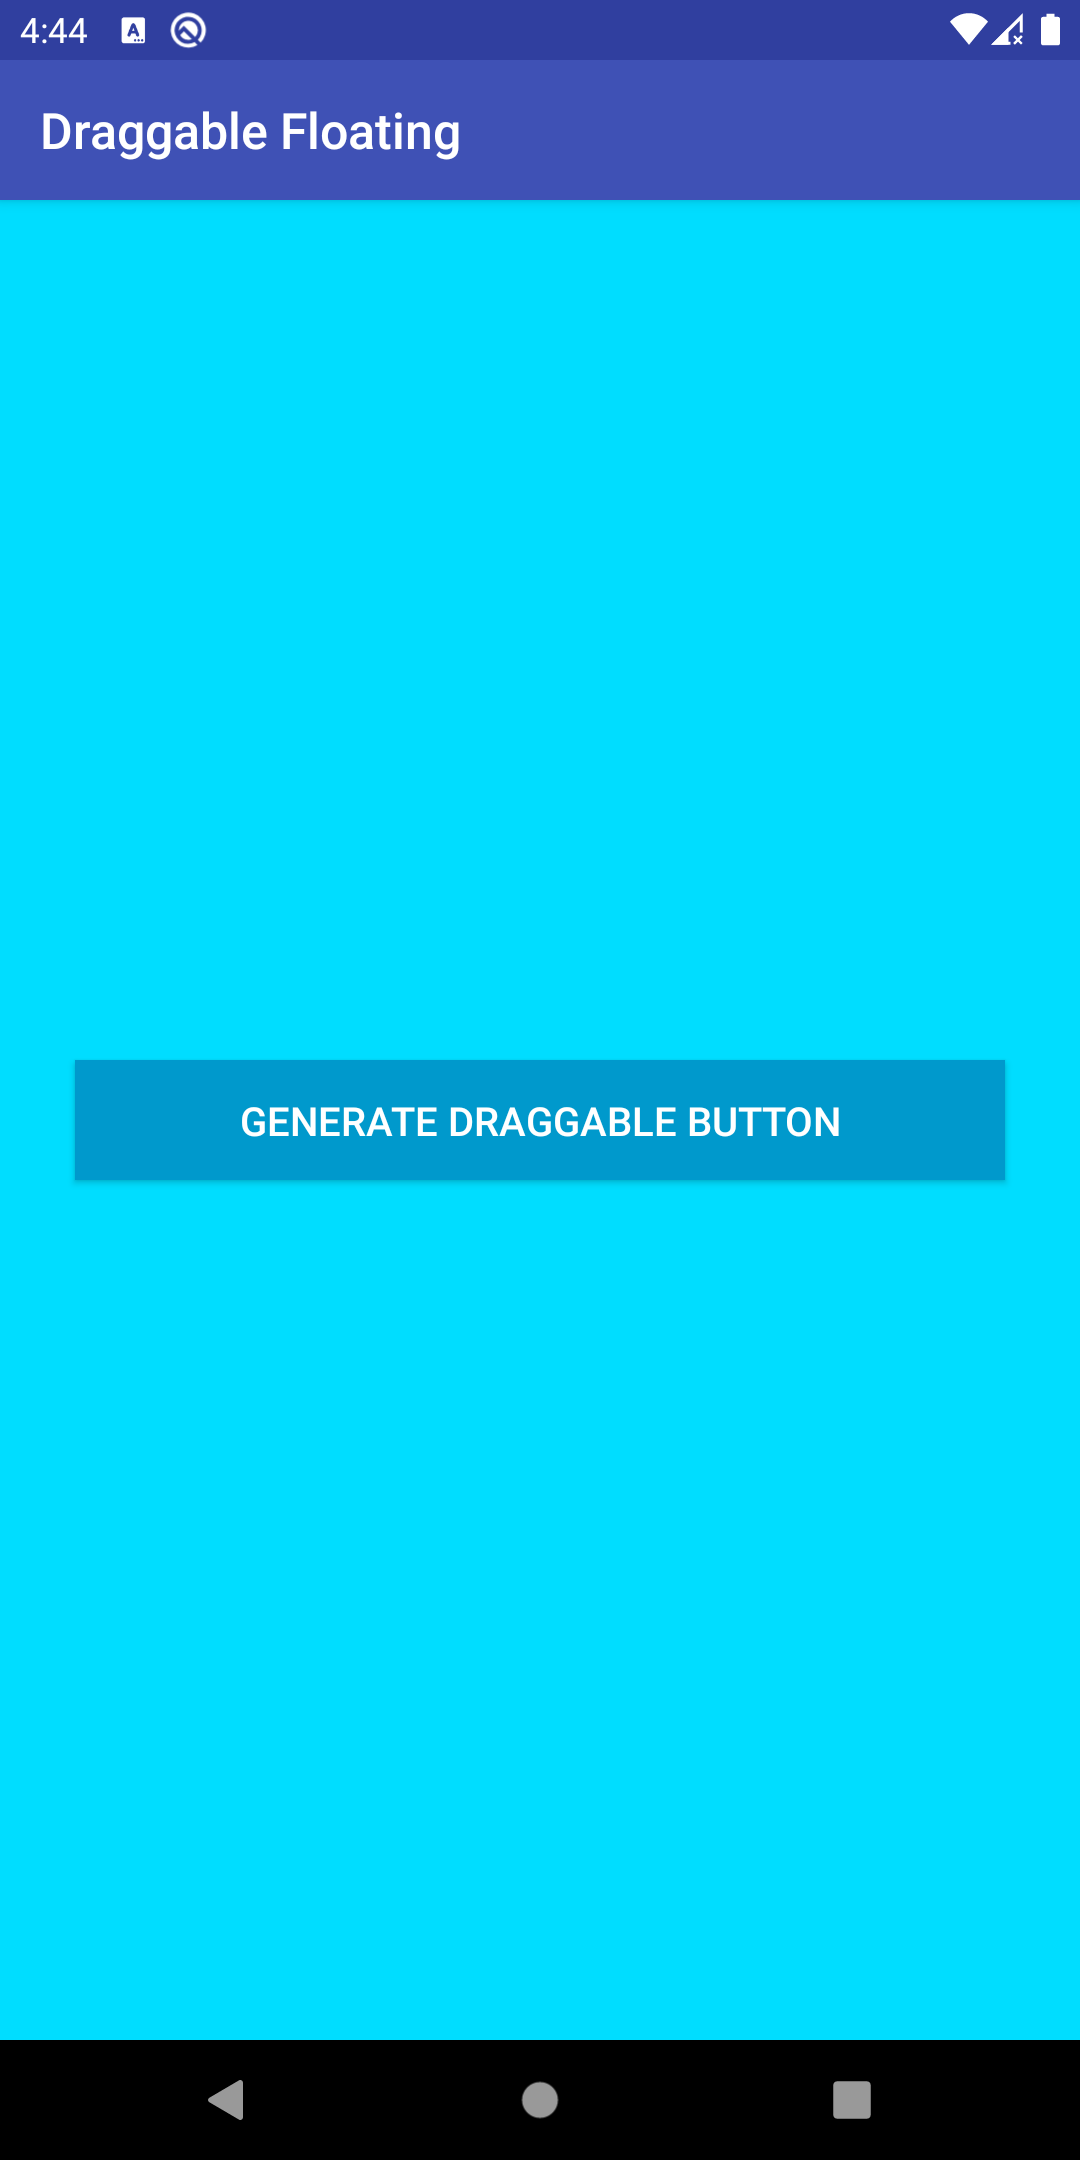
In this blog, we will learn how the Draggable Floating Button Floats all over the screen in Flutter.
A floating action button (FAB) is a circular button that triggers the primary action in your app’s UI. This page shows you how to add the FAB to your layout, customize some of its appearances, and respond to button taps. We can enhance our app more flexible by using Draggable Floating Button Floats all over the screen in Flutter.
Let’s understand with an example.
It is a circular button that triggers the primary action in our app’s UI.
1.) Firstly we have to make the floating button and Service class.
Manifest:
Add SYSTEM_ALERT_WINDOW permission in the Manifest.
|
1 |
<uses-permission android:name="android.permission.SYSTEM_ALERT_WINDOW" /> |
|
1 2 3 4 |
<service android:name=".FloatingWidgetService" android:enabled="true" android:exported="false" /> |
activity_main.xml
|
1 2 3 4 5 6 7 8 9 10 11 12 13 14 15 16 17 18 19 20 21 22 23 |
<?xml version="1.0" encoding="utf-8"?> <androidx.constraintlayout.widget.ConstraintLayout xmlns:android="http://schemas.android.com/apk/res/android" android:layout_width="match_parent" android:layout_height="match_parent" xmlns:app="http://schemas.android.com/apk/res-auto" android:padding="10dp" android:background="@android:color/holo_blue_bright"> <Button android:id="@+id/floating_button" android:layout_width="match_parent" android:layout_height="wrap_content" android:onClick="onClickFloatingButton" android:text="@string/generate_floating" android:textColor="@color/white" android:textSize="16sp" android:layout_margin="20dp" android:background="@android:color/holo_blue_dark" app:layout_constraintTop_toTopOf="parent" app:layout_constraintStart_toStartOf="parent" app:layout_constraintEnd_toEndOf="parent" app:layout_constraintBottom_toBottomOf="parent"/> </androidx.constraintlayout.widget.ConstraintLayout> |
floating_widget_layout.xml
|
1 2 3 4 5 6 7 8 9 10 11 12 13 14 15 16 17 18 19 20 21 22 23 24 25 26 27 28 29 30 31 32 33 34 35 36 37 38 39 40 41 42 43 44 45 46 47 48 49 50 51 52 53 54 55 56 57 58 59 60 61 62 63 64 65 66 67 68 69 70 71 72 73 74 75 76 77 78 79 80 81 82 83 84 85 86 87 88 89 90 91 92 93 94 95 96 97 |
<?xml version="1.0" encoding="utf-8"?> <FrameLayout xmlns:android="http://schemas.android.com/apk/res/android" xmlns:tools="http://schemas.android.com/tools" android:layout_width="wrap_content" android:layout_height="wrap_content"> <RelativeLayout android:id="@+id/root_layout" android:layout_width="wrap_content" android:layout_height="wrap_content"> <RelativeLayout android:id="@+id/relative_collapse" android:layout_width="wrap_content" android:layout_height="wrap_content" android:orientation="vertical" android:visibility="visible"> <ImageView android:id="@+id/image_collapsed" android:layout_width="70dp" android:layout_height="70dp" android:layout_marginTop="8dp" android:src="@mipmap/ic_launcher_round" tools:ignore="ContentDescription" /> <ImageView android:id="@+id/image_close_floating" android:layout_width="wrap_content" android:layout_height="wrap_content" android:layout_marginLeft="50dp" android:layout_marginTop="5dp" android:background="@drawable/circle_shape" android:src="@drawable/ic_close_white" tools:ignore="ContentDescription" /> </RelativeLayout> <LinearLayout android:id="@+id/linear_expanded" android:layout_width="wrap_content" android:layout_height="wrap_content" android:background="@color/white" android:gravity="center" android:orientation="horizontal" android:padding="8dp" android:visibility="gone"> <ImageView android:id="@+id/image_floating" android:layout_width="wrap_content" android:layout_height="wrap_content" android:src="@drawable/ic_baseline_access_alarm_24" /> <LinearLayout android:layout_width="wrap_content" android:layout_height="wrap_content" android:layout_marginStart="10dp" android:orientation="vertical" android:layout_marginLeft="10dp"> <TextView android:id="@+id/text_title_floating" android:layout_width="wrap_content" android:layout_height="wrap_content" android:gravity="center_vertical" android:text="@string/draggable_button" android:textColor="@android:color/black" android:textSize="14sp" /> <TextView android:id="@+id/text_floating_detail" android:layout_width="wrap_content" android:layout_height="wrap_content" android:gravity="center_vertical" android:text="@string/draggable_details" android:textColor="@android:color/darker_gray" android:textSize="11sp" /> </LinearLayout> <ImageView android:id="@+id/image_close_float" android:layout_width="match_parent" android:layout_height="wrap_content" android:layout_weight="1" android:padding="10dp" android:src="@drawable/ic_close_black" /> <ImageView android:id="@+id/image_open" android:layout_width="match_parent" android:layout_height="wrap_content" android:layout_weight="1" android:padding="10dp" android:src="@drawable/ic_open_view" /> </LinearLayout> </RelativeLayout> </FrameLayout> |
remove_floating_layout.xml
|
1 2 3 4 5 6 7 8 9 10 11 12 13 14 15 16 17 18 19 20 21 |
<?xml version="1.0" encoding="utf-8"?> <androidx.constraintlayout.widget.ConstraintLayout xmlns:android="http://schemas.android.com/apk/res/android" xmlns:app="http://schemas.android.com/apk/res-auto" android:id="@+id/remove_relativelayout" android:layout_width="match_parent" android:layout_height="match_parent" android:padding="10dp"> <ImageView android:id="@+id/image_remove" android:layout_width="70dp" android:layout_height="70dp" android:background="@drawable/white_circle_shape" android:padding="10dp" android:src="@drawable/ic_close_white" app:layout_constraintTop_toTopOf="parent" app:layout_constraintStart_toStartOf="parent" app:layout_constraintEnd_toEndOf="parent" app:layout_constraintBottom_toBottomOf="parent"/> </androidx.constraintlayout.widget.ConstraintLayout> |
2.) We can add the drawable resource layout below:
ic_baseline_access_alarm_24.xml
|
1 2 3 4 5 6 7 8 9 |
<vector xmlns:android="http://schemas.android.com/apk/res/android" android:width="24dp" android:height="24dp" android:viewportWidth="24" android:viewportHeight="24"> <path android:fillColor="@android:color/black" android:pathData="M22,5.72l-4.6,-3.86 -1.29,1.53 4.6,3.86L22,5.72zM7.88,3.39L6.6,1.86 2,5.71l1.29,1.53 4.59,-3.85zM12.5,8L11,8v6l4.75,2.85 0.75,-1.23 -4,-2.37L12.5,8zM12,4c-4.97,0 -9,4.03 -9,9s4.02,9 9,9c4.97,0 9,-4.03 9,-9s-4.03,-9 -9,-9zM12,20c-3.87,0 -7,-3.13 -7,-7s3.13,-7 7,-7 7,3.13 7,7 -3.13,7 -7,7z"/> </vector> |
ic_close_black.xml
|
1 2 3 4 5 6 7 8 9 |
<vector xmlns:android="http://schemas.android.com/apk/res/android" android:width="24dp" android:height="24dp" android:viewportWidth="24.0" android:viewportHeight="24.0"> <path android:fillColor="#FF000000" android:pathData="M19,6.41L17.59,5 12,10.59 6.41,5 5,6.41 10.59,12 5,17.59 6.41,19 12,13.41 17.59,19 19,17.59 13.41,12z"/> </vector> |
ic_close_white.xml
|
1 2 3 4 5 6 7 8 9 |
<vector xmlns:android="http://schemas.android.com/apk/res/android" android:width="24dp" android:height="24dp" android:viewportHeight="24.0" android:viewportWidth="24.0"> <path android:fi.xmlllColor="#FFFFFFFF" android:pathData="M19,6.41L17.59,5 12,10.59 6.41,5 5,6.41 10.59,12 5,17.59 6.41,19 12,13.41 17.59,19 19,17.59 13.41,12z" /> </vector> |
ic_open_view.xml
|
1 2 3 4 5 6 7 8 9 |
<vector xmlns:android="http://schemas.android.com/apk/res/android" android:width="24dp" android:height="24dp" android:viewportWidth="24.0" android:viewportHeight="24.0"> <path android:fillColor="#FF000000" android:pathData="M19,12h-2v3h-3v2h5v-5zM7,9h3L10,7L5,7v5h2L7,9zM21,3L3,3c-1.1,0 -2,0.9 -2,2v14c0,1.1 0.9,2 2,2h18c1.1,0 2,-0.9 2,-2L23,5c0,-1.1 -0.9,-2 -2,-2zM21,19.01L3,19.01L3,4.99h18v14.02z"/> </vector> |
white_circle_shape.xml
|
1 2 3 4 5 6 7 8 9 |
<?xml version="1.0" encoding="utf-8"?> <shape xmlns:android="http://schemas.android.com/apk/res/android" android:shape="oval"> <stroke android:width="1dp" android:color="@android:color/white" /> </shape> |
3.) The Kotlin service classes :
FloatingWidgetService.kt
|
1 2 3 4 5 6 7 8 9 10 11 12 13 14 15 16 17 18 19 20 21 22 23 24 25 26 27 28 29 30 31 32 33 34 35 36 37 38 39 40 41 42 43 44 45 46 47 48 49 50 51 52 53 54 55 56 57 58 59 60 61 62 63 64 65 66 67 68 69 70 71 72 73 74 75 76 77 78 79 80 81 82 83 84 85 86 87 88 89 90 91 92 93 94 95 96 97 98 99 100 101 102 103 104 105 106 107 108 109 110 111 112 113 114 115 116 117 118 119 120 121 122 123 124 125 126 127 128 129 130 131 132 133 134 135 136 137 138 139 140 141 142 143 144 145 146 147 148 149 150 151 152 153 154 155 156 157 158 159 160 161 162 163 164 165 166 167 168 169 170 171 172 173 174 175 176 177 178 179 180 181 182 183 184 185 186 187 188 189 190 191 192 193 194 195 196 197 198 199 200 201 202 203 204 205 206 207 208 209 210 211 212 213 214 215 216 217 218 219 220 221 222 223 224 225 226 227 228 229 230 231 232 233 234 235 236 237 238 239 240 241 242 243 244 245 246 247 248 249 250 251 252 253 254 255 256 257 258 259 260 261 262 263 264 265 266 267 268 269 270 271 272 273 274 275 276 277 278 279 280 281 282 283 284 285 286 287 288 289 290 291 292 293 294 295 296 297 298 299 300 301 302 303 304 305 306 307 308 309 310 311 312 313 314 315 316 317 318 319 320 321 322 323 324 325 326 327 328 329 330 331 332 333 334 335 336 337 338 339 340 341 342 343 344 345 346 347 348 349 350 351 |
class FloatingWidgetService : Service(), View.OnClickListener { private var mWindowManager: WindowManager? = null private var mFloatingWidgetView: View? = null private var collapsedView: View? = null private var expandedView: View? = null private var remove_image_view: ImageView? = null private val szWindow = Point() private var removeFloatingWidgetView: View? = null private var x_init_cord = 0 private var y_init_cord = 0 private var x_init_margin = 0 private var y_init_margin = 0 private var isLeft = true override fun onBind(intent: Intent): IBinder? { return null } override fun onCreate() { super.onCreate() mWindowManager = getSystemService(Context.WINDOW_SERVICE) as WindowManager windowManagerDefaultDisplay val inflater = getSystemService(Context.LAYOUT_INFLATER_SERVICE) as LayoutInflater addRemoveView(inflater) addFloatingWidgetView(inflater) implementClickListeners() implementTouchListenerToFloatingWidgetView() } private fun addRemoveView(inflater: LayoutInflater): View? { removeFloatingWidgetView = inflater.inflate(R.layout.remove_floating_layout, null) val paramRemove: WindowManager.LayoutParams paramRemove = if (Build.VERSION.SDK_INT < Build.VERSION_CODES.O) { WindowManager.LayoutParams( WindowManager.LayoutParams.WRAP_CONTENT, WindowManager.LayoutParams.WRAP_CONTENT, WindowManager.LayoutParams.TYPE_PHONE, WindowManager.LayoutParams.FLAG_NOT_FOCUSABLE, PixelFormat.TRANSLUCENT) } else { WindowManager.LayoutParams( WindowManager.LayoutParams.WRAP_CONTENT, WindowManager.LayoutParams.WRAP_CONTENT, WindowManager.LayoutParams.TYPE_APPLICATION_OVERLAY, WindowManager.LayoutParams.FLAG_NOT_FOCUSABLE, PixelFormat.TRANSLUCENT) } paramRemove.gravity = Gravity.TOP or Gravity.LEFT removeFloatingWidgetView?.setVisibility(View.GONE) remove_image_view = removeFloatingWidgetView?.findViewById<View>(R.id.image_remove) as ImageView mWindowManager!!.addView(removeFloatingWidgetView, paramRemove) return remove_image_view } private fun addFloatingWidgetView(inflater: LayoutInflater) { //Inflate the floating view layout we created mFloatingWidgetView = inflater.inflate(R.layout.floating_widget_layout, null) val params: WindowManager.LayoutParams params = if (Build.VERSION.SDK_INT < Build.VERSION_CODES.O) { WindowManager.LayoutParams( WindowManager.LayoutParams.WRAP_CONTENT, WindowManager.LayoutParams.WRAP_CONTENT, WindowManager.LayoutParams.TYPE_PHONE, WindowManager.LayoutParams.FLAG_NOT_FOCUSABLE, PixelFormat.TRANSLUCENT) } else { WindowManager.LayoutParams( WindowManager.LayoutParams.WRAP_CONTENT, WindowManager.LayoutParams.WRAP_CONTENT, WindowManager.LayoutParams.TYPE_APPLICATION_OVERLAY, WindowManager.LayoutParams.FLAG_NOT_FOCUSABLE, PixelFormat.TRANSLUCENT) } params.gravity = Gravity.TOP or Gravity.LEFT params.x = 0 params.y = 100 mWindowManager!!.addView(mFloatingWidgetView, params) collapsedView = mFloatingWidgetView?.findViewById(R.id.image_collapsed) expandedView = mFloatingWidgetView?.findViewById(R.id.linear_expanded) } private val windowManagerDefaultDisplay: Unit private get() { if (Build.VERSION.SDK_INT >= Build.VERSION_CODES.HONEYCOMB_MR2) mWindowManager!!.defaultDisplay.getSize(szWindow) else { val w = mWindowManager!!.defaultDisplay.width val h = mWindowManager!!.defaultDisplay.height szWindow[w] = h } } private fun implementTouchListenerToFloatingWidgetView() { mFloatingWidgetView!!.findViewById<View>(R.id.root_layout).setOnTouchListener(object : OnTouchListener { var time_start: Long = 0 var time_end: Long = 0 var isLongClick = false var inBounded = false var remove_img_width = 0 var remove_img_height = 0 var handler_longClick = Handler() var runnable_longClick = Runnable { isLongClick = true removeFloatingWidgetView!!.visibility = View.VISIBLE onFloatingWidgetLongClick() } override fun onTouch(v: View, event: MotionEvent): Boolean { val layoutParams = mFloatingWidgetView!!.layoutParams as WindowManager.LayoutParams val x_cord = event.rawX.toInt() val y_cord = event.rawY.toInt() val x_cord_Destination: Int var y_cord_Destination: Int when (event.action) { MotionEvent.ACTION_DOWN -> { time_start = System.currentTimeMillis() handler_longClick.postDelayed(runnable_longClick, 600) remove_img_width = remove_image_view!!.layoutParams.width remove_img_height = remove_image_view!!.layoutParams.height x_init_cord = x_cord y_init_cord = y_cord x_init_margin = layoutParams.x y_init_margin = layoutParams.y return true } MotionEvent.ACTION_UP -> { isLongClick = false removeFloatingWidgetView!!.visibility = View.GONE remove_image_view!!.layoutParams.height = remove_img_height remove_image_view!!.layoutParams.width = remove_img_width handler_longClick.removeCallbacks(runnable_longClick) if (inBounded) { stopSelf() inBounded = false // break } val x_diff = x_cord - x_init_cord val y_diff = y_cord - y_init_cord if (Math.abs(x_diff) < 5 && Math.abs(y_diff) < 5) { time_end = System.currentTimeMillis() if (time_end - time_start < 300) onFloatingWidgetClick() } y_cord_Destination = y_init_margin + y_diff val barHeight = statusBarHeight if (y_cord_Destination < 0) { y_cord_Destination = 0 } else if (y_cord_Destination + (mFloatingWidgetView!!.height + barHeight) > szWindow.y) { y_cord_Destination = szWindow.y - (mFloatingWidgetView!!.height + barHeight) } layoutParams.y = y_cord_Destination inBounded = false } MotionEvent.ACTION_MOVE -> { val x_diff_move = x_cord - x_init_cord val y_diff_move = y_cord - y_init_cord x_cord_Destination = x_init_margin + x_diff_move y_cord_Destination = y_init_margin + y_diff_move if (isLongClick) { val x_bound_left = szWindow.x / 2 - (remove_img_width * 1.5).toInt() val x_bound_right = szWindow.x / 2 + (remove_img_width * 1.5).toInt() val y_bound_top = szWindow.y - (remove_img_height * 1.5).toInt() if (x_cord >= x_bound_left && x_cord <= x_bound_right && y_cord >= y_bound_top) { inBounded = true val x_cord_remove = ((szWindow.x - remove_img_height * 1.5) / 2).toInt() val y_cord_remove = (szWindow.y - (remove_img_width * 1.5 + statusBarHeight)).toInt() if (remove_image_view!!.layoutParams.height == remove_img_height) { remove_image_view!!.layoutParams.height = (remove_img_height * 1.5).toInt() remove_image_view!!.layoutParams.width = (remove_img_width * 1.5).toInt() val param_remove = removeFloatingWidgetView!!.layoutParams as WindowManager.LayoutParams param_remove.x = x_cord_remove param_remove.y = y_cord_remove mWindowManager!!.updateViewLayout(removeFloatingWidgetView, param_remove) } layoutParams.x = x_cord_remove + Math.abs(removeFloatingWidgetView!!.width - mFloatingWidgetView!!.width) / 2 layoutParams.y = y_cord_remove + Math.abs(removeFloatingWidgetView!!.height - mFloatingWidgetView!!.height) / 2 mWindowManager!!.updateViewLayout(mFloatingWidgetView, layoutParams) // break } else { inBounded = false remove_image_view!!.layoutParams.height = remove_img_height remove_image_view!!.layoutParams.width = remove_img_width onFloatingWidgetClick() } } layoutParams.x = x_cord_Destination layoutParams.y = y_cord_Destination mWindowManager!!.updateViewLayout(mFloatingWidgetView, layoutParams) return true } } return false } }) } private fun implementClickListeners() { mFloatingWidgetView!!.findViewById<View>(R.id.image_close_float).setOnClickListener(this) mFloatingWidgetView!!.findViewById<View>(R.id.linear_expanded).setOnClickListener(this) mFloatingWidgetView!!.findViewById<View>(R.id.image_open).setOnClickListener(this) } override fun onClick(v: View) { when (v.id) { R.id.image_close_float -> stopSelf() R.id.image_close_float -> { collapsedView!!.visibility = View.VISIBLE expandedView!!.visibility = View.GONE } R.id.image_open -> { val intent = Intent(this@FloatingWidgetService, MainActivity::class.java) intent.addFlags(Intent.FLAG_ACTIVITY_NEW_TASK) startActivity(intent) stopSelf() } } } private fun onFloatingWidgetLongClick() { val removeParams = removeFloatingWidgetView!!.layoutParams as WindowManager.LayoutParams val x_cord = (szWindow.x - removeFloatingWidgetView!!.width) / 2 val y_cord = szWindow.y - (removeFloatingWidgetView!!.height + statusBarHeight) removeParams.x = x_cord removeParams.y = y_cord mWindowManager!!.updateViewLayout(removeFloatingWidgetView, removeParams) } private fun resetPosition(x_cord_now: Int) { if (x_cord_now <= szWindow.x / 2) { isLeft = true moveToLeft(x_cord_now) } else { isLeft = false moveToRight(x_cord_now) } } private fun moveToLeft(current_x_cord: Int) { val x = szWindow.x - current_x_cord object : CountDownTimer(500, 5) { var mParams = mFloatingWidgetView!!.layoutParams as WindowManager.LayoutParams override fun onTick(t: Long) { val step = (500 - t) / 5 mParams.x = 0 - (current_x_cord * current_x_cord * step).toInt() mWindowManager!!.updateViewLayout(mFloatingWidgetView, mParams) } override fun onFinish() { mParams.x = 0 mWindowManager!!.updateViewLayout(mFloatingWidgetView, mParams) } }.start() } private fun moveToRight(current_x_cord: Int) { object : CountDownTimer(500, 5) { var mParams = mFloatingWidgetView!!.layoutParams as WindowManager.LayoutParams override fun onTick(t: Long) { val step = (500 - t) / 5 mParams.x = (szWindow.x + current_x_cord * current_x_cord * step - mFloatingWidgetView!!.width).toInt() mWindowManager!!.updateViewLayout(mFloatingWidgetView, mParams) } override fun onFinish() { mParams.x = szWindow.x - mFloatingWidgetView!!.width mWindowManager!!.updateViewLayout(mFloatingWidgetView, mParams) } }.start() } private fun bounceValue(step: Long, scale: Long): Double { return scale * Math.exp(-0.055 * step) * Math.cos(0.08 * step) } private val isViewCollapsed: Boolean private get() = mFloatingWidgetView == null || mFloatingWidgetView!!.findViewById<View>(R.id.image_collapsed).visibility == View.VISIBLE private val statusBarHeight: Int private get() = Math.ceil(25 * applicationContext.resources.displayMetrics.density.toDouble()).toInt() override fun onConfigurationChanged(newConfig: Configuration) { super.onConfigurationChanged(newConfig) windowManagerDefaultDisplay val layoutParams = mFloatingWidgetView!!.layoutParams as WindowManager.LayoutParams if (newConfig.orientation == Configuration.ORIENTATION_LANDSCAPE) { if (layoutParams.y + (mFloatingWidgetView!!.height + statusBarHeight) > szWindow.y) { layoutParams.y = szWindow.y - (mFloatingWidgetView!!.height + statusBarHeight) mWindowManager!!.updateViewLayout(mFloatingWidgetView, layoutParams) } if (layoutParams.x != 0 && layoutParams.x < szWindow.x) { resetPosition(szWindow.x) } } else if (newConfig.orientation == Configuration.ORIENTATION_PORTRAIT) { if (layoutParams.x > szWindow.x) { resetPosition(szWindow.x) } } } private fun onFloatingWidgetClick() { if (isViewCollapsed) { collapsedView!!.visibility = View.GONE expandedView!!.visibility = View.VISIBLE } } override fun onDestroy() { super.onDestroy() if (removeFloatingWidgetView != null) mWindowManager!!.removeView(removeFloatingWidgetView) } } |
The MainActivity.kt classes
|
1 2 3 4 5 6 7 8 9 10 11 12 13 14 15 16 17 18 19 20 21 22 23 24 25 26 27 28 29 30 31 32 33 34 35 36 37 |
class MainActivity : AppCompatActivity() { override fun onCreate(savedInstanceState: Bundle?) { super.onCreate(savedInstanceState) setContentView(R.layout.activity_main) } fun onClickFloatingButton(view: View?) { if (Build.VERSION.SDK_INT >= Build.VERSION_CODES.M && !Settings.canDrawOverlays(this)) { val intent = Intent(Settings.ACTION_MANAGE_OVERLAY_PERMISSION, Uri.parse("package:$packageName")) startActivityForResult(intent, DRAW_OVER_OTHER_APP_PERMISSION_REQUEST_CODE) } else startFloatingWidgetService() } private fun startFloatingWidgetService() { startService(Intent(this@MainActivity, FloatingWidgetService::class.java)) finish() } override fun onActivityResult(requestCode: Int, resultCode: Int, data: Intent?) { if (requestCode == DRAW_OVER_OTHER_APP_PERMISSION_REQUEST_CODE) { if (resultCode == Activity.RESULT_OK) startFloatingWidgetService() else Toast.makeText(this, resources.getString(R.string.draw_other_app_permission_denied), Toast.LENGTH_SHORT).show() } else { super.onActivityResult(requestCode, resultCode, data) } } companion object { private const val DRAW_OVER_OTHER_APP_PERMISSION_REQUEST_CODE = 1222 } } |
Finally, we implemented the code part of moving the floating button in this blog.
You can also check these links.
https://mobikul.com/how-to-add-extended-floating-action-button-in-android-app/
https://mobikul.com/display-floating-button-add-event-swift/
Another mentioned URL
Now we can also create any kind of Floating draggable button for our applications.
I hope this blog will help you to how to move the floating button all over the screen.
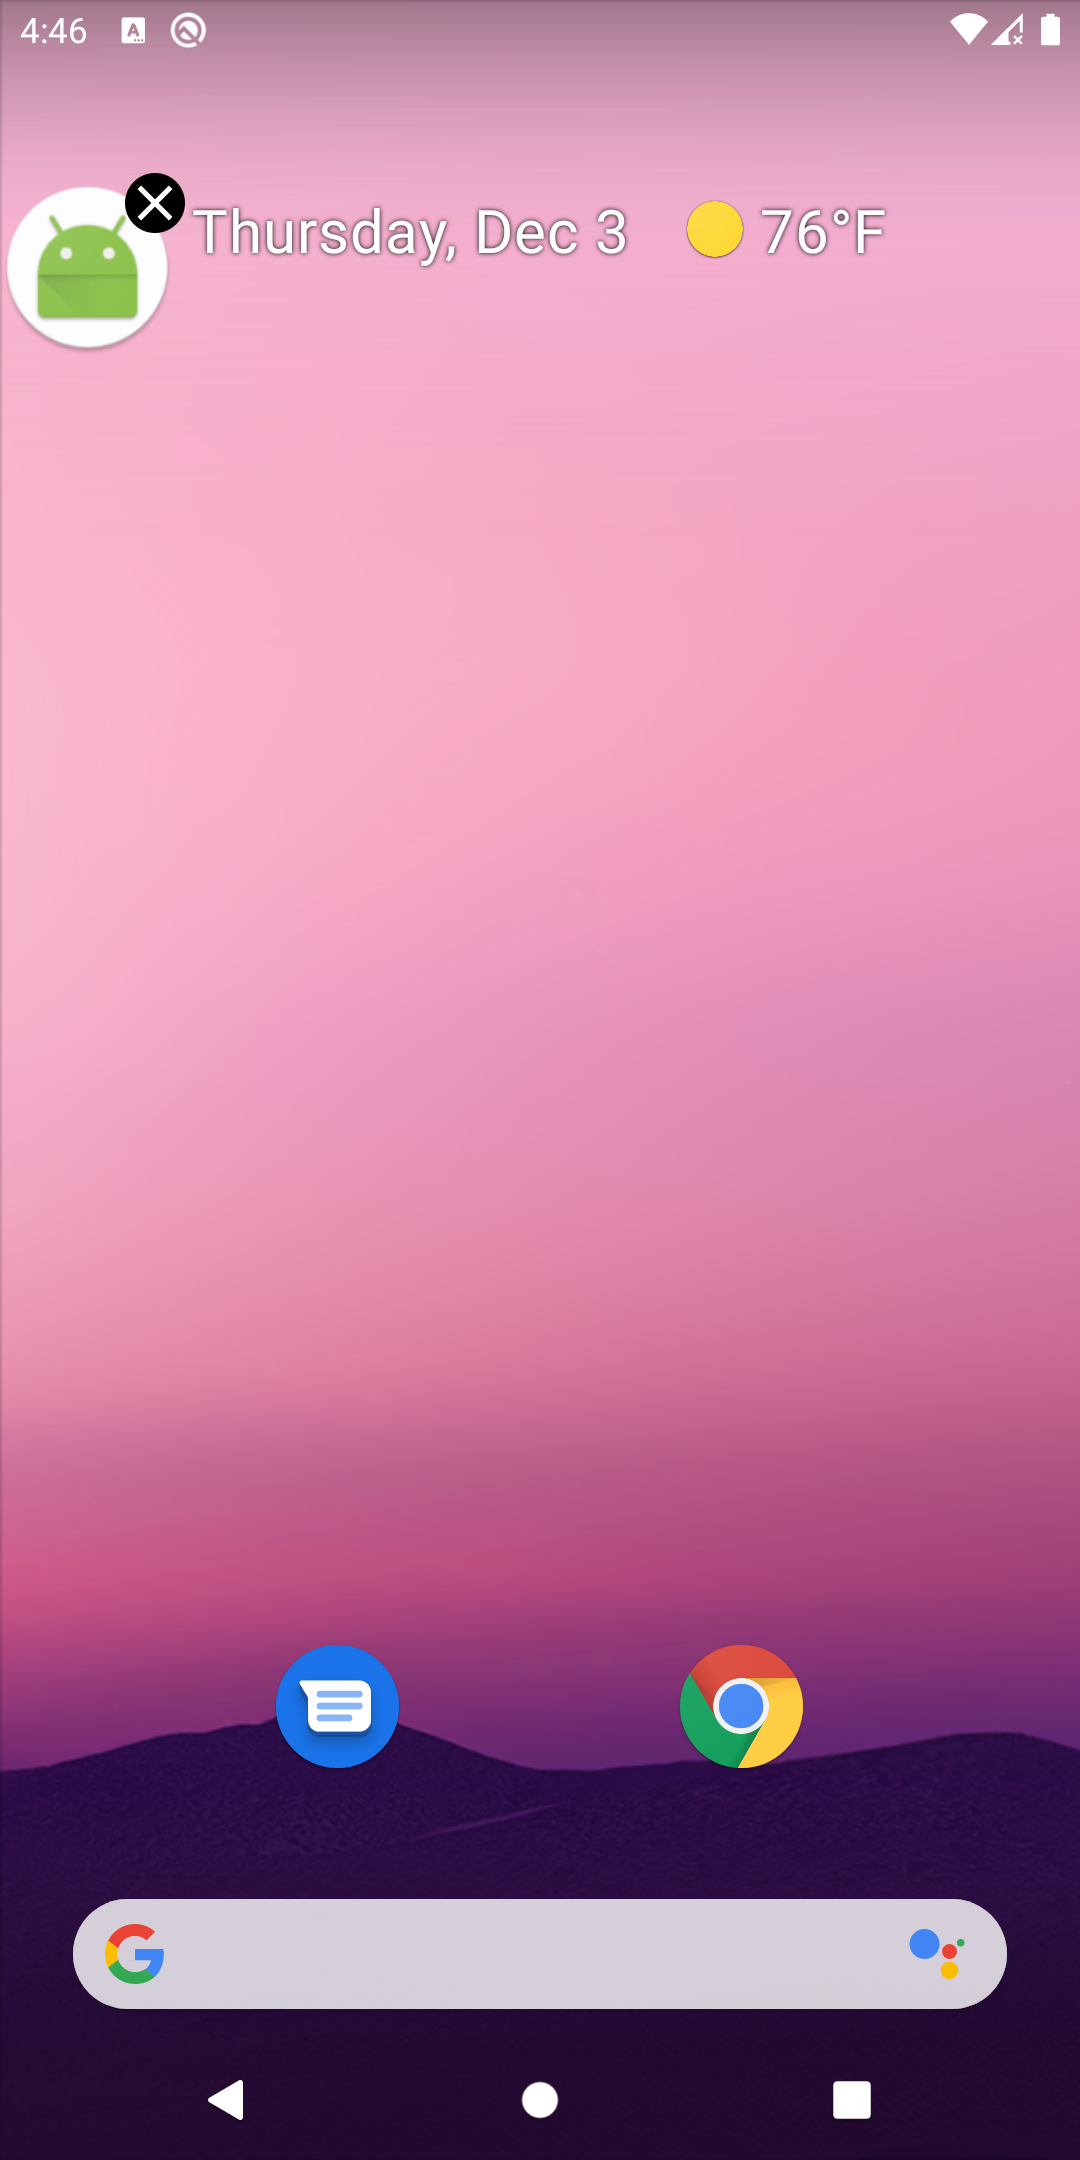
We can now run the app on how to create a draggable floating button.
Finally, We have implemented the draggable button feature.
Hope this blog helps you to create a Draggable floating button float all over the screen.
So, I hope it will help you out in understanding and get a brief idea about it.
You Can Also Check These links.
Another mentioned URL.
For more understanding please can go through this Link:
That’s all, You can enjoy your Floating Button implementation in Android.
Thank you very much.

Be the first to comment.