Dark Mode
In iOS 13.0 and later, people can choose to adopt a dark system-wide appearance called Dark Mode. In Dark Mode, the system uses a darker color palette for all screens, views, menus, and controls, and it uses more vibrancy to make foreground content stand out against the darker backgrounds. Dark Mode supports all accessibility features.
Benefits of Dark Mode
- Dark Mode is very helpful when the surrounding is dark; it puts less strain on eyes compared to Light Mode.
- You can choose the Dark Mode as the default interface style.
- You can also use Settings to make your device select the Dark Mode automatically when the ambient light is low.
- Dark Mode supports all accessibility features.
Support changes in iOS 13 dark mode
1. Status bar style — default , darkcontent , lightcontent
2. Activity indicator — medium , large , Depreciated (gray, white, whitelarge)
3. UILabel, UITextField, UITextView — Use Semantic Colors or Custom Colors for light and dark mode
4. AttributedString — requires to provide foregroundColor
5. For Embedded web content — Declare supported color schemes with color-scheme, Use prefers-color-scheme media query for custom colors and image
6. Images — Dark mode images
7. Images Tint Color — Dark mode tint color
Adapt Images For iOS 13 Dark Mode
Most images look great in iOS 13 dark mode, and at times they pop out in a way that really highlights details. However, you may still end up finding some images which look a bit off or unsuitable for dark mode.
The good news is that you can adjust images for dark mode in the same way text is adjusted.
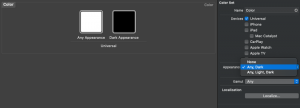
All you need to do is select the image in the catalog and as done previously, and change attributes to Any, Dark in the Attributes Inspector. Now add the dark appearance of the image and we’re done
Color appearance
To configure app colors with different appearances, you can use Asset Catalogs. Just create a New Color Set and add required colors. If you want to improve app accessibility, you can add high contrast color variant for every color:
In storyboards, these colors are available in the Named Colors section during color selection. To use it in code, just initialize it with the given name:
|
1 2 |
let view = UIView() view.backdroundColor = UIColor(named: "Color") |
Requirements
Before diving in, there are a couple of requirements you must meet in order to actually make your app dark-mode compliant.
-
- It must be built and released using Xcode 11
- It must run on a device running iOS 13.0 or later
If you built your app using any older Xcode, the app will always display its normal appearance, even on devices that support dark mode. The exact same is true for apps built using Xcode 11 but running on older versions of iOS–these new features will not apply and the app will retain its default appearance.
Steps to implement Dark mode with Table view
Use the below steps for implementing the Dark mode.
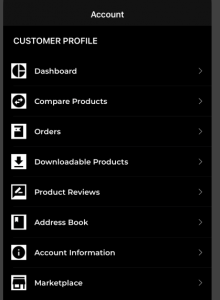
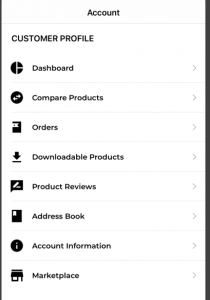
1-> Create cell for the Table view. and we will use background color is a system background color. and we will use text color is label default color.
2-> For live rendering we will use below method
The system calls this method when the iOS interface environment changes. Implement this method in view controllers and views, according to your app’s needs, to respond to such changes. For example, you might adjust the layout of the subviews of a view controller when an iPhone is rotated from portrait to landscape orientation. The default implementation of this method is empty.
|
1 2 3 4 5 |
override func traitCollectionDidChange(_ previousTraitCollection: UITraitCollection?) { profileTableView.reloadData() } |
From the above method, if you will do changes from the setting then you will get screen according to the interface type.
Conclusion
Thanks for reading this blog, You can know more from here!
So pls follow the above step and And if you have any issue or suggestion you can leave your message in the comment section I will try to solve this.


Be the first to comment.