In this blog, we will explore Navigation and Bottom Tab Navigation in React Native.
Before diving into Bottom Tab Navigation, let’s first understand the fundamentals of how navigation works in React Native.
This foundational knowledge will help you better grasp how to implement and customize navigation in your app.

Navigation in React native:
Navigation :
As we know a mobile application consists of many screens and pages. To move from one screen to another or to show another screen on a button click is navigation.
Navigation in react native can be achieved using the navigation library and navigate prop.
Let’s take an example of navigation
In this example, we have two screens Home screen and About screen.
The home screen has a button on which click you will navigate to the “About screen”.
Install the required packages in your sample project:
|
1 2 3 |
npm install @react-navigation/stack npm install @react-navigation/native |
Let’s code for the Home Screen.
In this section, we’ll write the code for a simple Home Screen in React Native. This code will demonstrate the usage of some basic React Native components, such as View, Text, and Button.
Additionally, we’ll implement simple navigation functionality to navigate from the Home screen to the About screen.
Home.js
|
1 2 3 4 5 6 7 8 9 10 11 12 13 14 15 16 17 18 19 20 21 |
import React from "react"; import { Button, View, Text } from "react-native"; import React from "react"; import { Button, View, Text } from "react-native"; export default class Home extends React.Component{ render(){ return( <View style={{ flex: 1, alignItems: 'center', justifyContent: 'center' }}> <Text> This is Home Screen </Text> <Button title="Go to About" onPress={() => this.props.navigation.navigate('about')} /> </View> ) } } |
Let’s code for About Screen.
About.js
|
1 2 3 4 5 6 7 8 9 10 11 12 |
import React, { Component } from 'react'; import { View, Text } from 'react-native'; export default class Aboutscreen extends Component { render() { return ( <View style={{ flex: 1, alignItems: 'center', justifyContent: 'center' }}> <Text>About Screen</Text> </View> ) } } |
Now main part of our sample code due to which we will be able to navigate is in our App.js file.
App.js
|
1 2 3 4 5 6 7 8 9 10 11 12 13 14 15 16 17 18 19 20 21 22 23 24 25 26 27 28 29 30 31 32 33 34 35 |
import React from 'react'; import { StyleSheet } from 'react-native'; import {createAppContainer } from "react-navigation"; import { createStackNavigator } from 'react-navigation-stack'; import Home from './Home'; import About from'./About'; export default class App extends React.Component { render() { return <AppContainer />; } } const AppNavigator = createStackNavigator({ Home:{ screen : Home }, about:{ screen: About } },{ initialRouteName: "Home" }); const AppContainer = createAppContainer(AppNavigator) const styles = StyleSheet.create({ container: { flex: 1, backgroundColor: '#fff', alignItems: 'center', justifyContent: 'center', }, }); |
Now Run the sample App.
Result :


So far, we have learned how navigation works in react native. Now our sample app is able to navigate from one screen to another.
So, let’s move to the Bottom Tab Navigation.
Bottom Tab Navigation In React Native
Bottom tab navigation is one of the most used navigation in mobile apps.
Types of Tab Navigation
1. Bottom tab Navigation- In the bottom tab navigation tab is aligned to the bottom of the screen
2. Top tab navigation- Tabs are aligned to the top of the screen below the header or toolbar.
Let’s take an example of the bottom tab bar navigation
For the bottom tab bar, we are reusing the above navigation example.
Install the below package in our sample.
|
1 2 |
npm install @react-navigation/bottom-tabs // for bottom tab bar npm install --save react-native-vector-icons // for icons on bottom tab bar |
For the Home screen and About screen we used the same code as in the navigation example. If you want to add or modify or redesign your screen you can do it accordingly.
There is little change in the app.js class for bottom tab navigation.
App.js
|
1 2 3 4 5 6 7 8 9 10 11 12 13 14 15 16 17 18 19 20 21 22 23 24 25 26 27 28 29 30 31 32 33 34 35 36 37 38 39 40 41 42 |
import React from 'react'; import Home from './Home'; import About from'./About'; import { createBottomTabNavigator } from '@react-navigation/bottom-tabs'; import { NavigationContainer} from '@react-navigation/native'; import Ionicons from 'react-native-vector-icons/Ionicons'; const sampleTabNavigation = createBottomTabNavigator( ); export default class App extends React.Component { render() { return ( <NavigationContainer> <sampleTabNavigation.Navigator screenOptions={({ route }) => ({ tabBarIcon: ({ focused, color, size }) => { let iconName; if (route.name === 'Home') { iconName = 'md-home-sharp'; } else if (route.name === 'about') { iconName = 'md-reader-outline'; } return <Ionicons name = {iconName} size={size} color={color} />; }, })} tabBarOptions={{ activeTintColor: 'red', inactiveTintColor: 'gray', }} > <sampleTabNavigation.Screen name="Home" component={Home} /> <sampleTabNavigation.Screen name="about" component={About} /> </sampleTabNavigation.Navigator> </NavigationContainer> ); } } |
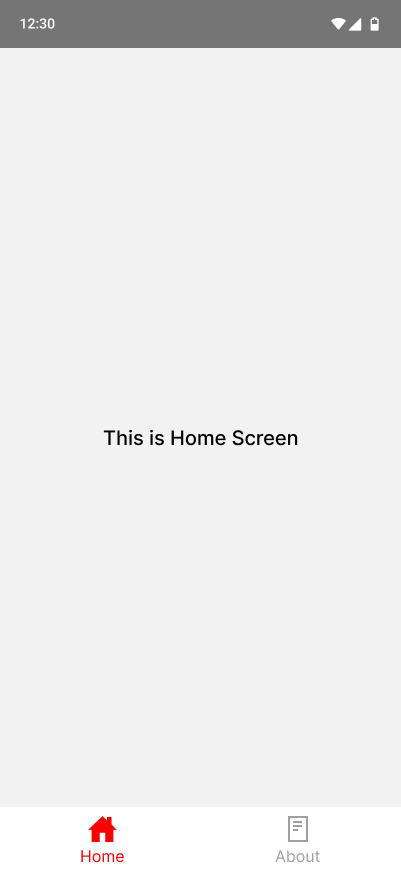
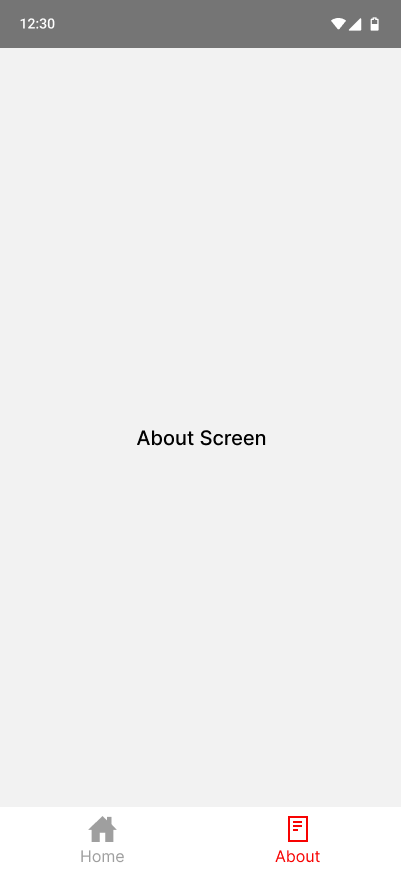
Now run the sample code
Result :
Troubleshooting
When working with Bottom Tab Navigation in React Native, you might encounter some common issues related to gesture handling, screen areas, and view surfaces.
These issues can arise due to missing dependencies or improper configuration.
While the following packages can help resolve such issues, they are optional—only install them if you’re experiencing related problems:
|
1 2 3 4 5 6 7 8 9 |
npm install react-native-gesture-handler npm install react-native-screens npm install react-native-safe-area-context npm install react-native-safe-area-view npm install --save @react-native-masked-view/masked-view |
If you want to learn more about bottom tab navigation in react native, you can visit here.
Conclusion
In this blog, we learned about Bottom Tab Navigation in React Native and explored how to set up a navigation flow between multiple screens using the @react-navigation/bottom-tabs library.
By implementing bottom tab navigation, we can create a more intuitive and accessible UI for users to switch between different sections of an app seamlessly.
We also covered how to enhance the navigation experience by using custom icons and configuring the tab bar’s appearance.
You can also check other blogs from here.
Thank you for reading! ❤️
References

Be the first to comment.