The augmented reality app in Flutter is one of the most popular technologies which provides a mechanism to show a virtual object in a physical atmosphere.
So, in this tutorial, you will learn the below points.
- AR core
- AR Kit
- AR core configuration for Android
- AR kit configuration for iOS
- Plugin installation
- Making 3d object example
- Conclusion
You may also explore our Flutter app development page.
AR Core
Augmented reality core platform provided by Google to create the argument reality app in Flutter.
And AR core provides the APIs for the Android argument reality app in Flutter.
So, as per Google AR documentation, ARCore is doing two things: tracking the position of the mobile device as it moves and building its own understanding of the real world.
AR Kit
AR kit only works for iOS apps and this platform is provided by Apple.
And AR kit provides the APIs for the iOS argument reality app in Flutter
As per Apple AR kit documentation, ARKit combines device motion tracking, camera scene capture, advanced scene processing, and display conveniences to simplify the task of building an AR experience.
You can create many kinds of AR experiences with these technologies using the front or rear camera of an iOS device.
AR core configuration for Android
To configure the AR core for Android follow the below points.
So, add the AR optional and AR required entries to the manifest file.
AR required->
An AR Required app cannot function without ARCore. It requires an ARCore supported device that has installed Google Play Services for AR.
Need to add the following entries in AndroidManifest.xml.
|
1 2 3 4 5 6 |
<uses-permission android:name="android.permission.CAMERA" /> <uses-sdk android:minSdkVersion="24" /> <uses-feature android:name="android.hardware.camera.ar" /> <application …> <meta-data android:name="com.google.ar.core" android:value="required" /> </application> |
AR optional->
An AR Optional app uses ARCore to enhance existing functionality. It has optional AR features which are only activated on ARCore-supported devices that have installed Google Play Services for AR.
|
1 2 3 4 5 |
<uses-permission android:name="android.permission.CAMERA" /> <uses-sdk android:minSdkVersion="14" /> <application> <meta-data android:name="com.google.ar.core" android:value="optional" /> </application> |
Modify build.gradle->
So Add the below codes in the project level build gradle file.
|
1 2 3 |
allprojects { repositories { google() |
Add the below codes in app level build gradle file.
|
1 2 3 4 |
dependencies { implementation 'com.google.ar:core:1.16.0' } |
So Add the sceneform plugin in app level build gradle.
|
1 2 3 4 5 6 7 8 9 |
android { compileOptions { sourceCompatibility 1.8 targetCompatibility 1.8 } dependencies { implementation 'com.google.ar.sceneform.ux:sceneform-ux:1.8.0' implementation 'com.google.ar.sceneform:core:1.8.0' } |
AR kit configuration in iOS
In case of any permission issues please use the below code in the pod file.
|
1 2 3 4 5 6 7 8 9 10 11 12 13 14 15 16 17 18 19 20 21 22 23 24 25 26 27 28 29 30 31 |
post_install do |installer| installer.pods_project.targets.each do |target| flutter_additional_ios_build_settings(target) target.build_configurations.each do |config| # Additional configuration options could already be set here # BEGINNING OF WHAT YOU SHOULD ADD config.build_settings['GCC_PREPROCESSOR_DEFINITIONS'] ||= [ '$(inherited)', ## dart: PermissionGroup.camera 'PERMISSION_CAMERA=1', ## dart: PermissionGroup.photos 'PERMISSION_PHOTOS=1', ## dart: [PermissionGroup.location, PermissionGroup.locationAlways, PermissionGroup.locationWhenInUse] 'PERMISSION_LOCATION=1', ## dart: PermissionGroup.sensors 'PERMISSION_SENSORS=1', ## dart: PermissionGroup.bluetooth 'PERMISSION_BLUETOOTH=1',´ # add additional permission groups if required ] # END OF WHAT YOU SHOULD ADD end end end |
Plugin installation
Please follow this blog for plugin installation.
Making 3D object example
In the below code, you have got separate iOS and Android code classes.
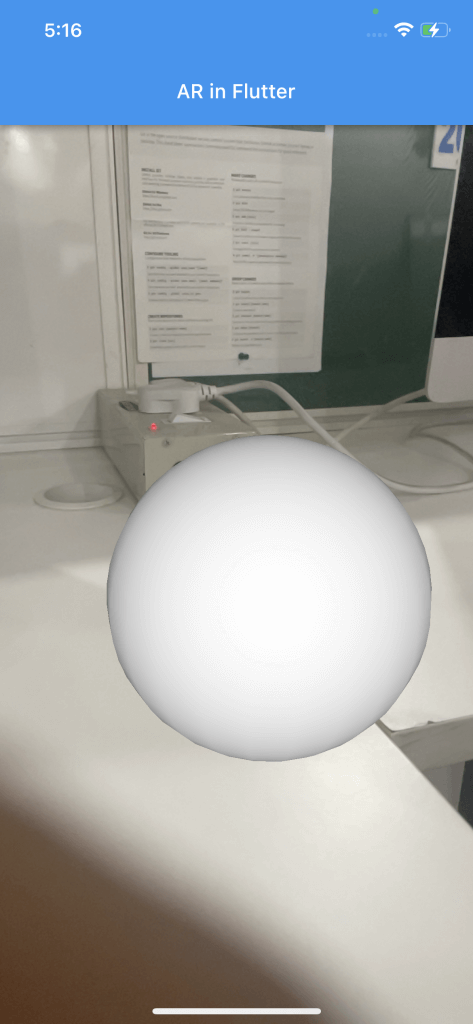
We are making the sphere object.
|
1 2 3 4 5 6 7 8 9 10 11 12 13 14 15 16 17 18 19 20 21 22 23 24 25 26 27 28 29 30 31 32 33 34 35 36 37 38 39 40 41 42 43 44 45 46 47 48 49 50 51 52 53 54 55 56 57 58 59 60 61 62 63 64 65 66 67 68 69 70 71 72 73 74 75 76 77 78 79 80 81 82 83 84 85 86 87 88 89 90 91 92 93 94 95 96 97 98 99 100 101 102 103 104 |
import 'dart:io'; import 'package:arcore_flutter_plugin/arcore_flutter_plugin.dart'; import 'package:flutter/material.dart'; import 'package:vector_math/vector_math_64.dart' as vector; import 'iOS AR.dart'; void main() { if(Platform.isIOS){ runApp(const MaterialApp( debugShowCheckedModeBanner: false, home: MyAppIos())); }else { runApp(const MaterialApp( debugShowCheckedModeBanner: false, home: MyAppAndroid())); } } //Android Part class MyAppAndroid extends StatefulWidget { const MyAppAndroid({super.key}); @override State<MyAppAndroid> createState() => _MyAppAndroidState(); } class _MyAppAndroidState extends State<MyAppAndroid> { ArCoreController? arCoreController; @override Widget build(BuildContext context) { return Scaffold( appBar: AppBar( title: const Text('AR in Flutter'), ), body: ArCoreView( onArCoreViewCreated: _onArCoreViewCreated, ), ); } void _onArCoreViewCreated(ArCoreController controller) { arCoreController = controller; _addSphere(arCoreController!); } void _addSphere(ArCoreController controller) { final material = ArCoreMaterial( color: Colors.white, ); final sphere = ArCoreSphere( materials: [material], radius: 0.5, ); final node = ArCoreNode( shape: sphere, position: vector.Vector3(0, 0, -1.5), ); controller.addArCoreNode(node); } @override void dispose() { arCoreController?.dispose(); super.dispose(); } } //iOS Part class MyAppIos extends StatefulWidget { const MyAppIos({super.key}); @override State<MyAppIos> createState() => _MyAppStateIOS(); } class _MyAppStateIOS extends State<MyAppIos> { late ARKitController arkitController; @override void dispose() { arkitController.dispose(); super.dispose(); } @override Widget build(BuildContext context) => Scaffold( appBar: AppBar(title: const Text('AR in Flutter')), body: ARKitSceneView(onARKitViewCreated: onARKitViewCreated)); void onARKitViewCreated(ARKitController arkitController) { this.arkitController = arkitController; final node = ARKitNode( geometry: ARKitSphere(radius: 0.1), position: Vector3(0, 0, -0.5)); this.arkitController.add(node); } } |
Conclusion
In this tutorial, you have learned about how to create an augmented reality app in a flutter.
So pls follow the above step and if you have any issues or suggestions you can leave your message in the comment section we will try to solve this.
You can read more interesting blogs by Mobikul.


Be the first to comment.