Hello everyone, in this blog topic we will learn how to implement the animated UITabBar in Swift.
We will discuss the animated Tab bar controller and animated Tab bar icons.
Let’s begin with the tutorial.
Integrating Animated UITabBar in Swift
Let us begin with setting up the project. Below are the steps to create the app and set up basic configuration.
Setting up the basic configuration
Create the Xcode Project.
Create the TabViewController which will basically inherit from the UITabBarController.
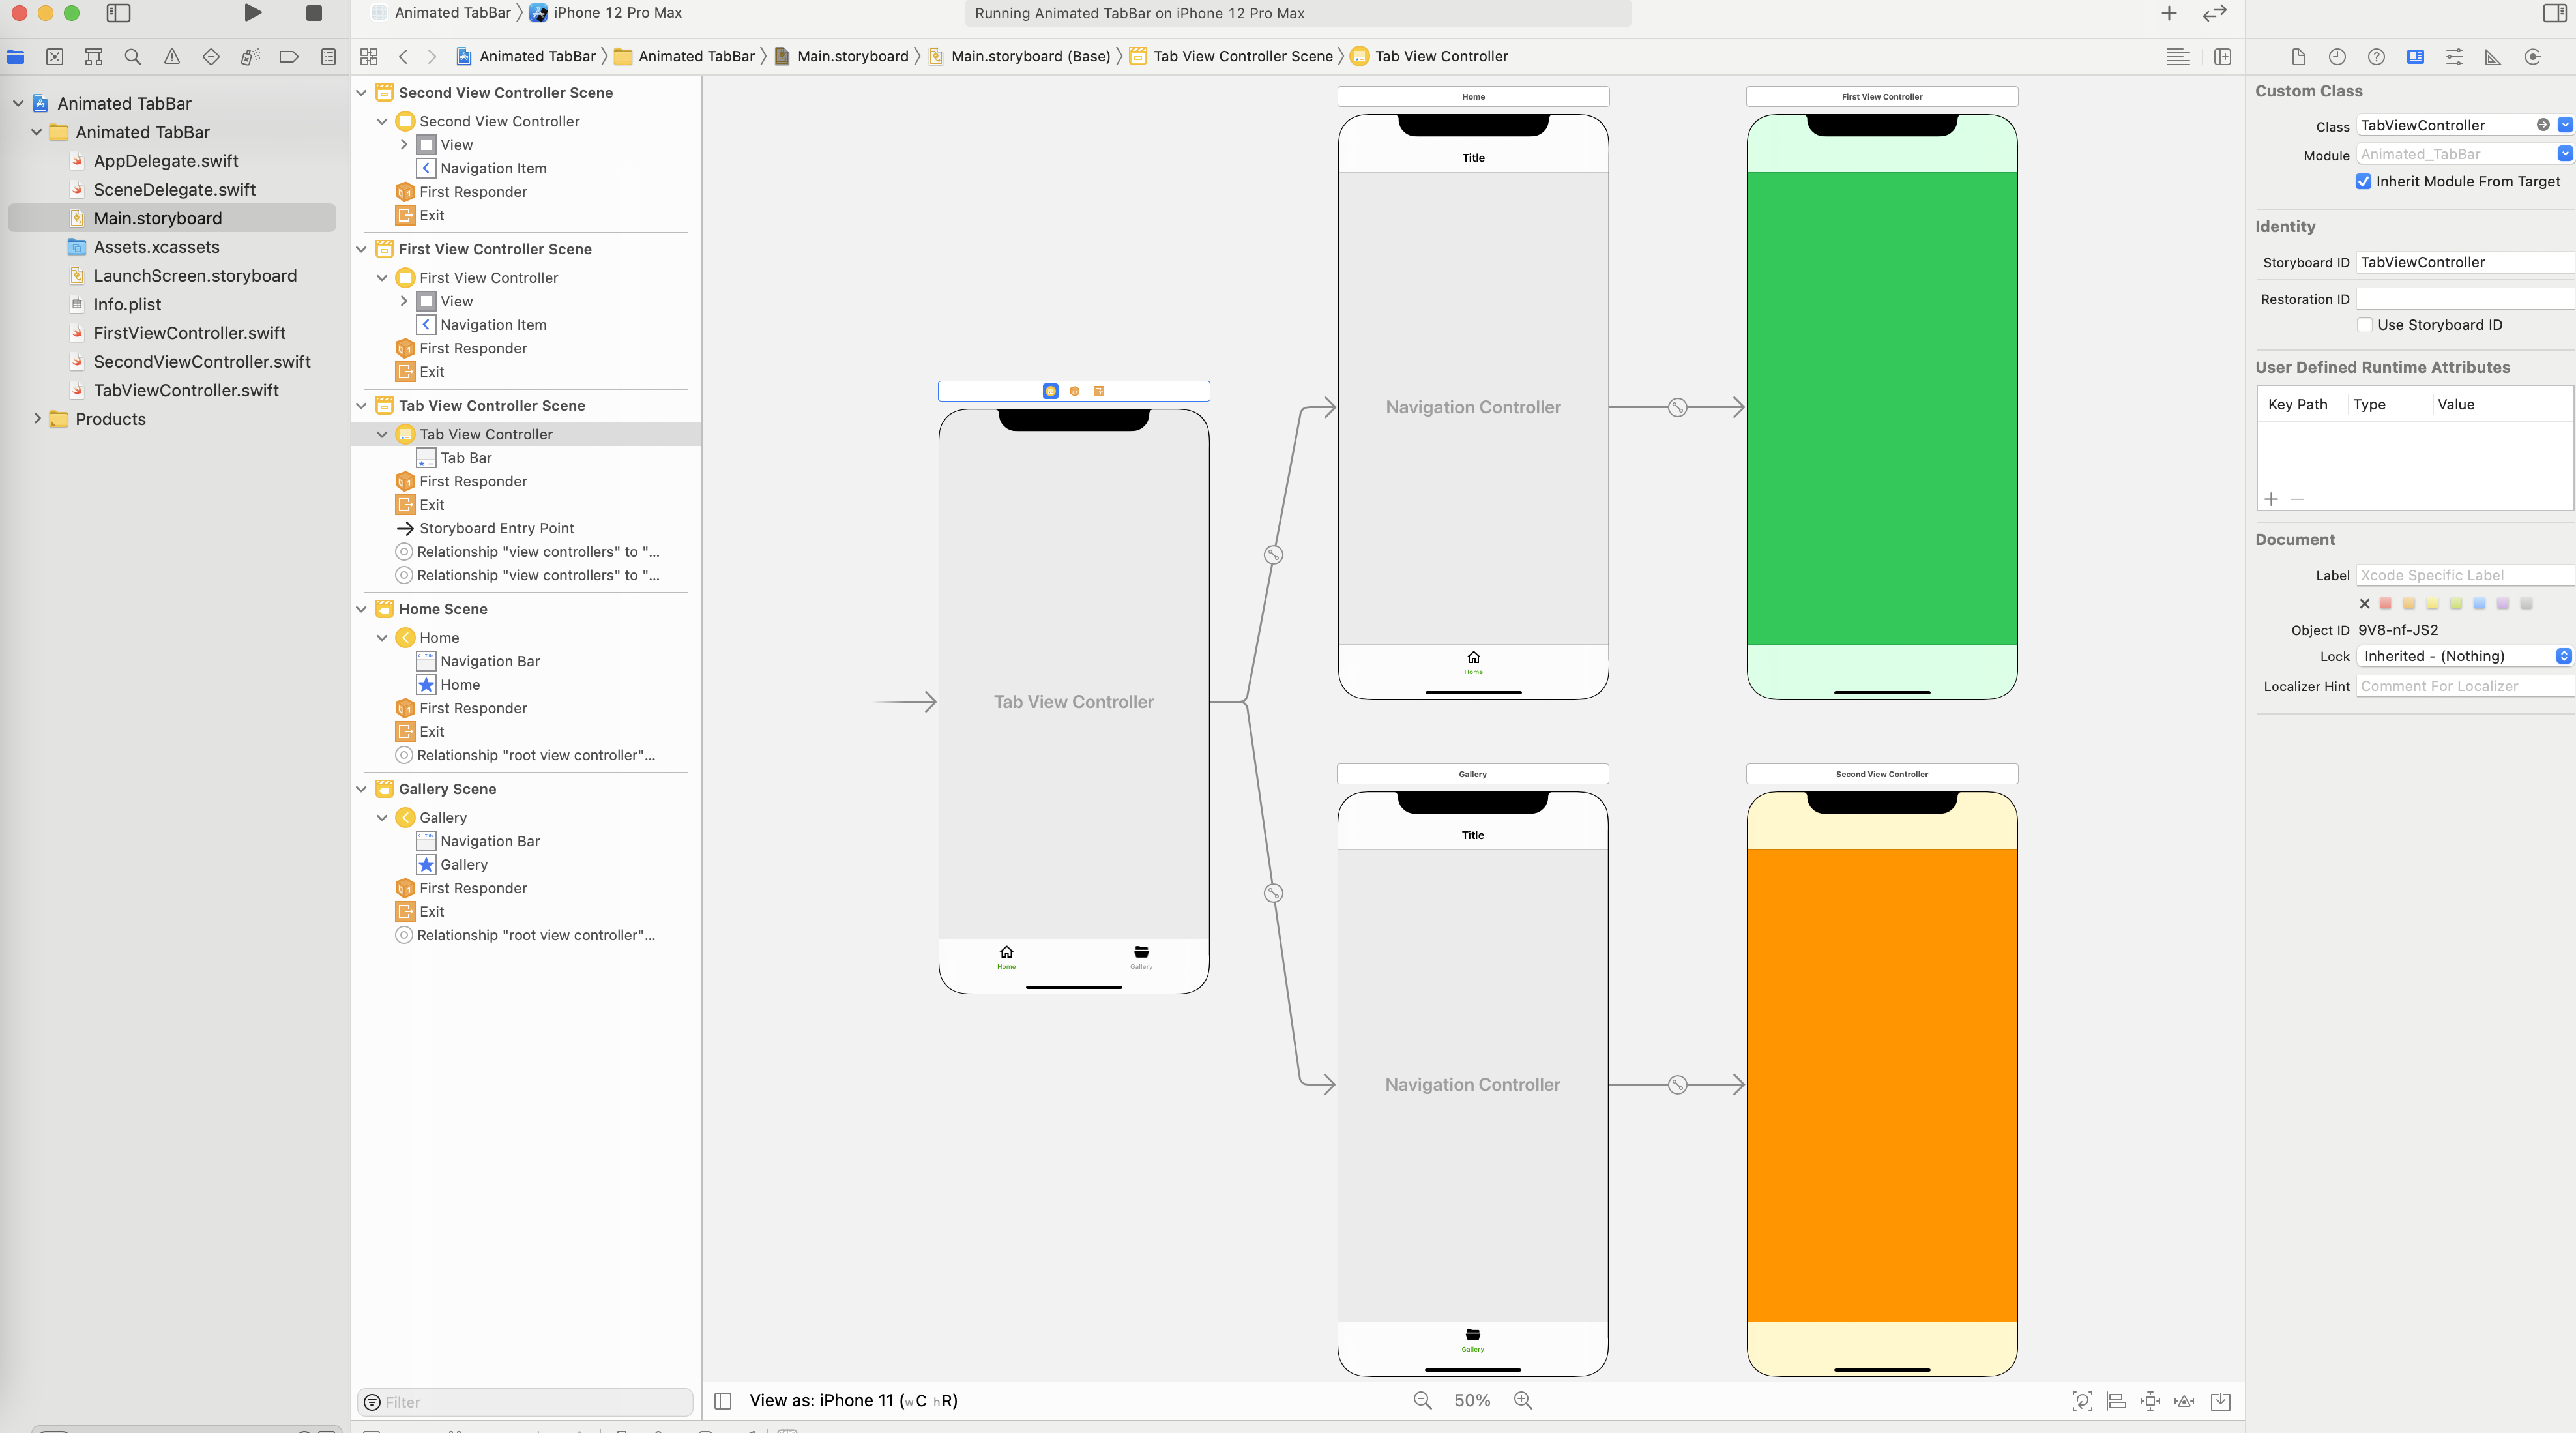
Now, set up the Storyboard with the UITabBarController and its child Tab bar controllers.
Embed the child Tab bar controllers in the Navigation controller.
In addition, create the classes FirstViewController.swift and SecondViewController.swift and assign them to their respective child tab bar controllers.
Here we have attached the images for reference.


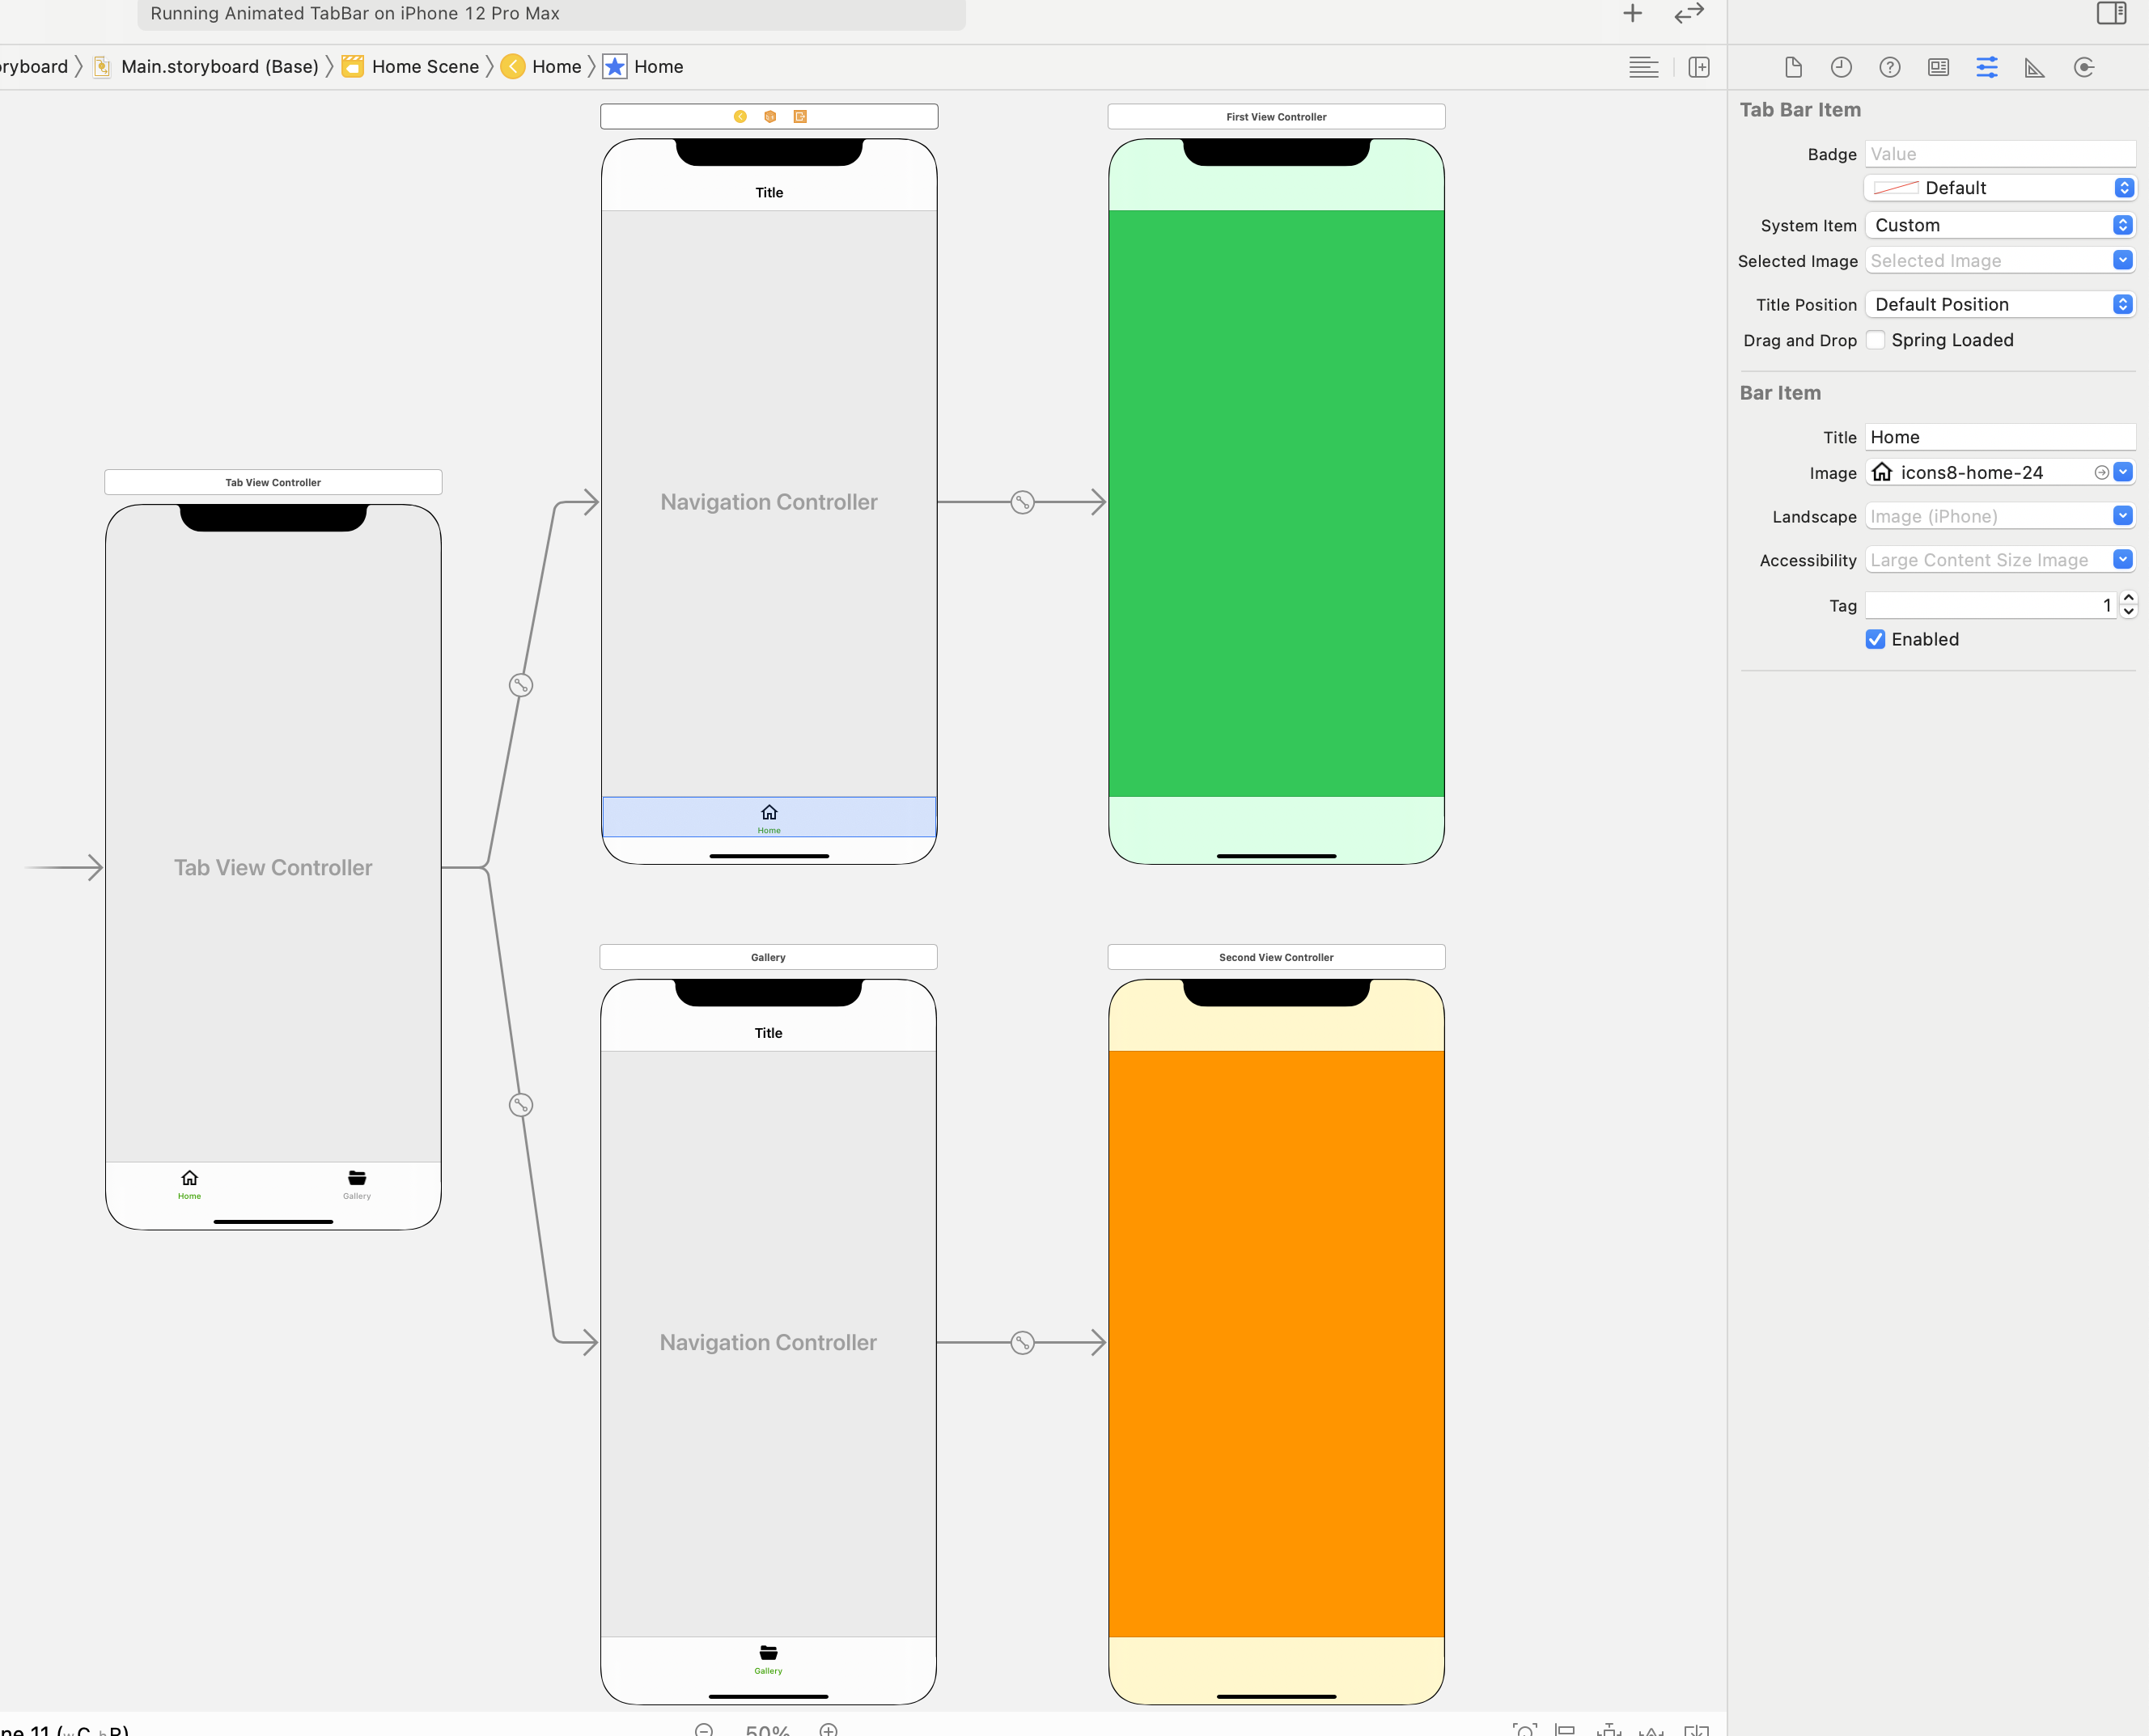
After that, add the images for the Tab icons.
By now, we have set up the basic UITabBar configuration. Now we will move to the animation part.
Animated UITabBar Controllers
Now we will start animating the UITabBar controllers when we select the respective tab bar.
Open the TabViewController, and assign the UITabBar delegate to self TabViewController in ViewDidLoad.
Above all, create an extension of TabViewController and inherit it from the UITabBarControllerDelegate.
In addition, I have added the extension code here.
|
1 2 3 4 5 |
extension TabViewController : UITabBarControllerDelegate{ func tabBarController(_ tabBarController: UITabBarController, animationControllerForTransitionFrom fromVC: UIViewController, to toVC: UIViewController) -> UIViewControllerAnimatedTransitioning? { return ViewControllerAnimation() } } |
Here, we are returning the ViewController class. For instance, responsible for displaying the animations for the Tab bar controllers.
|
1 2 3 4 5 6 7 8 9 10 11 12 13 14 15 16 17 |
class ViewControllerAnimation: NSObject, UIViewControllerAnimatedTransitioning{ func transitionDuration(using transitionContext: UIViewControllerContextTransitioning?) -> TimeInterval { return 0.5 } func animateTransition(using transitionContext: UIViewControllerContextTransitioning) { guard let dest = transitionContext.view(forKey: .to) else {return} dest.transform = CGAffineTransform(translationX: dest.frame.width, y: 0) transitionContext.containerView.addSubview(dest) UIView.animate(withDuration: transitionDuration(using: transitionContext), animations: { dest.transform = .identity }, completion: {transitionContext.completeTransition($0)}) } } |
ViewControllerAnimation class is inherited from the NSObject and UIViewControllerAnimatedTransitioning.
In other words, UIViewControllerAnimatedTransitioning has some methods which are responsible to draw the animation for the controllers using time intervals. For instance, transitionDuration method takes the time interval for the animation. However, animateTransition method is used to create the transition effect.
Above all, we are using CGAffineTransform for the transition view defined as constant dest to describe the transition. Therefore, we can change the parameter values of CGAffineTransform to use the desirable transitions.
Till now with this code we have animated our Tab bar controllers, now we will be animating our tab bar icons.
You can also check the Apple documentation here
Animated UITabBar Icons
For animating the tab bar icons I have created the image variables for each icon and for every index.
I am animating each image view on being selected, here is the reference code.
|
1 2 3 4 5 6 7 8 9 10 11 12 13 14 15 16 17 18 19 20 21 22 23 24 25 26 27 28 |
class TabViewController: UITabBarController { var img1 : UIImageView! var img2 : UIImageView! override func viewDidLoad() { super.viewDidLoad() var imgView = self.tabBar.subviews[0] self.img1 = imgView.subviews.first as? UIImageView self.img1.contentMode = .center imgView = self.tabBar.subviews[1] self.img2 = imgView.subviews.first as? UIImageView self.img2.contentMode = .center self.delegate = self } override func tabBar(_ tabBar: UITabBar, didSelect item: UITabBarItem) { if item.tag == 1{ self.img1.transform = CGAffineTransform(rotationAngle: 360) UIView.animate(withDuration: 0.5, animations: {self.img1.transform = .identity}) }else{ self.img2.transform = CGAffineTransform(rotationAngle: 360) UIView.animate(withDuration: 0.5, animations: {self.img2.transform = .identity}) } } } |
I am using didSelect function of the UITabbar to detect the selection of each tab bar item.
You need to assign the tag for each UITabbar item to distinguish the selected item.
In didSelect function again I am using the CGAffineTransform for the transition.
I am using the animate method to animate the UIView using time intervals for the animation.
Result

Conclusion
This is the basic animation for the UITabBar based applications.
I hope you would like my tutorial.
For other blogs please click here

Be the first to comment.