Hello fellow Dev’s, this tutorial will help you in setting up GitHub using Android Studio IDE.
Android Studio comes with the Git client. All we need to do is enabling it.
As a prerequisite, you need to install git in your local environment.
Here are the steps to configure git in Android Studio
1. Test if Git is Configured
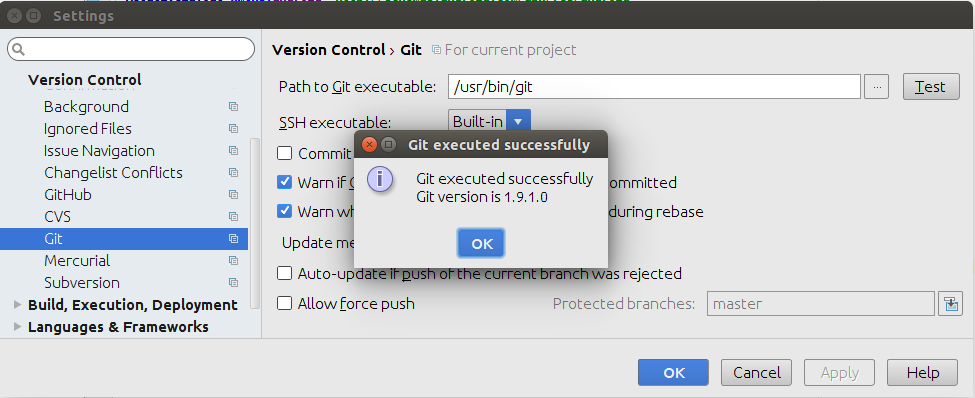
In Android Studio, go to ‘File’ –> ‘Settings(Ctrl+Alt+S)’ –> ‘Version Control’ –> ‘Git’. Then click ‘Test’ to ensure that Git is configured properly in Android Studio. You will get the version name and message on successful test.
or, Alternatively, you can use Terminal command:
git – – version
2. Login to your GitHub Account
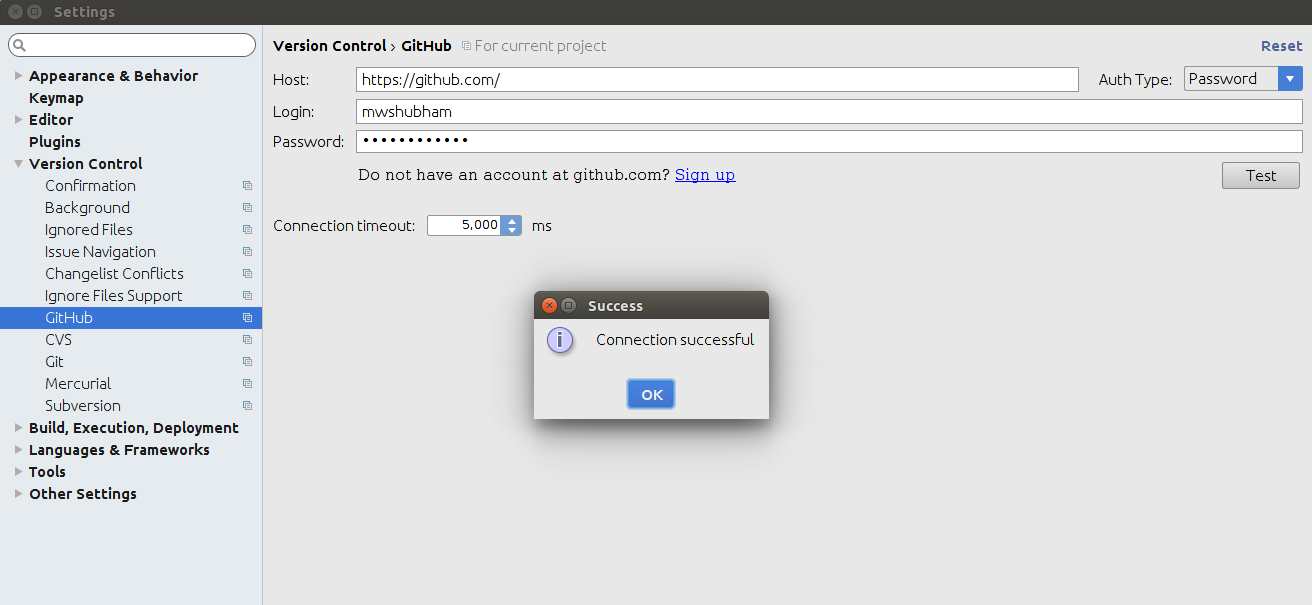
Now, go to ‘File’ –> ‘Settings(Ctrl+Alt+S)’ –> ‘Version Control’ –> ‘GitHub’.
Add you GitHub credentials. And then click ‘Test’ to ensure that GitHub connection.
3. Enable Version Control Integration
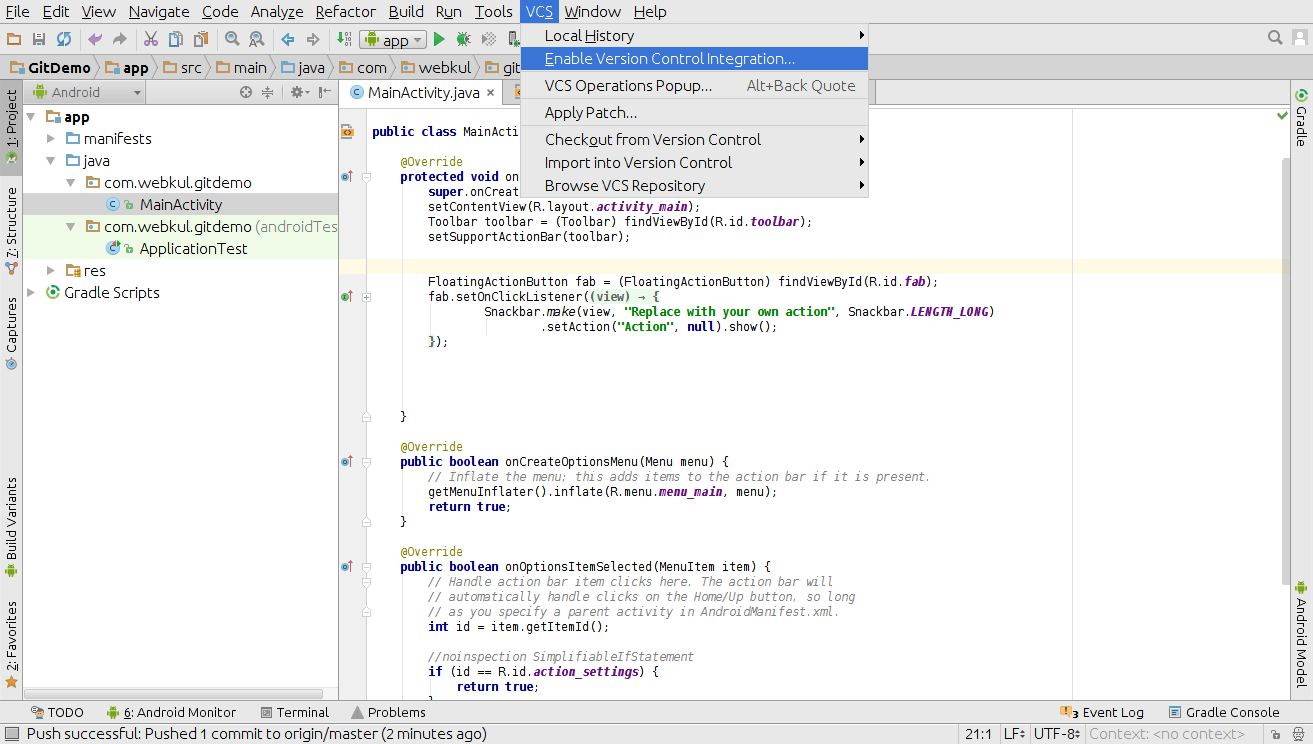
Select ‘VCS’ –> ‘Enable Version Control Integration…’ to enable version control for the current project.
Choose the version control system for your project.
4. Share project on your VCS
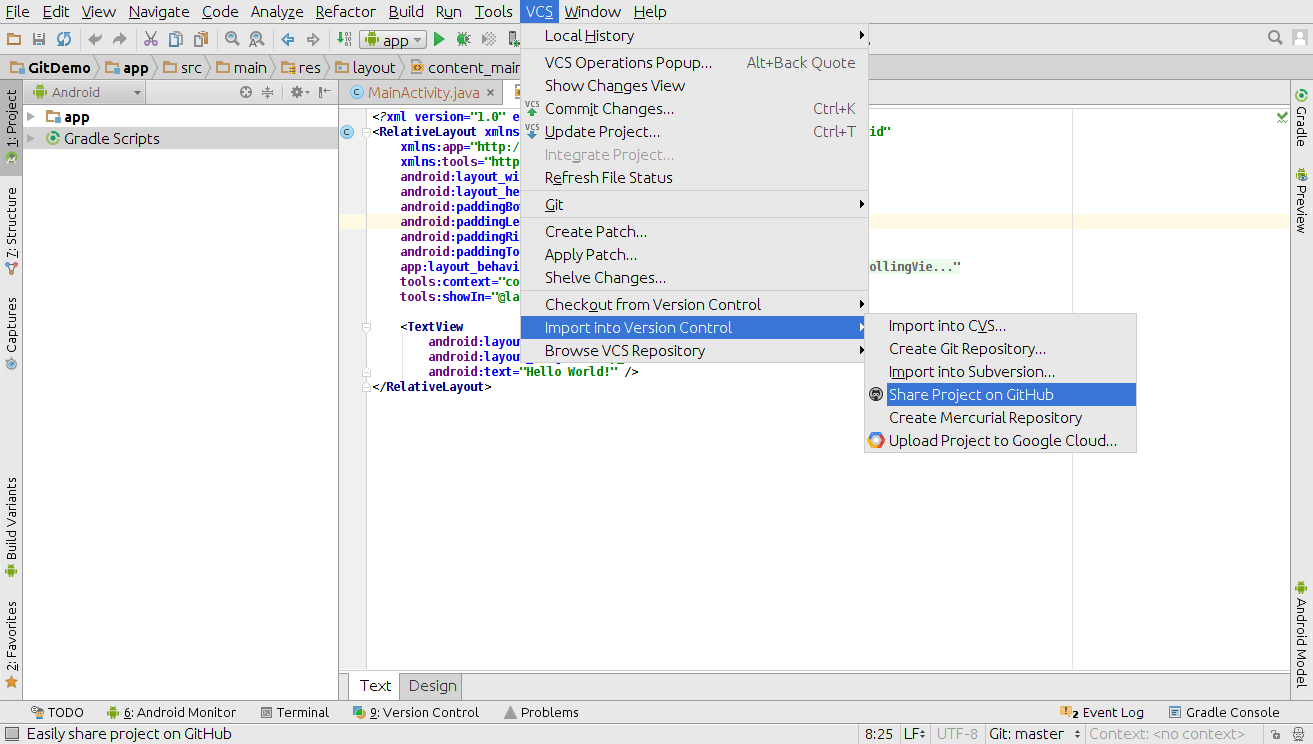
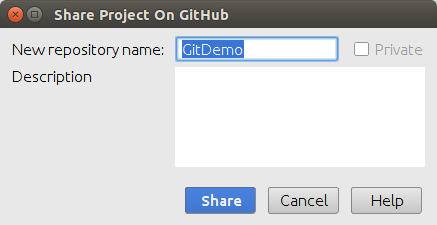
got to ‘VCS’ –> ‘Import into Version Control’ – > ‘Share Project on GitHub’ for creating a repository on GitHub.
Choose a repository name for your project.
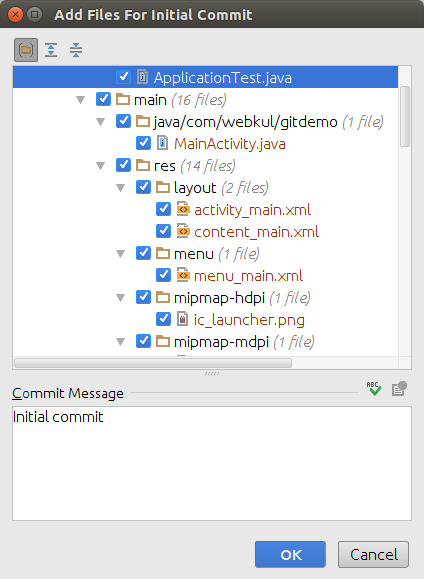
An automated dialog will allow you to add files for the initial commit.
Pressing OK will automatically create the repository, add chosen file and share the project with GitHub.
Here is the sample repository created along with changes done in initial commit.
5. Make Changes in the file and pushing to the repository
If we want to reflect any changes to our repository done in the project.
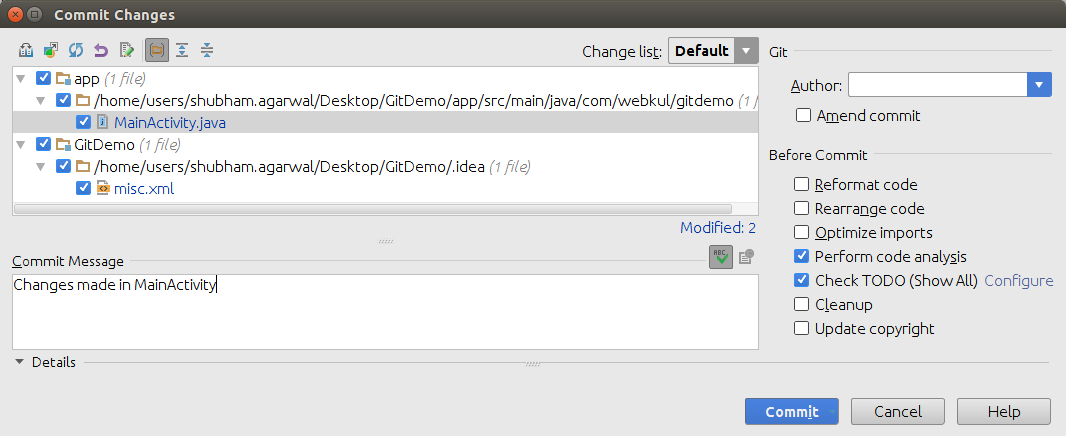
5.1 Git Add and Commit.
to add any changes made, press VCS commit changes button (Ctrl +K) this will automatically add all the files after ignoring from the list of file mentioned in .gitignore.
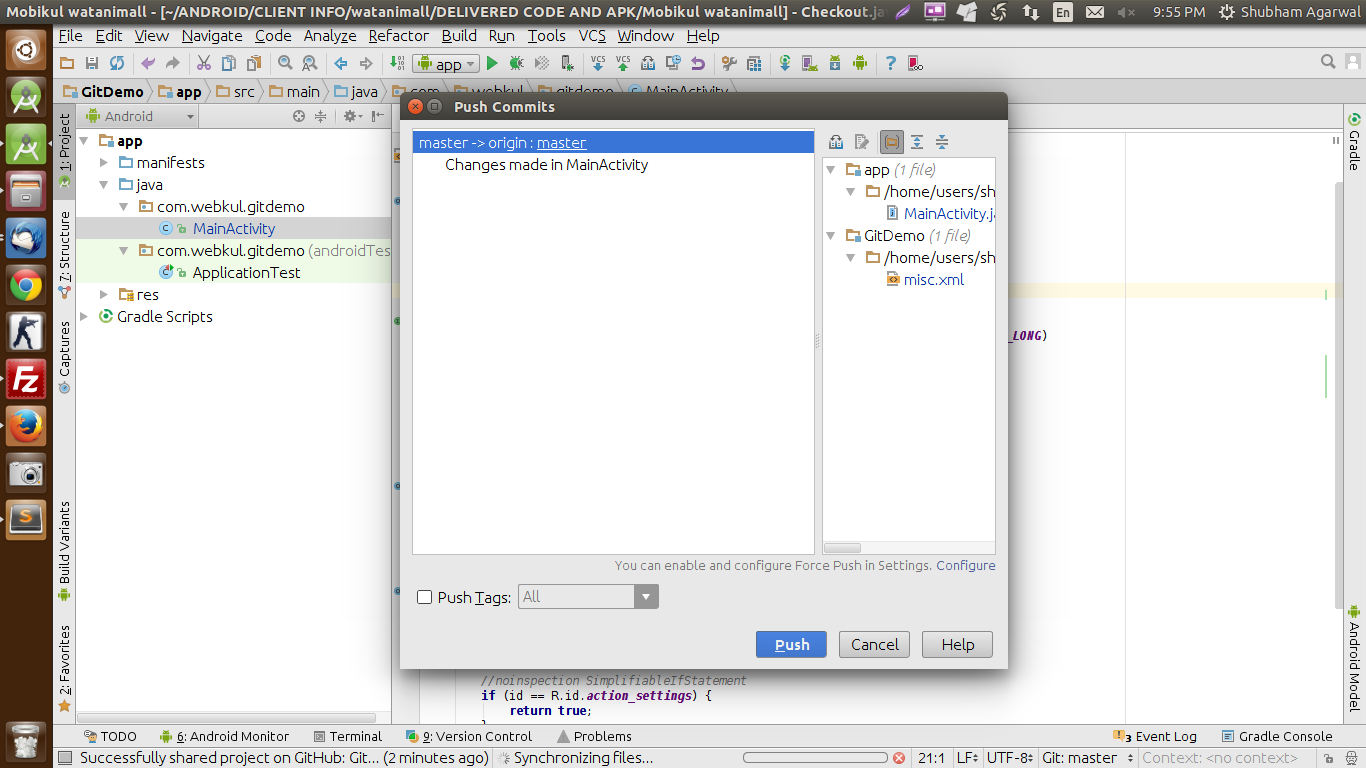
5.1 Git Push.
to push all the files to the server Github repository, go to ‘VCS’ –> ‘Git’ – > ‘Push…’ or press (Ctrl + Shft +k).
Congrats files are successfully pushed.
here is sample image of the project uploaded to the repository created by ourselves.
That’s all folk. Stay Updated.





1 comments