We all love to enable the firebase push notification in our android application.
But while looking at the documents and prescribed content, one might be confused many a times as in what exactly is the right approach to send a notification.
In this blog, we will learn two ways of sending a push notification to your android application using firbase push notification.
Prerequisite :
- Register your application on the firebase console.
- Download the google service json file.
- Save the server key with you ( this might be required in the second approach).
Now looking at the approaches, the first approach is pretty simple and officially recommended. Lets have a look at this :
Approach 1 :
- Put all the content you want to send in a hashmap.
- Get an instance of FirebaseMessaging class.
- Build an instance of RemoteMessage.Builder class.
- Send the notification by using the send method of FirebaseMessaging instance you had.
CODE :
|
1 2 3 4 5 6 7 8 9 |
Map<String, String> data = new HashMap<>(); data.put("title", YOUR_NOTIFICATION_TITLE); data.put("description", YOUR_CONTENT); FirebaseMessaging fm = FirebaseMessaging.getInstance(); AtomicInteger msgId = new AtomicInteger(); fm.send(new RemoteMessage.Builder(YOUR_DEVICE_TOKEN_OR_NOTIFICATION KEY) .setMessageId(String.valueOf(msgId)) .setData(data) .build()); |
Well, that’s it . You can now send the Push notification.
APPROACH 2 :
- Put all your content in a JSON OBJECT .
- Create a HTTP request.( you can use any library you wish to i have used VOLLEY).
- Change the header of that request.
CODE :
|
1 2 3 4 5 6 7 8 9 10 11 12 13 14 15 16 17 18 19 20 21 22 23 24 25 26 27 28 29 30 31 32 33 34 35 36 37 38 39 |
try{ RequestQueue queue = Volley.newRequestQueue(this); String url = "https://fcm.googleapis.com/fcm/send"; JSONObject data = new JSONObject(); data.put("title", YOUR_TITLE); data.put("body", YOUR_CONTENT); JSONObject notification_data = new JSONObject(); notification_data.put("data", data); notification_data.put("to",YOUR_DEVICE_TOKEN_OR_NOTIFICATION_KEY); JsonObjectRequest request = new JsonObjectRequest(url, notification_data, new Response.Listener<JSONObject>() { @Override public void onResponse(JSONObject response) { } }, new Response.ErrorListener() { @Override public void onErrorResponse(VolleyError error) { } }) { @Override public Map<String, String> getHeaders() { String api_key_header_value = "Key=YOUR_SERVER_API_KEY_VALUE" Map<String, String> headers = new HashMap<>(); headers.put("Content-Type", "application/json"); headers.put("Authorization", api_key_header_value); return headers; } }; queue.add(request); }catch (Exception e){ e.printStackTrace(); } |
That’s it, the second approach is done.
NOTE: Saving SERVER API KEY in code is not recommended by the FIREBASE.
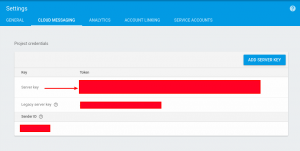
For getting where exactly thye serverkey is on firebase console ,you can have a look at this screenshot.


9 comments
data.put(“sound”, YOUR_SOUND_REFRENCE);
data.put(“icon”, YOUR_ICON_REFRENCE);
Only these small changes should do.
If in case these don’t work then you can also try sending these in the notification payload parallel to the data payload only.
For that, you will have to do something like this :
JSONObject data = new JSONObject();
data.put(“title”, YOUR_TITLE);
data.put(“body”, YOUR_CONTENT);
data.put(“sound”, YOUR_SOUND_REFRENCE);
data.put(“icon”, YOUR_ICON_REFRENCE);
JSONObject notification_data = new JSONObject();
notification_data.put(“data”, data);
notification_data.put(“notification”, data);
notification_data.put(“to”,YOUR_DEVICE_TOKEN_OR_NOTIFICATION_KEY);
And then use the above-mentioned snippet.
NOTE: 1) The sound to play when the device receives the notification.
Supports “default” or the filename of a sound resource bundled in the app. Sound files must reside in /res/raw/.
2) The notification’s icon.
Sets the notification icon to myicon for drawable resource myicon. If you don’t send this key in the request, FCM displays the launcher icon specified in your app manifest.
Thanks,
Anchit
Can you share the code you have written?