Updated 20 December 2023
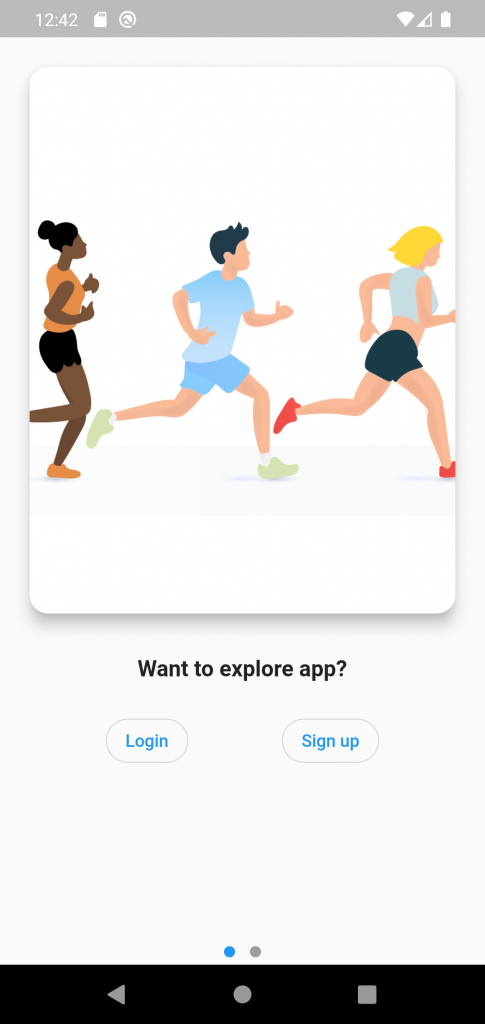
Today, we are learning about the onboarding screen in Flutter. The onboarding screen gives a short overview of the app and helps you to create an impression of the app. It’s really easy to implement in Flutter. The Onboarding Screen shows the user functions of their apps. It’s an important aspect of keeping the user in the app while explaining the app.
The onboarding screen appears after the loading of the splash screen and only at the first interaction of the user with the app. Mainly Onboarding Screen consists of more than two layouts that slide horizontally. Onboarding must also cater to a large swath of users, ranging from users brought in from a marketing campaign, word of mouth, or seeing an app in the app store.
We are using the PageView widget and dot indicator package for implementation in Flutter. You can check out the package dots_indicator.
Check out more about our Flutter app development company.
Let’s start by creating a new project.
|
1 2 3 4 5 6 7 8 9 10 11 12 13 14 15 16 17 18 19 |
return Scaffold( body: Stack( children: [ PageView( controller: controller, onPageChanged: _updatePosition, children: [ // onboarding screen widget ], ), Align( alignment: Alignment.bottomCenter, child: DotsIndicator( dotsCount: 2, )) ], ), ); |
|
1 2 3 4 5 6 7 8 9 10 11 12 13 14 15 16 17 18 19 20 21 22 23 24 25 26 27 28 29 30 31 32 33 34 35 36 37 38 39 40 41 42 43 44 |
class OnboardingScreen extends StatelessWidget { final Widget? image; final List<Widget> text; const OnboardingScreen(this.image, this.text, {Key? key}) : super(key: key); @override Widget build(BuildContext context) { return Container( // color: Colors.tealAccent.shade100, child: Column( children: [ if (image != null) Expanded( child: SafeArea( child: Padding( padding: const EdgeInsets.all(20.0), child: Card( elevation: 10, child: image!, shape: RoundedRectangleBorder( borderRadius: BorderRadius.circular(15)), ), ), ), flex: 2, ), Expanded( child: Padding( padding: const EdgeInsets.all(10.0), child: Column( crossAxisAlignment: CrossAxisAlignment.center, mainAxisSize: MainAxisSize.max, mainAxisAlignment: MainAxisAlignment.start, children: text ), ), // flex: 1 ), ], ), ); } } |
Create a function for when a page is changed and add it in pageView.
|
1 2 3 4 5 6 7 8 |
double _validPosition(double position) { if (position >= _totalDots) return 0; if (position < 0) return _totalDots - 1.0; return position; } void _updatePosition(int position) { setState(() => _currentPosition = _validPosition(position.toDouble())); } |
On the tap of Dot indicator move the page controller.
|
1 2 3 4 5 6 7 8 9 |
DotsIndicator( dotsCount: 2, position: _currentPosition, onTap: (double page){ setState(() { controller.animateToPage(page.toInt(), duration: Duration(milliseconds: 300), curve: Curves.ease); }); }, ) |
|
1 2 3 4 5 6 7 8 9 10 11 12 13 14 15 16 17 18 19 20 21 22 23 24 25 26 27 28 29 30 31 32 33 34 35 36 37 38 39 40 41 42 43 44 45 46 47 48 49 50 51 52 53 54 55 56 57 58 59 60 61 62 63 64 65 66 67 68 69 70 71 72 73 74 75 76 77 78 79 80 81 82 83 84 85 86 87 88 89 90 91 92 93 94 95 96 97 98 99 100 101 102 103 104 105 106 107 108 109 110 111 112 113 114 115 116 117 118 119 120 121 122 123 124 125 126 127 128 129 130 131 132 133 134 135 136 137 138 139 |
class MyHomePage extends StatefulWidget { const MyHomePage({Key? key}) : super(key: key); @override _MyHomePageState createState() => _MyHomePageState(); } class _MyHomePageState extends State<MyHomePage> { PageController controller = PageController(); int _totalDots = 2; double _currentPosition = 0.0; double _validPosition(double position) { if (position >= _totalDots) return 0; if (position < 0) return _totalDots - 1.0; return position; } void _updatePosition(int position) { setState(() => _currentPosition = _validPosition(position.toDouble())); } @override Widget build(BuildContext context) { return Scaffold( body: Stack( children: [ PageView( controller: controller, onPageChanged: _updatePosition, children: [ OnboardingScreen( Image.network( "https://res.cloudinary.com/im2015/image/upload/w_1200,h_1200,c_fill,g_center//blog/running_cover_1.jpg"), [ const Text("Want to explore app?", style: TextStyle( fontSize: 18, fontWeight:FontWeight.bold ),), const Padding(padding: EdgeInsets.all(12.0)), Row( mainAxisAlignment: MainAxisAlignment.spaceEvenly, children: [ OutlinedButton(onPressed: (){}, child: Text("Login"), style: ButtonStyle( shape: MaterialStateProperty.all(RoundedRectangleBorder(borderRadius: BorderRadius.circular(18.0))), ),), OutlinedButton(onPressed: (){}, child: Text("Sign up"), style: ButtonStyle( shape: MaterialStateProperty.all(RoundedRectangleBorder(borderRadius: BorderRadius.circular(18.0))), ),), ], ) ], ), OnboardingScreen( Image.network( "https://media.self.com/photos/57dc10b30d97fce03211748a/4:3/w_768,c_limit/sub-channel-fitness-running.jpg", fit: BoxFit.cover,), [ const Text("Running makes you fit.", style: TextStyle( fontSize: 18, fontWeight:FontWeight.bold ),), const Padding(padding: EdgeInsets.all(12.0)), OutlinedButton(onPressed: (){},child: const Text("SKIP"), style: ButtonStyle( shape: MaterialStateProperty.all(RoundedRectangleBorder(borderRadius: BorderRadius.circular(18.0))), ), ) ] ) ], ), Align( alignment: Alignment.bottomCenter, child: DotsIndicator( dotsCount: 2, position: _currentPosition, onTap: (double page){ setState(() { controller.animateToPage(page.toInt(), duration: Duration(milliseconds: 300), curve: Curves.ease); }); }, )) ], ), ); } } class OnboardingScreen extends StatelessWidget { final Widget? image; final List<Widget> text; const OnboardingScreen(this.image, this.text, {Key? key}) : super(key: key); @override Widget build(BuildContext context) { return Container( // color: Colors.tealAccent.shade100, child: Column( children: [ if (image != null) Expanded( child: SafeArea( child: Padding( padding: const EdgeInsets.all(20.0), child: Card( elevation: 10, child: image!, shape: RoundedRectangleBorder( borderRadius: BorderRadius.circular(15)), ), ), ), flex: 2, ), Expanded( child: Padding( padding: const EdgeInsets.all(10.0), child: Column( crossAxisAlignment: CrossAxisAlignment.center, mainAxisSize: MainAxisSize.max, mainAxisAlignment: MainAxisAlignment.start, children: text ), ), // flex: 1 ), ], ), ); } } |

This is how we add an onboarding screen in Flutter. You can add more functionalities to it.
Thanks for reading this article.
If I got something wrong, let me know in the comments. I would love to improve.
For more interesting blogs check out here – https://mobikul.com/blog/
Reference link: https://blog.logrocket.com/creating-flutter-onboarding-screen/
If you have more details or questions, you can reply to the received confirmation email.
Back to Home
Be the first to comment.