In this blog, we are creating IndexedStack in a flutter. we will implement an IndexedStack demo program.
An IndexedStack is a stack where only one component is shown at one time by its index.
It takes children as a normal Stack. But it only displays one child at one time.
Check our Flutter app development page.
To use IndexedStack, we can simply wrap the list of widgets inside the IndexedStack widget. Then, add an index parameter with a variable that can be changed with some action.
Properties:
- index: we can use this property to assign the index to the child.
- children: we can use this property to list the widgets.
- sizing: we can use this property to size the children in the stack.
- alignment: we can use this property to align the children in the stack.
- textDirection: we can use this property to give direction to the text.
Let’s Start The Steps For Integrating Indexedstack In Flutter
Step1: Create a flutter project.
Step2: Add the required assets to pubspec.yaml file.
Step3: Run “flutter pub get” in the root directory of your app.
Step4: Now start the coding for the same.
|
1 2 3 4 5 6 7 8 9 10 11 12 13 14 15 16 17 18 19 20 21 22 23 24 25 26 27 28 29 30 31 32 33 34 35 36 37 38 39 40 41 42 43 44 45 46 47 48 49 50 51 52 53 54 55 56 57 58 59 60 61 62 63 64 65 66 67 68 69 70 71 72 73 74 75 76 77 78 79 80 81 82 83 84 85 86 87 88 89 90 91 92 93 94 95 96 97 98 99 100 101 102 103 104 105 106 107 108 109 110 111 112 113 114 115 116 117 118 119 120 121 122 123 124 125 126 127 128 129 130 131 132 133 134 135 136 137 138 139 140 141 142 |
import 'package:flutter/material.dart'; class MyIndexedStack extends StatefulWidget { const MyIndexedStack({Key? key}) : super(key: key); @override _MyIndexedStackState createState() => _MyIndexedStackState(); } class _MyIndexedStackState extends State<MyIndexedStack> { int value = 0; @override Widget build(BuildContext context) { return Scaffold( appBar: AppBar( title: const Text("Indexed Stack"), ), body: Center( child: Column( mainAxisAlignment: MainAxisAlignment.center, children: [ IndexedStack( index: value, children: [ Column( children: [ const Text( "Image 1", style: TextStyle( color: Colors.black, fontSize: 20.0, fontWeight: FontWeight.bold), ), Container( width: 200, height: 200, child: const Center( child: Image( image: AssetImage("assets/images/one.png"), ), ), ) ], ), Column( children: [ const Text( "Image 2", style: TextStyle( color: Colors.black, fontSize: 20.0, fontWeight: FontWeight.bold), ), Container( width: 200, height: 200, child: const Center( child: Image( image: AssetImage("assets/images/two.png"), ), ), ) ], ), Column( children: [ const Text( "Image 3", style: TextStyle( color: Colors.black, fontSize: 20.0, fontWeight: FontWeight.bold), ), Container( width: 200, height: 200, child: const Center( child: Image( image: AssetImage("assets/images/three.png"), ), ), ) ], ), Column( children: [ const Text( "Image 4", style: TextStyle( color: Colors.black, fontSize: 20.0, fontWeight: FontWeight.bold), ), Container( width: 200, height: 200, child: const Center( child: Image( image: AssetImage("assets/images/four.jpeg"), ), ), ) ], ) ], ), Padding( padding: const EdgeInsets.all(8.0), child: Container( width: 200, child: Padding( padding: const EdgeInsets.all(8.0), child: RaisedButton( color: Colors.black, onPressed: () { setState(() { if (value < 3) { value++; } else { value = 0; } }); }, child: const Text( "CLICK", style: TextStyle( color: Colors.white, fontSize: 23.0, fontWeight: FontWeight.bold), ), ), ), color: Colors.black, ), ) ], ), ), ); } } |
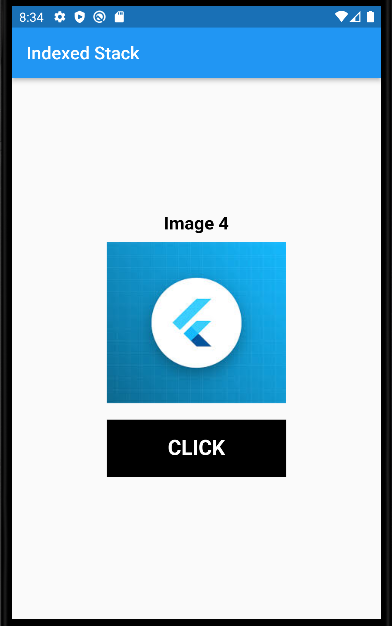
Finally, we can run the code and as a result, we can see the below output.

Conclusion
In this blog, we have read and implemented the IndexedStack in Flutter.
I hope it will help you out in understanding and getting a brief idea about it.
Thank you for reading!!
References
https://api.flutter.dev/flutter/widgets/IndexedStack-class.html


Be the first to comment.