Scoped Model in flutter allows us to easily pass a Data Model from a parent widget down to its descendants.

So, In this blog we are discussing how to manage the state of the flutter app.
There are some other ways also for the state management in a flutter, but Scoped Model is one of the best ways to manage the state because it is easy and fast in use.
The scoped_model library consists of various utilities that allow children UI elements to receive data from their parent widget.
The library consists of three major classes –
- ScopedModel – It can be used to wrap UI Components and access data from the Model.
- ScopedModelDescendant – It can be used to identify the correct ScopedModel from the widget hierarchy.
- The Model – We must extend the Model class to listen the changes.
Read about the variety of Flutter App Development Services offered by Mobikul
Let’s Start The Steps For Integrating Scoped Model In Flutter
Step1: Create a flutter project.
Step2: Add the below dependencies in pubspec.yaml file.
|
1 |
scoped_model: ^1.1.0 |
Therefore In order to check the updated version of the dependency click here.
Step3: Now we can create the required file and directory as shown in the figure to remove the conflict.

Step4: Now start the coding for the same.
main.dart file.
|
1 2 3 4 5 6 7 8 9 10 11 12 13 14 |
import 'package:blog_scoped_model/Screens/HomePage.dart'; import 'package:flutter/material.dart'; void main() { runApp(MyApp()); } class MyApp extends StatelessWidget { @override Widget build(BuildContext context) { return MaterialApp( debugShowCheckedModeBanner: false, home: HomePage(), ); } } |
HomePage.dart file.
|
1 2 3 4 5 6 7 8 9 10 11 12 13 14 15 16 17 18 19 20 21 22 23 24 25 26 27 28 29 30 31 32 33 34 35 36 37 38 39 40 41 42 43 44 45 46 47 48 49 50 51 52 53 54 55 56 57 58 59 60 61 62 |
import 'package:blog_scoped_model/ScopedModel/MyScopedModel.dart'; import 'package:flutter/material.dart'; import 'package:scoped_model/scoped_model.dart'; class HomePage extends StatelessWidget { MyScopedModel myScopedModel=MyScopedModel(); @override Widget build(BuildContext context) { return ScopedModel<MyScopedModel>( model: myScopedModel, child: ScopedModelDescendant<MyScopedModel>( builder: (context,child,model) { return Scaffold( appBar: AppBar( title: Text("Scoped Model"), ), body: Center( child: Row( mainAxisAlignment: MainAxisAlignment.center, children: [ MaterialButton( onPressed: () { model.decrementValue(); }, child: Icon(Icons.exposure_minus_1), shape: CircleBorder(), color: Colors.red, elevation: 2, padding: EdgeInsets.all(10.0), ), SizedBox( width: 20.0, ), Text( model.value.toString(), style: TextStyle( color: Colors.black, fontWeight: FontWeight.bold, fontSize: 20.0), ), SizedBox( width: 20.0, ), MaterialButton( onPressed: () { model.incrementValue(); }, child: Icon(Icons.add), shape: CircleBorder(), elevation: 2, color: Colors.red, padding: EdgeInsets.all(10.0), ), ], ), ), ) ; }, ), ); } } |
MyScopedModel.dart file.
|
1 2 3 4 5 6 7 8 9 10 11 12 13 14 |
import 'package:scoped_model/scoped_model.dart'; class MyScopedModel extends Model{ int value=0; void incrementValue() { value=value+1; notifyListeners(); } void decrementValue() { value=value-1; notifyListeners(); } } |
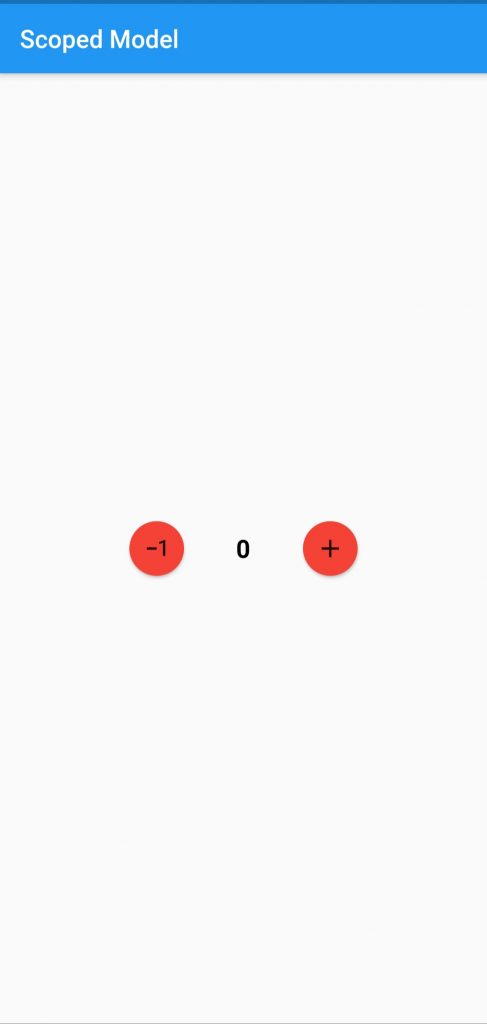
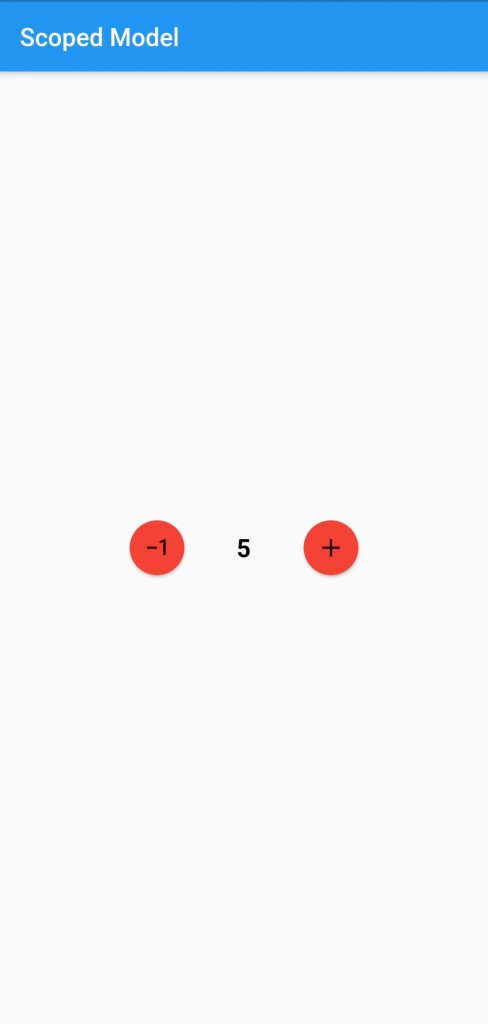
Finally, we can run the code and as a result, we can see the below output.
Conclusion
In Conclusion, State Management is one of the key parts of the performance improvement of the app, and Scoped Model is one of the approaches that offer better performance than the inherited widget.
In this blog, we have discussed Scoped Model In Flutter.
I hope it will help you out in understanding and getting a brief about it.
Similarly, for more interesting blogs check out here – https://mobikul.com/blog/
Thank you for reading!!


Be the first to comment.